Author: Faiz RK

  • Curly Hairstyles: 20 Beautiful Cuts and Styling Ideas

    Curly Hairstyles: 20 Beautiful Cuts and Styling Ideas

    Curly hairstyles look their best when the shape works with the curls you already have. A short cut can highlight a springy texture, while longer layers create room for movement. Updos offer another way to change your look without committing to a haircut. The right choice depends on your length, density, preferred silhouette and the time you enjoy spending on styling.

    This guide explores twenty curly hair ideas, from a compact pixie to a loose half-up style. Each comes with front, side and back illustrations so you can compare more than the face-framing detail. The images are original generated styling references, not photographs of salon clients. Bring your favourites to a stylist and discuss how the shape could be adapted to your own curl pattern.

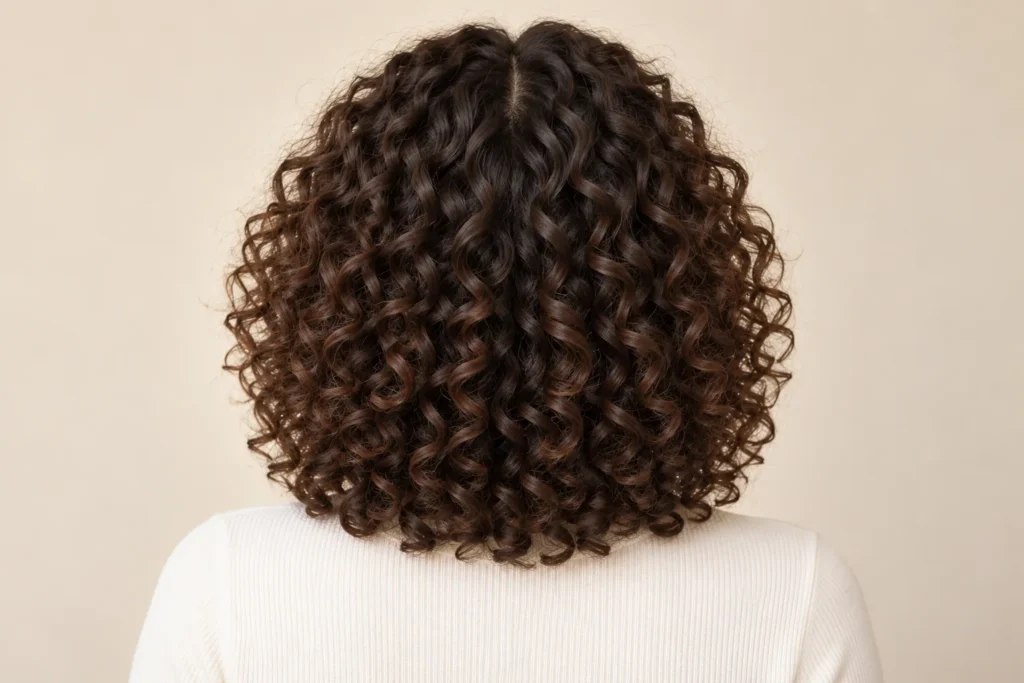
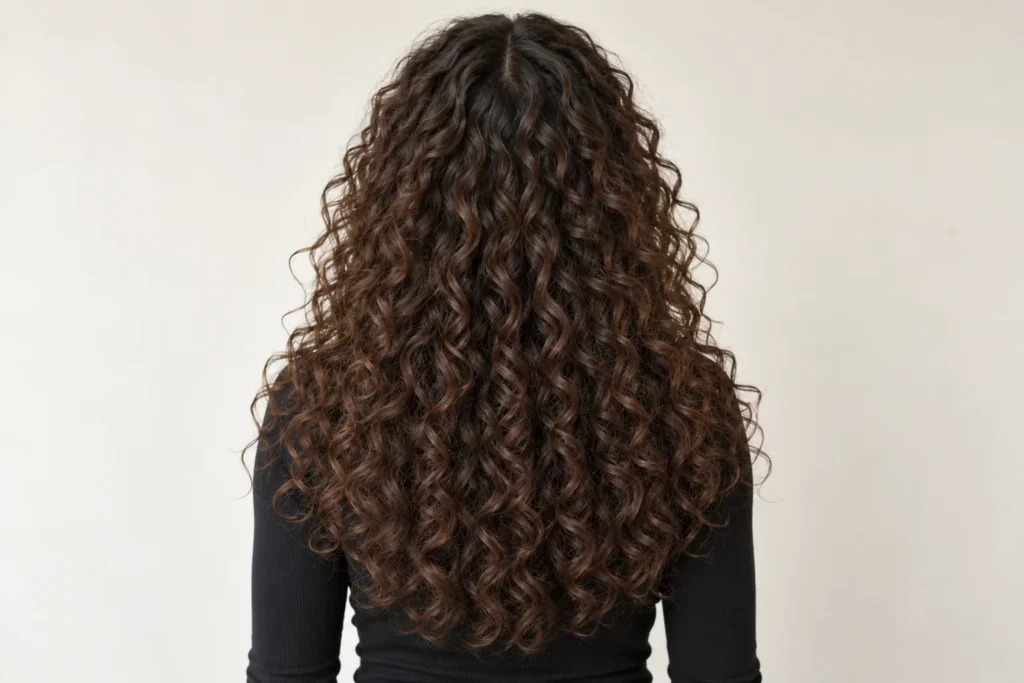
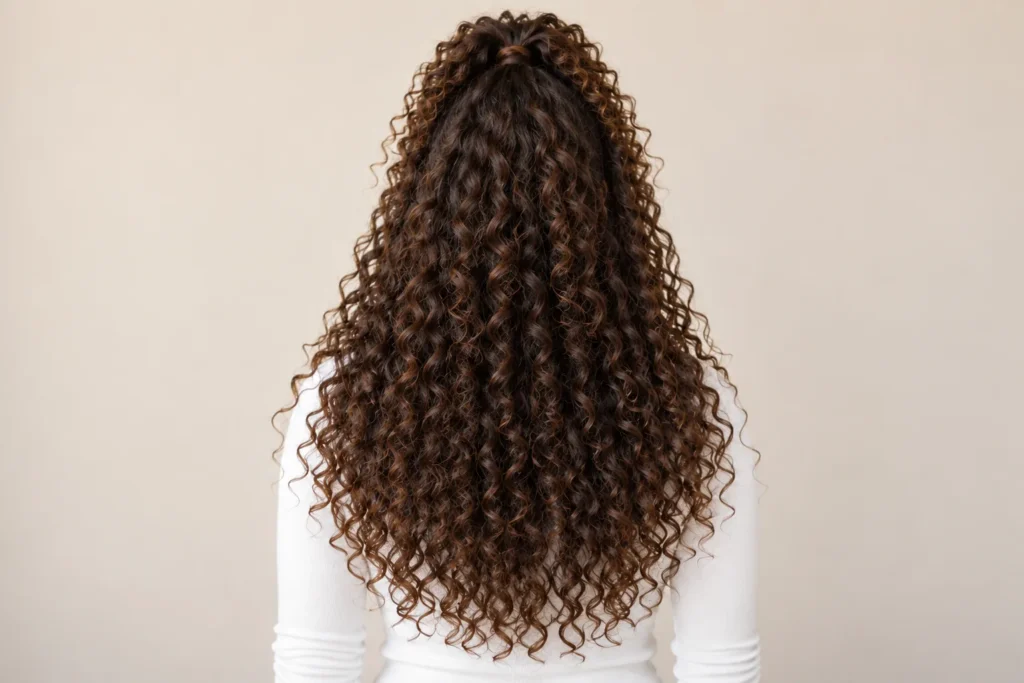
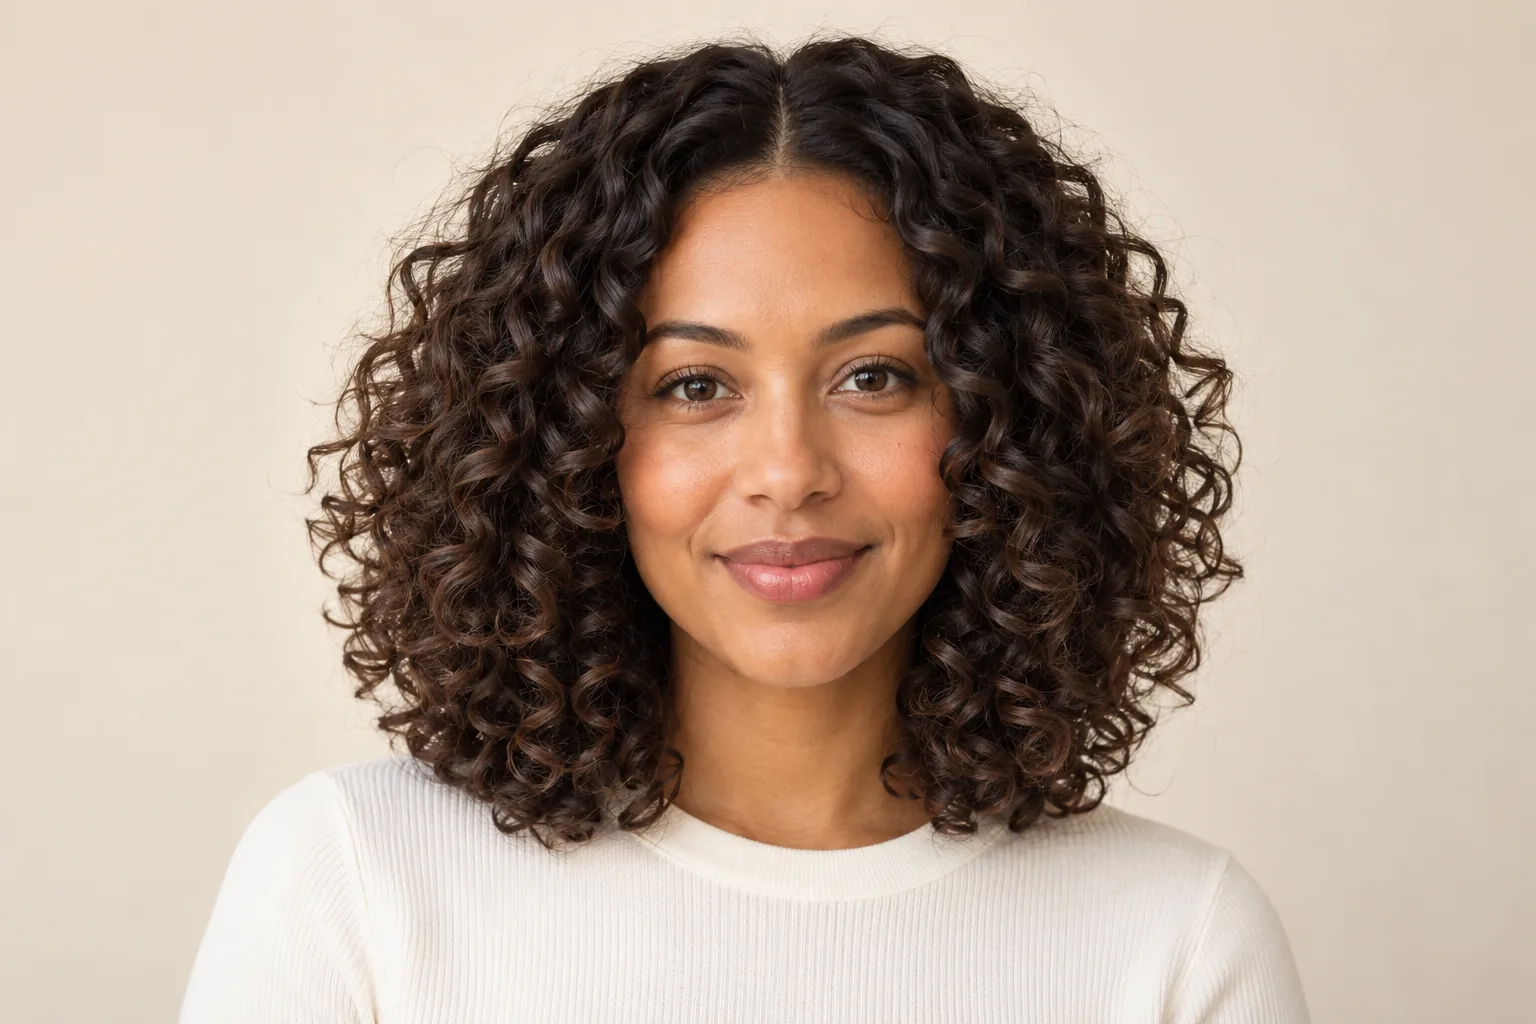
    1. Shoulder-Length Layered Curls

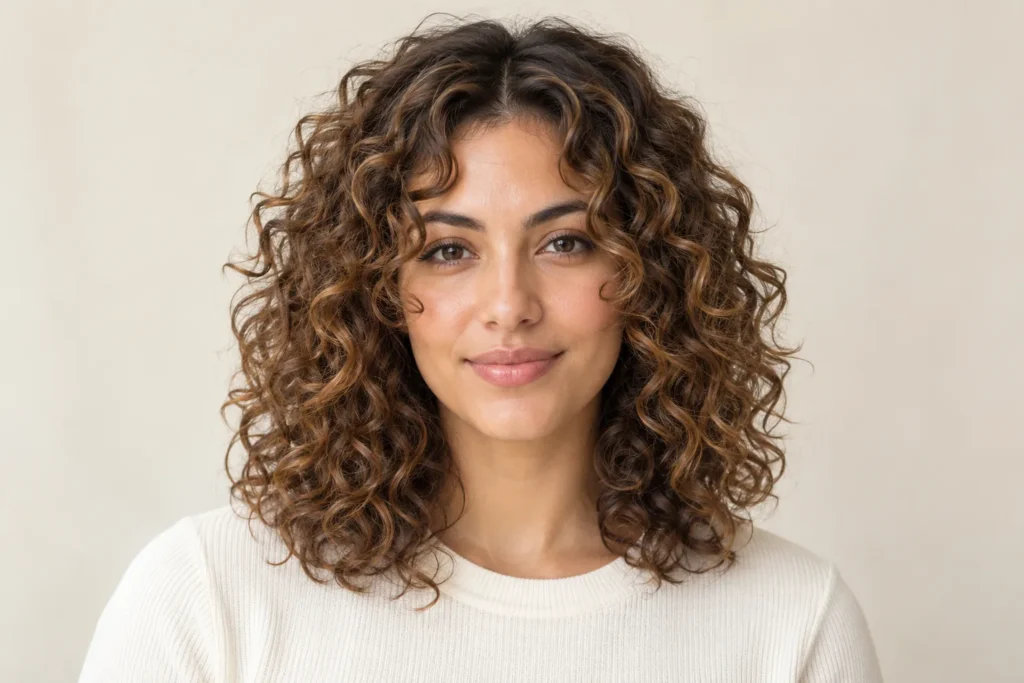
    Shoulder-length layers create a rounded outline without removing all the weight from the ends. Shorter pieces near the crown give the curls space, while the perimeter keeps the cut looking full. It is a flexible starting point if you want a noticeable shape and enough length for small updos.

    Ask your stylist where the shortest layer will sit when your hair is dry. At home, arrange the part while the hair is damp, then let the curls settle before separating a few clumps with your fingertips.
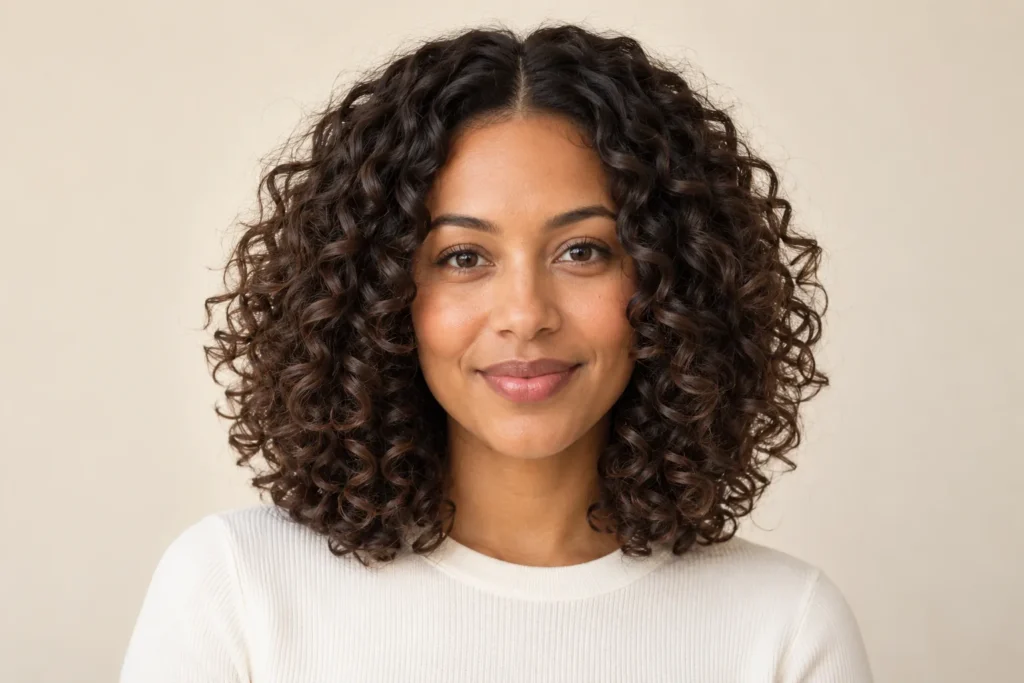
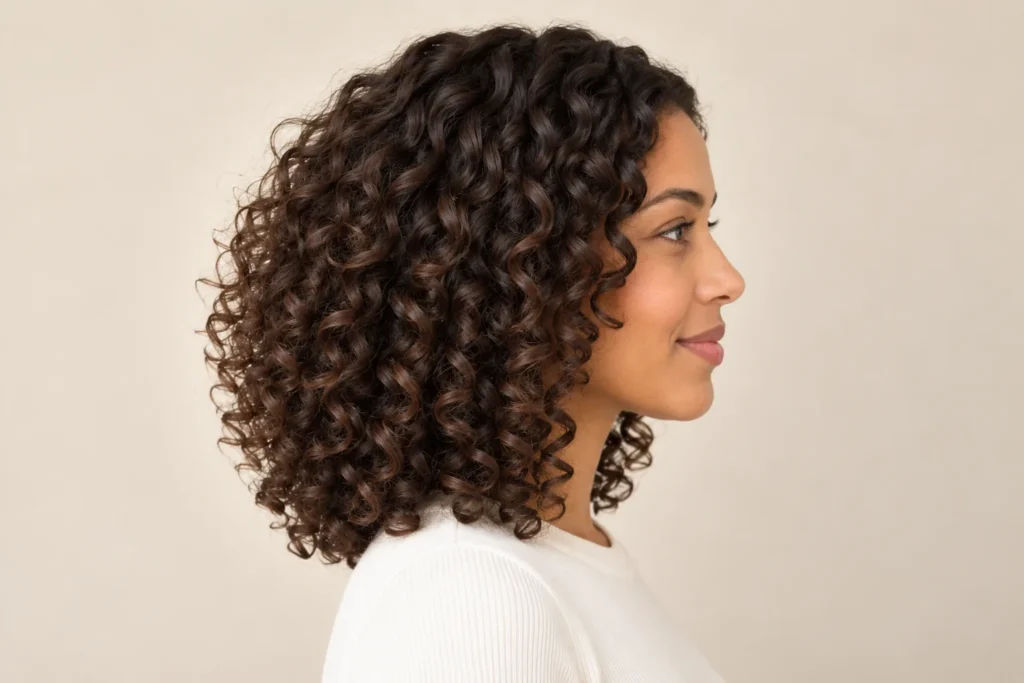
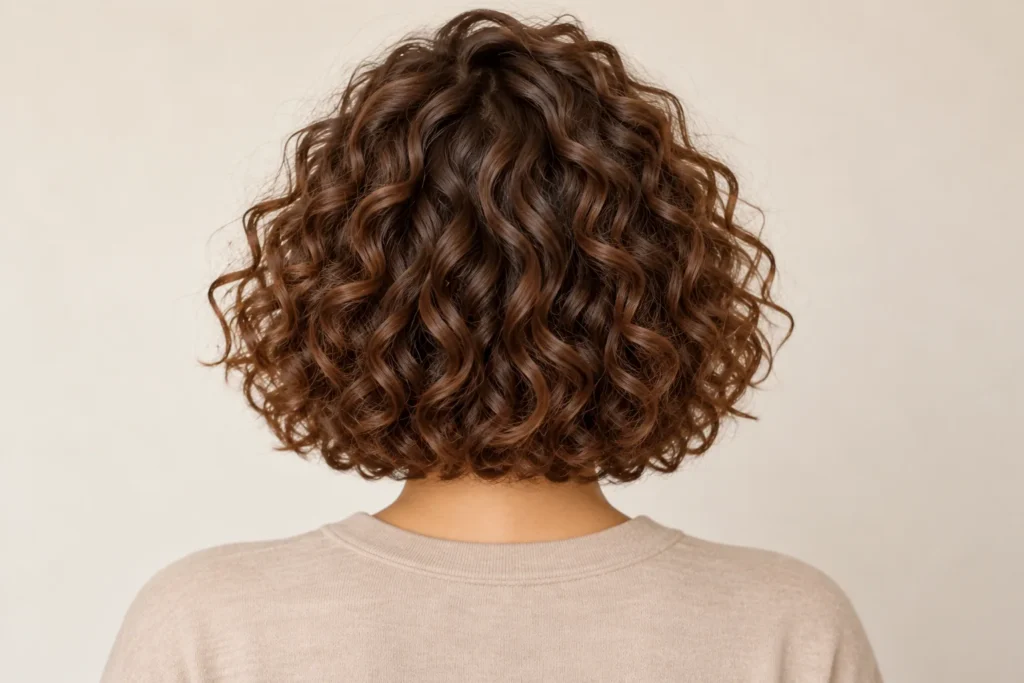
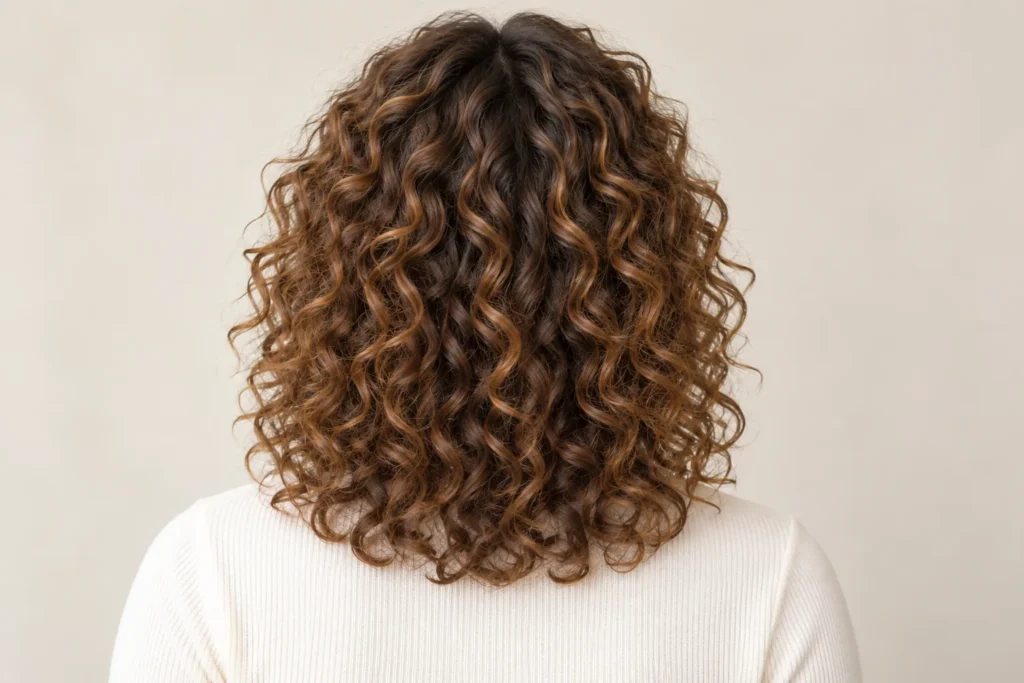
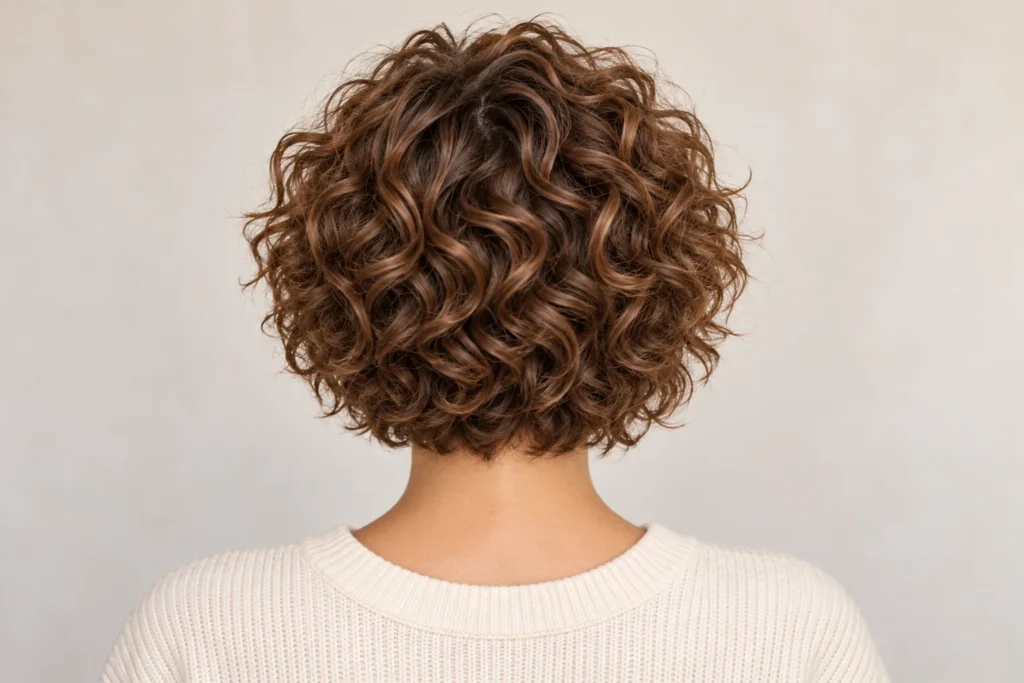
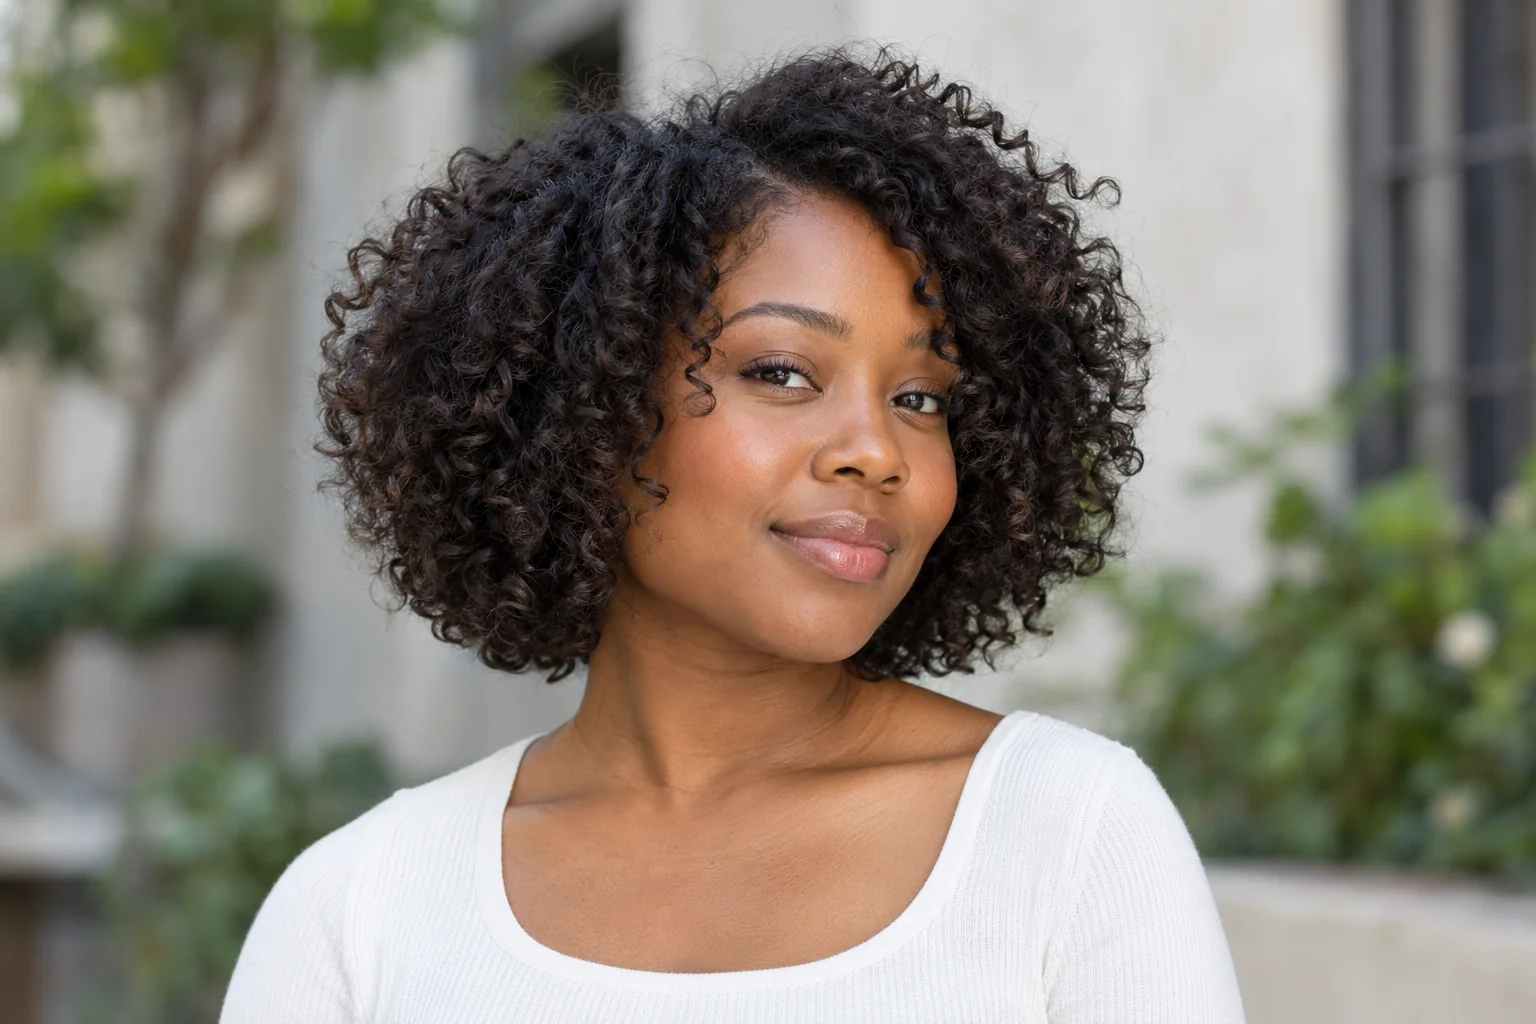
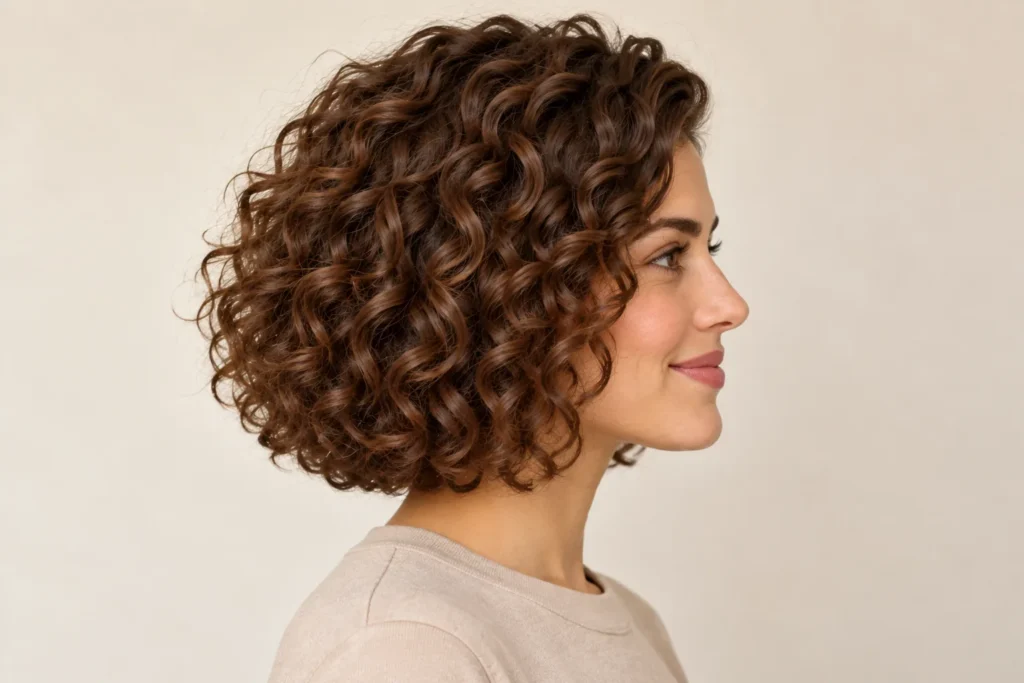
    2. Curly Bob

    A curly bob brings the focus toward the jaw and cheekbones. Defined ends make the outline feel deliberate, while a gentle side part stops it from looking overly symmetrical. The exact finished length matters more than a fixed label such as chin-length or shoulder-length.

    Compare the side and back views before choosing your cut. Leave enough length at the nape for the silhouette you want, and discuss how the front curls rise after drying so they do not finish shorter than expected.
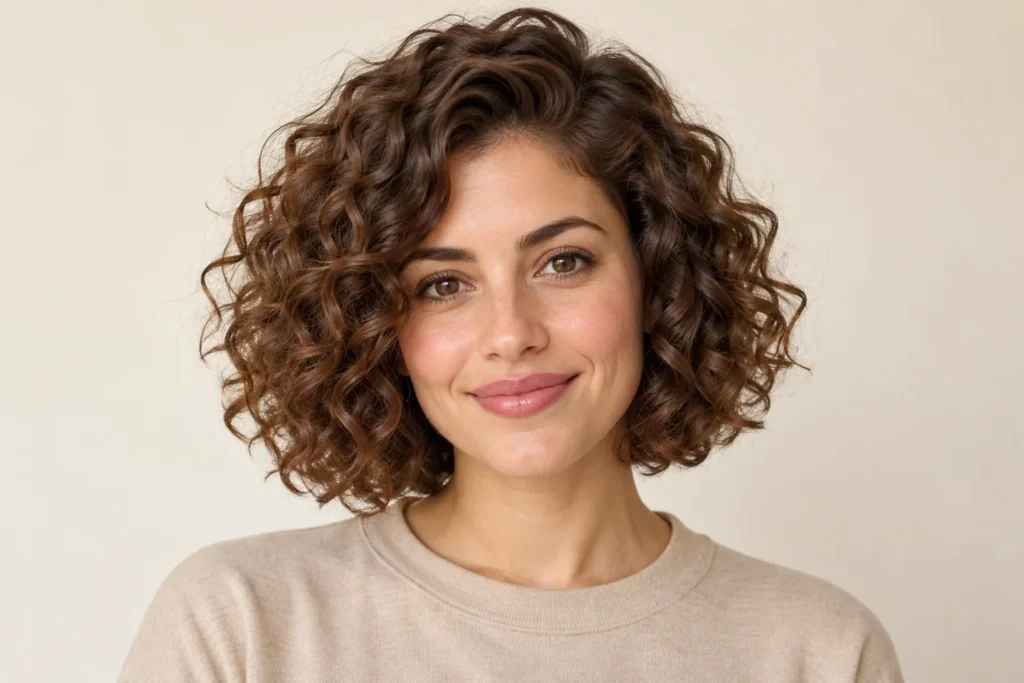
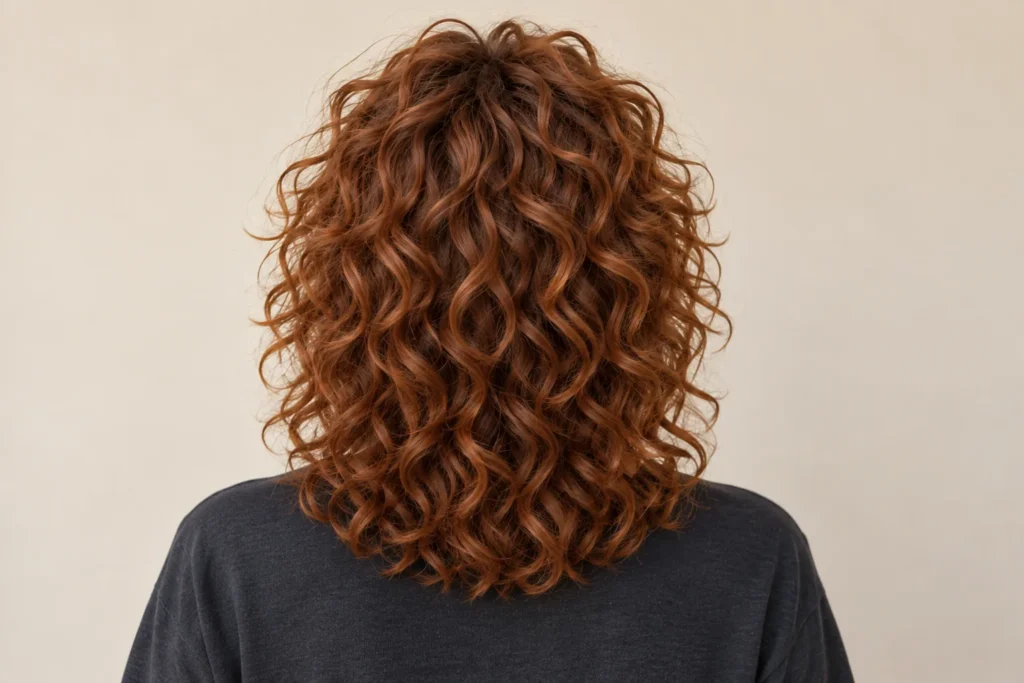
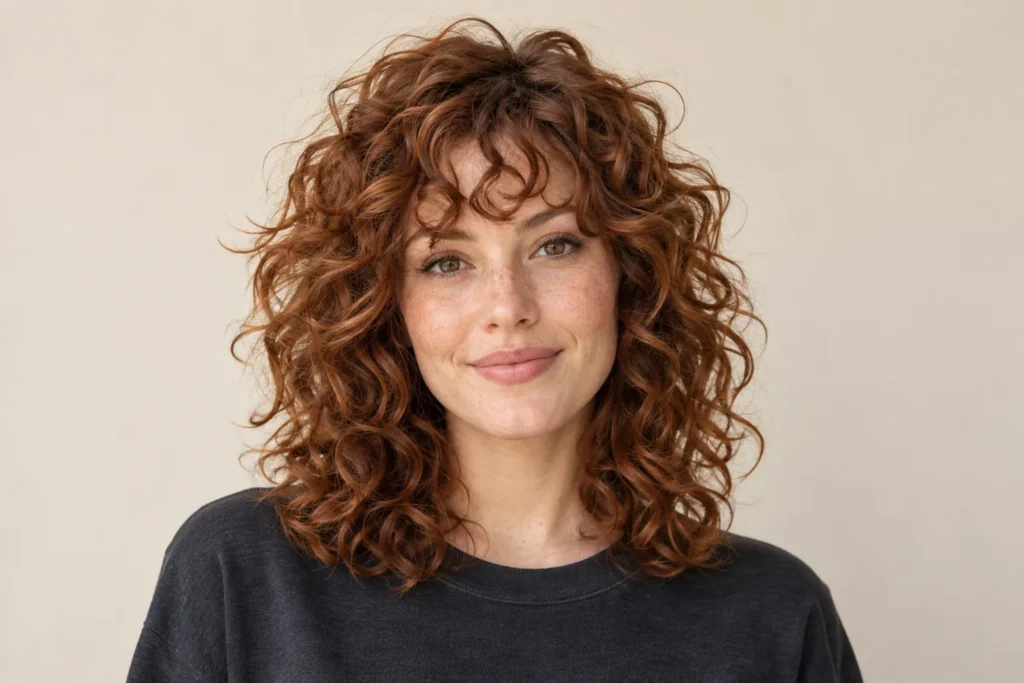
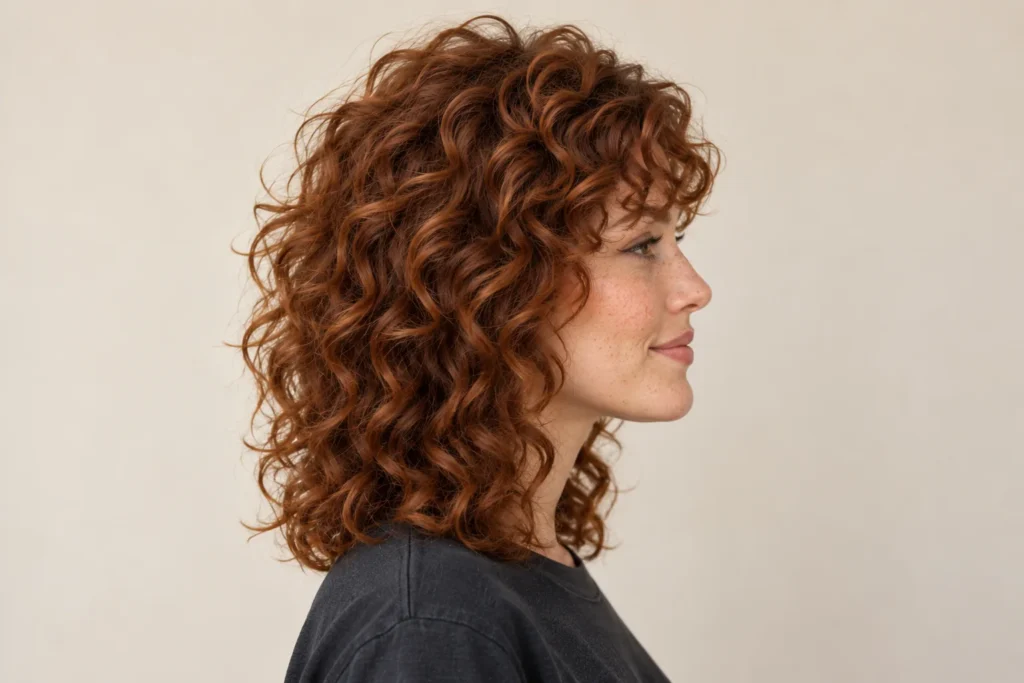
    3. Curly Shag

    The curly shag combines a layered crown, a lighter perimeter and a relaxed fringe. Its charm comes from an uneven, lived-in outline rather than perfectly matching ringlets. It suits someone who enjoys visible movement and does not want the sides to form a solid block.

    Keep the fringe conversation separate from the overall length. Ask how it will blend into the cheekbone pieces. When styling, lift selected curls around the crown and let the shorter layers find their own direction.
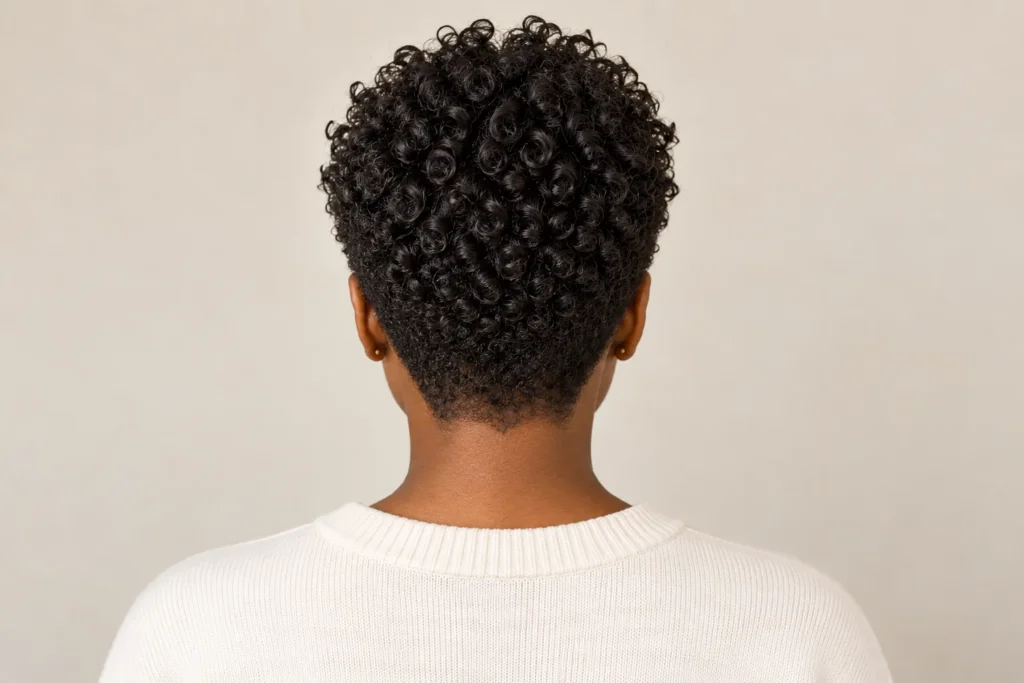
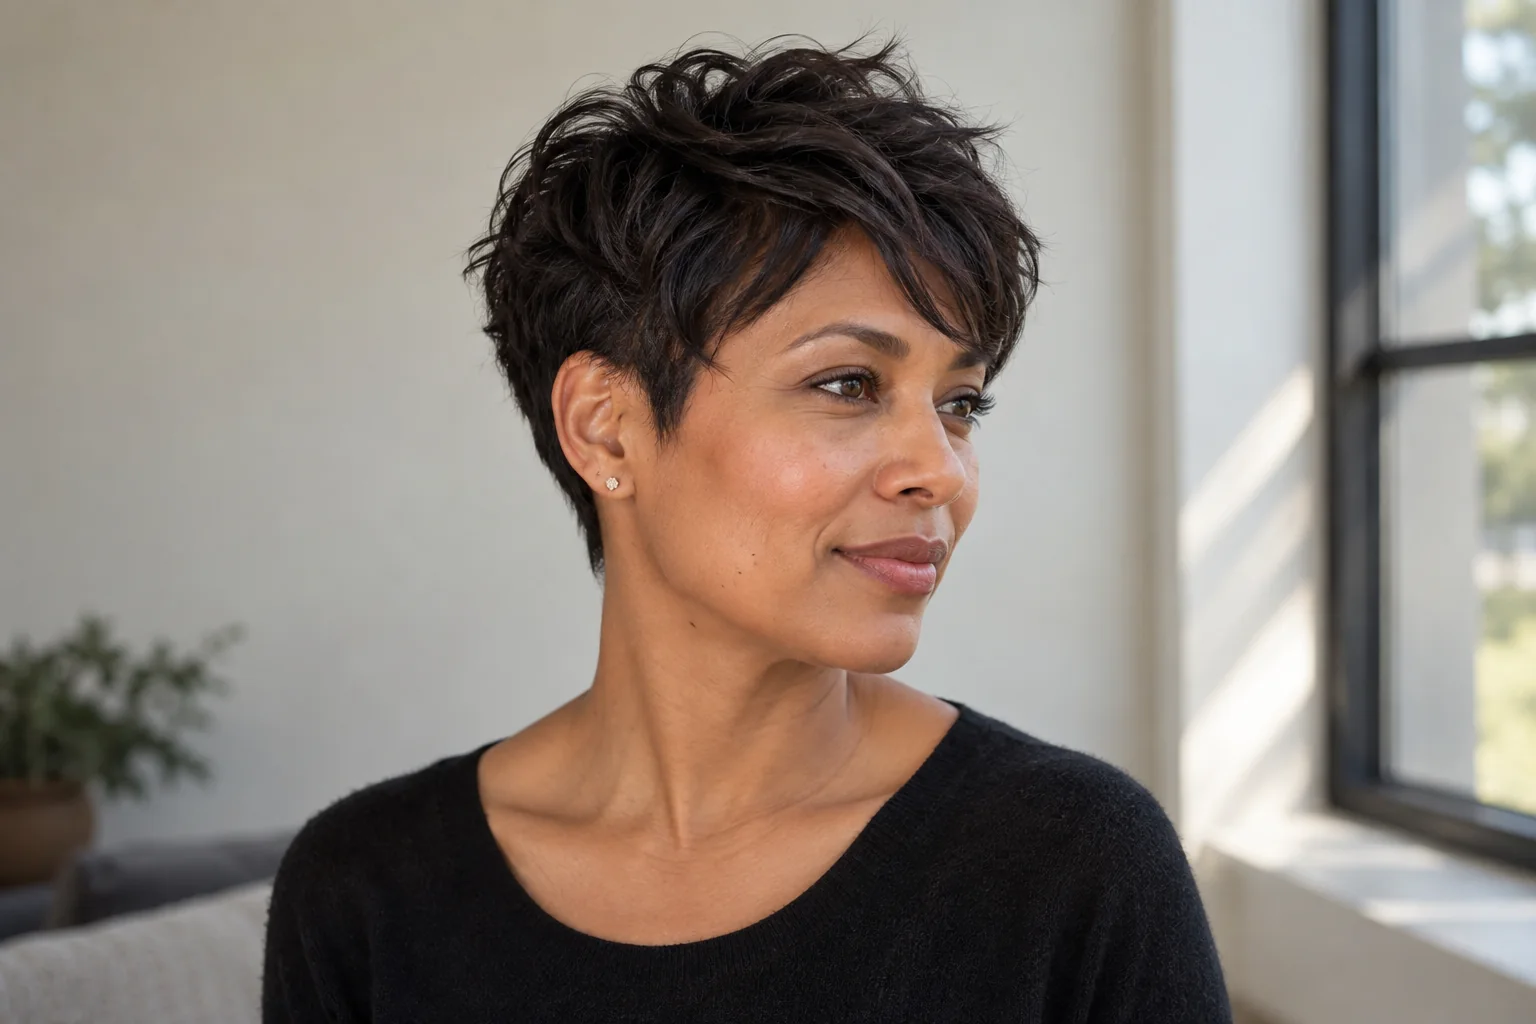
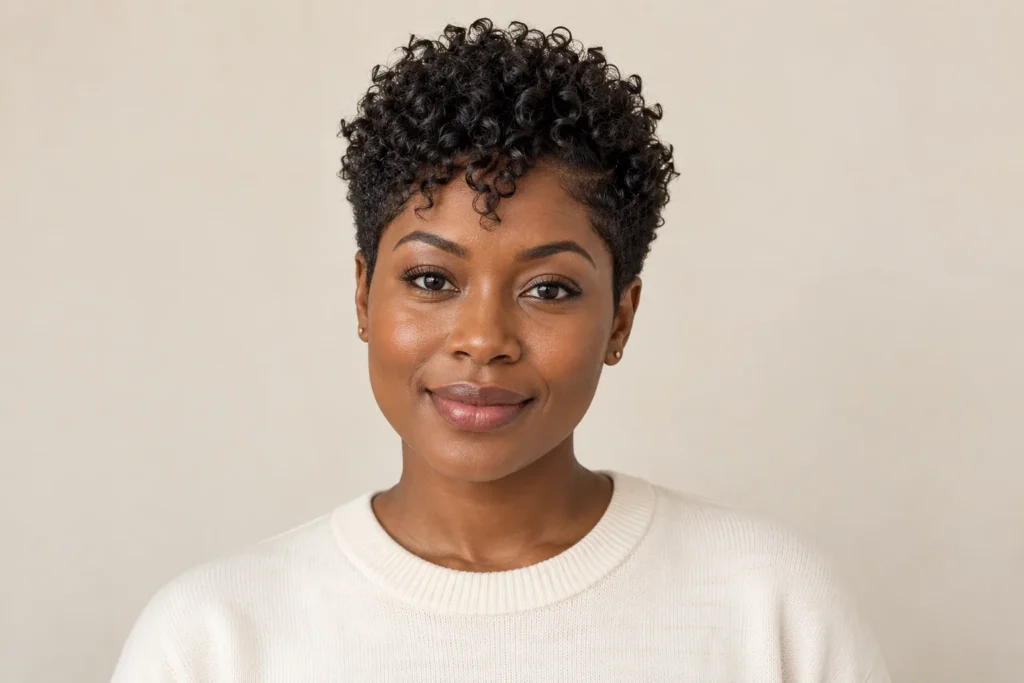
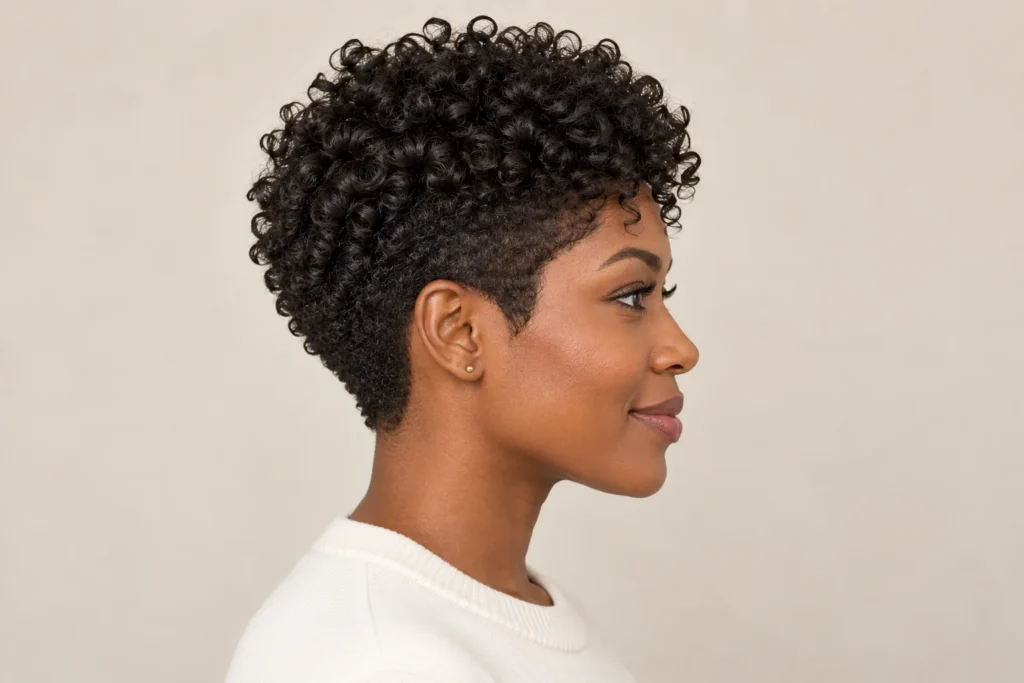
    4. Curly Pixie

    A curly pixie keeps the sides compact and leaves more texture on top. The contrast makes the individual curls easy to see and gives a short cut a clear profile. It can be neat around the ears while still feeling soft through the fringe.

    Show your stylist both the front and side references, especially if you want tapered edges. A little definition on the longer top section is often enough for the visual effect; the outline will also need attention as the cut grows.
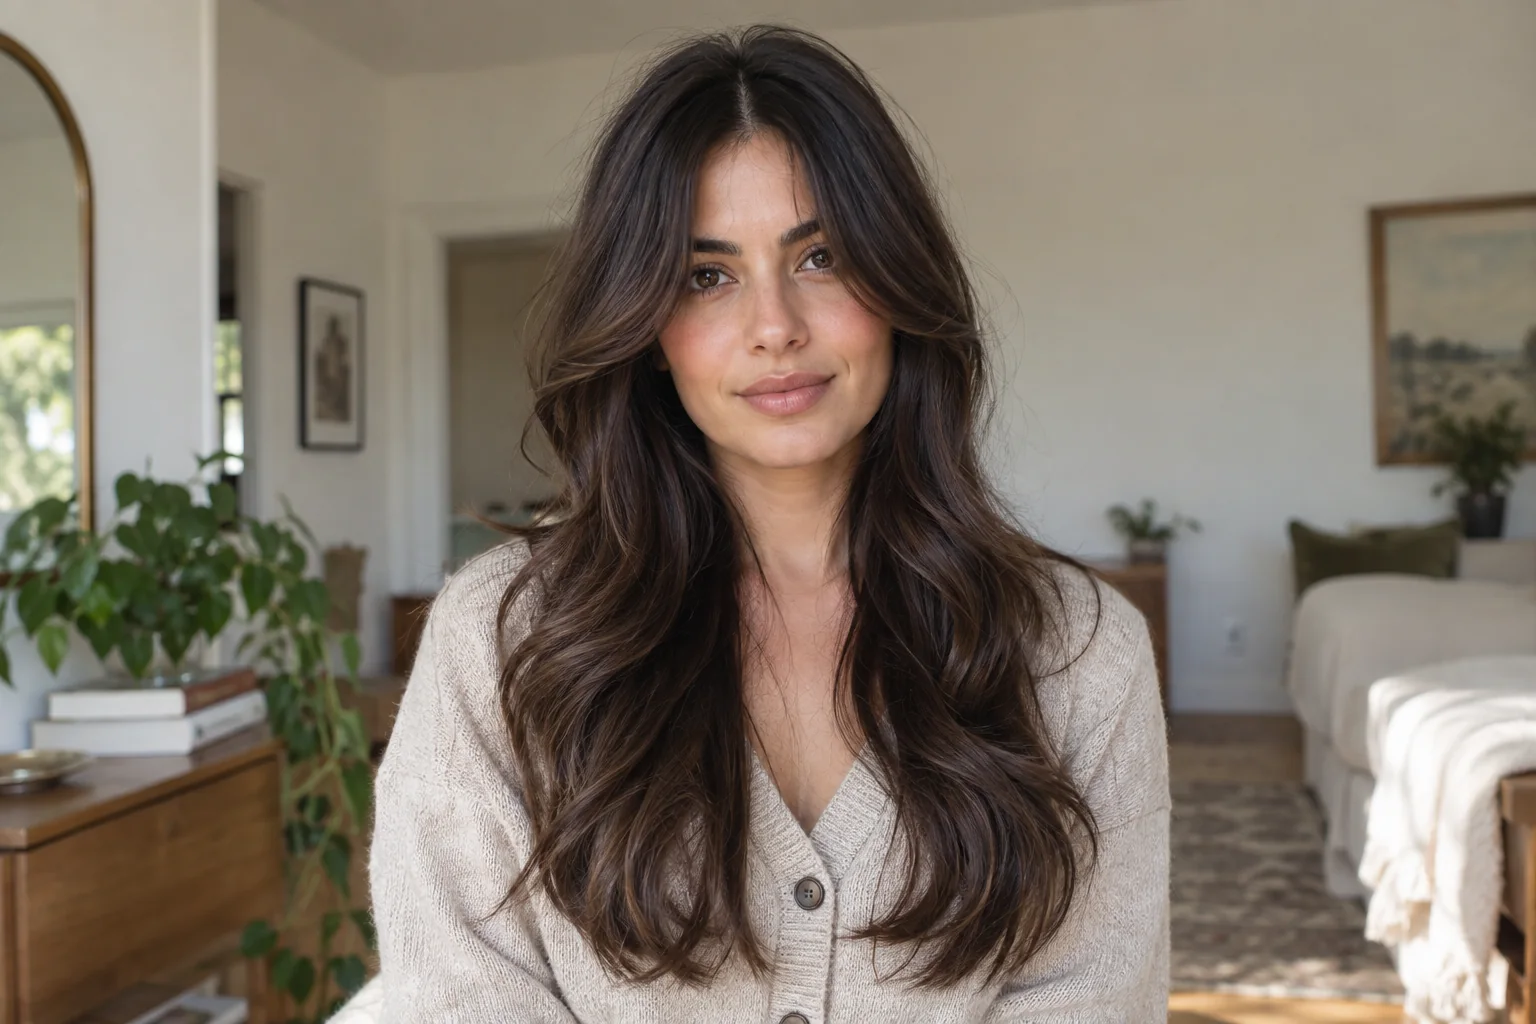
    5. Long Layers With a Centre Part

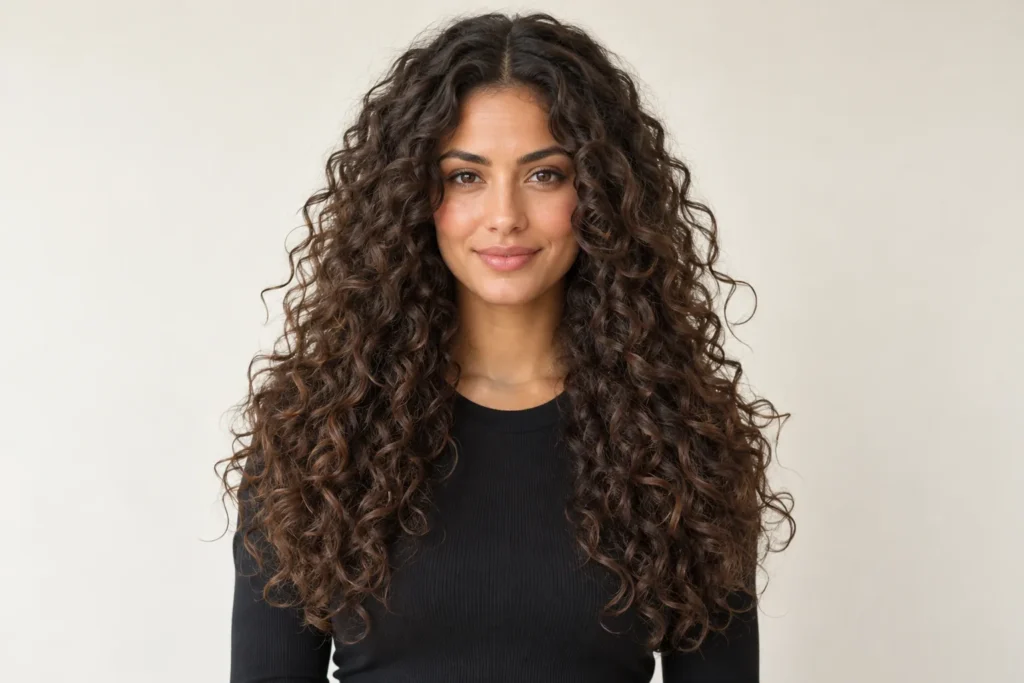
    Long layers preserve length while changing how the curls fall around the shoulders. A centre part creates a balanced frame, and subtle shorter pieces prevent all the visual weight from collecting at the bottom. This is an option when you love long hair but want a more considered shape.

    Avoid copying the shortest layer from a reference without discussing your density. Ask for enough fullness through the ends. Style the two sides in their natural direction instead of forcing every curl to sit identically.
    6. Curly Curtain Bangs

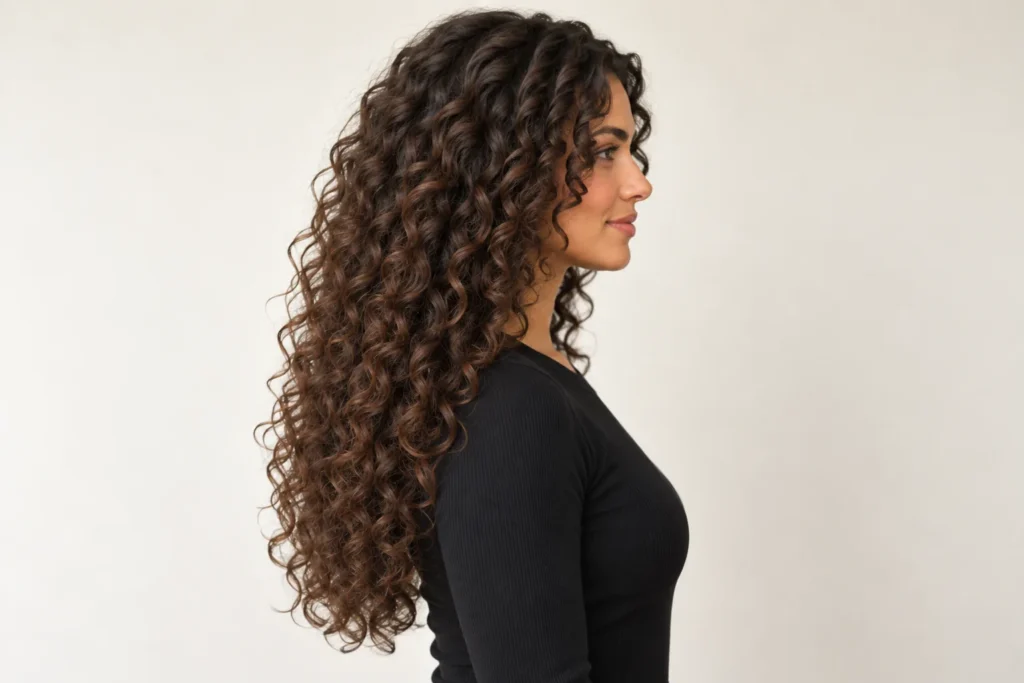
    Curly curtain bangs open around the centre and blend into longer pieces beside the face. They create a softer frame than a straight, heavy fringe. The important detail is the transition: the shortest curls should connect naturally with the rest of the haircut.

    Talk through the fringe length on dry curls before any cutting starts. For everyday styling, place the split where you want it while damp and guide each side gently outward. A fringe can need its own refresh even when the lengths look settled.
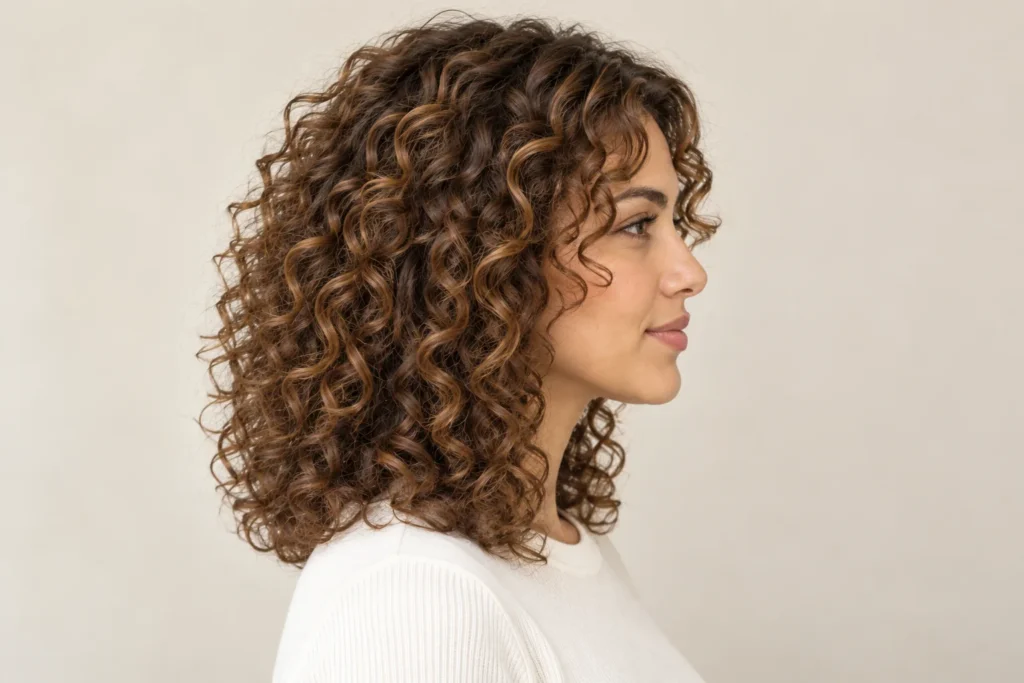
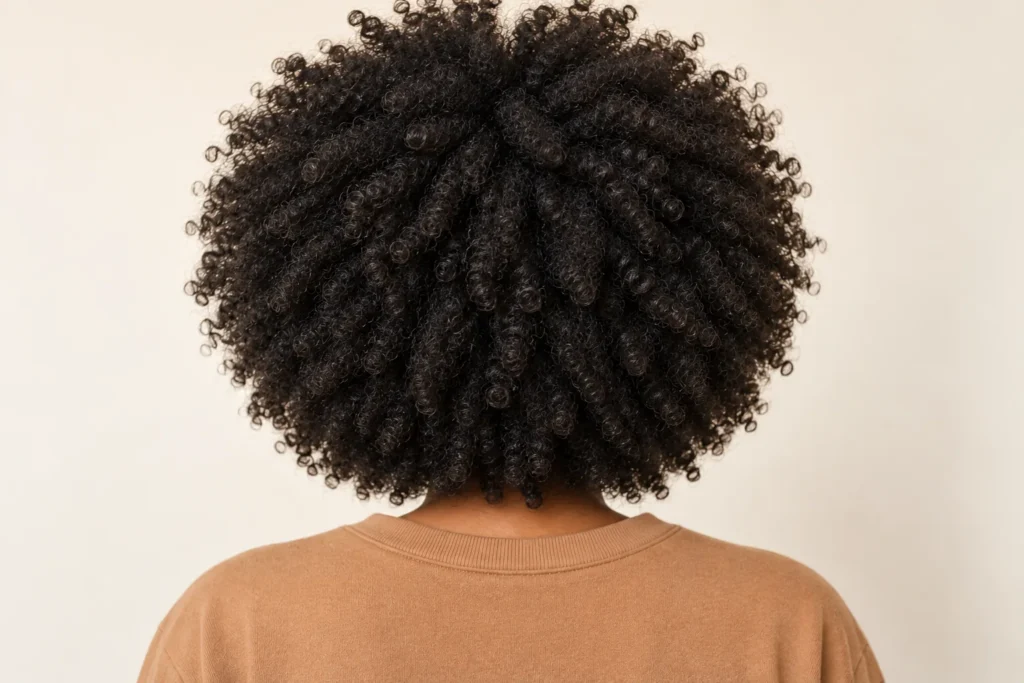
    7. Rounded Curly Afro

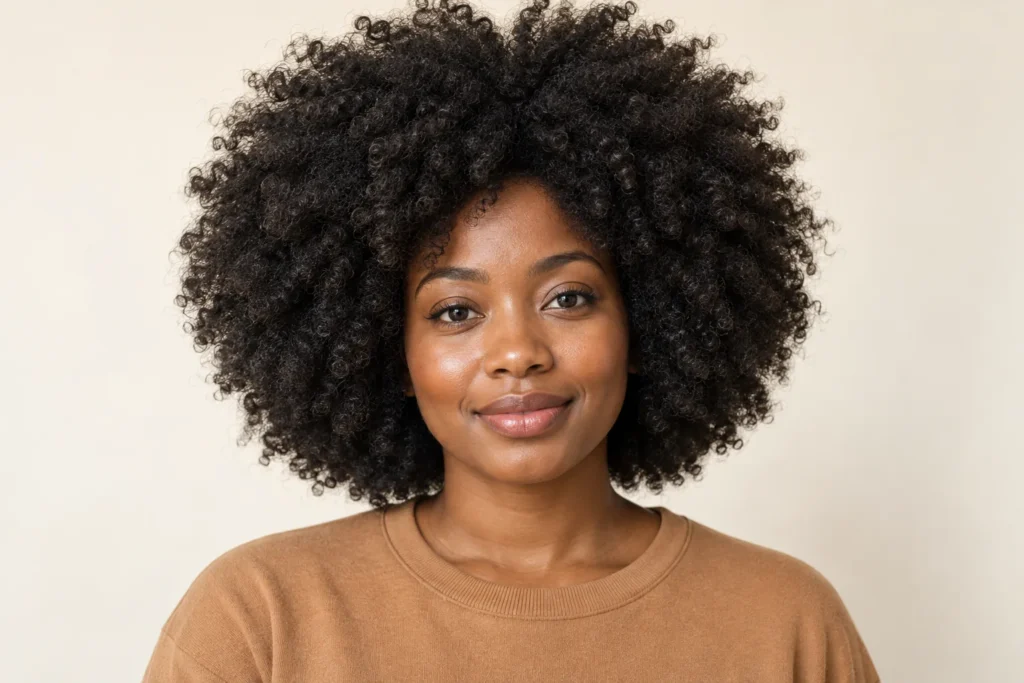
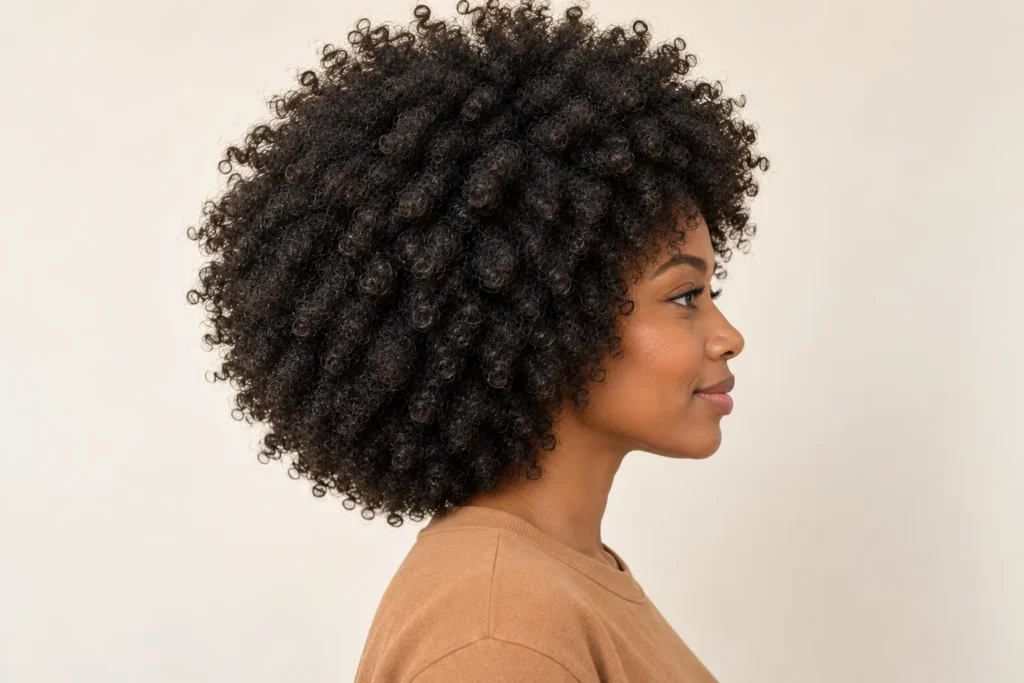
    A rounded curly afro puts the whole silhouette at the centre of the look. The crown, sides and back work together, with fullness distributed around the head. Defined coils and a soft outer edge can coexist; the style does not have to look rigid to have a deliberate shape.

    Use all three angles to explain the proportions you like. Ask whether you want more width at the sides or height at the crown. Arrange the outer curls lightly so the outline remains visible without flattening the texture.
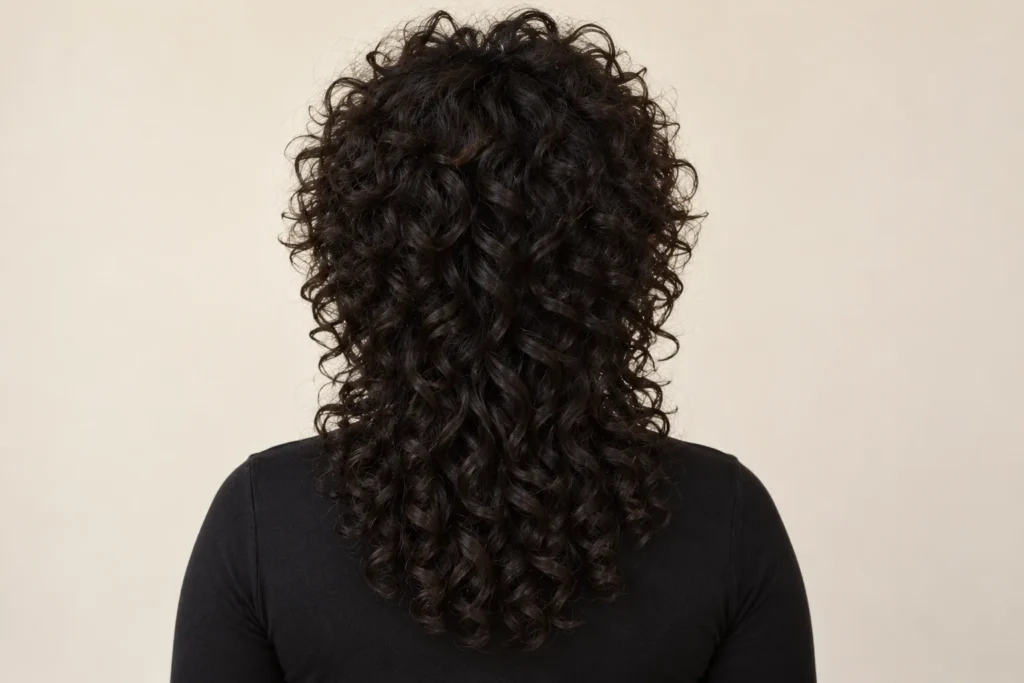
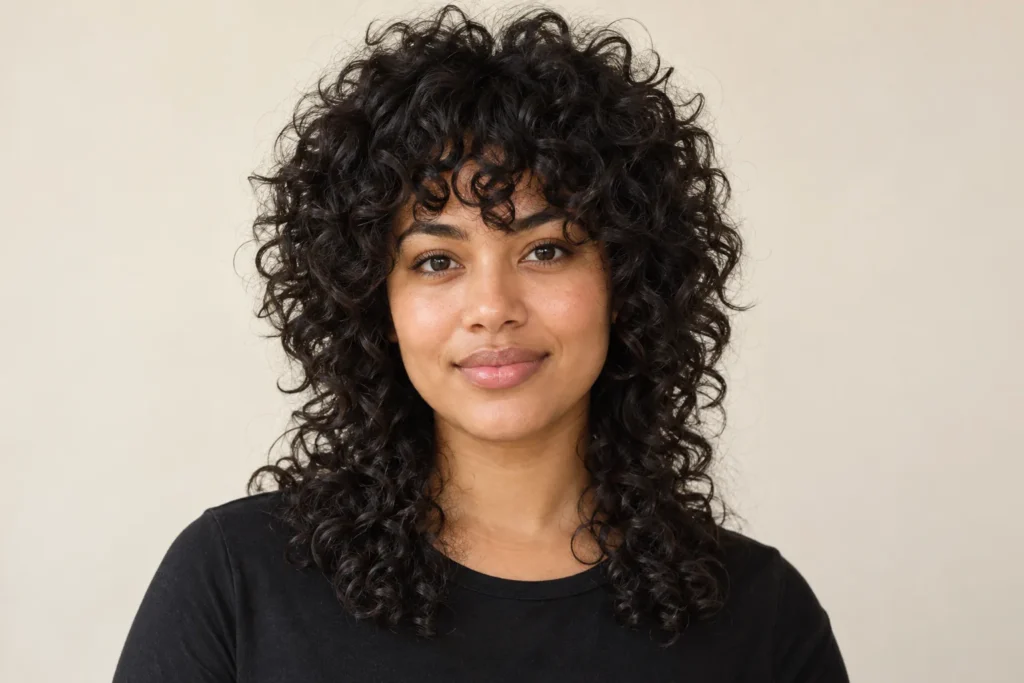
    8. Curly Wolf Cut

    The curly wolf cut has a fuller top, shorter framing pieces and a longer nape. Its contrast is stronger than a gentle layered cut, giving it a slightly rebellious profile. It is useful inspiration if you want the back length to remain visible beneath the crown.

    Discuss how dramatic the transition should be. A subtle version can be easier to tie up, while very short crown layers create a different daily styling commitment. Look closely at the side reference before deciding where that change in length should begin.
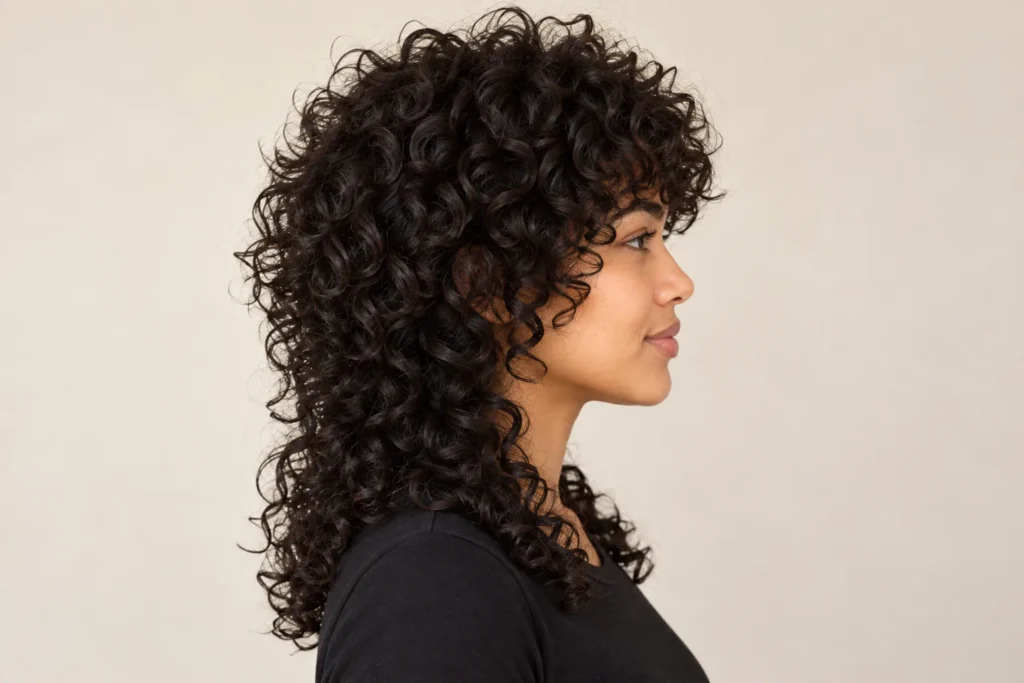
    9. Half-Up Curly Ponytail

    A half-up curly ponytail gathers the upper section while leaving the lower curls loose. It shows the face and preserves movement through the back, making it an easy alternative to wearing everything down. The amount you gather changes how much volume remains beside the ears.

    Start with a smaller top section and adjust it before fastening. Let the ponytail sit loosely enough for comfort, then arrange a few curls around the join. The back view helps you judge whether the gathered section feels balanced.
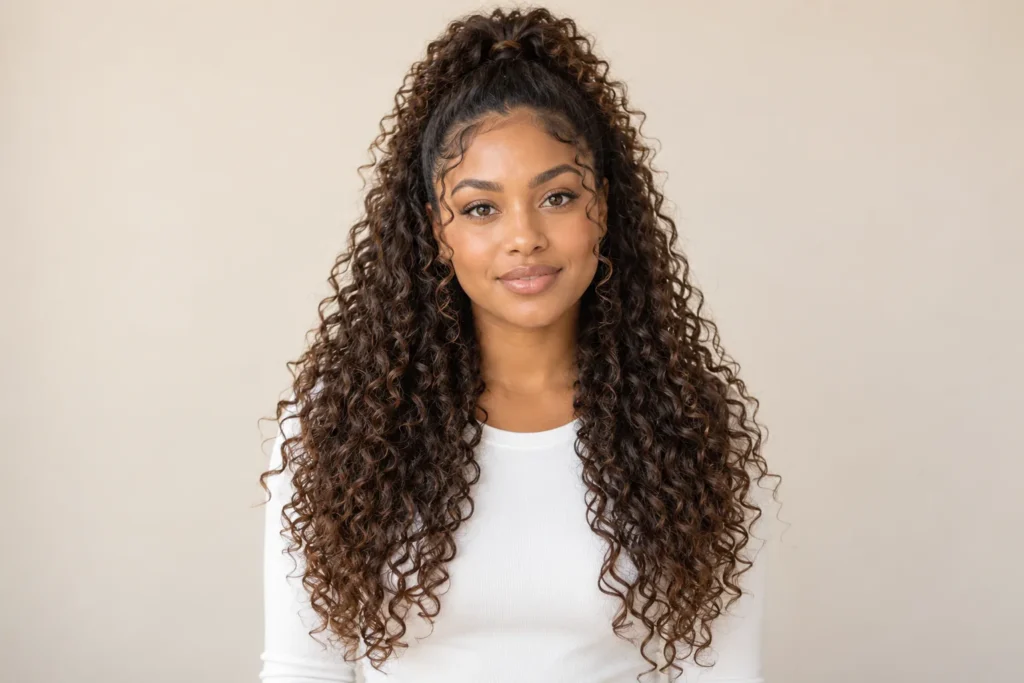
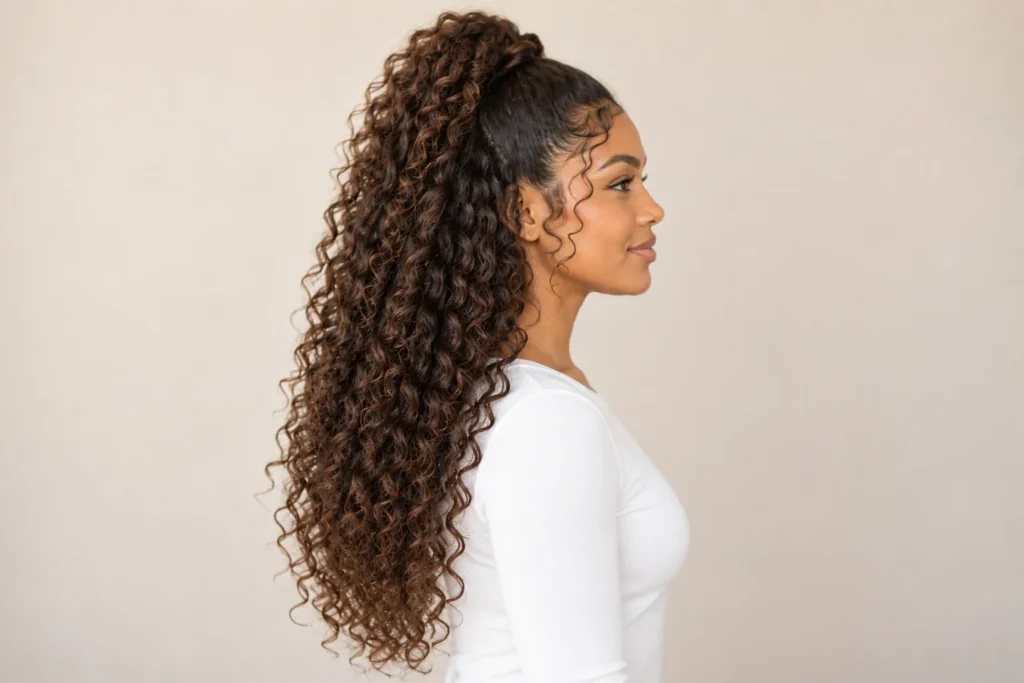
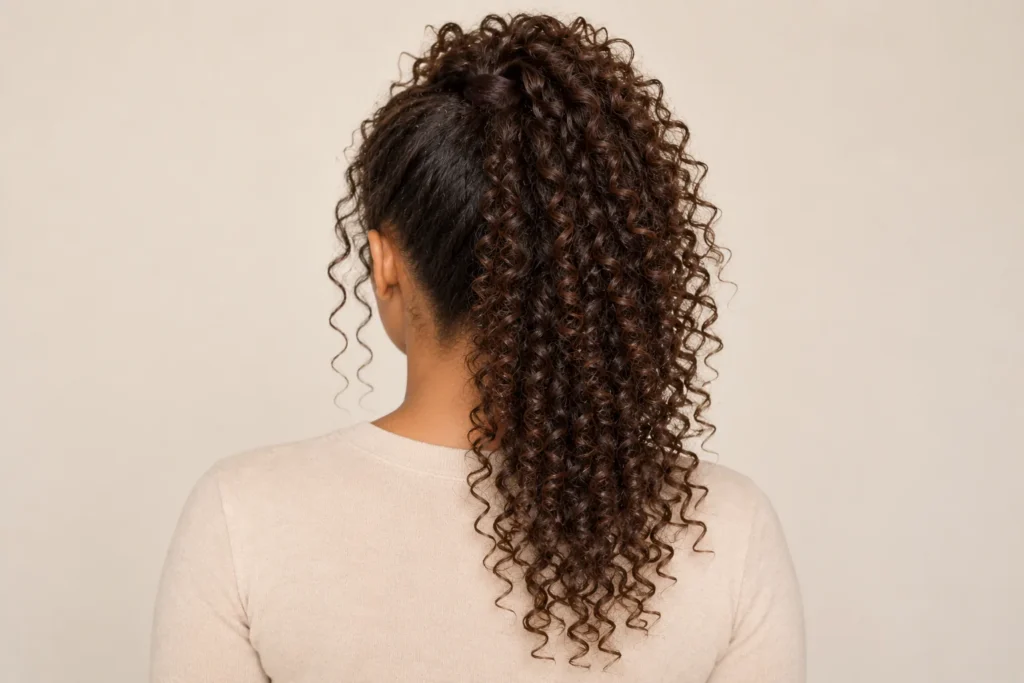
    10. High Curly Ponytail

    A high curly ponytail creates height and a cascading tail. Smooth sides can make the contrast more visible, although a softer finish works too. It is a styling idea rather than a particular haircut, and the result will look different depending on your length and density.

    Gather the hair with your hands and choose a comfortable fastening point near the crown. Leave room for the tail to spread instead of pulling it into one narrow section. If the style feels tight, loosen it rather than chasing a flatter finish.
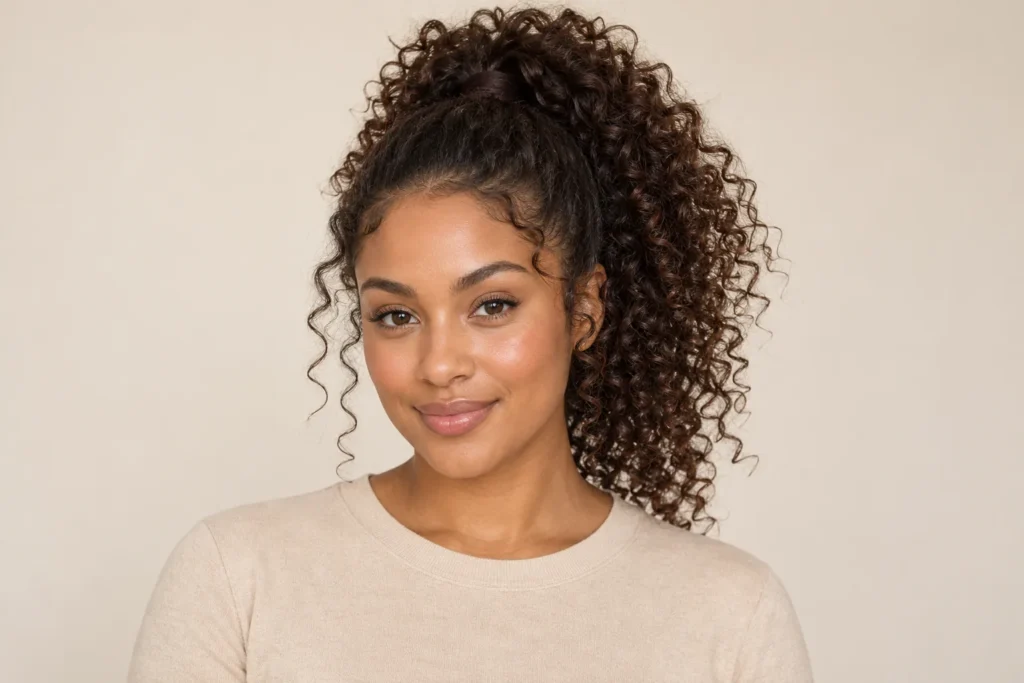
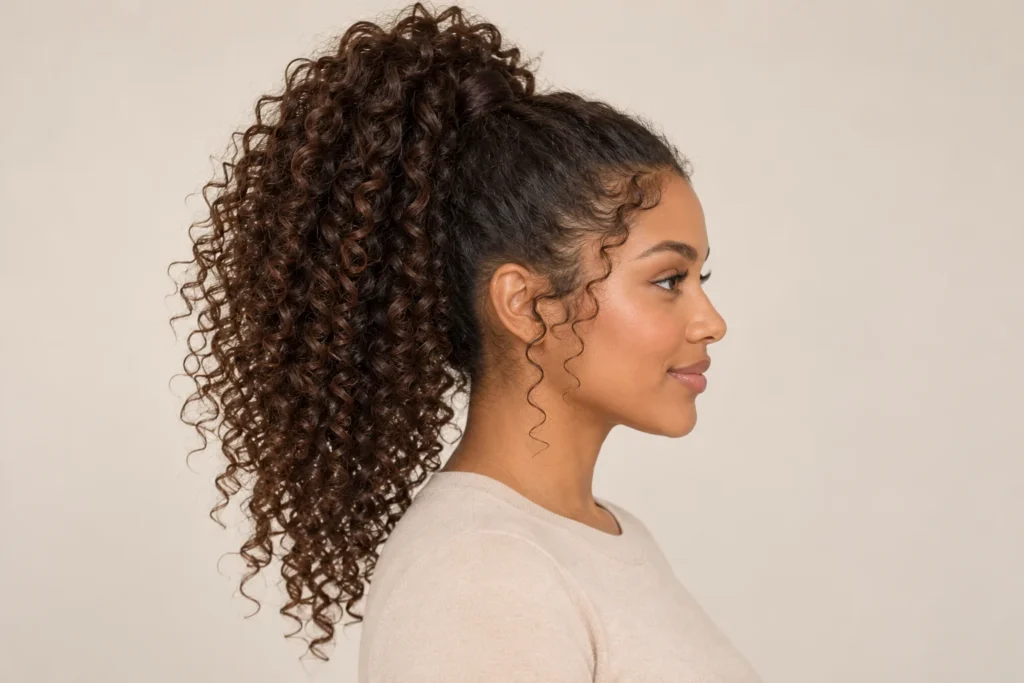
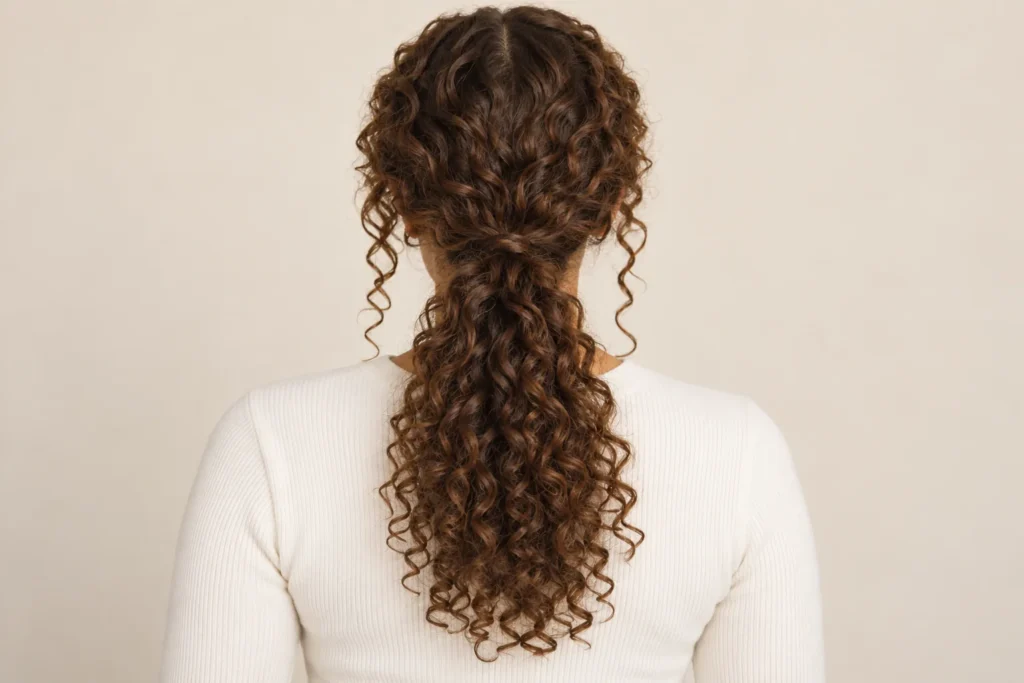
    11. Low Curly Ponytail

    A low curly ponytail places the main shape near the nape. A centre part and a couple of loose tendrils give it a calm, understated finish. It works well when you want the curls contained while still showing their texture along the tail.

    Gather the lengths gently and check that the two sides sit comfortably. Choose tendrils from curls that naturally fall forward rather than pulling new pieces out repeatedly. The side view is particularly useful for comparing where the fastening sits.
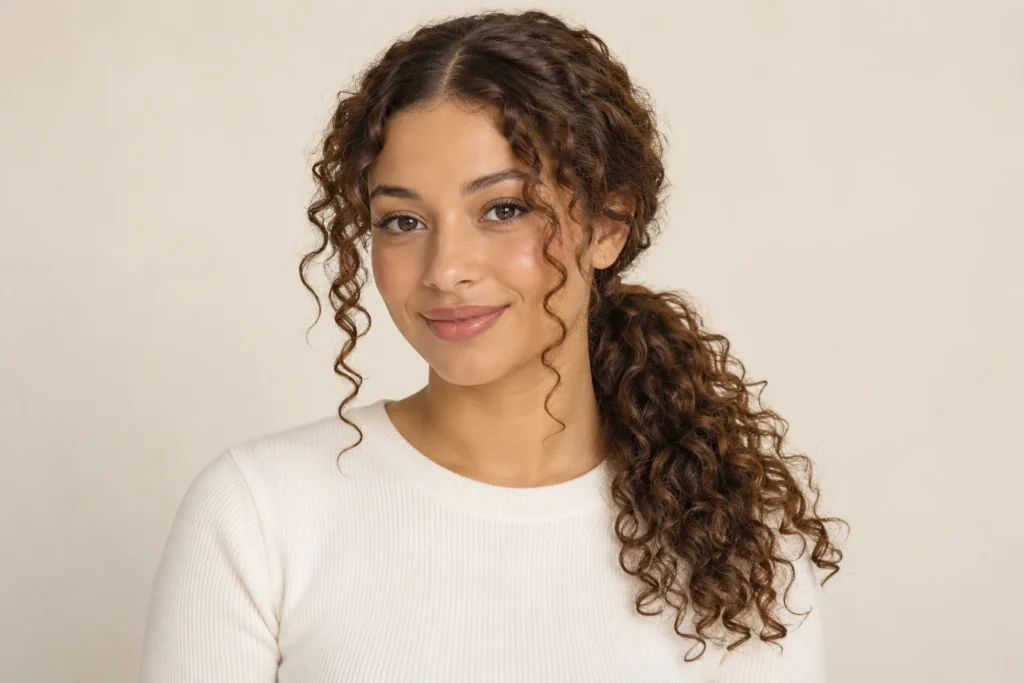
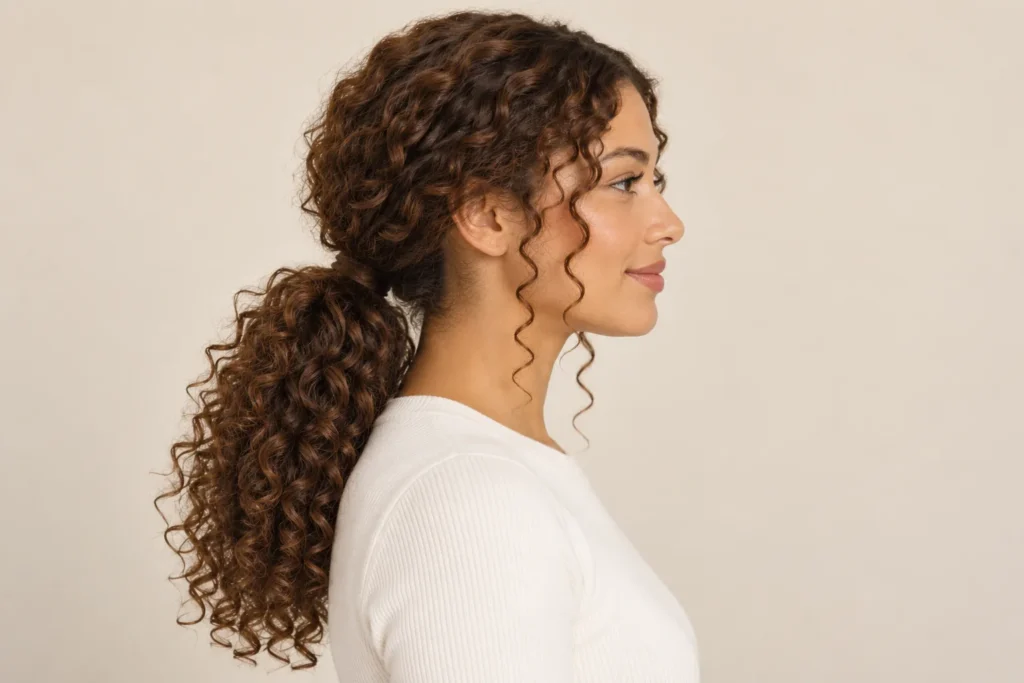
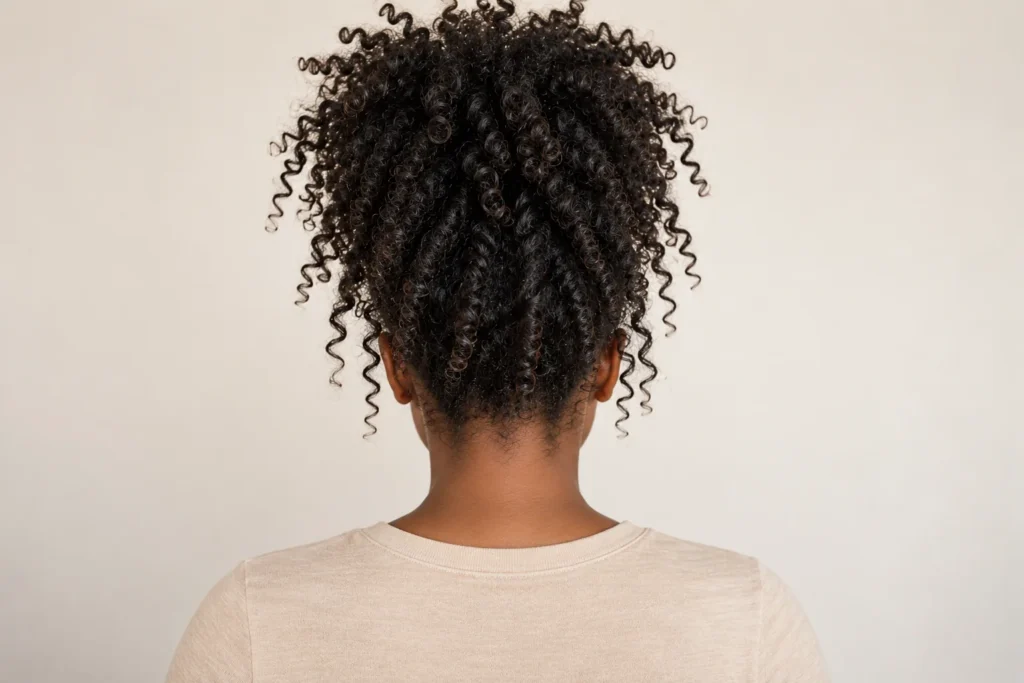
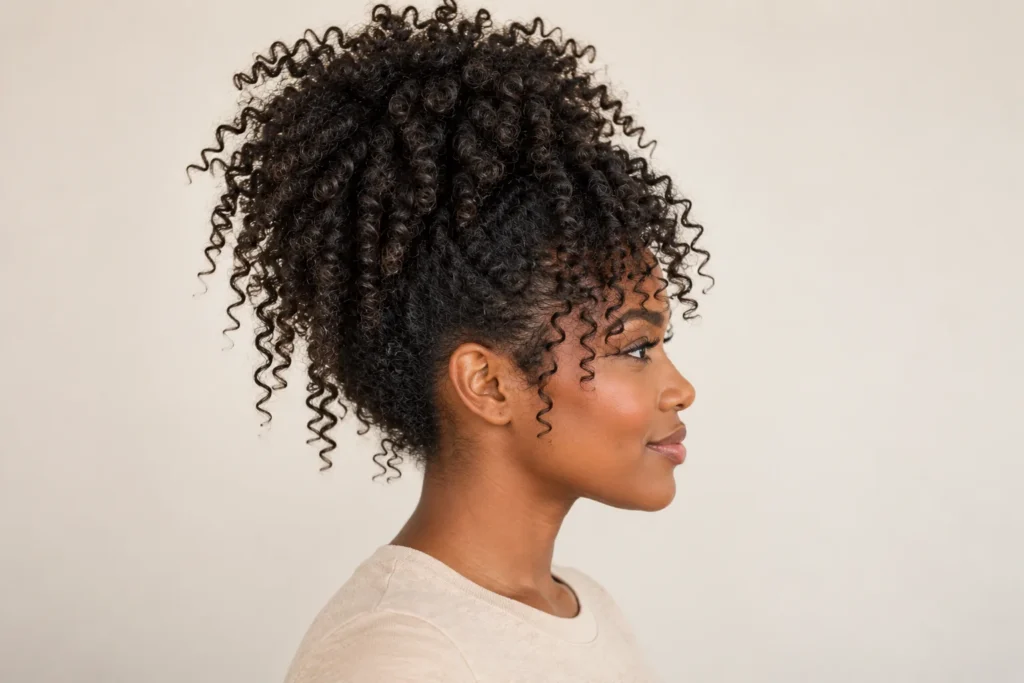
    12. Pineapple Updo

    The pineapple updo gathers curls high on the head, leaving the ends to fan forward and outward. Its loose, airy appearance makes it a distinct daytime look as well as a familiar way of gathering longer curls. The final silhouette depends on how much length you have.

    Use a relaxed fastening and arrange the ends instead of tightening the base until everything looks smooth. Check the back for loose sections and adjust them individually. The aim is a comfortable cluster of curls with visible movement.
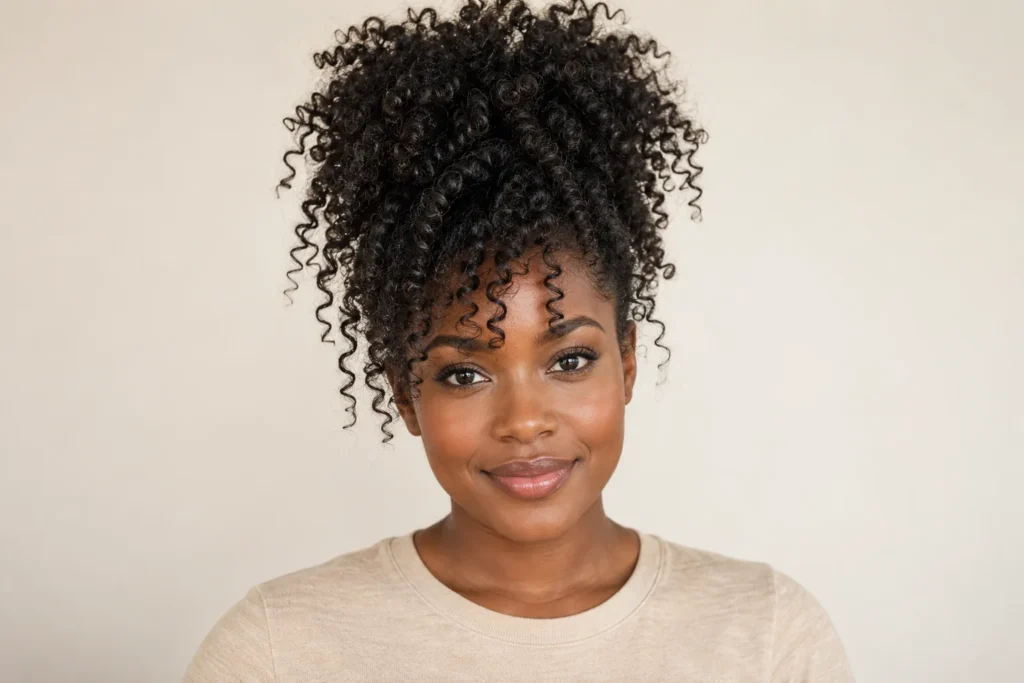
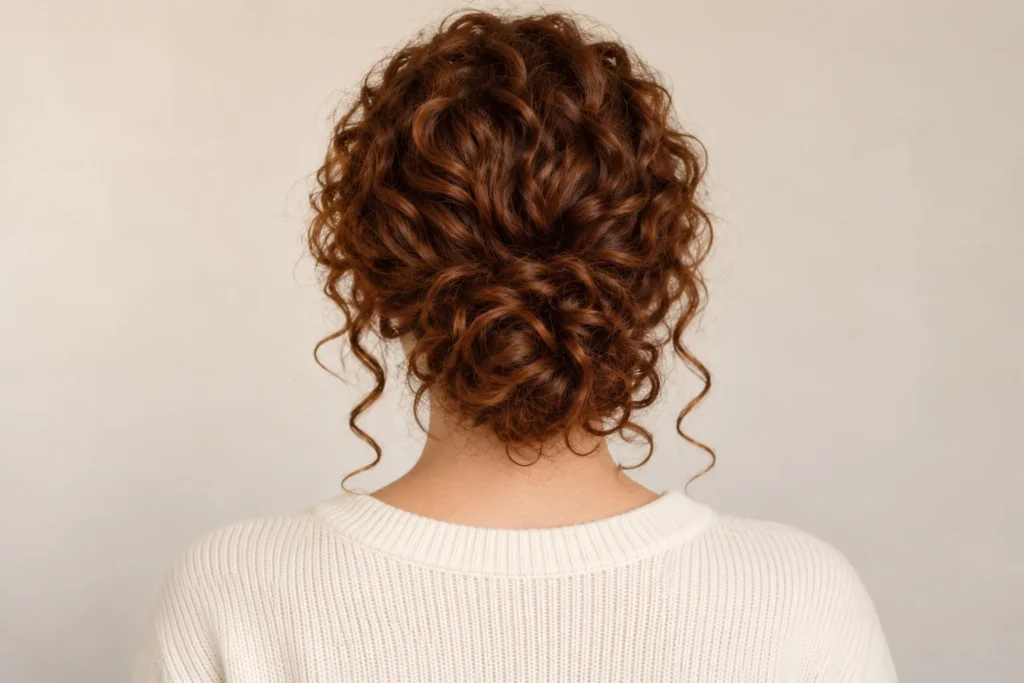
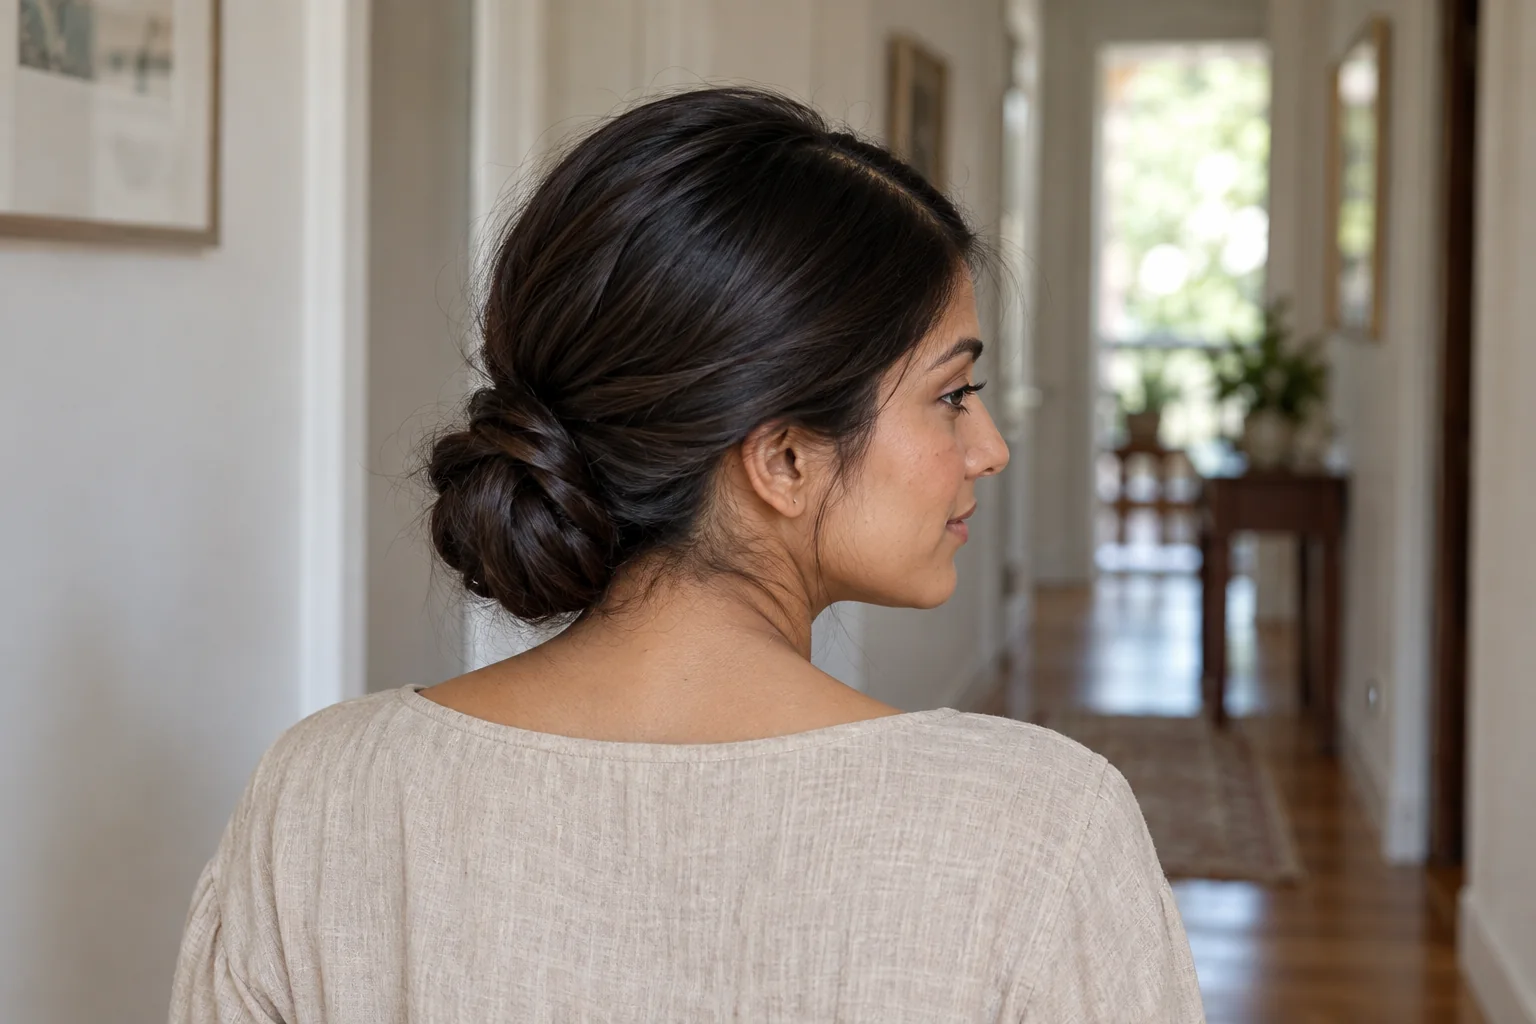
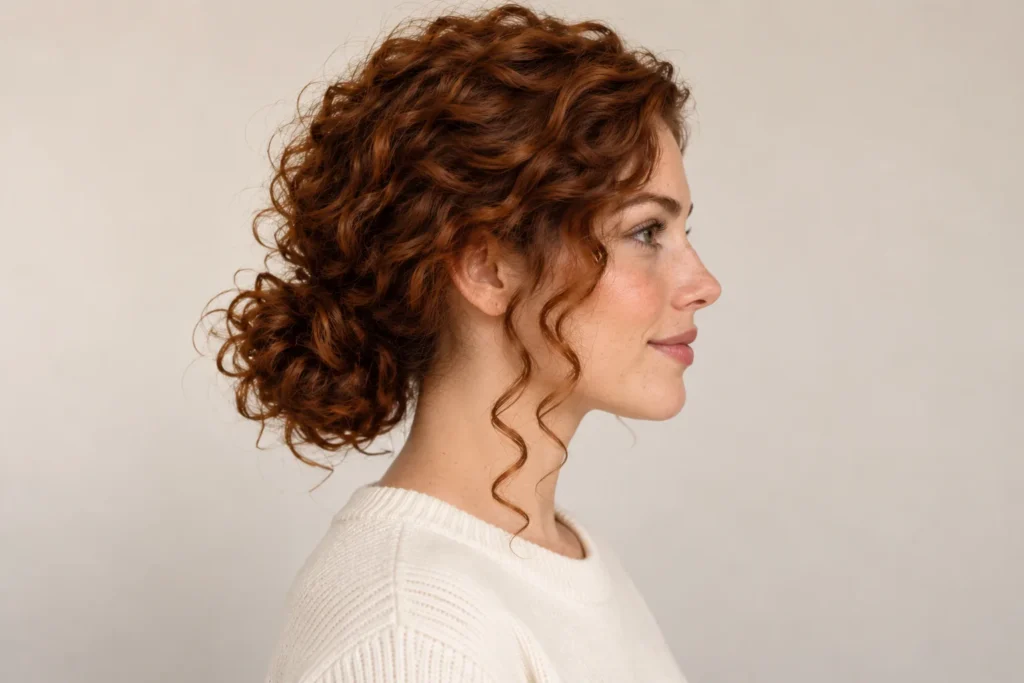
    13. Messy Curly Bun

    A messy curly bun uses loops and loose ends to create texture around the nape. It feels softer than a perfectly tucked bun because the curl pattern remains visible. A few face-framing pieces can connect the updo with the front of your haircut.

    Gather the hair low, form a loose bun and secure the shape without hiding every end. Reposition sections that stick out awkwardly rather than adding more tension. The rear reference shows how an intentional outline can still look relaxed.

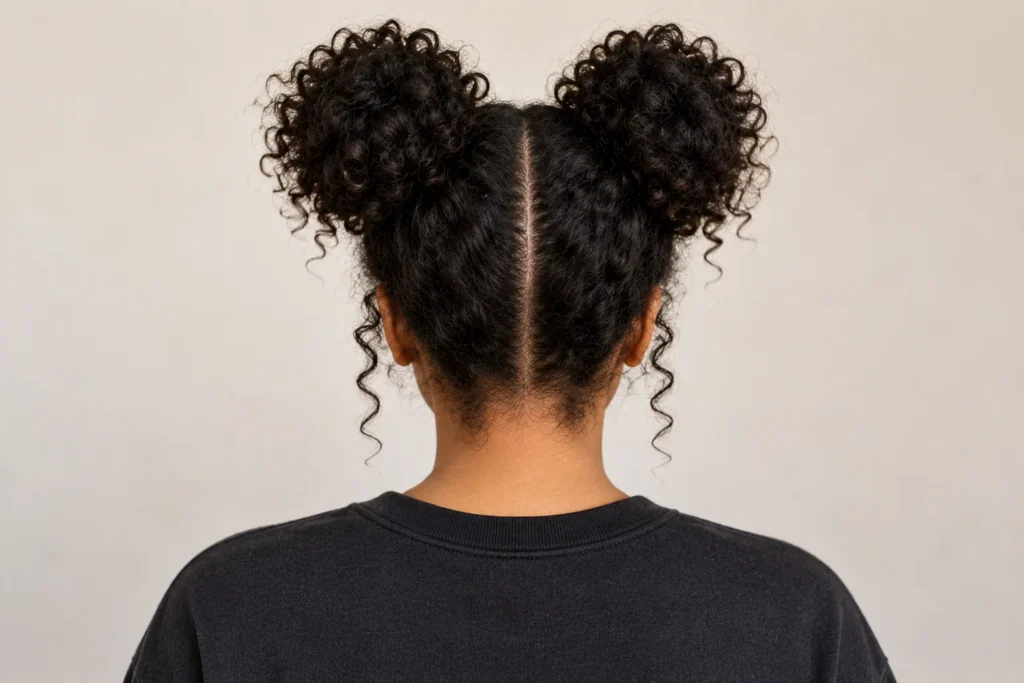
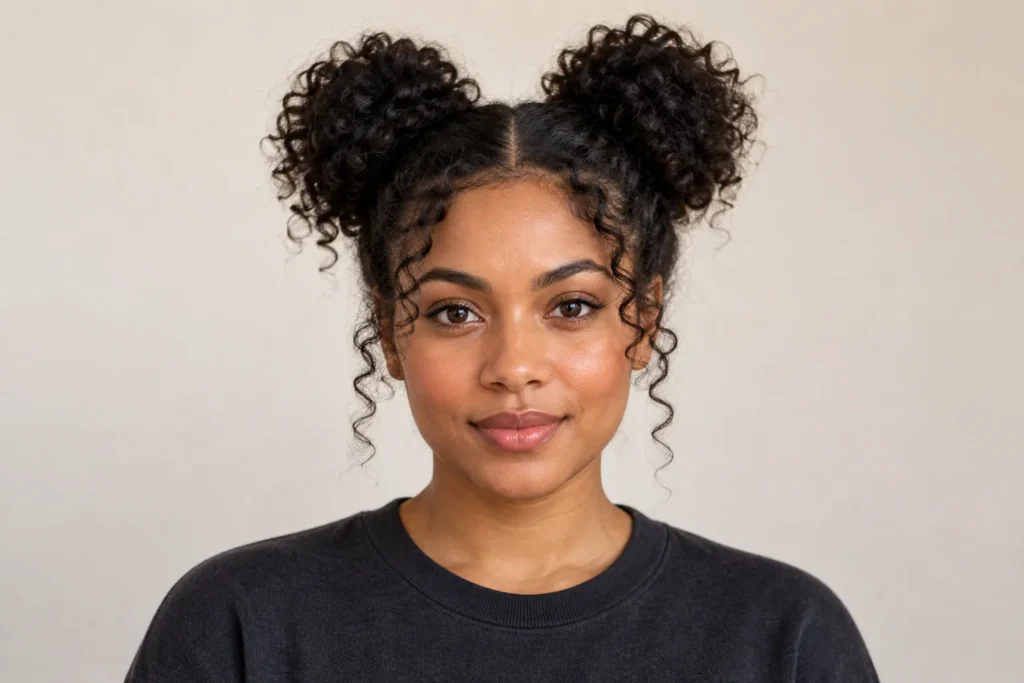
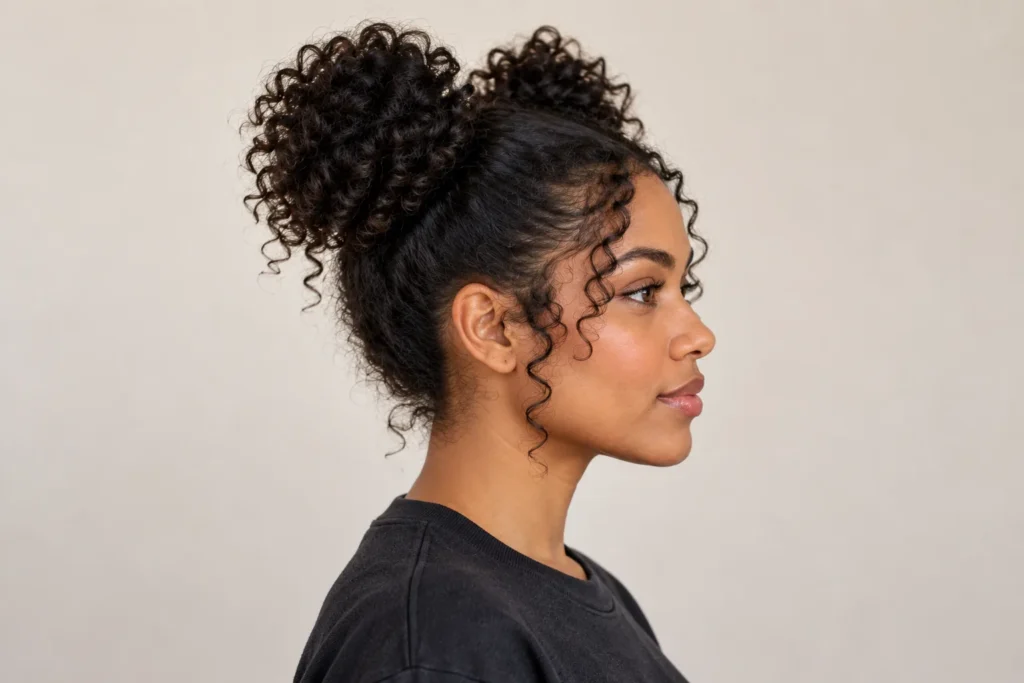
    14. Curly Space Buns

    Curly space buns divide the hair into two sections and build matching shapes above the ears. The curls keep the buns from looking too solid, while a centre part gives the arrangement a clear structure. They can feel playful without needing extra accessories.

    Make the two sections similar in size before fastening them. Arrange each bun loosely and compare their height in a mirror. Leave a couple of curls near the temples if you want a softer front, or keep the outline clean for more contrast.
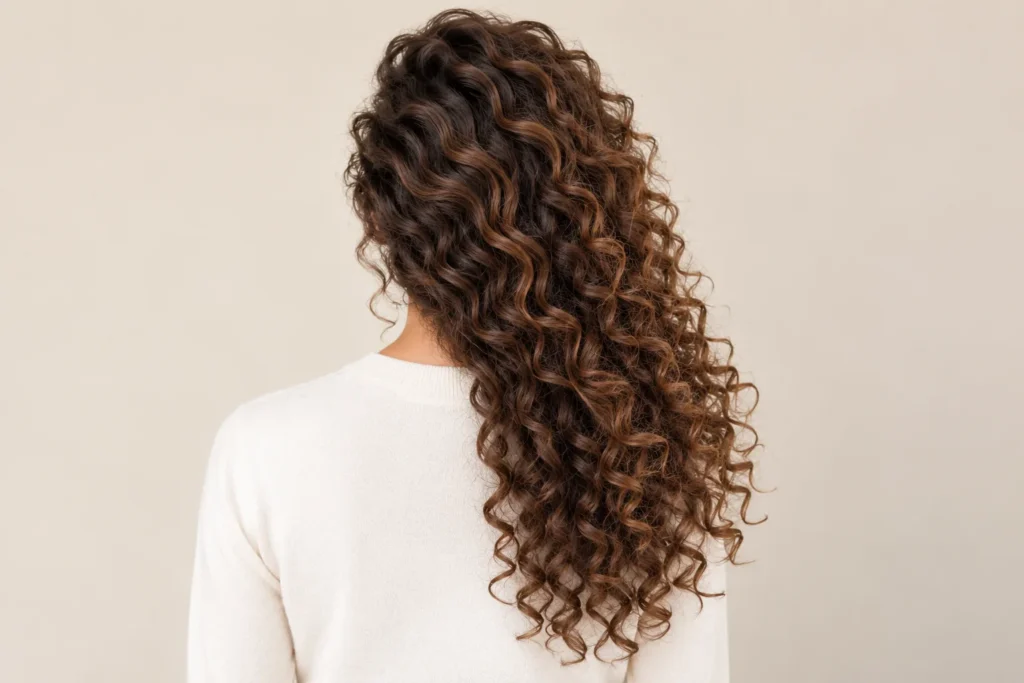
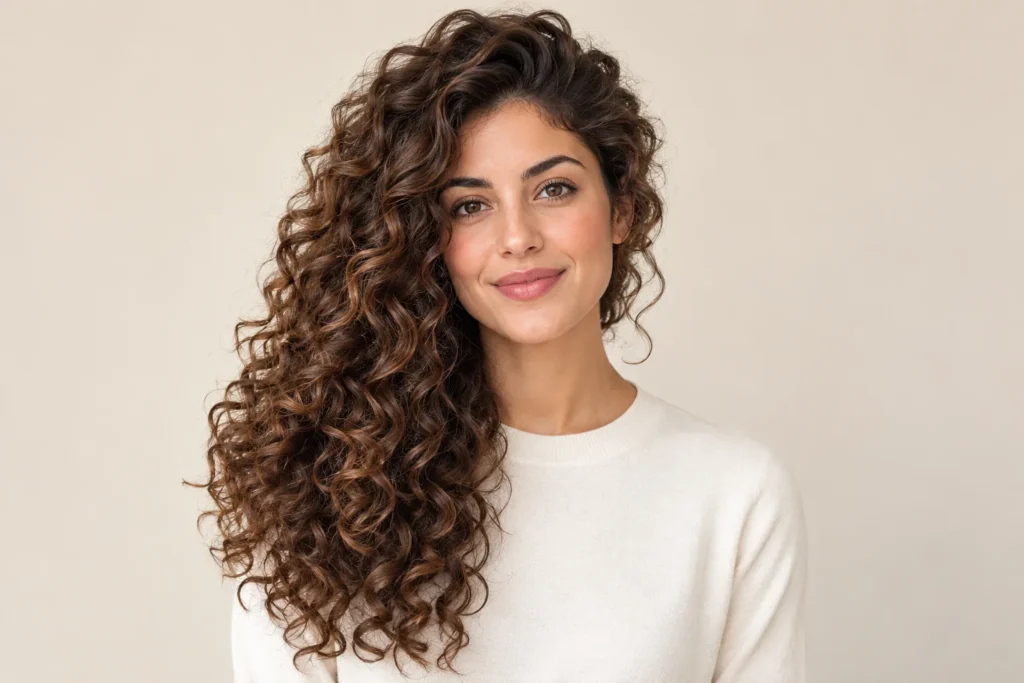
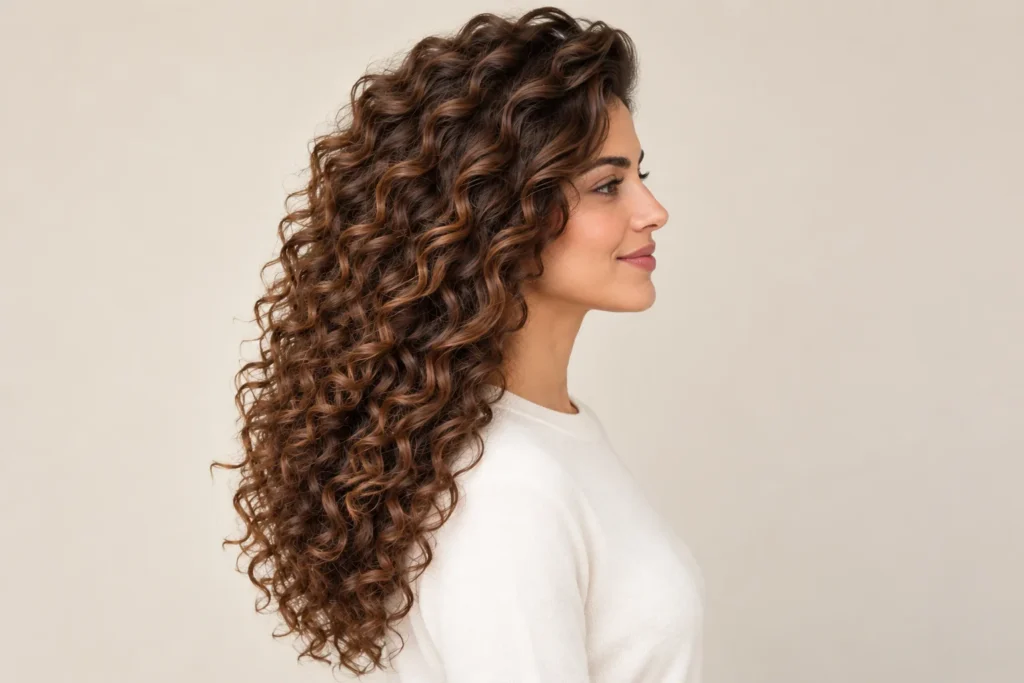
    15. Side-Swept Curls

    Side-swept curls move most of the length toward one shoulder. A deeper part creates the shift, and the exposed side adds contrast to the full side. It is a useful way to change the silhouette of an existing long cut without taking away length.

    Try the part on both sides before settling on the direction. Guide the curls over your shoulder and secure a small section discreetly if needed. Keep the ends loose so the look remains about the curl texture rather than the fastening.
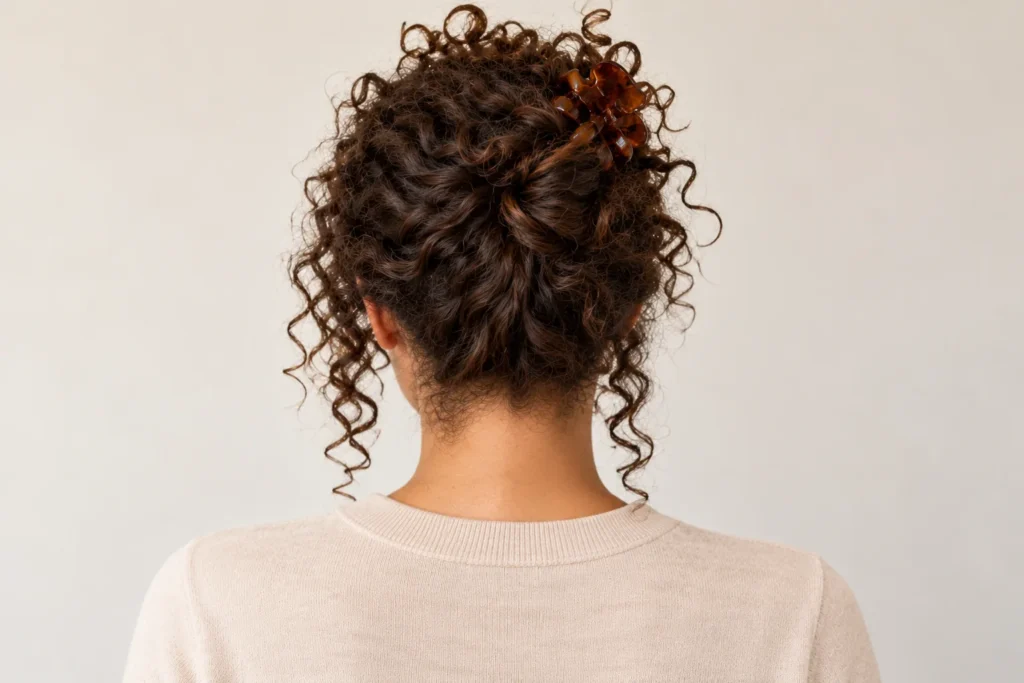
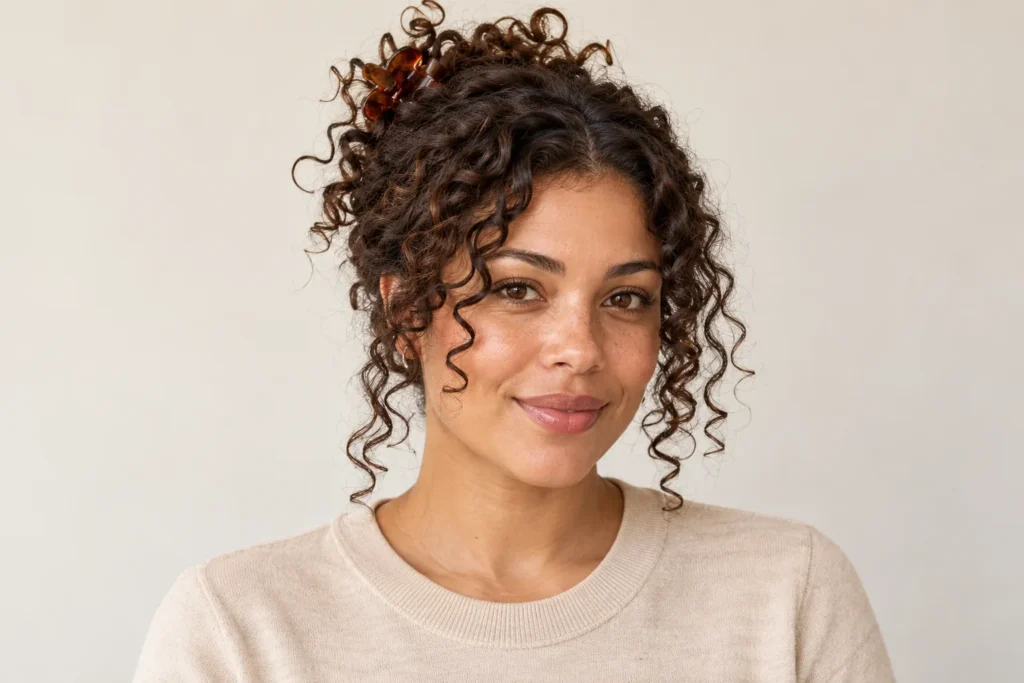
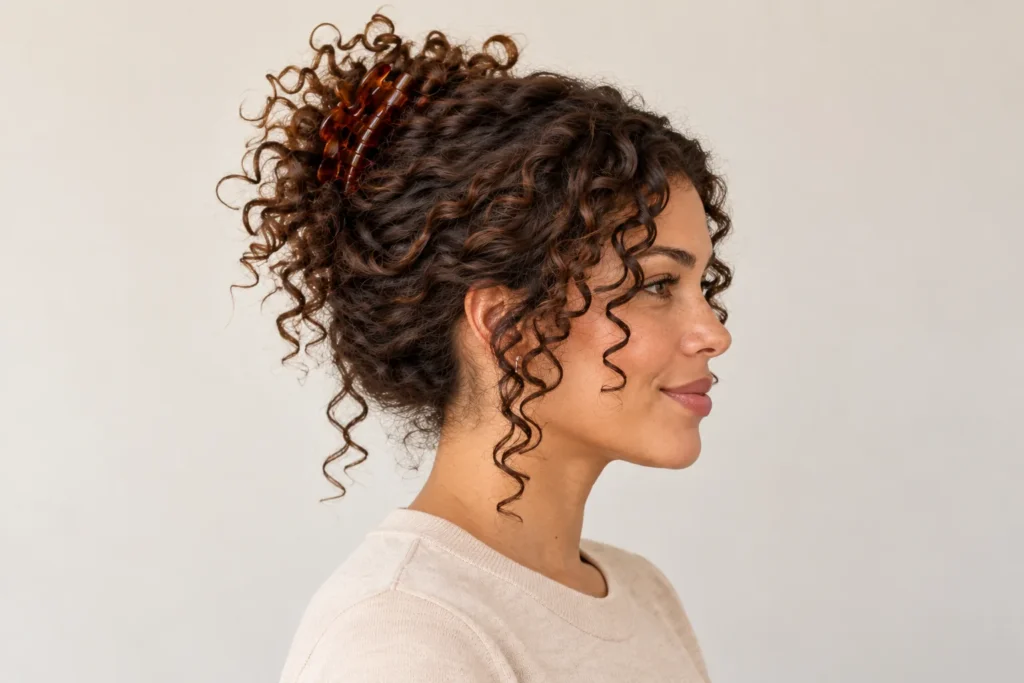
    16. Claw-Clip Curly Updo

    A claw-clip curly updo gathers the back into an upward twist and lets the ends spill above the clip. The accessory holds the structure while the curls provide the finish. It is especially helpful as a reference for medium lengths that do not form a large bun.

    Choose a clip that comfortably holds your hair, then twist the lengths loosely before closing it. Check that the teeth do not press awkwardly against the scalp. From the rear, the clip and curls should look like one balanced arrangement.
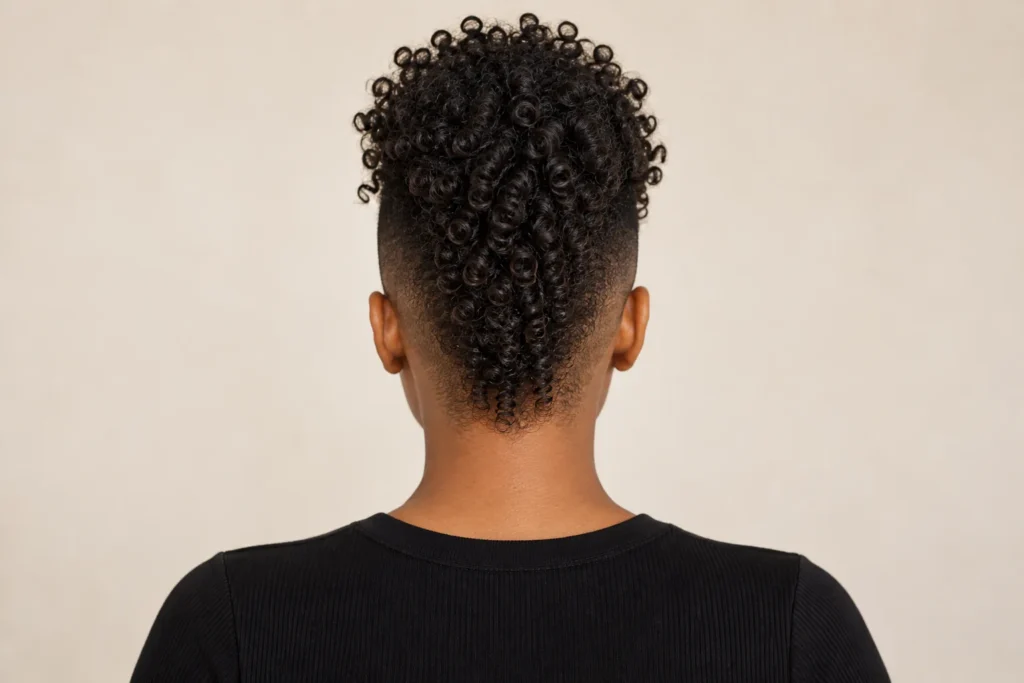
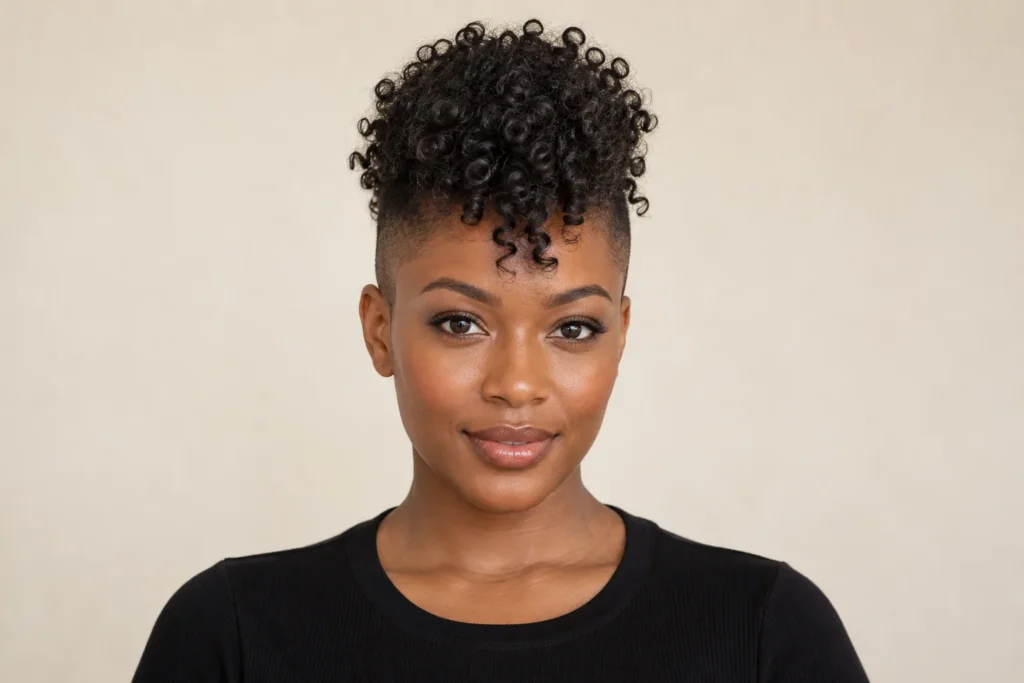
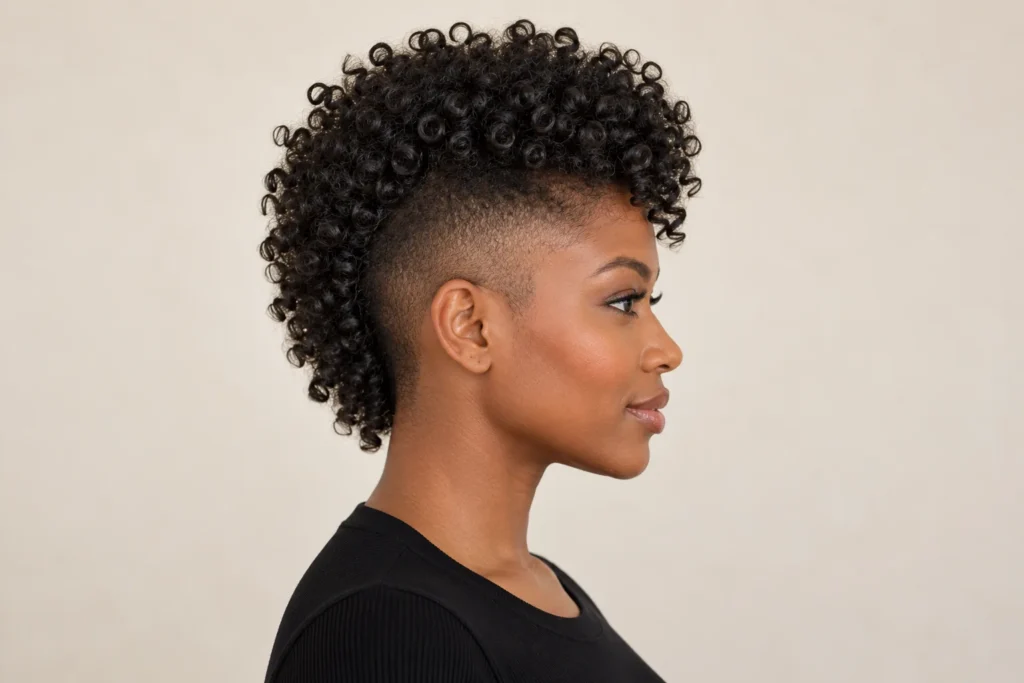
    17. Curly Mohawk

    The curly mohawk places the fullest texture through the centre and keeps the sides much shorter. This strong contrast makes the profile as important as the front. A tapered version feels different from shaved sides, so those details are worth deciding before the appointment.

    Bring a side image and discuss the width of the central strip. Ask how the shorter sides will grow into the longer section. Let the curls on top keep their natural character instead of trying to turn them into a rigid ridge.
    18. Curly Bixie

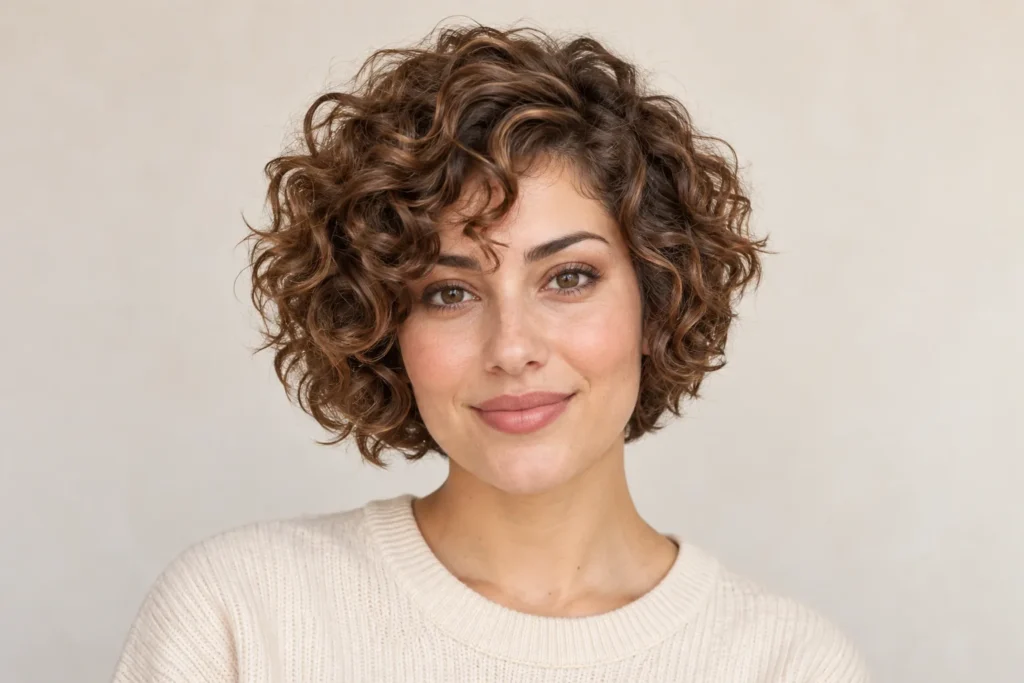
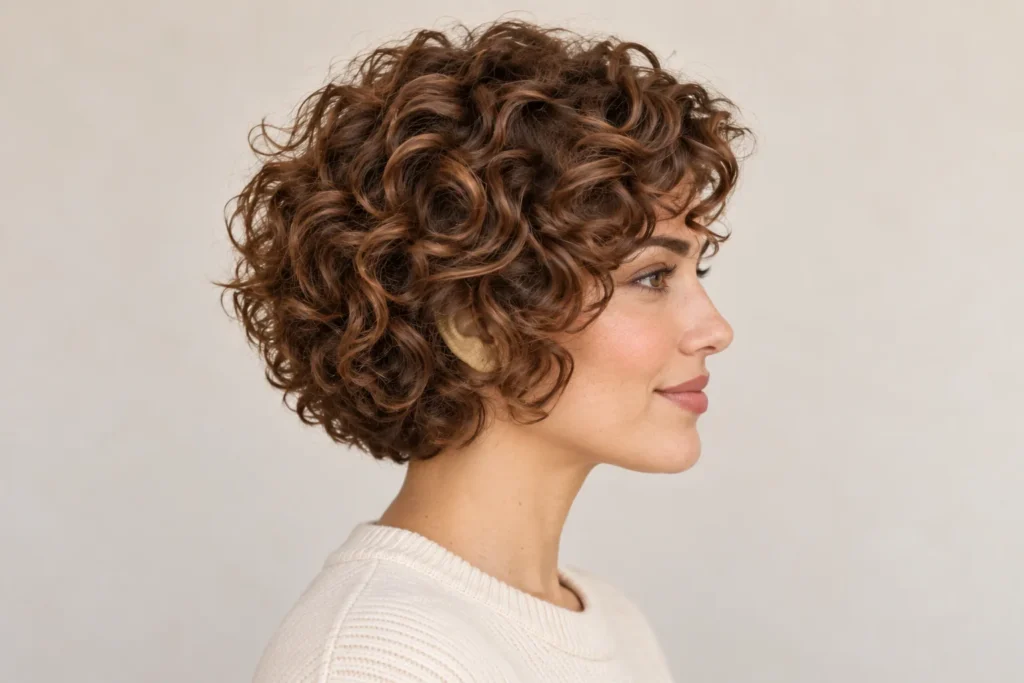
    A curly bixie sits between a pixie and a short bob. It keeps softness around the ears and nape while giving the crown a more compact shape. A little curly side fringe connects the short outline with the face and makes the cut feel less severe.

    Specify which bob details you want to keep, particularly the back length. The name alone does not tell a stylist your preferred proportions. Arrange the fringe separately from the crown so the two areas do not compete for the same direction.
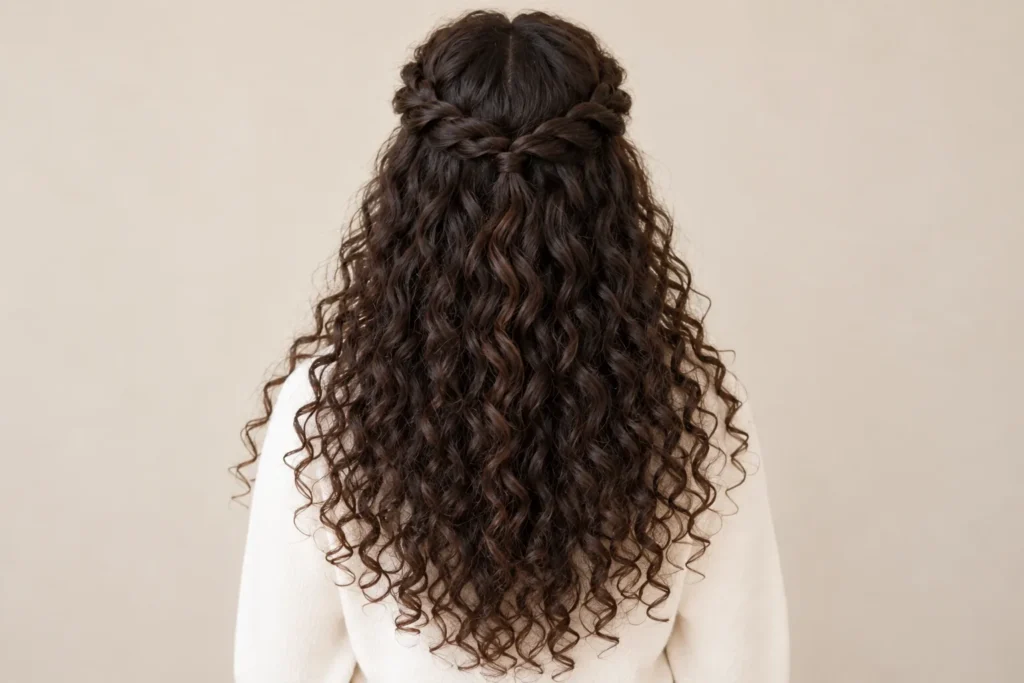
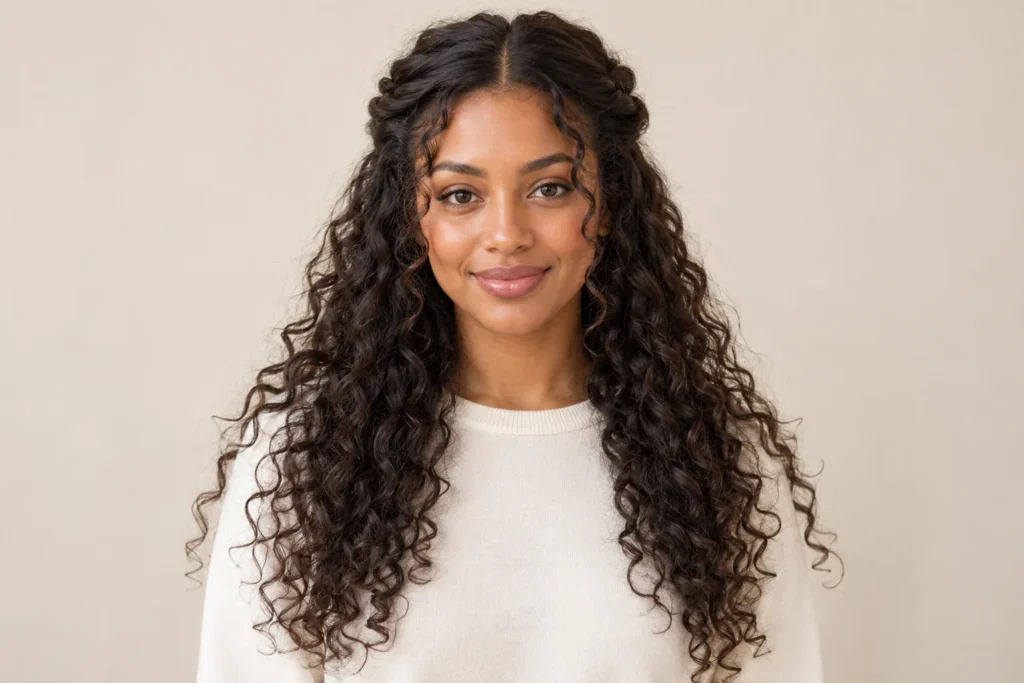
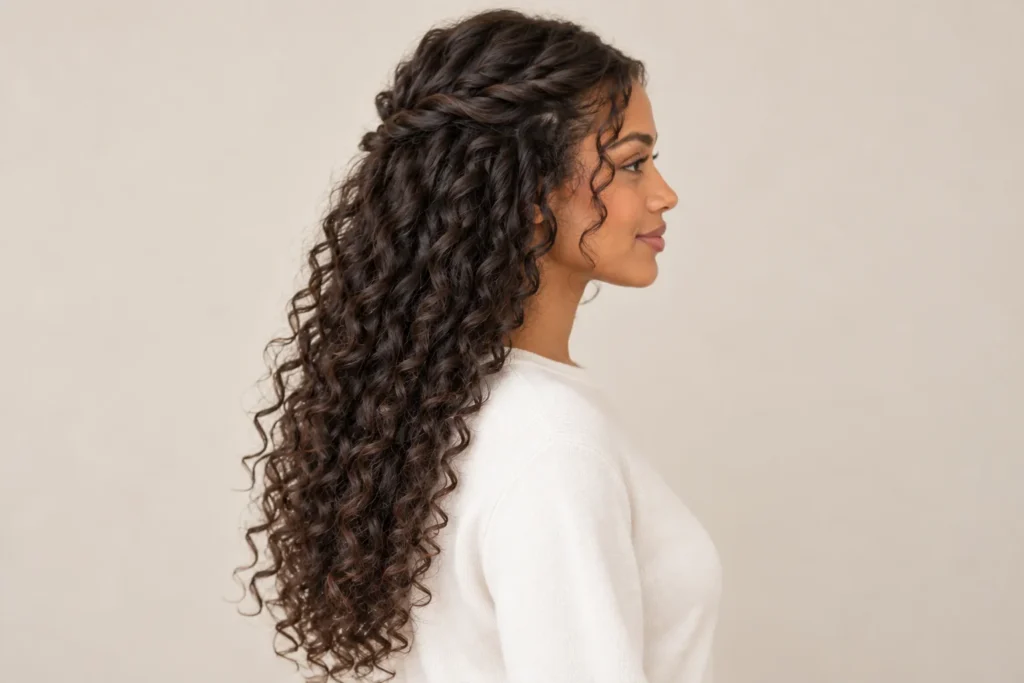
    19. Half-Up Twists With Curls

    Half-up twists add a small structured detail to loose curls. Two sections from near the temples meet at the back, leaving the lower hair free. Compared with a ponytail, the fastening can sit more discreetly and preserve a softer outline around the crown.

    Twist each section gently in the direction you prefer and secure their meeting point at the back. Keep the sections modest so the loose hair remains the main feature. Use the rear reference to explain the placement of the join.
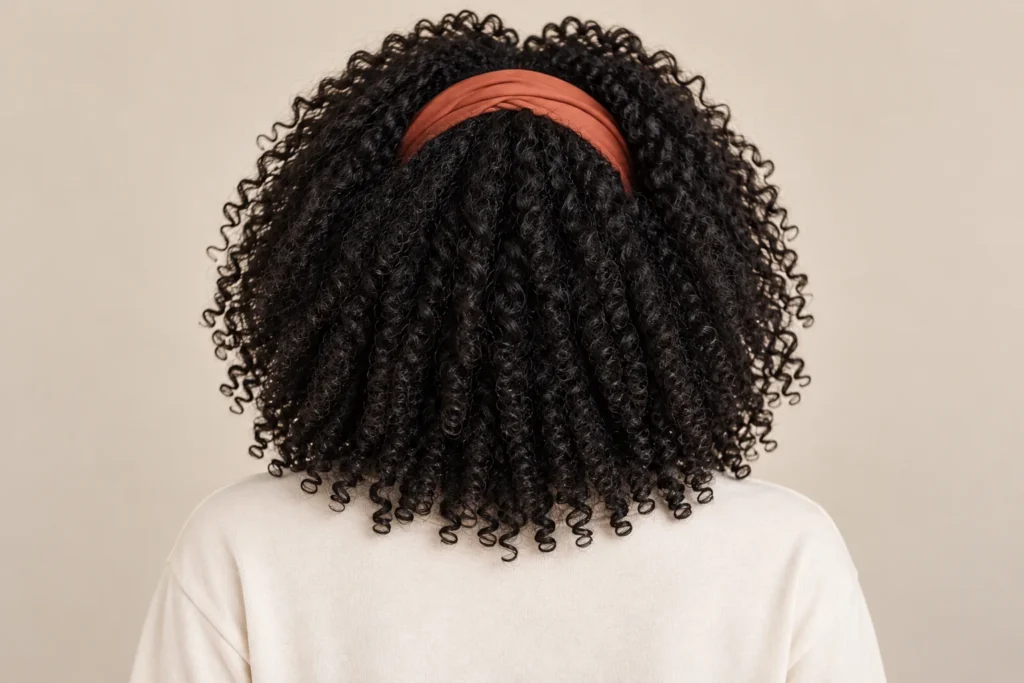
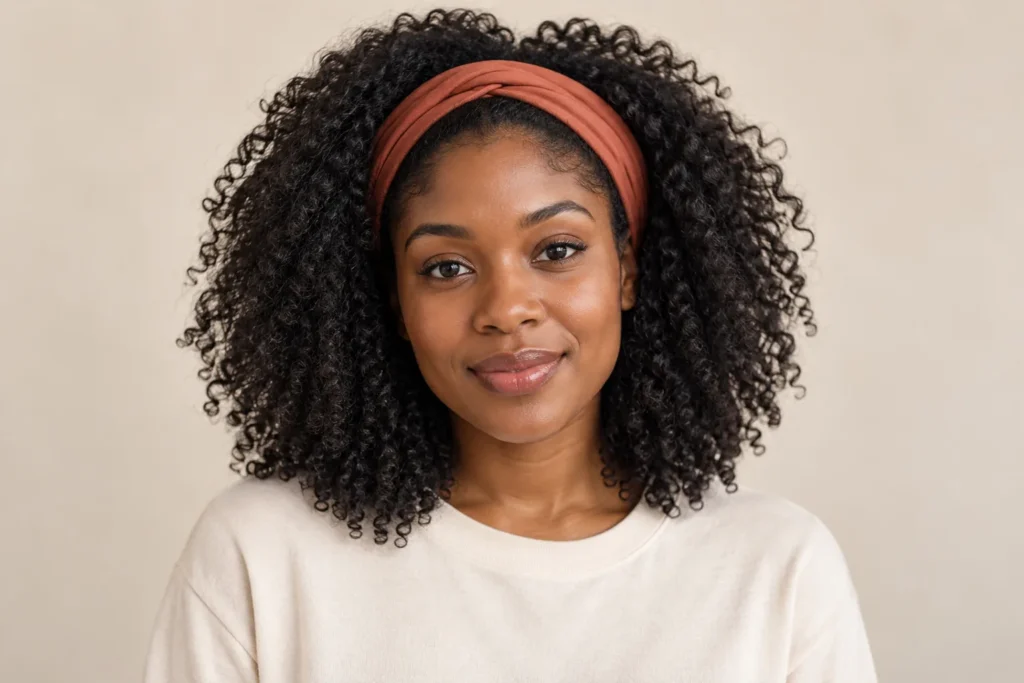
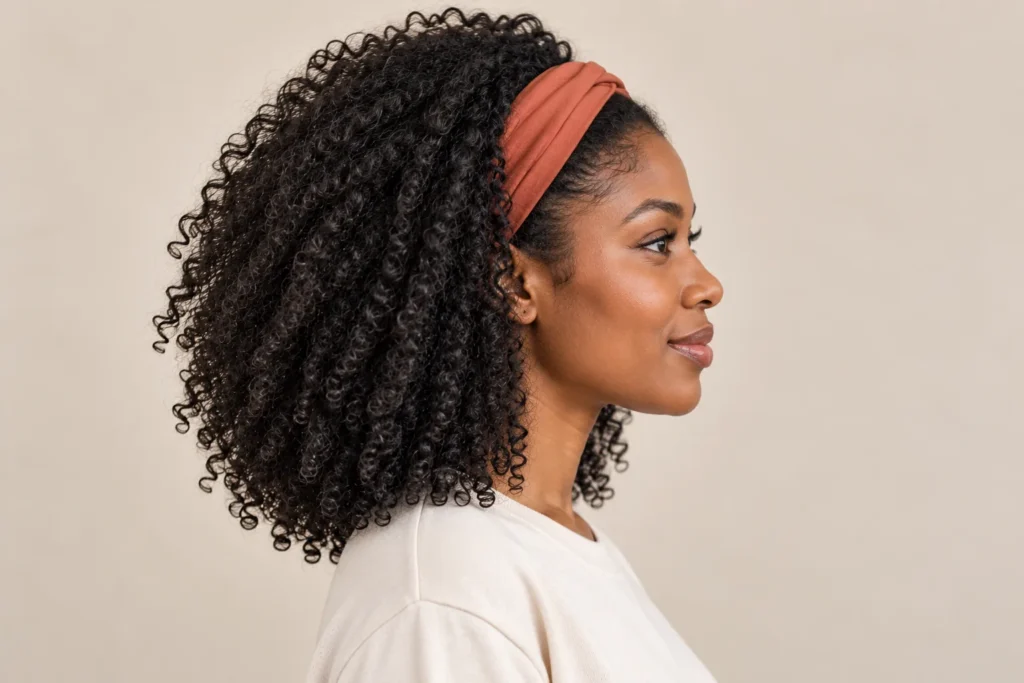
    20. Curly Hair With a Headband

    A headband gives loose curly hair an immediate change of frame. A plain fabric band can hold the front back while leaving volume above and behind it. The width and placement of the band determine how much of the hairline and fringe stays visible.

    Try the band slightly behind the hairline and adjust it for comfort. Arrange a few curls around the edge rather than trapping every strand beneath it. A simple colour lets the texture stand out and makes the accessory easy to pair with everyday clothes.
    How to Choose Between Curly Hairstyles

    Begin with the amount of change you want. A new part, ponytail or headband can change the outline for an afternoon. A bob, shag or pixie changes the haircut itself. Consider how often you tie your hair up, what length you enjoy and whether you want a fringe before choosing a salon reference.

    What to Ask Your Stylist

    Describe the silhouette, not just the style name. Point out the crown height, side fullness, fringe length and back shape you like. Explain how your curls look after your usual styling routine. The reference is a starting point for a conversation, and your finished cut can be adapted rather than copied exactly.

    Small Styling Details That Change the Result

    Notice where the part begins, how tightly an updo is fastened and whether the ends are tucked away or visible. These small decisions can make two versions of the same hairstyle feel different. Start with one change at a time so you can see which detail gives you the finish you prefer.

    Quick Reference Checklist

    • Compare front, side and back views before choosing a cut.
    • Discuss the finished dry length and the shortest layers.
    • Choose an updo fastening that feels comfortable.
    • Save references with a curl texture close to your own.

    For more inspiration, browse our Haircare guides and explore our cool hair styles collection. Choose a few references that fit your routine, then make the final shape your own.
  • Trendy Autumn Fall Nails: 20 Designs for a Cosy Manicure

    Trendy Autumn Fall Nails: 20 Designs for a Cosy Manicure

    Trendy autumn fall nails can be subtle, colourful or full of texture. A seasonal manicure does not need every autumn shade at once: one warm colour, a clear pattern and a nail shape you enjoy can be enough. These twenty ideas explore different finishes, from cinnamon tips to forest-green foil.

    Use the designs as inspiration for your next appointment rather than as fixed instructions. Nail width, preferred length and daily activities can change how much detail feels comfortable. The accompanying images are generated design illustrations; your nail artist can adapt their colours and placement to your hands.

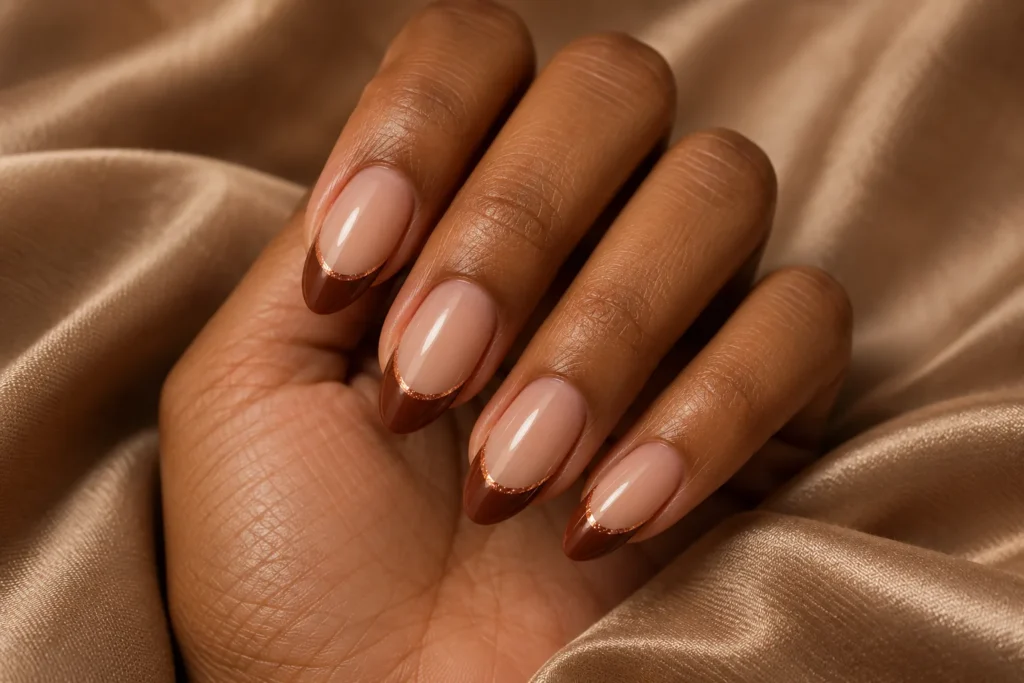
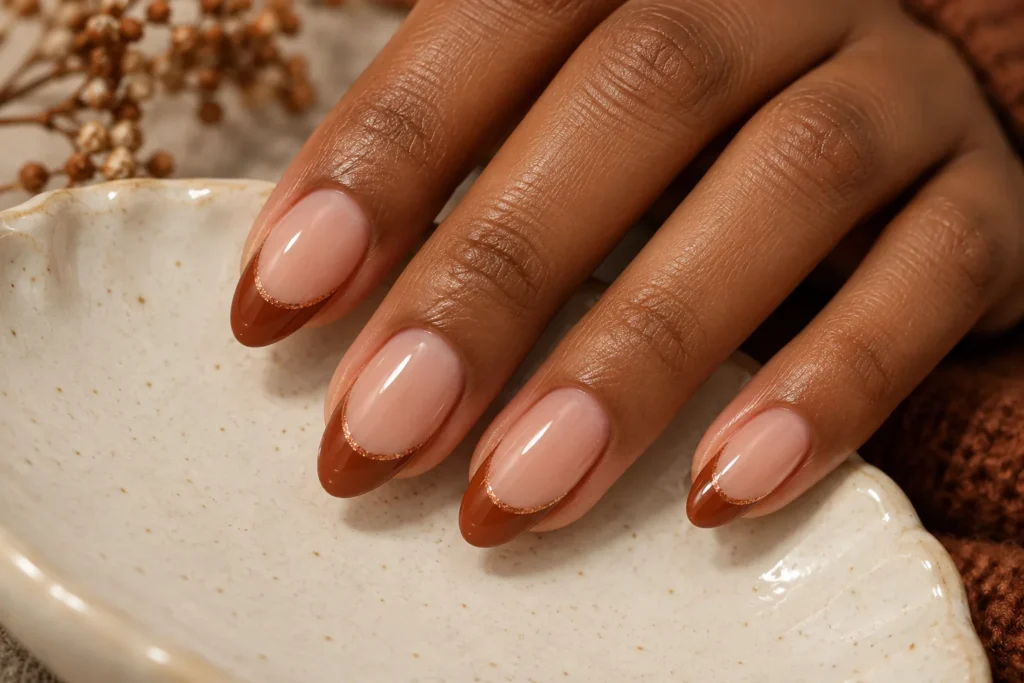
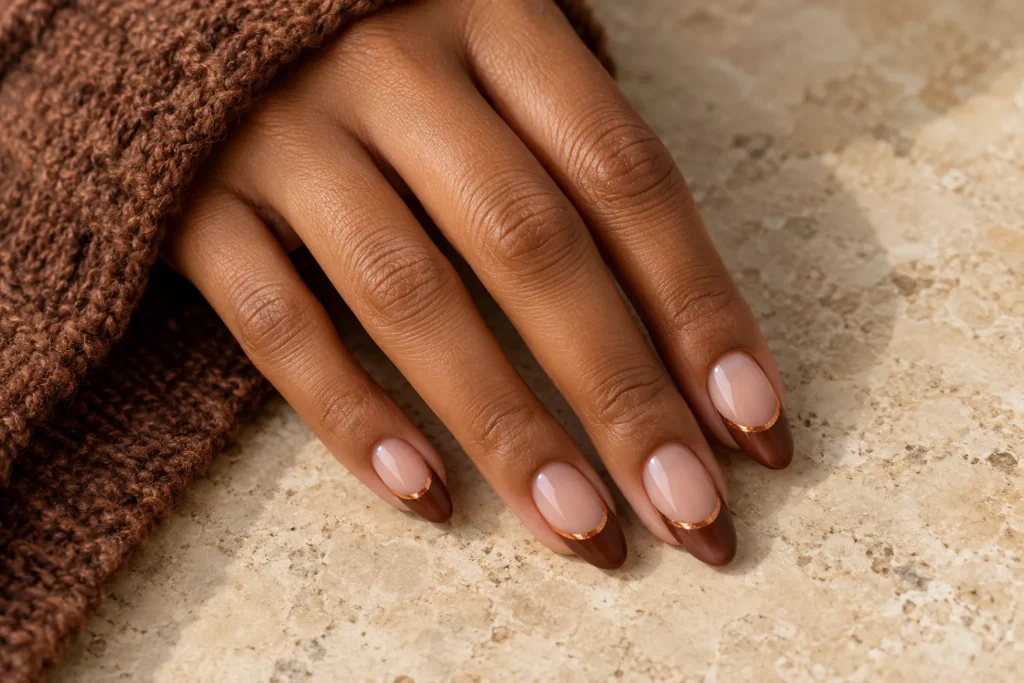
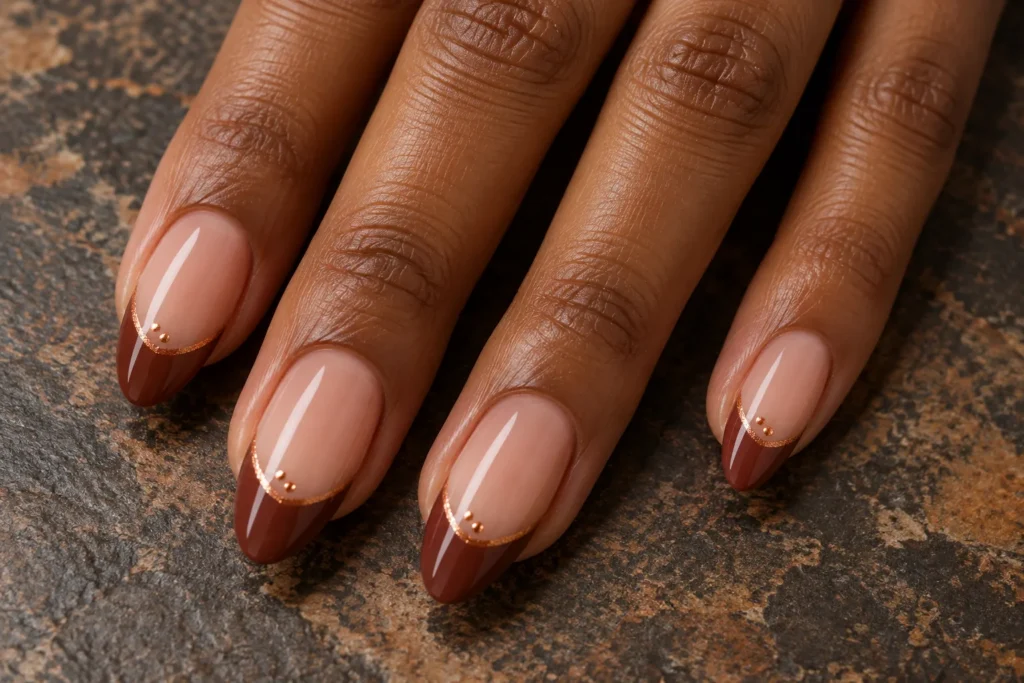
    1. Cinnamon French Tips

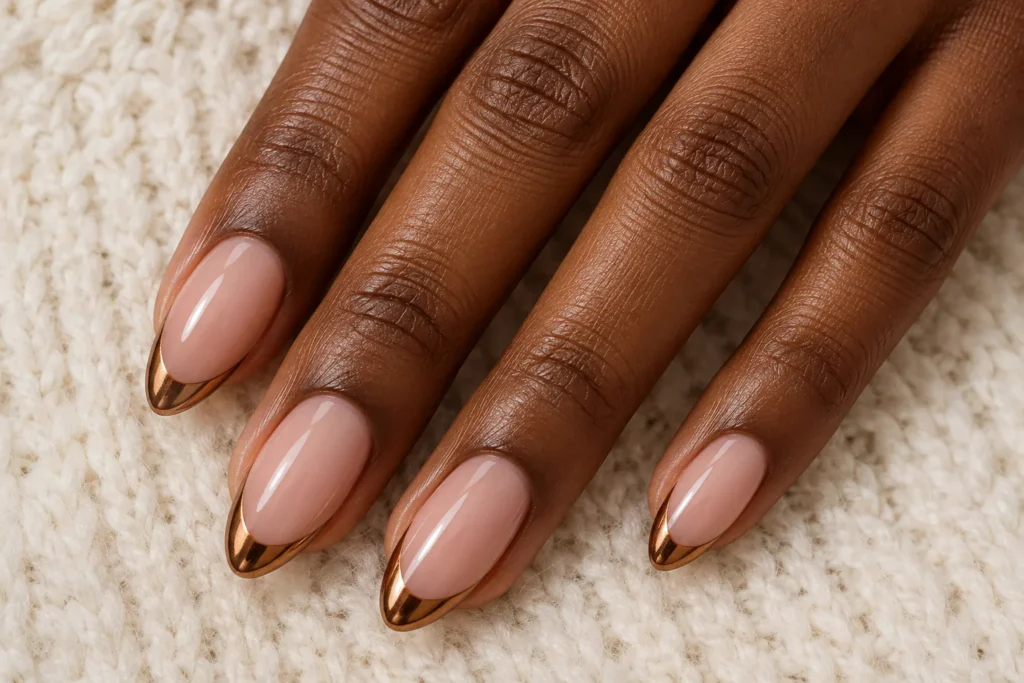
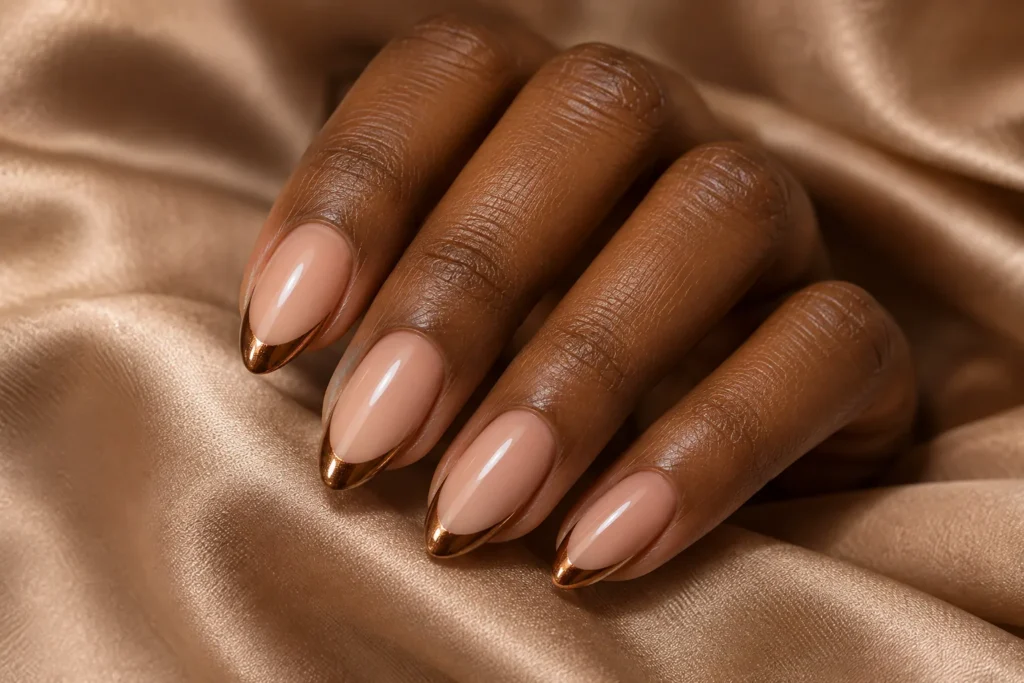
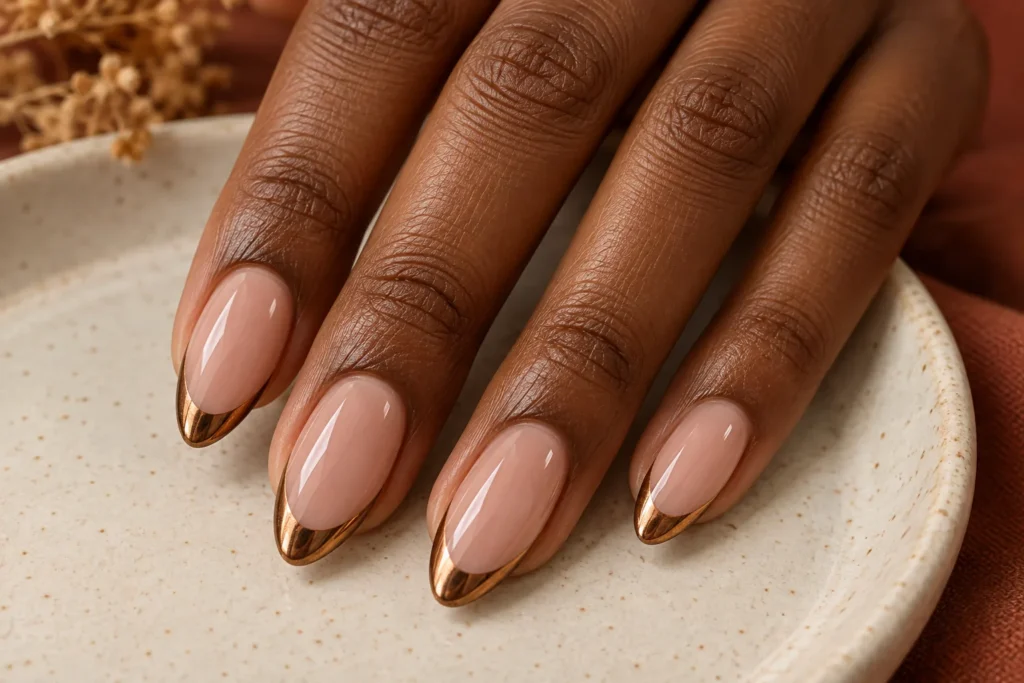
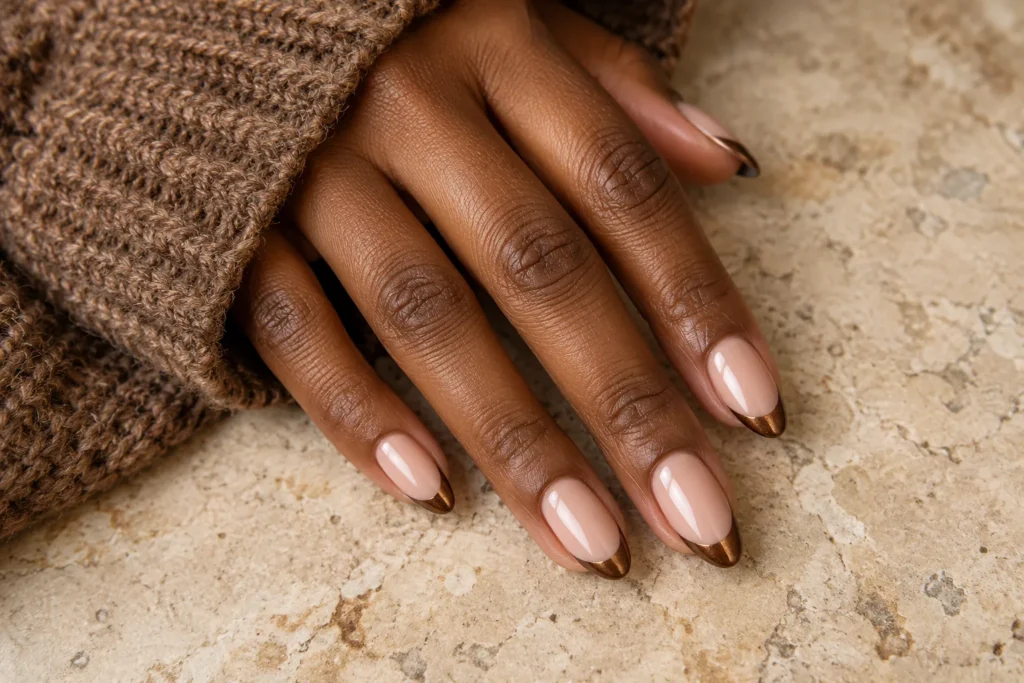
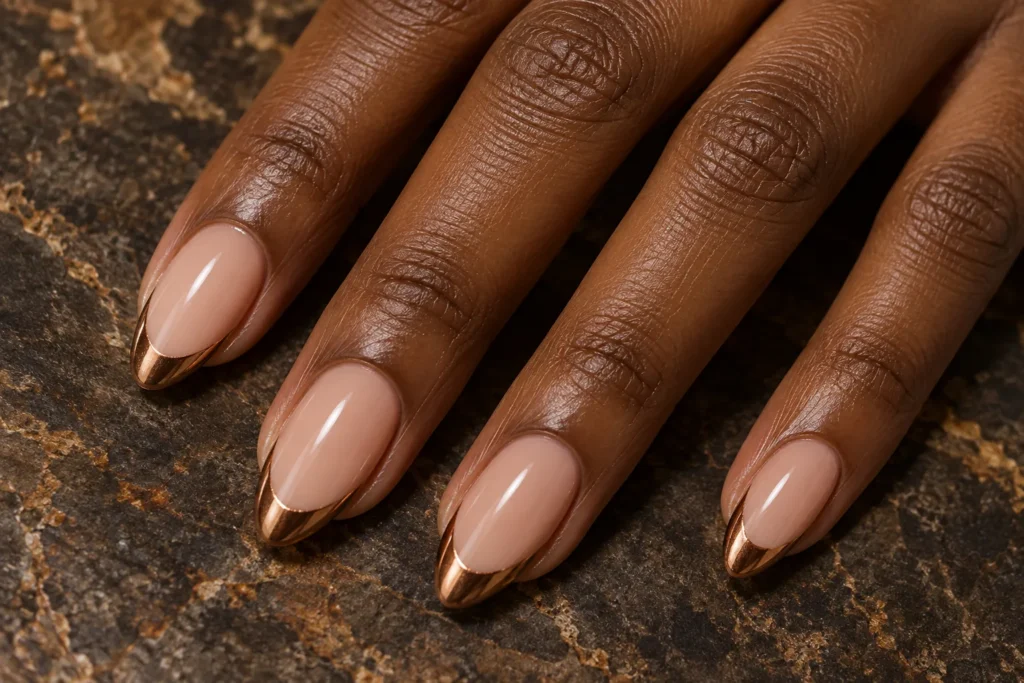
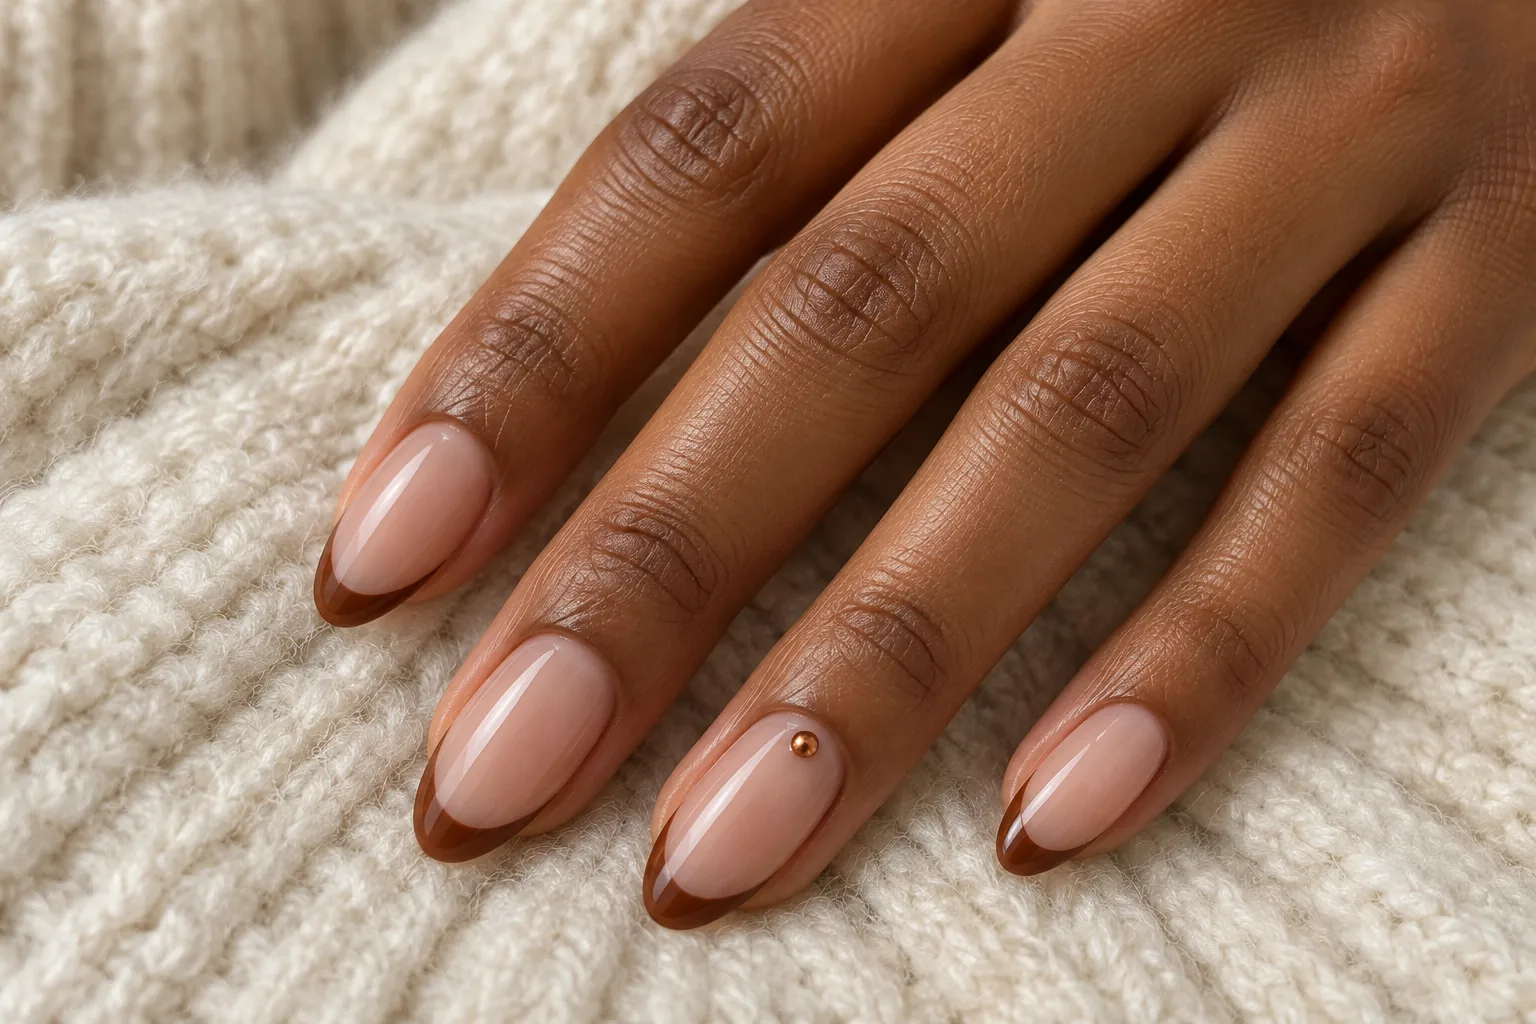
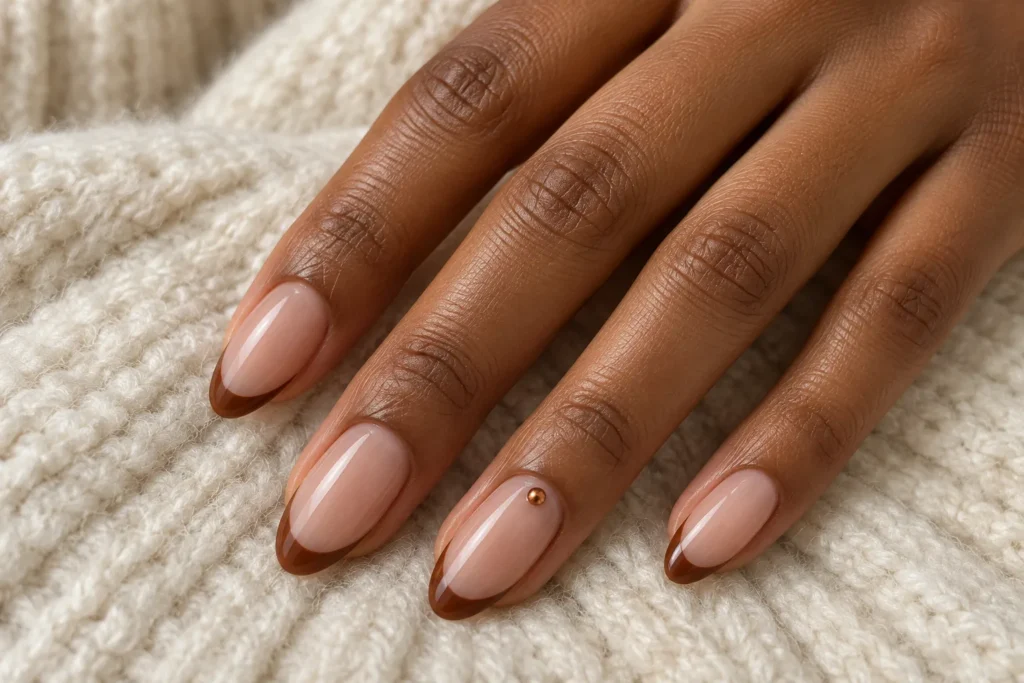
    A nude base with cinnamon French tips creates an understated autumn manicure. The narrow brown edge keeps the design light, while a tiny copper accent adds warmth. Choose almond nails for a softer outline, or reduce the tip width on shorter nails so the nude base stays visible.

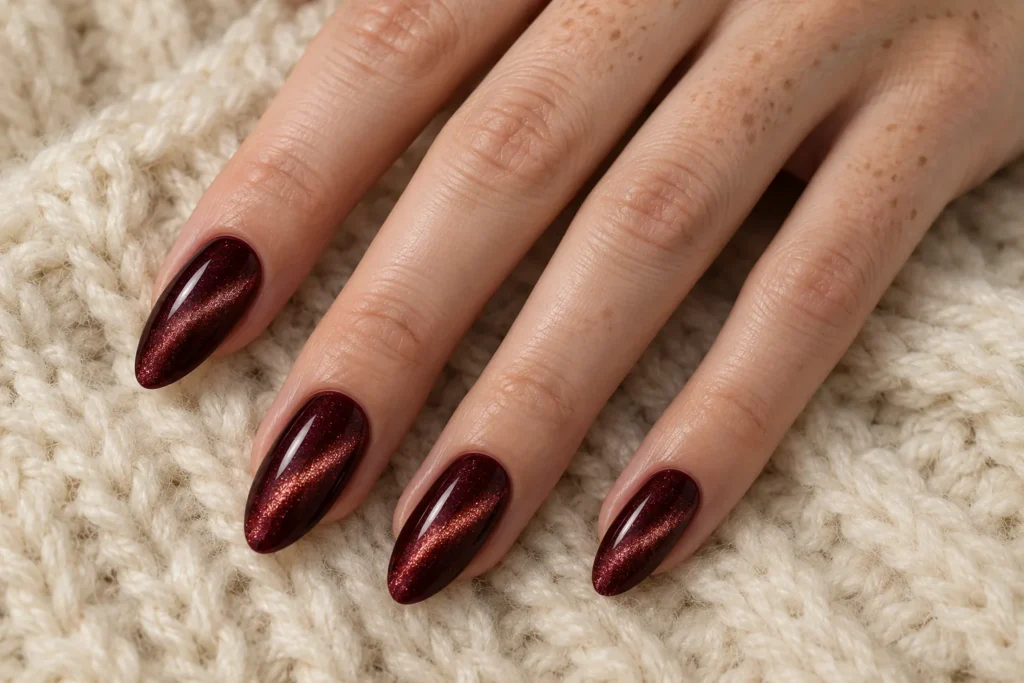
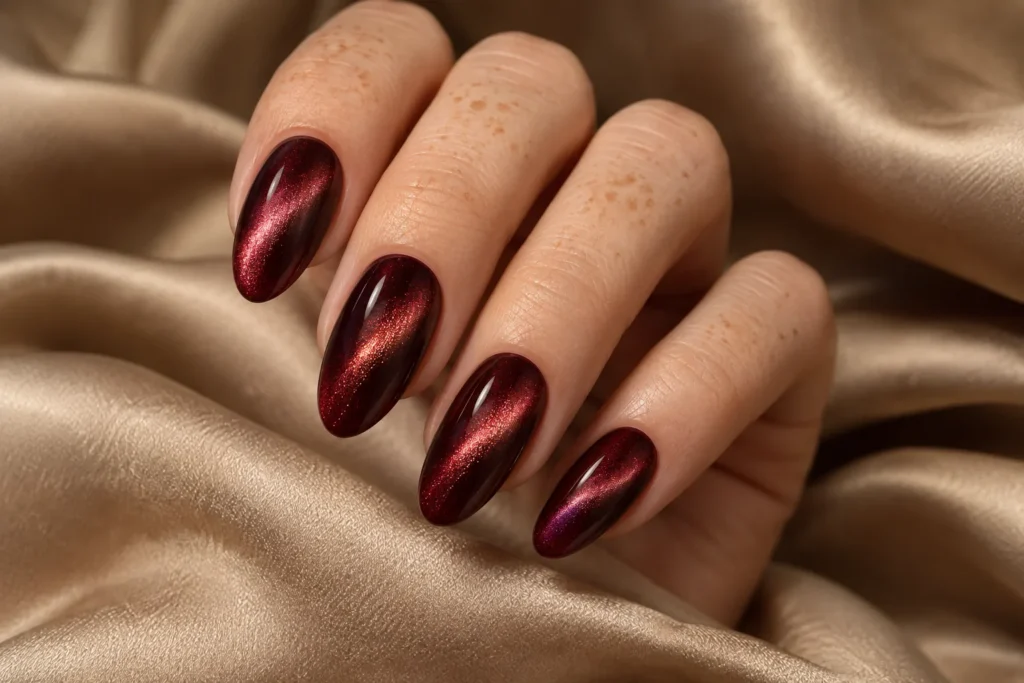
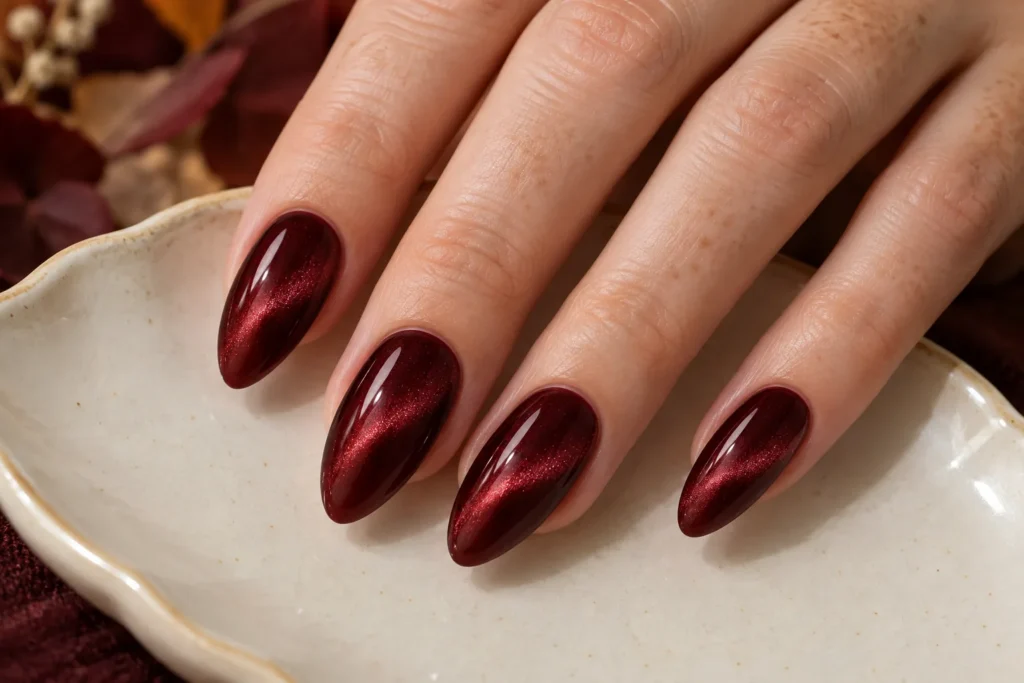
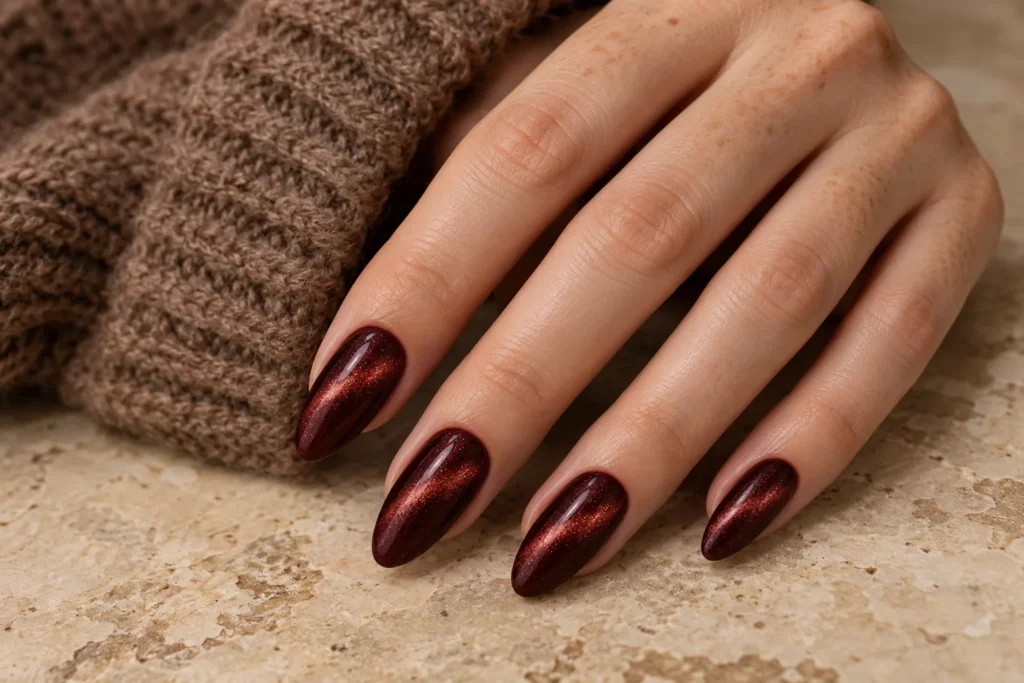
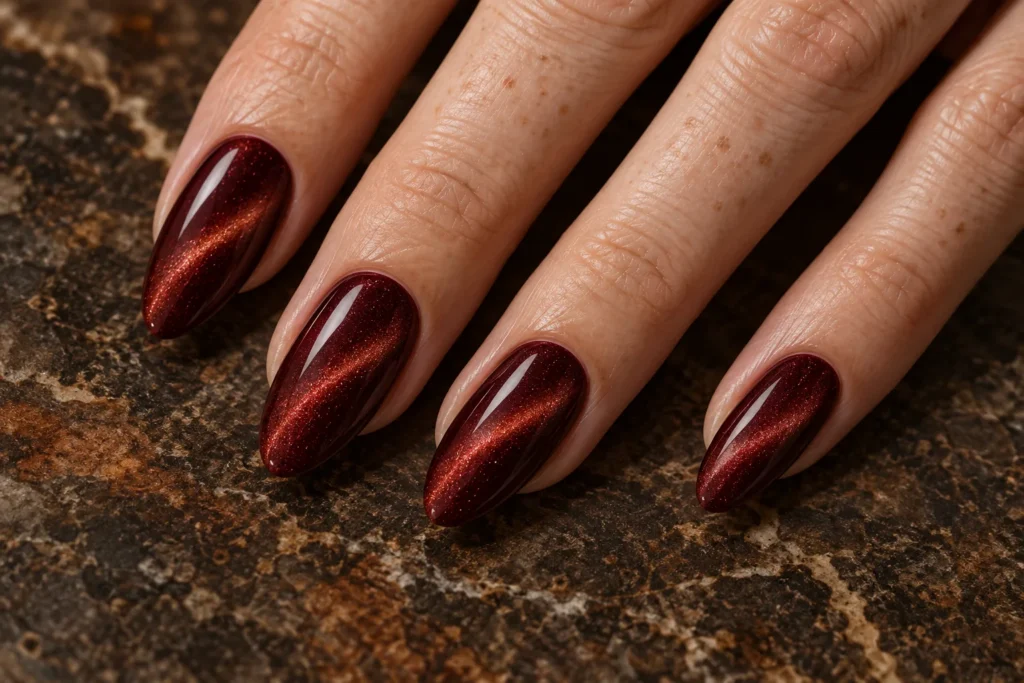
    2. Burgundy Velvet Cat Eye

    Burgundy velvet nails use a magnetic-looking sheen to give one rich colour depth. The highlight should move across the surface rather than resemble a hard glitter stripe. Long almond nails show the effect clearly, but a shorter oval version can feel equally polished with less dramatic length.

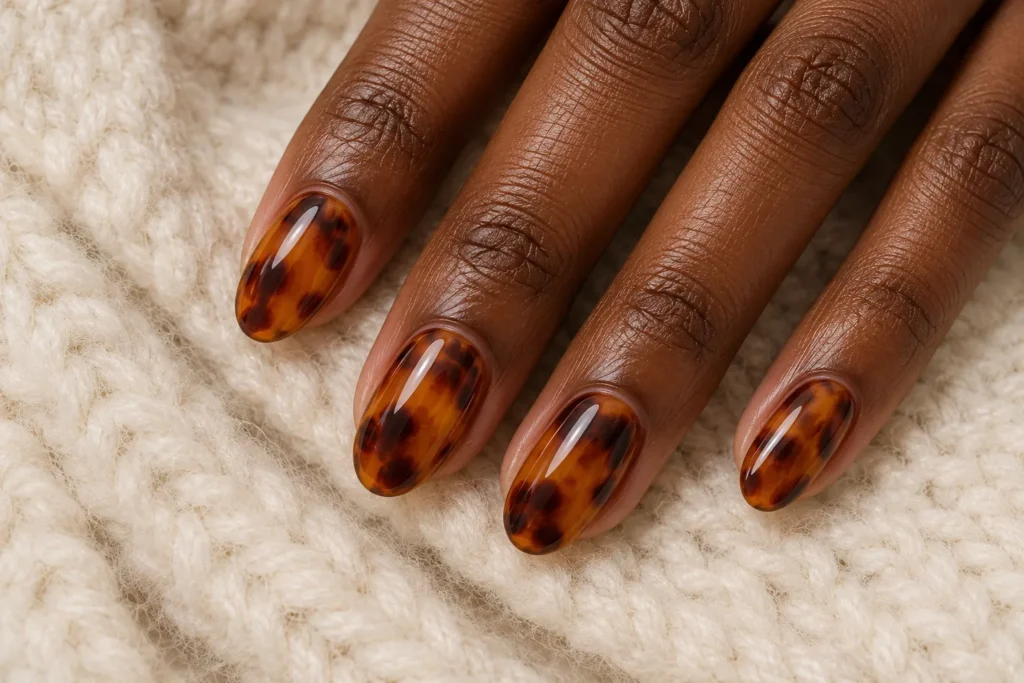
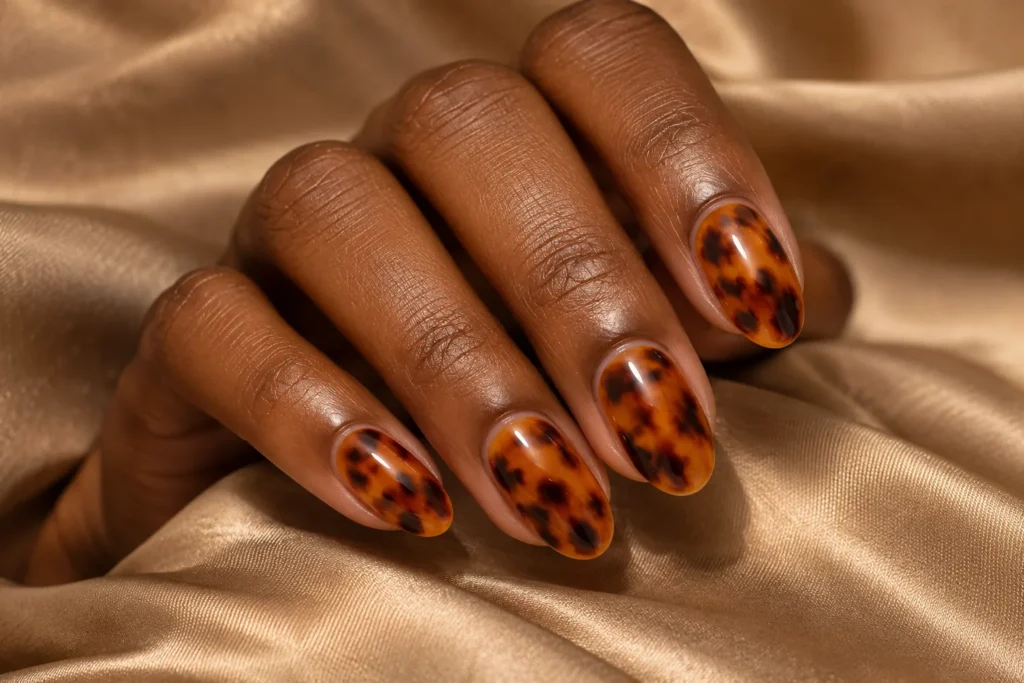
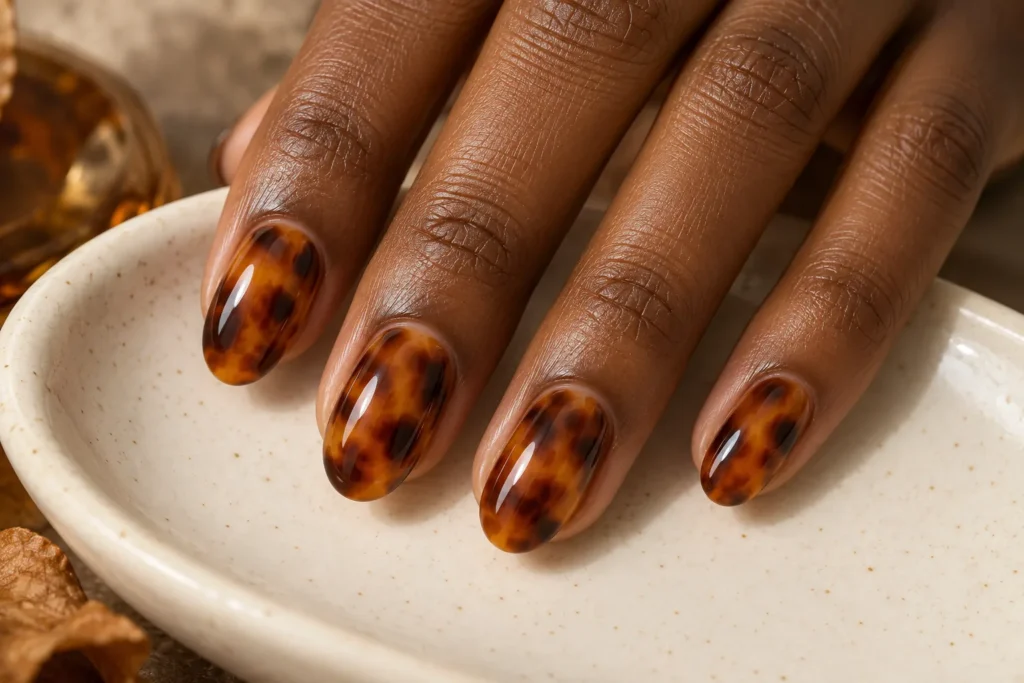
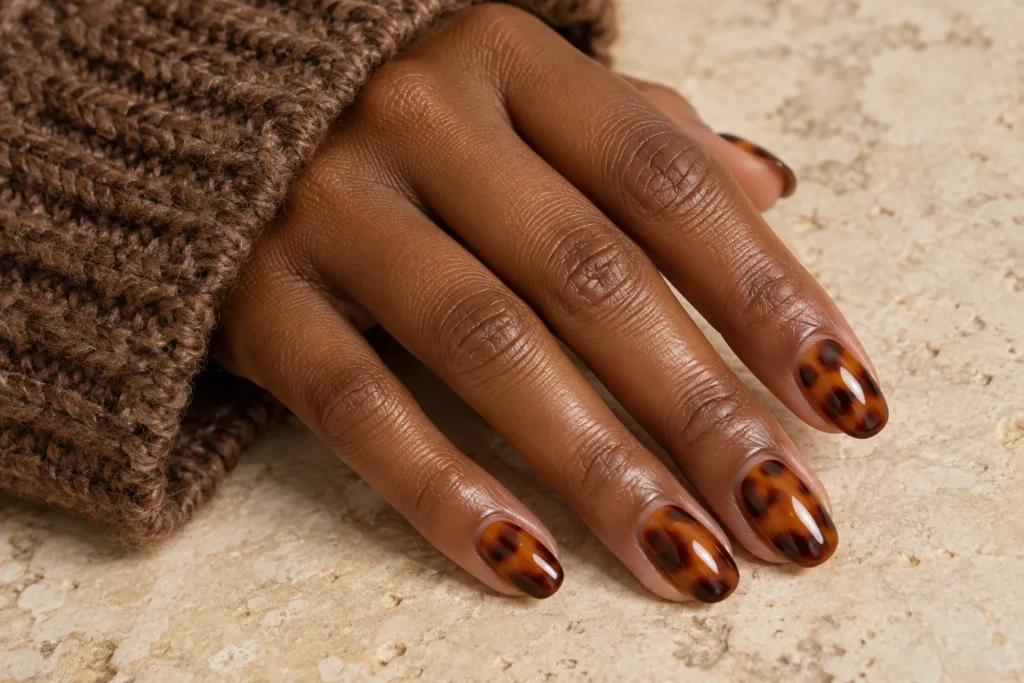
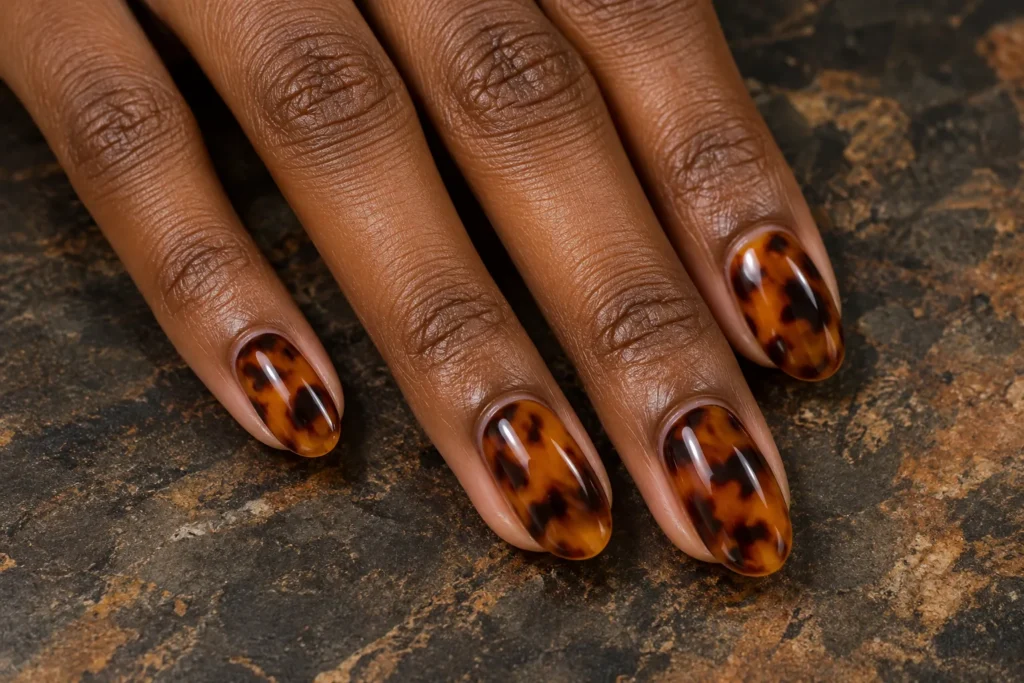
    3. Tortoiseshell Amber Nails

    Amber and dark brown mottling give tortoiseshell nails their distinctive appearance. Keep the patches irregular and allow the golden base to show through. One or two patterned accents can sit beside plain chocolate nails, making this detailed look easier to wear with everyday autumn outfits.

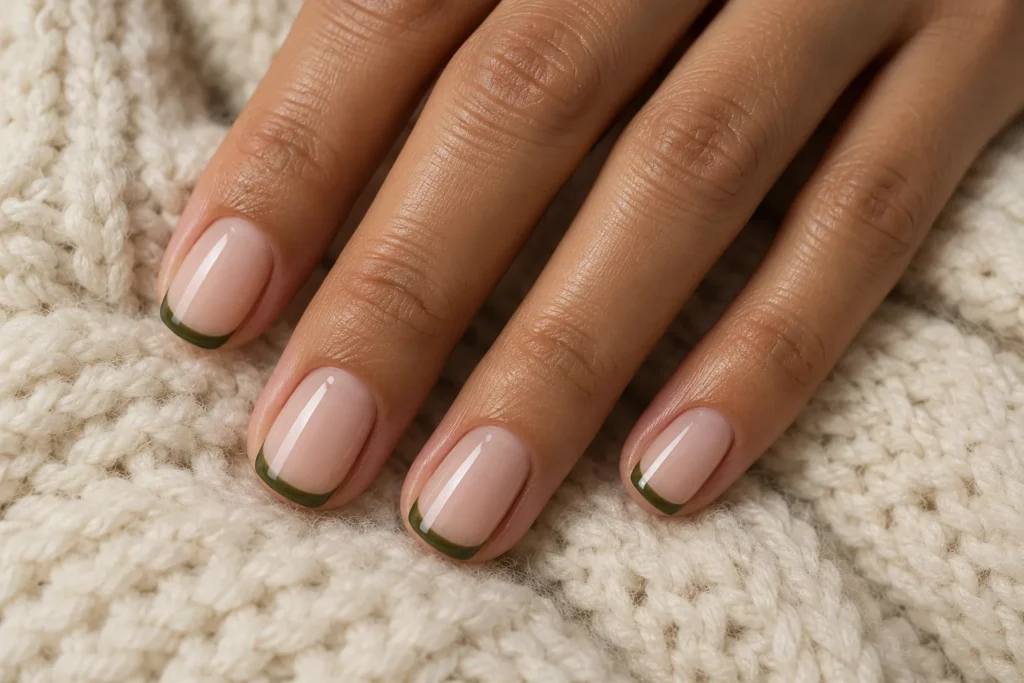
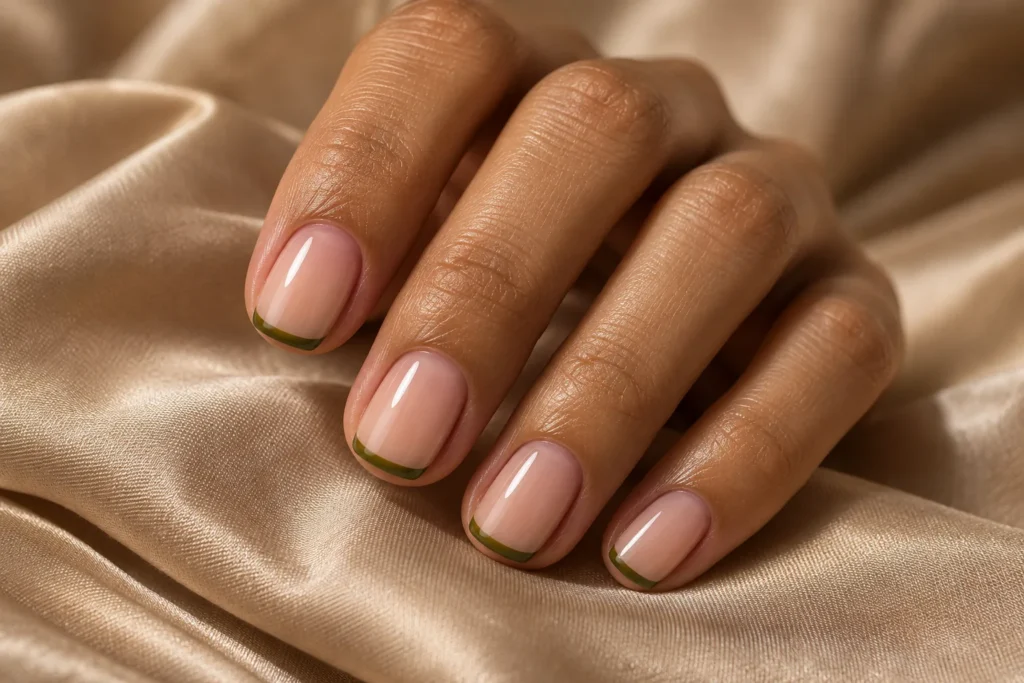
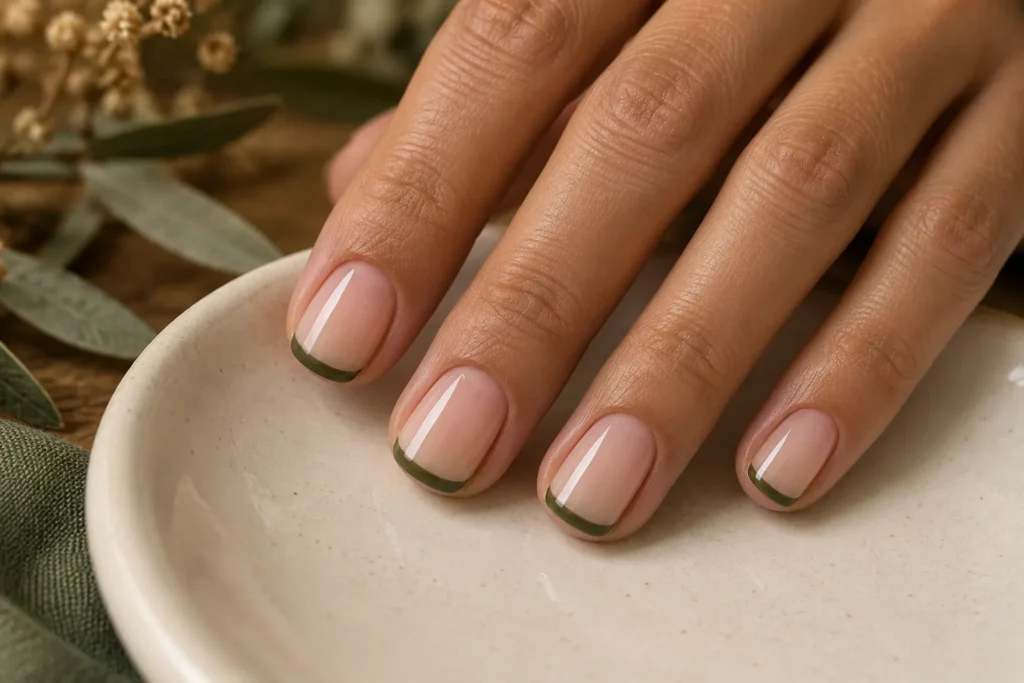
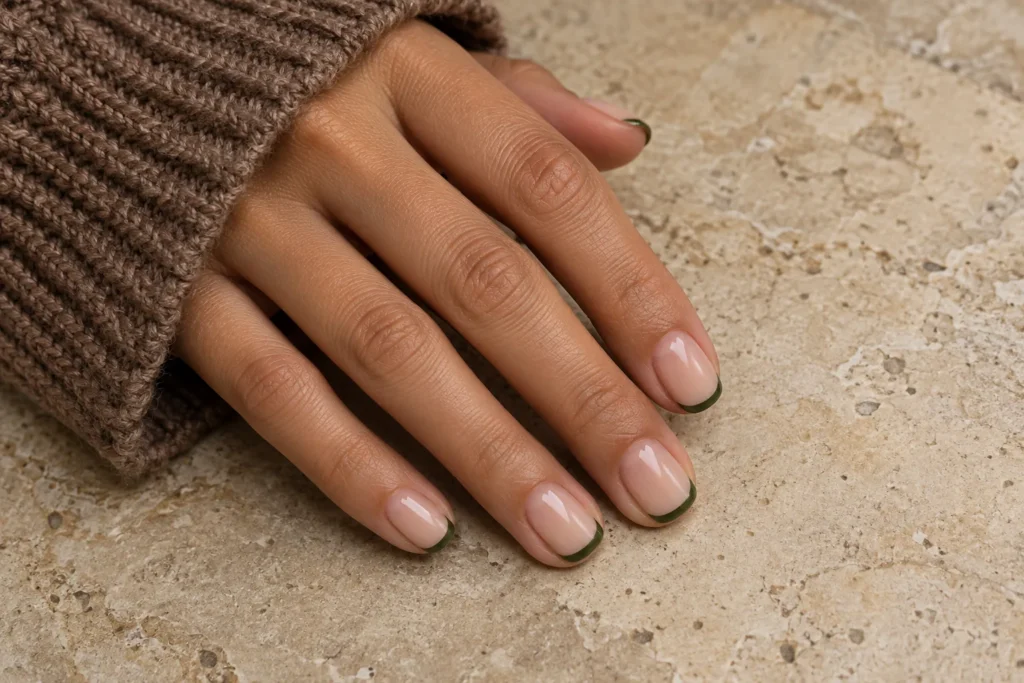
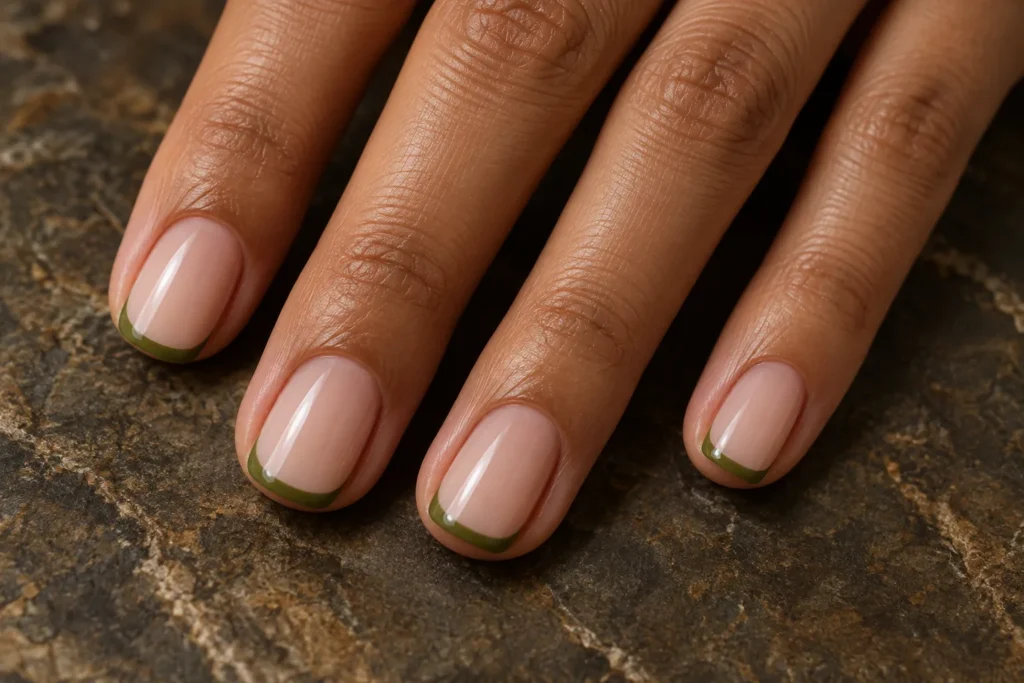
    4. Olive Micro French

    Olive micro French tips bring a muted green into a simple manicure. A sheer nude centre keeps the narrow edge easy to see. This is a useful choice for short squoval nails when you want a seasonal colour without filling the whole nail with decoration or heavy detail.

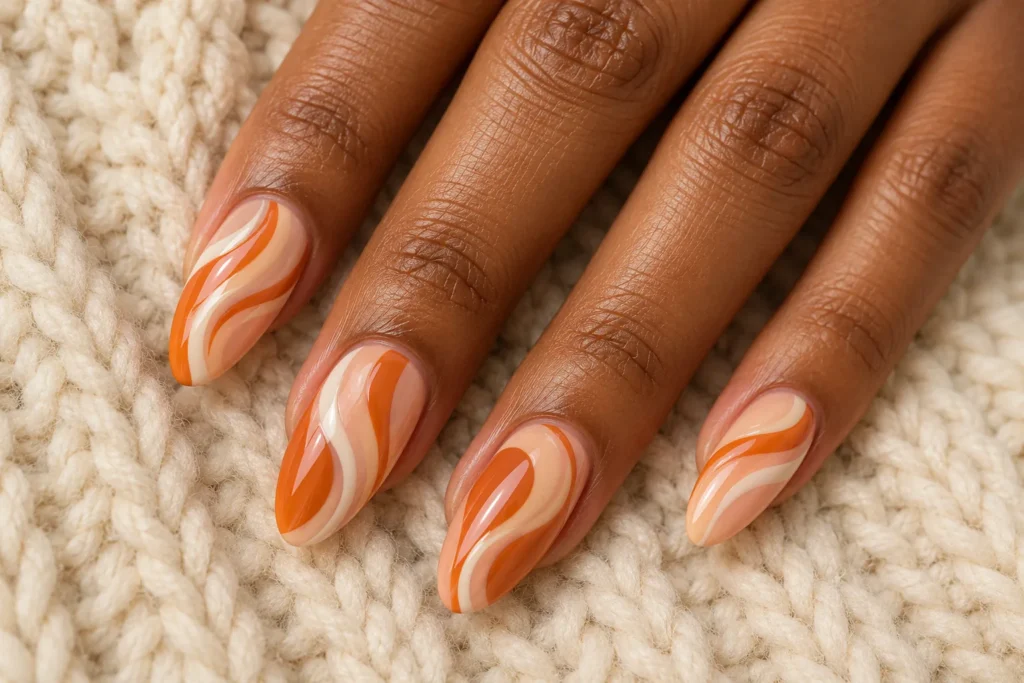
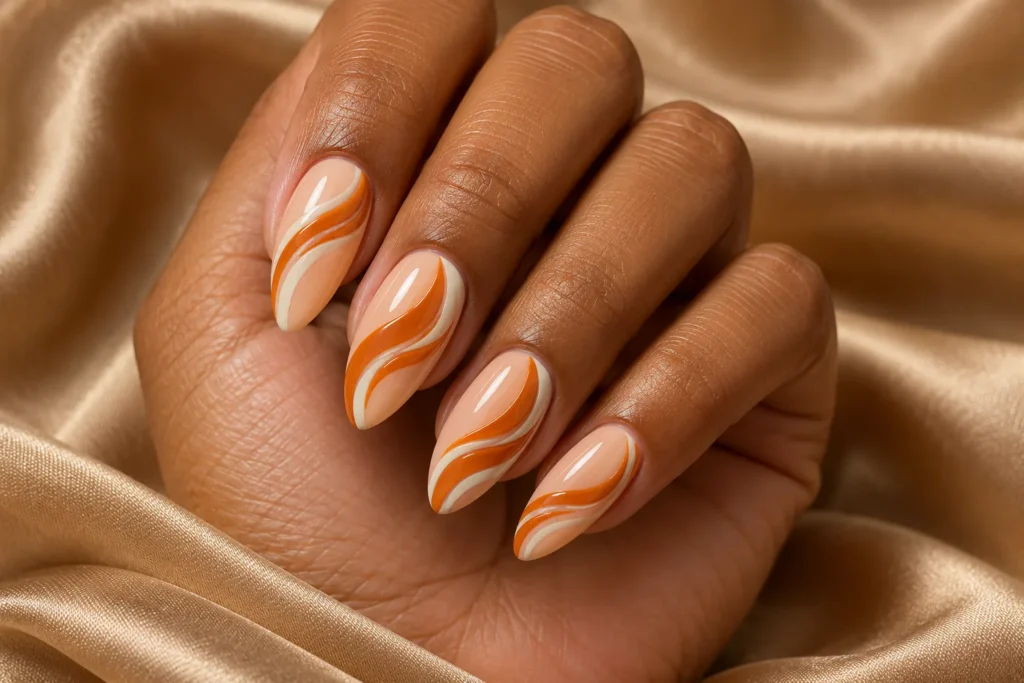
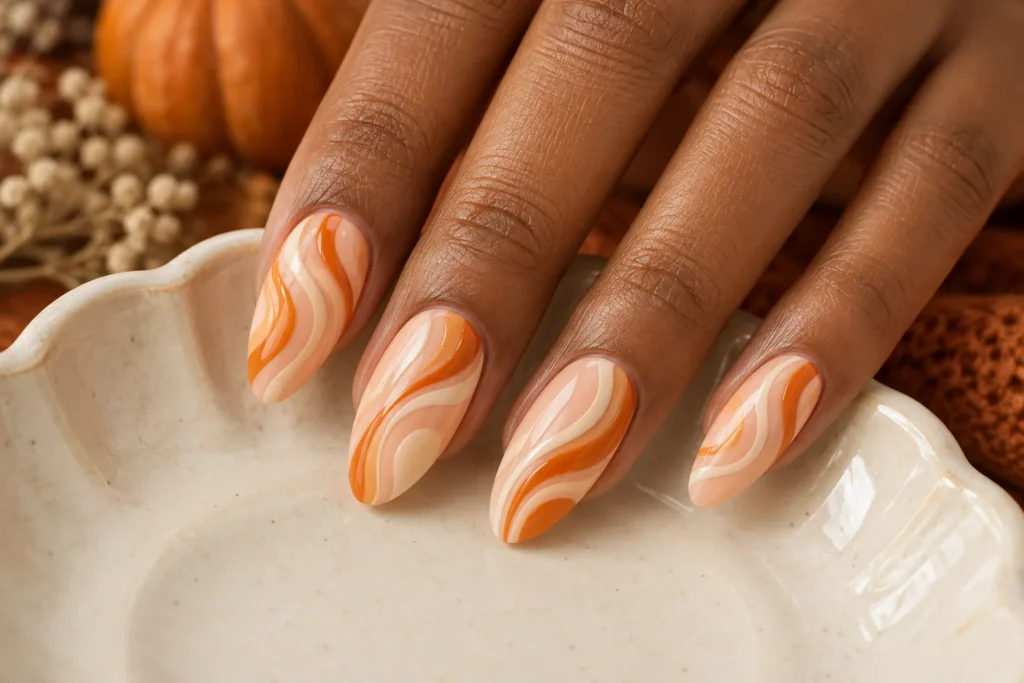
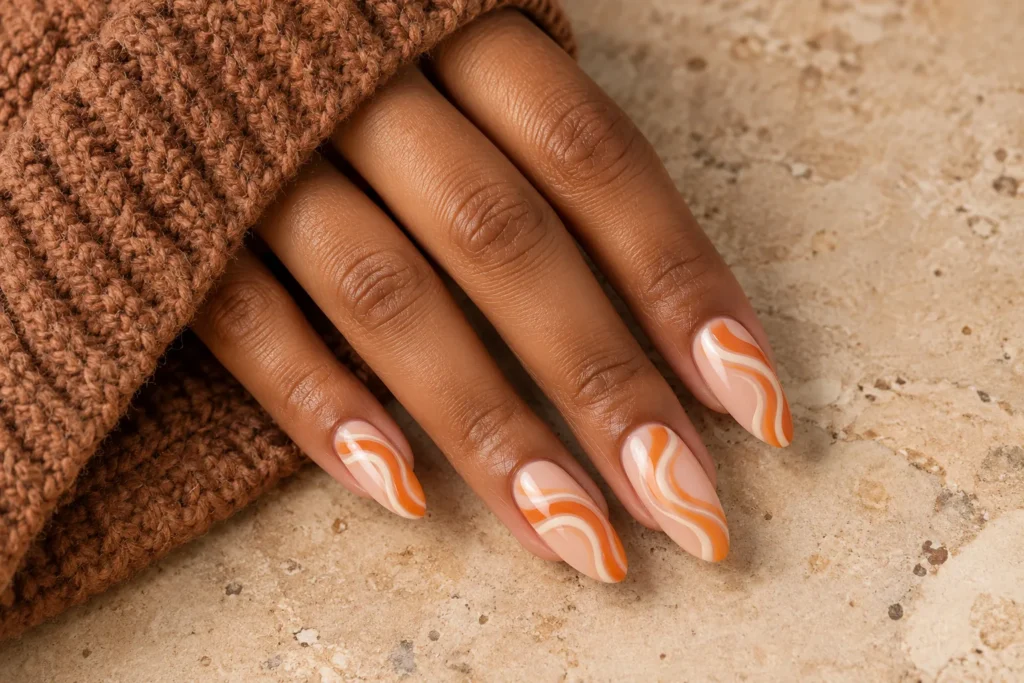
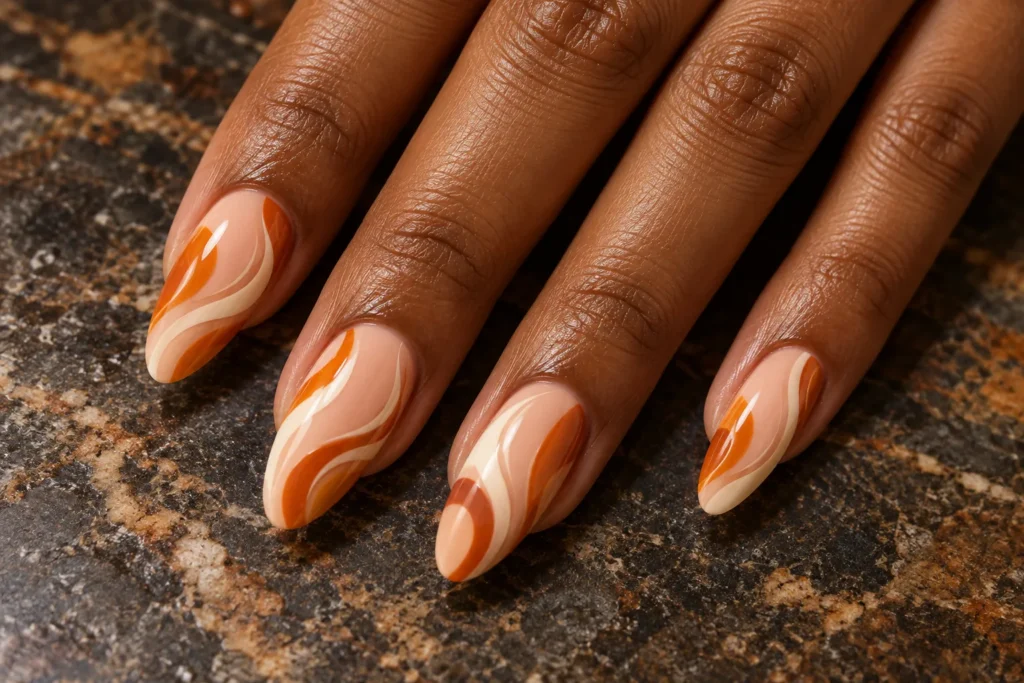
    5. Pumpkin Swirl Nails

    Pumpkin and ivory swirls add movement to a pale peach base. Let the curves vary slightly across the fingers instead of repeating an identical wave. Long almond nails provide room for the pattern, while a smaller swirl on two accent nails gives shorter sets a similar warm mood.

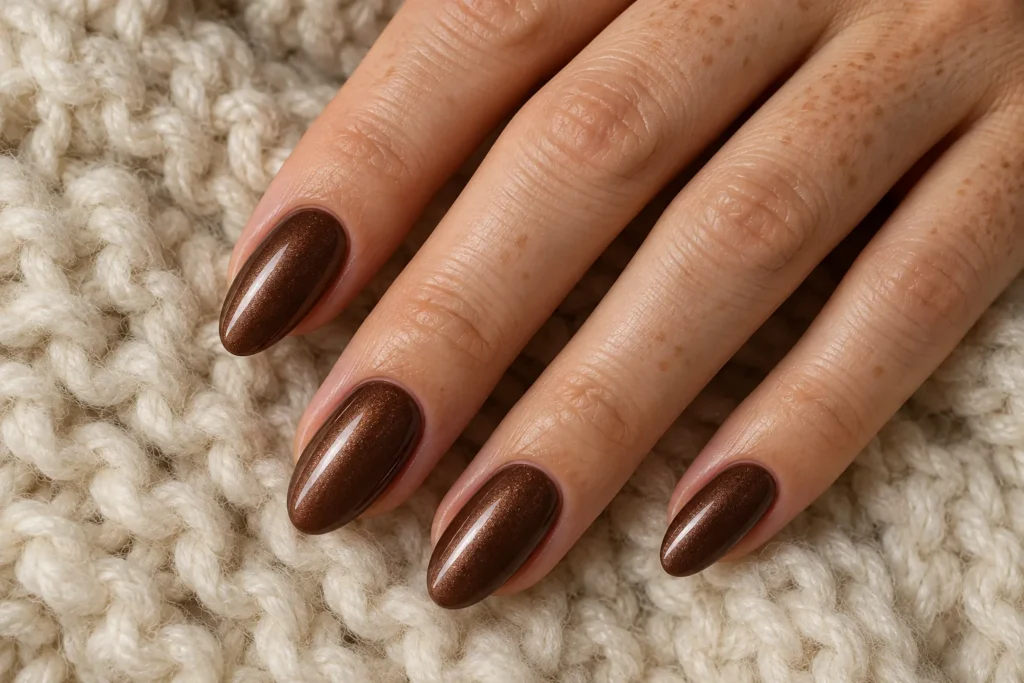
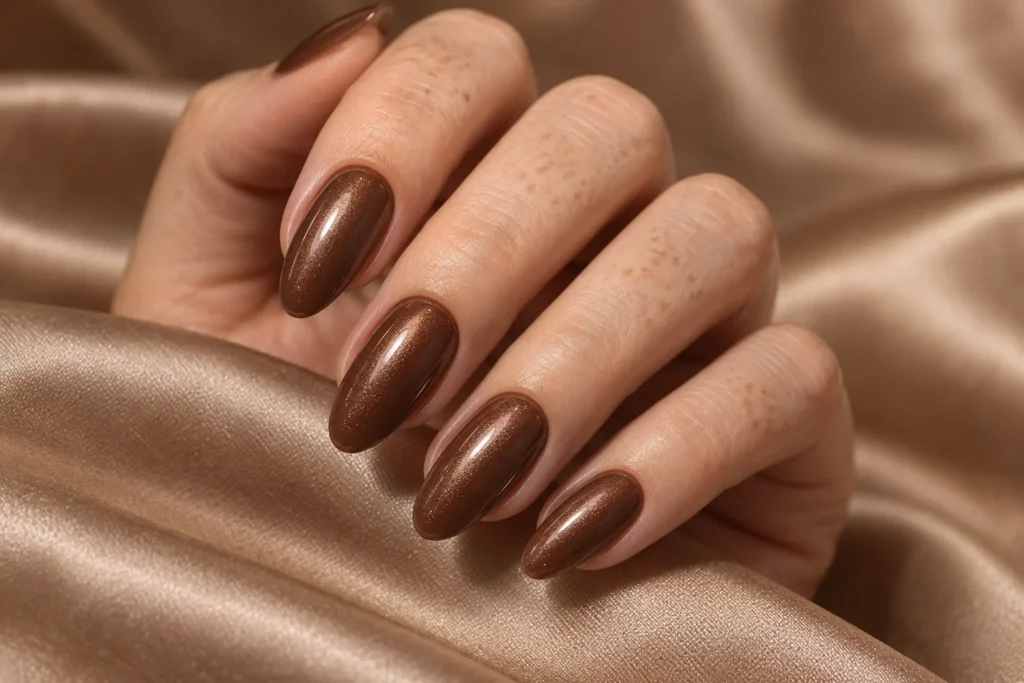
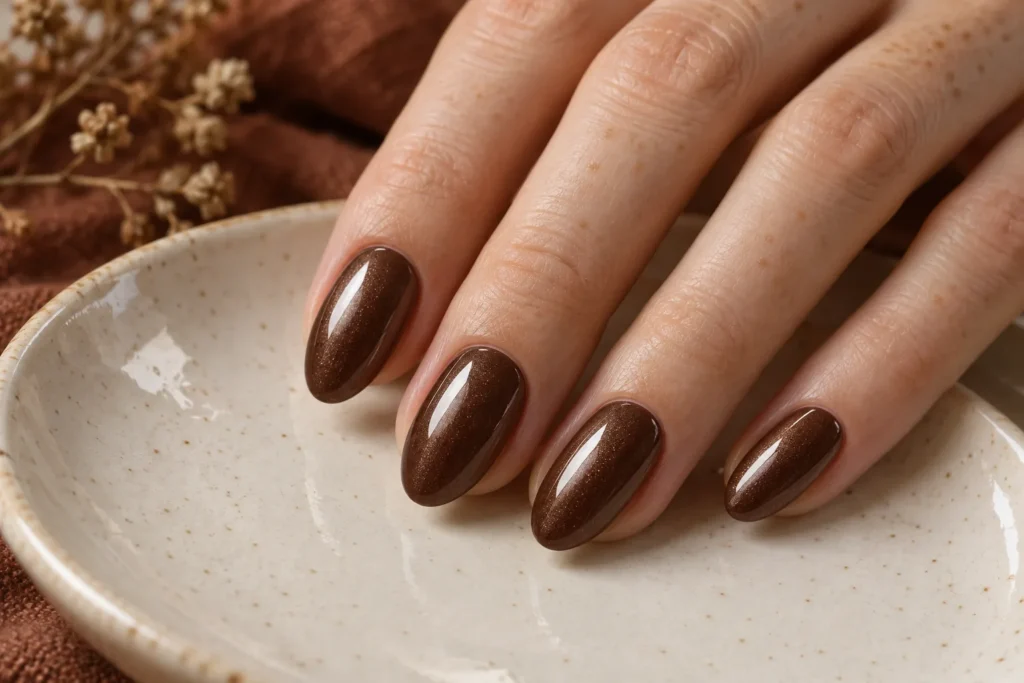
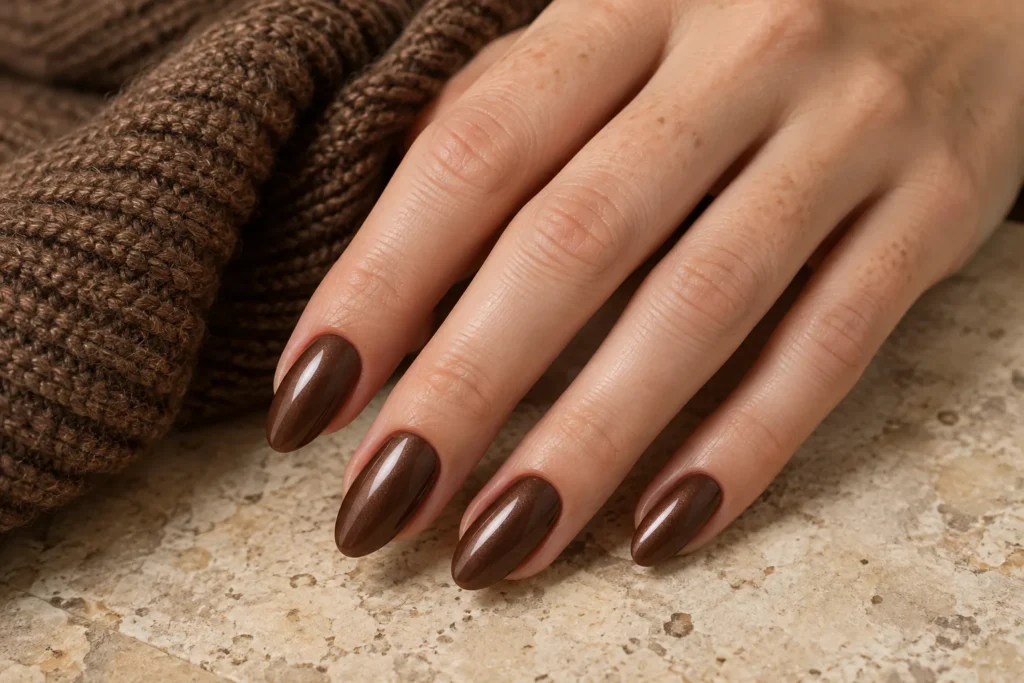
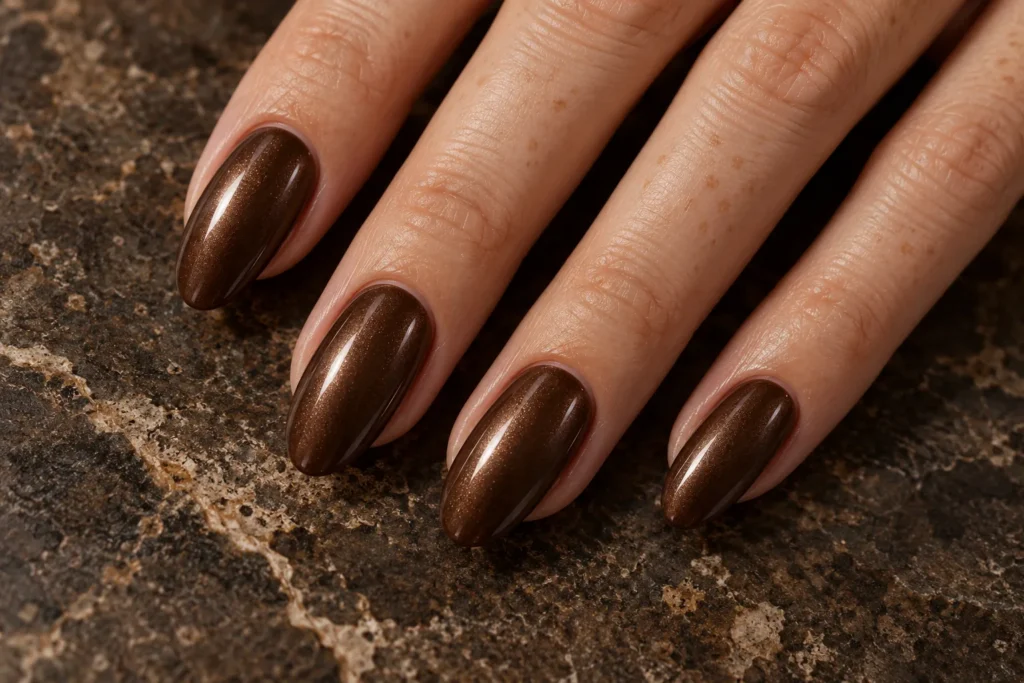
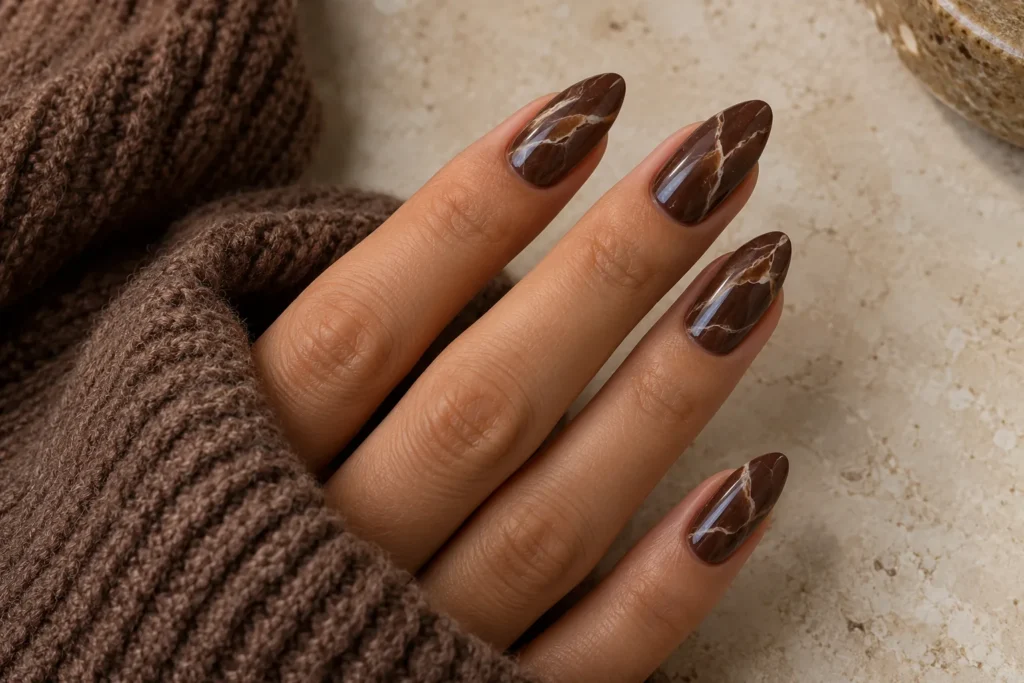
    6. Chocolate Glazed Nails

    Chocolate glazed nails combine a deep brown base with a gentle pearlescent finish. The shine should enhance the colour rather than conceal it beneath silver. Keep the set mostly plain so the finish becomes the feature, and pair it with cream knitwear for a soft seasonal contrast.

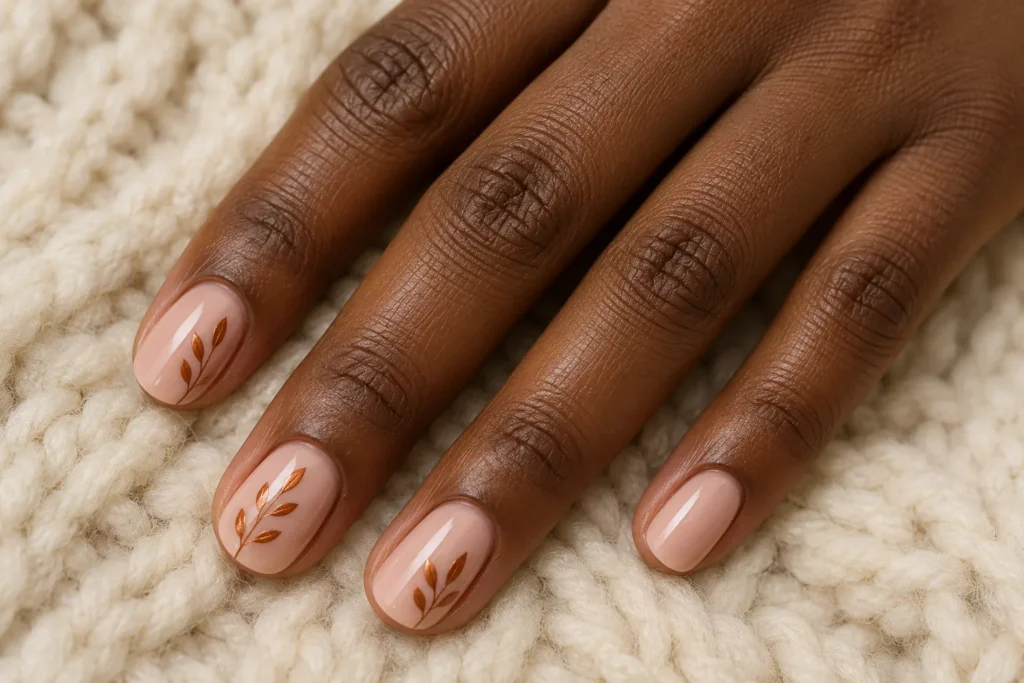
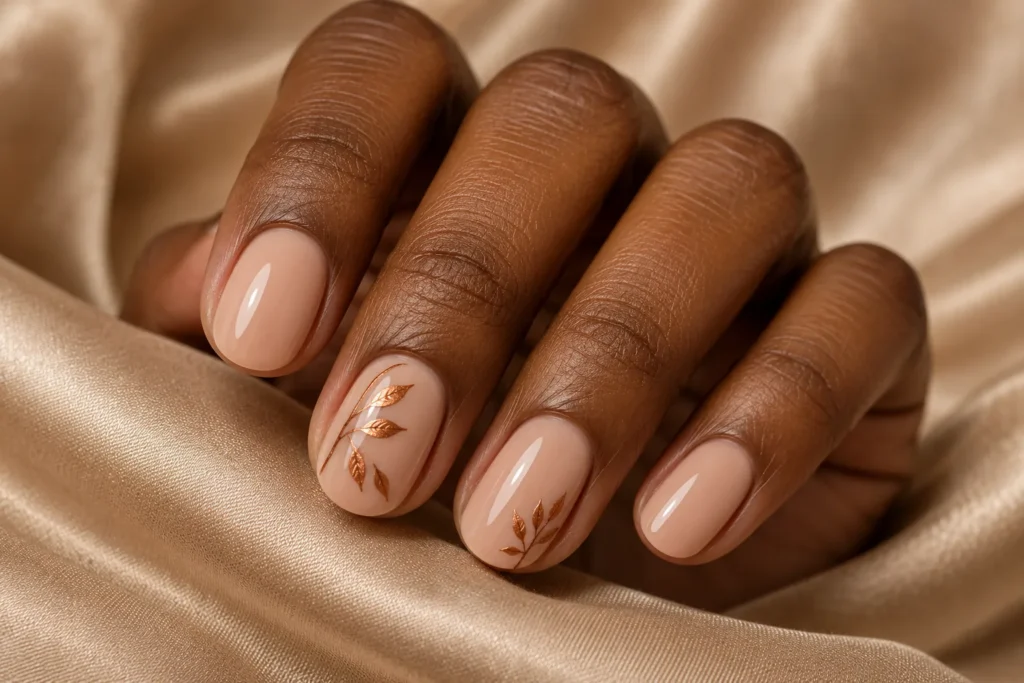
    7. Copper Leaf Accents

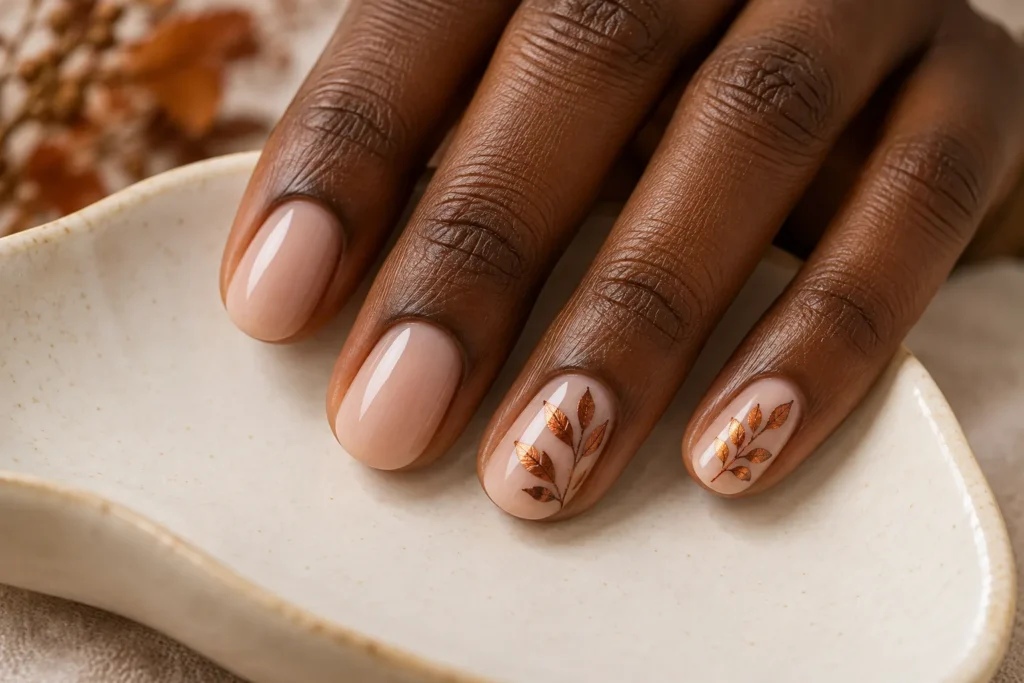
    Copper leaf accents offer a small botanical detail without covering every nail. Fine painted leaves on a nude base look airy beside plain nails. Place the artwork away from the cuticle and leave clear space around it, so the shape remains readable instead of becoming a metallic patch.

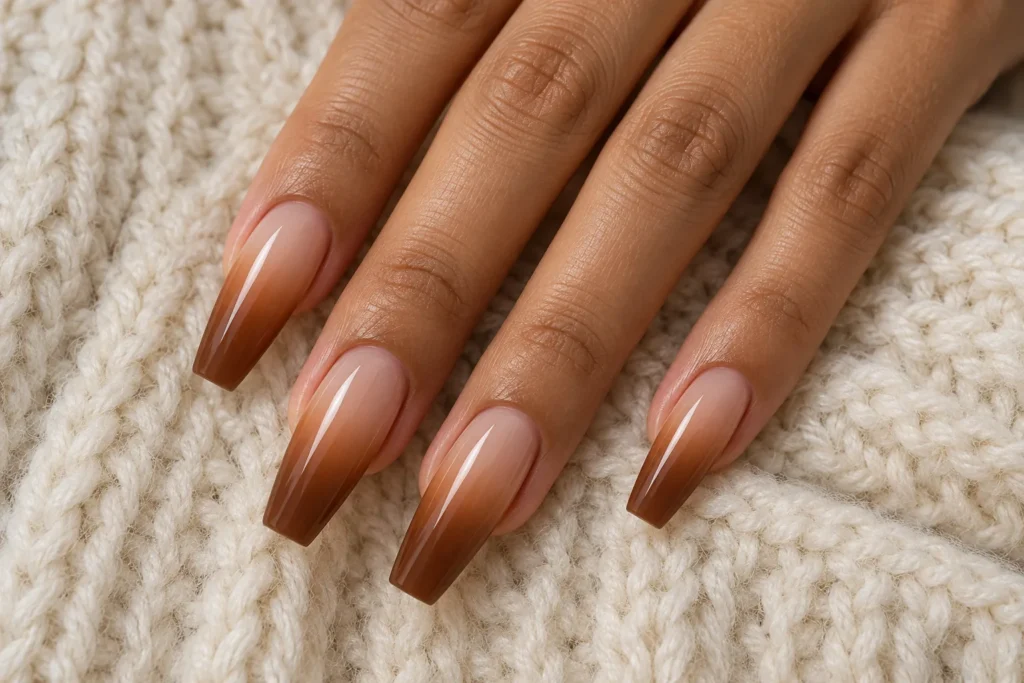
    8. Caramel Ombre Nails

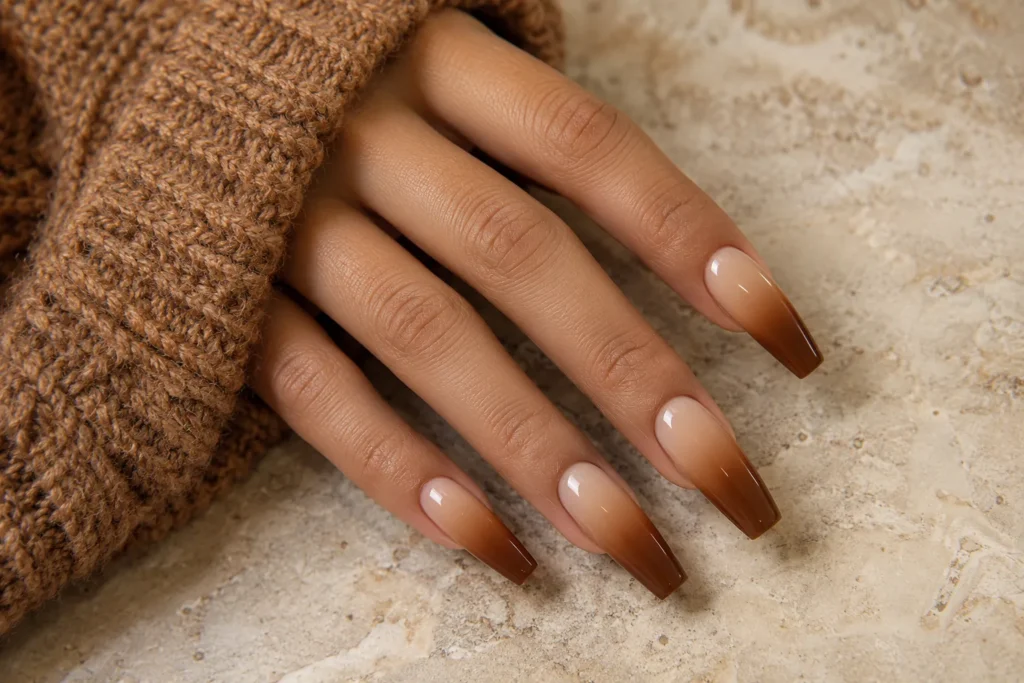
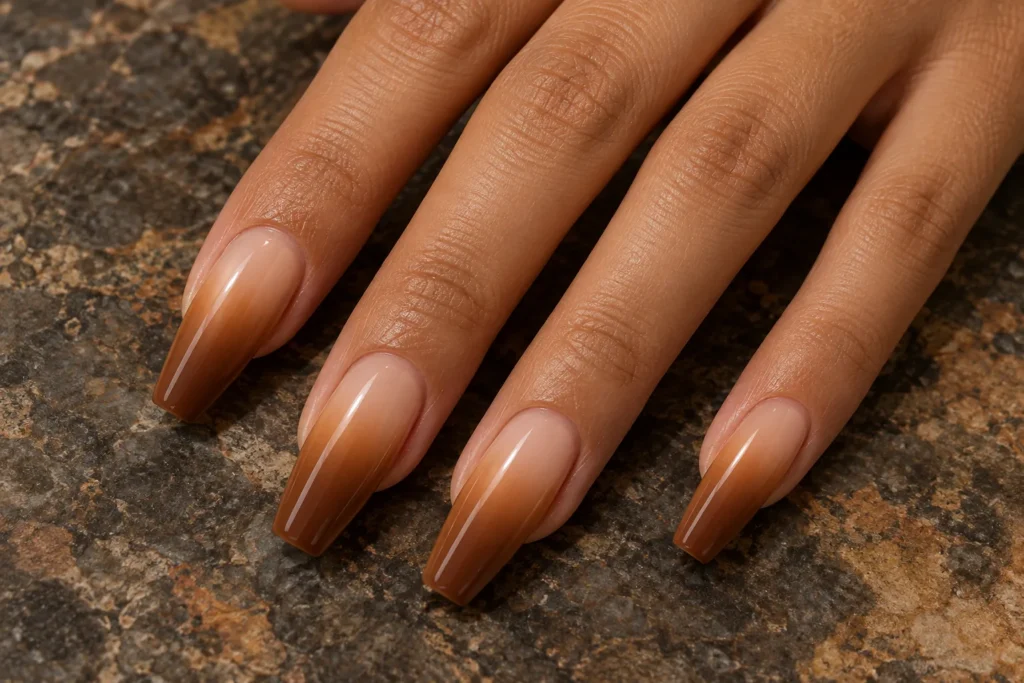
    A caramel-to-nude ombre softens the transition between autumn colour and a natural-looking base. Long coffin nails show more of the fade, but the gradient can be shortened to suit your preferred length. Keep the colour blend smooth and avoid adding several competing patterns over it.

    9. Autumn Plaid Nails

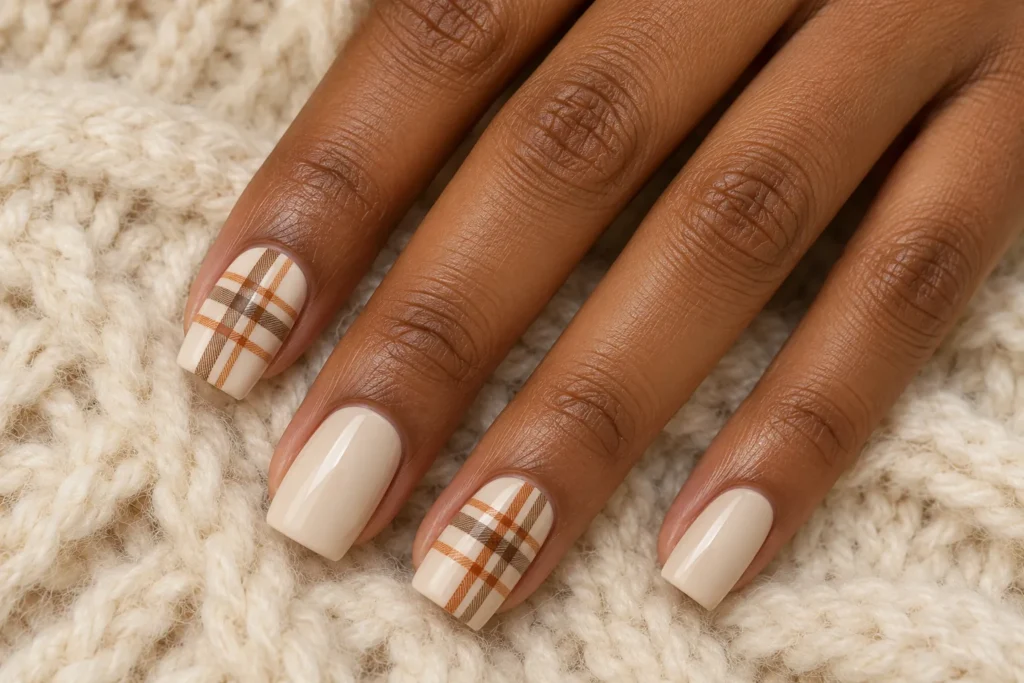
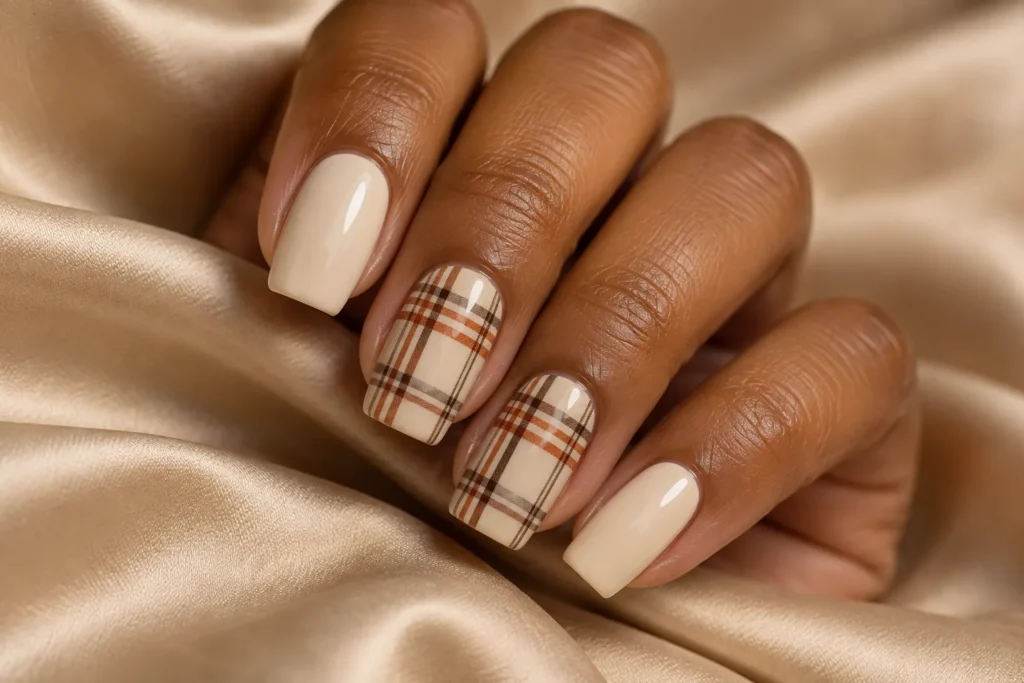
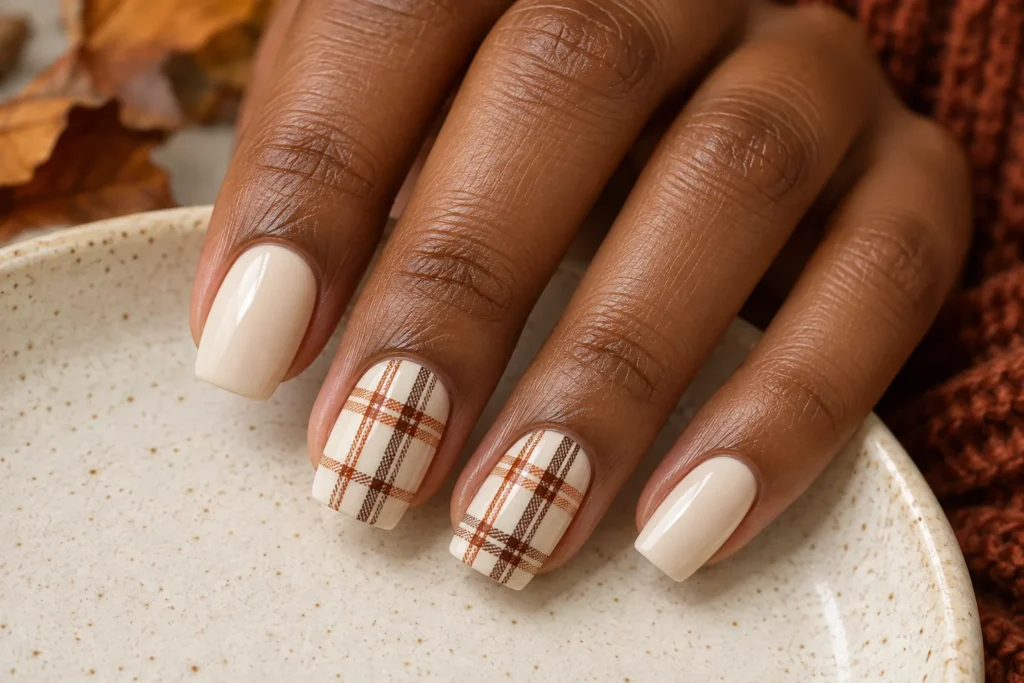
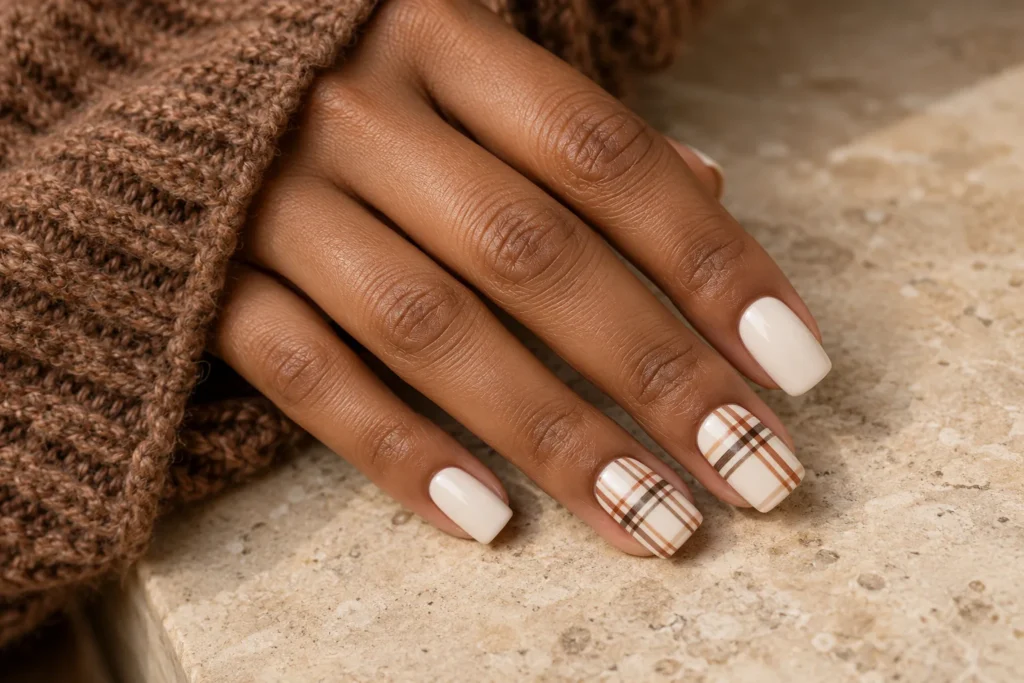
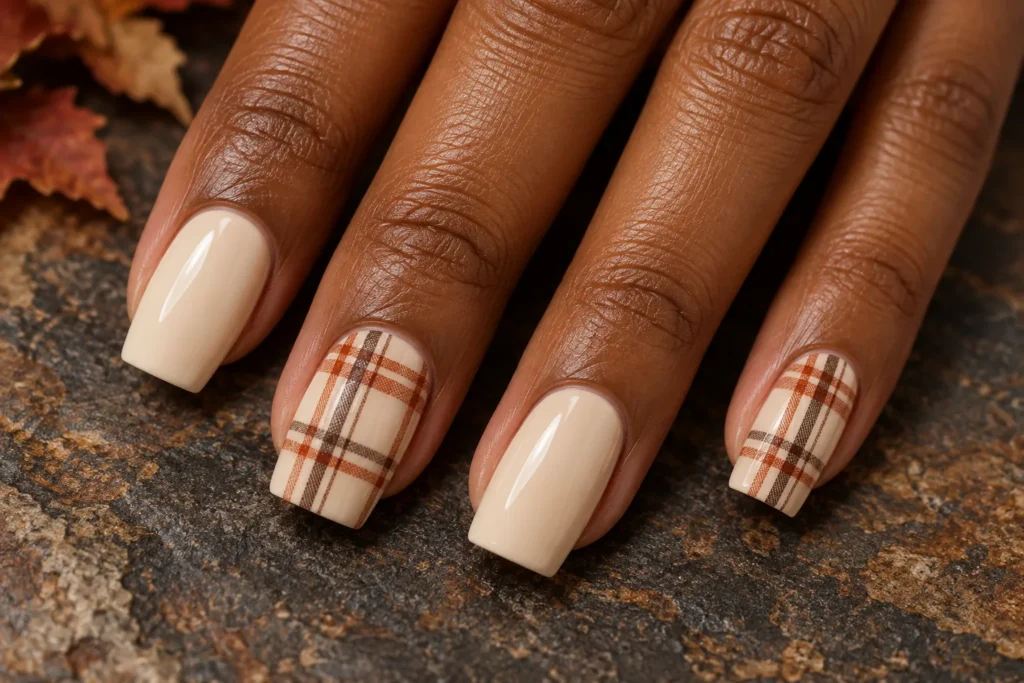
    Rust, brown and cream plaid creates a cosy patterned accent. Use fine crossing lines and reserve the busiest detail for selected nails. Medium square tips suit the structured pattern. Plain cream or rust nails beside the plaid help the whole manicure feel coordinated without looking crowded.

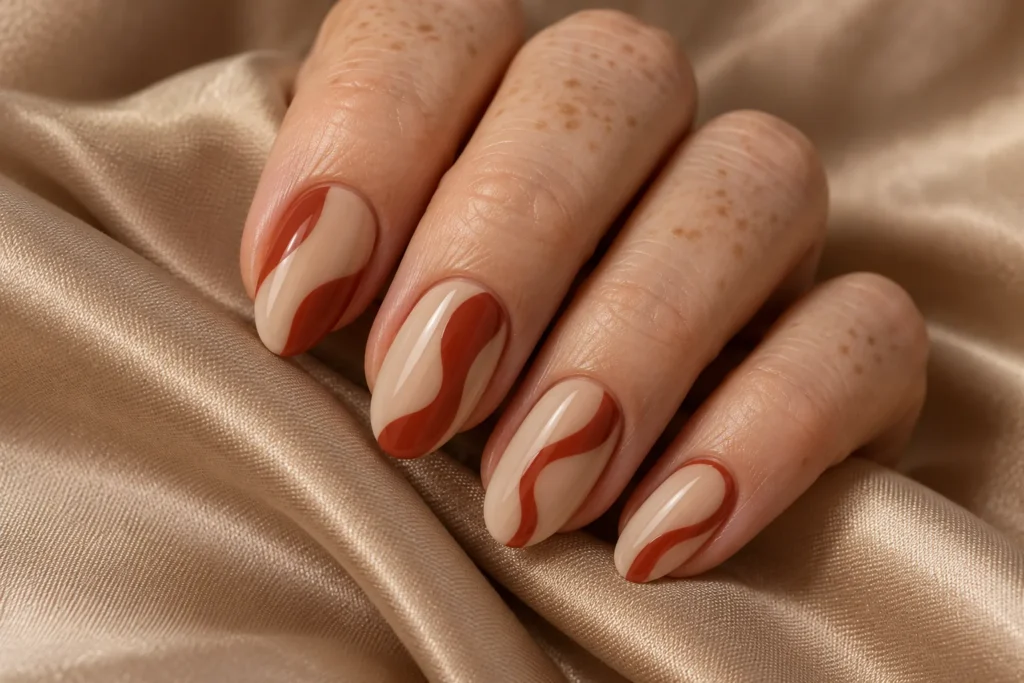
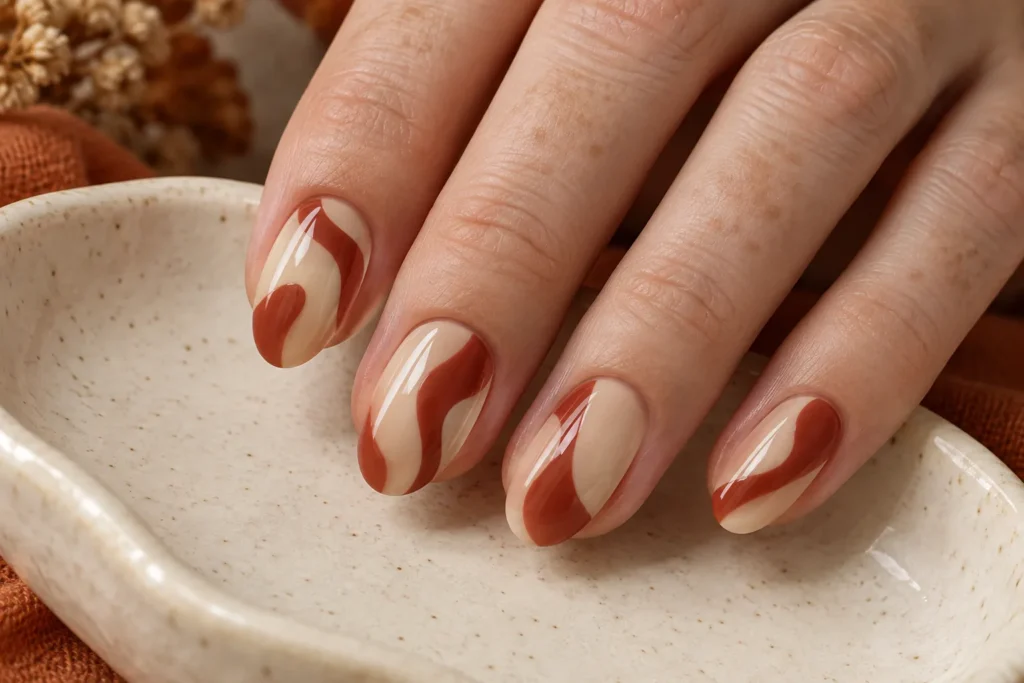
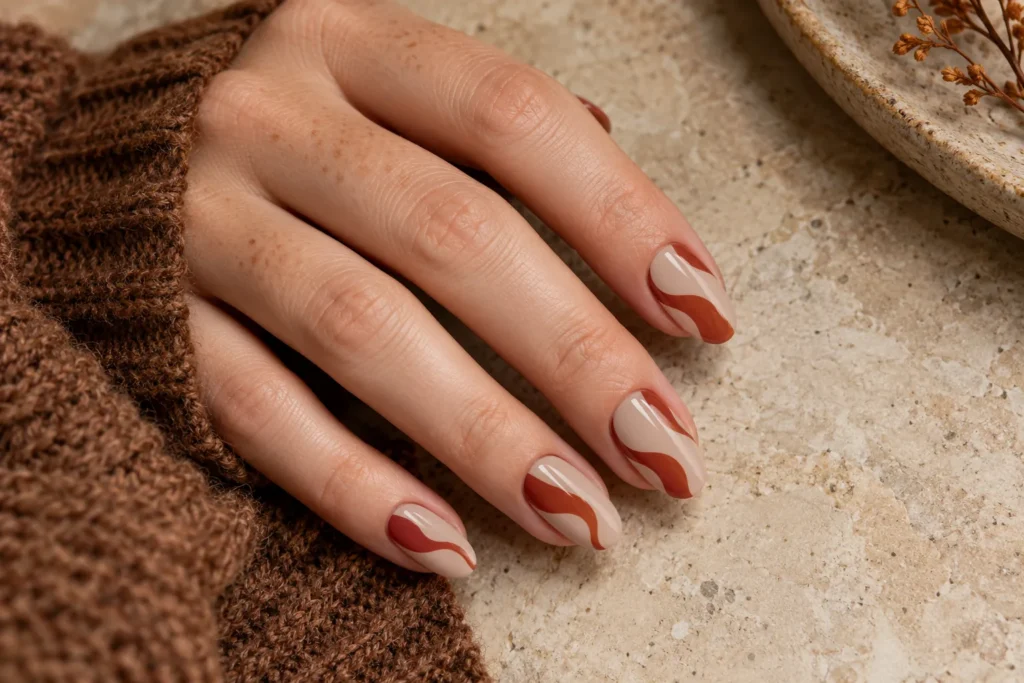
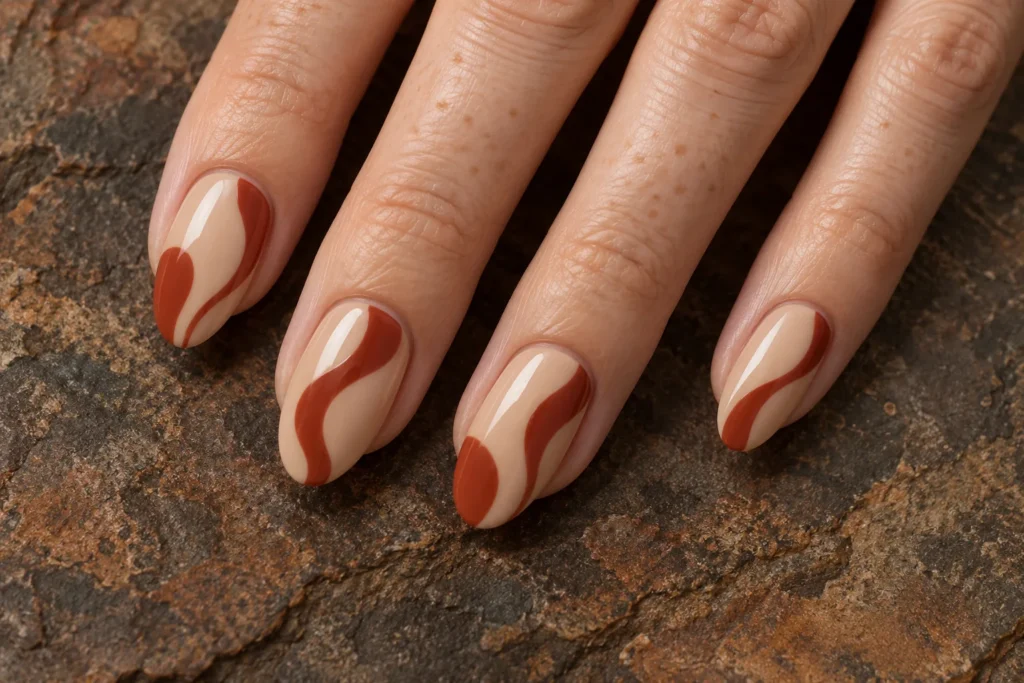
    10. Rust Abstract Waves

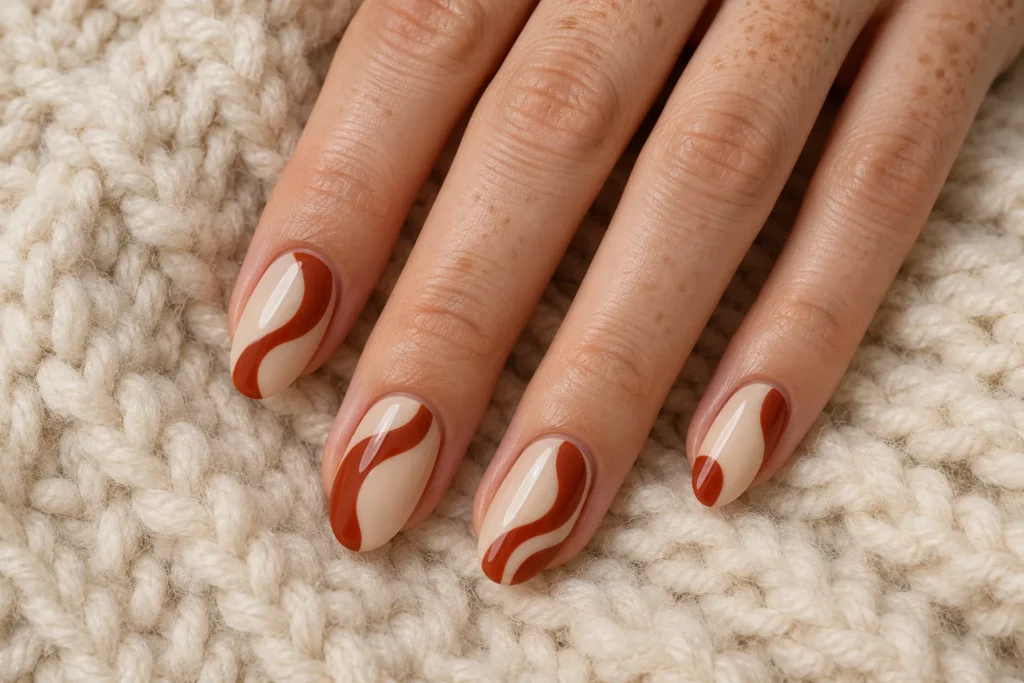
    Rust abstract waves give beige polish a graphic seasonal twist. The curves can move across the nail at different heights while sharing the same colour. Leave a generous amount of beige visible; it is the clear background that makes each wave stand out, especially on a shorter oval shape.

    11. Mushroom Taupe Nails

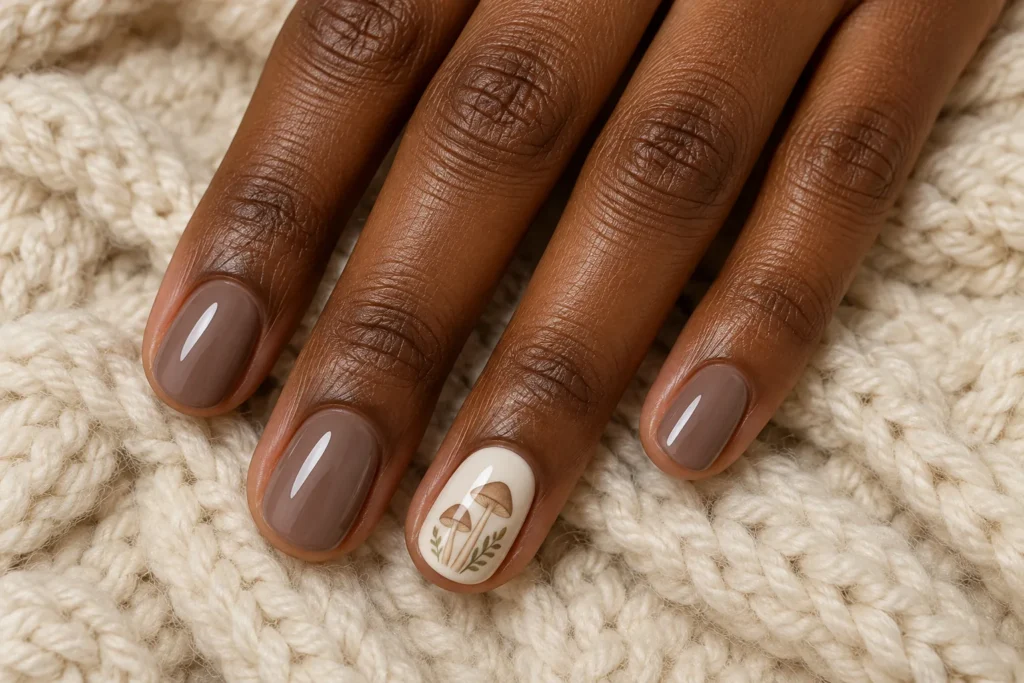
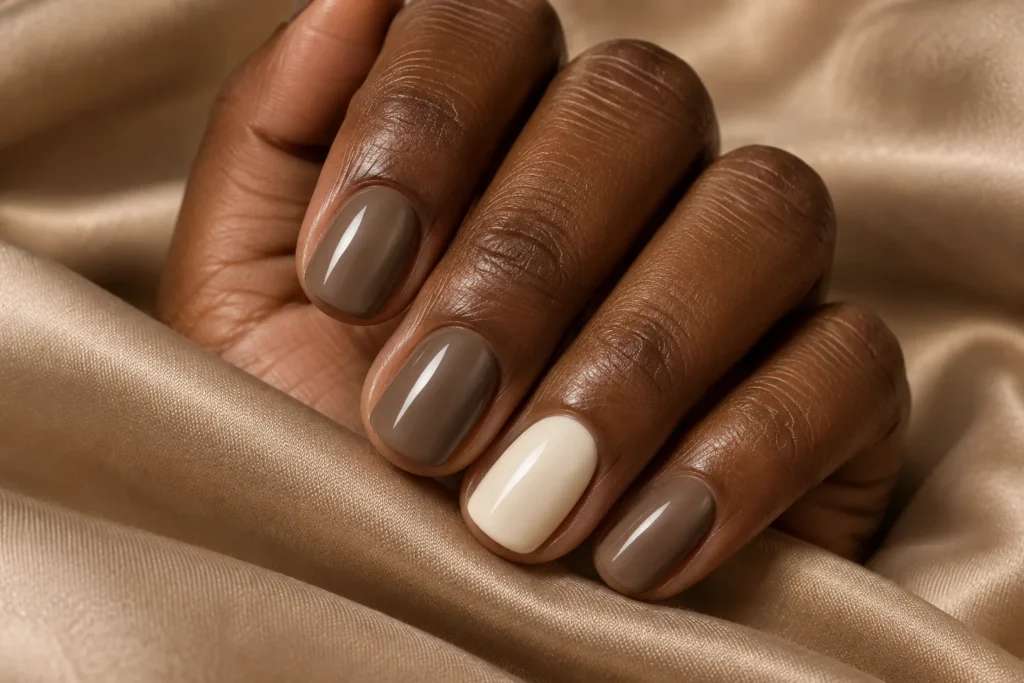
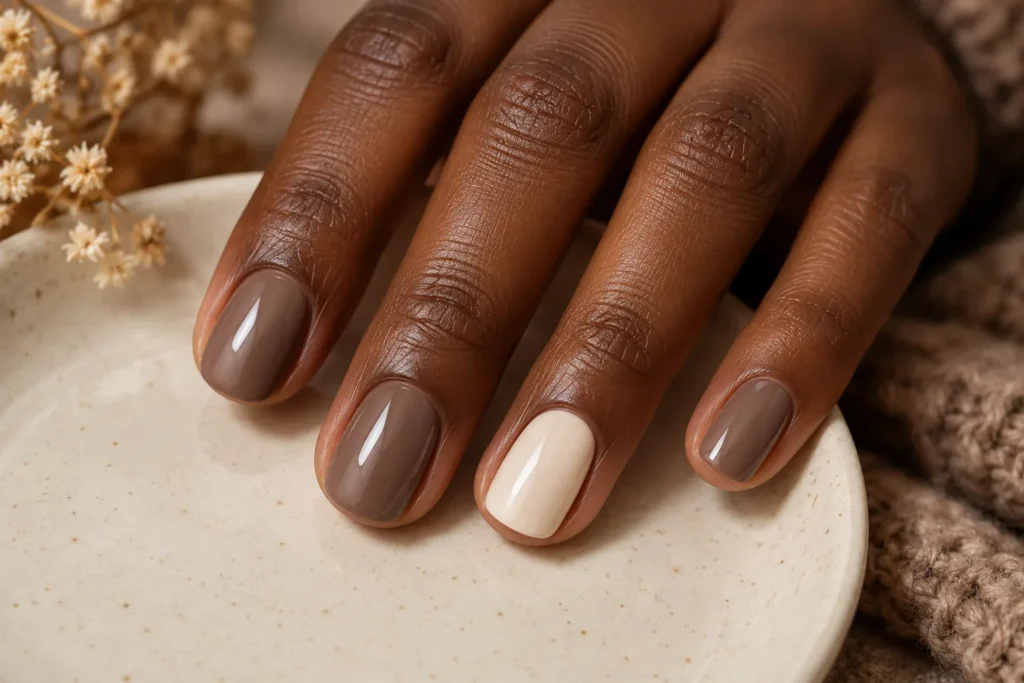
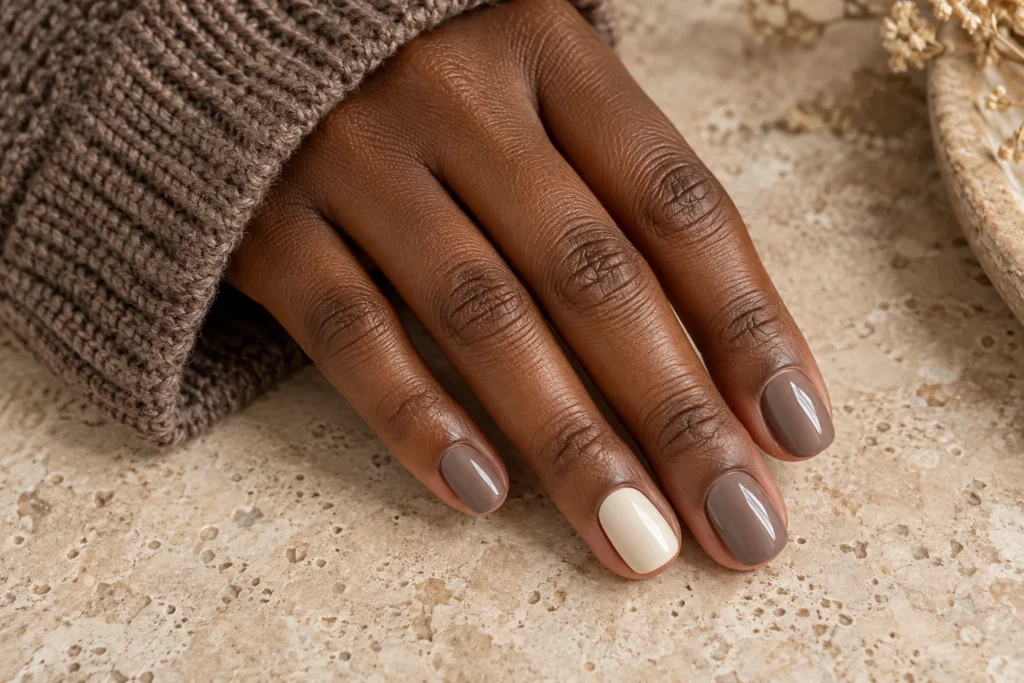
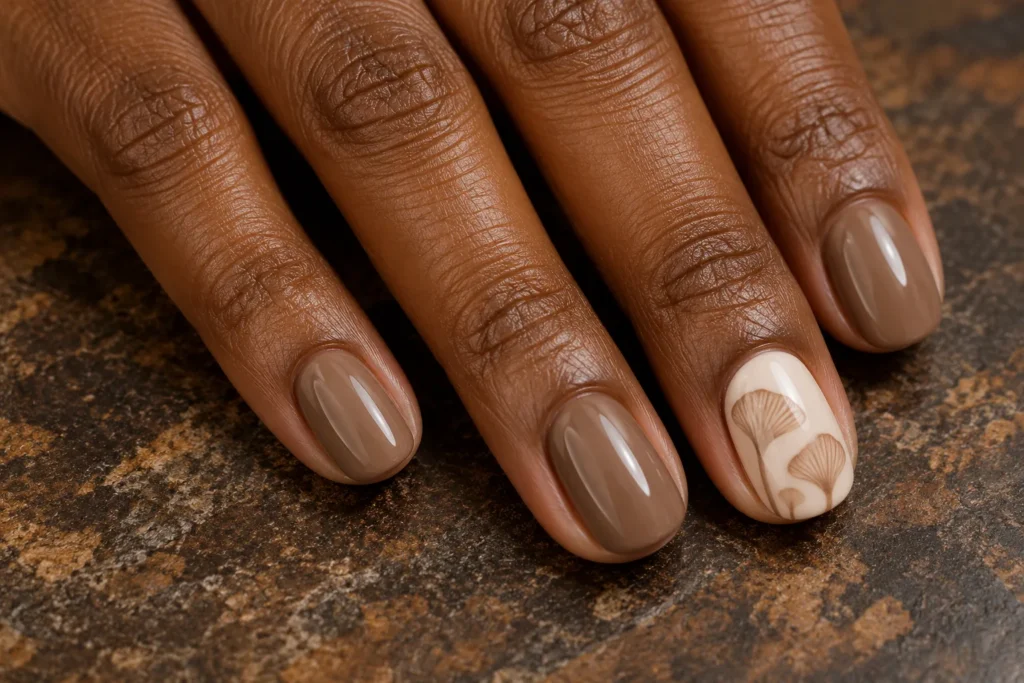
    Mushroom taupe offers a quiet alternative to orange and burgundy. Its soft neutral tone works well on short rounded nails, with one ivory accent for a little variation. This design relies on a neat outline and glossy finish, making it a straightforward choice for an understated everyday set.

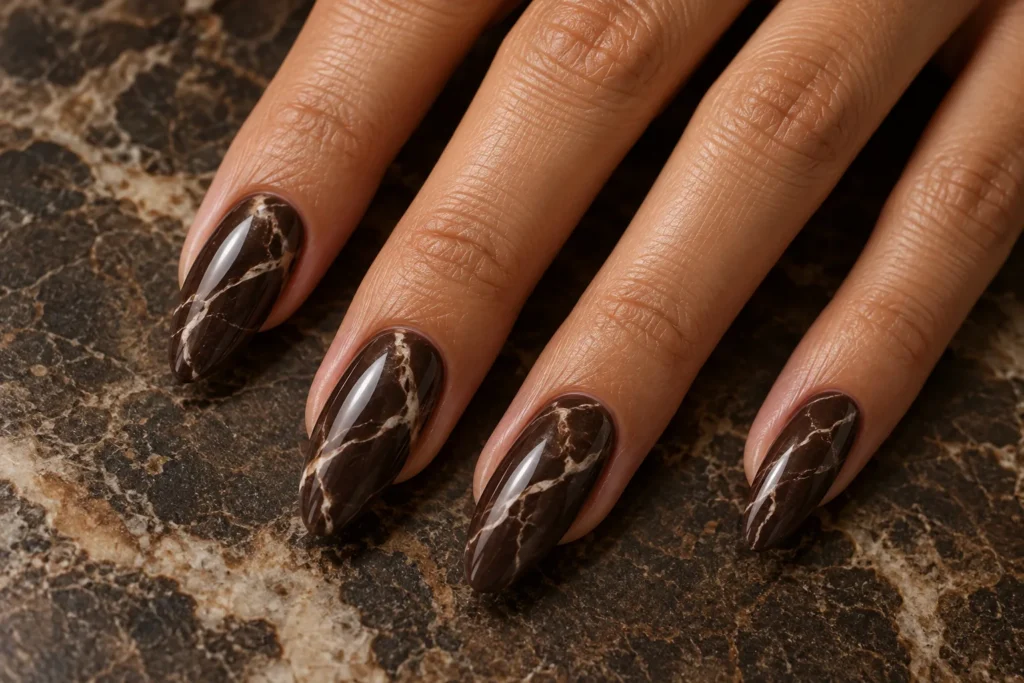
    12. Espresso Marble Nails

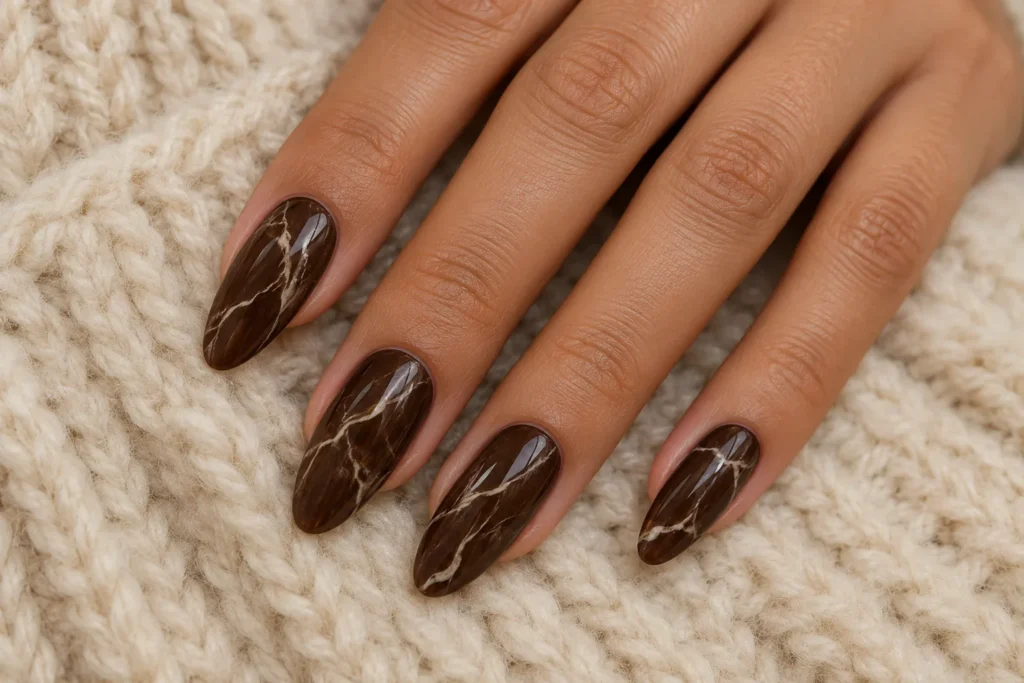
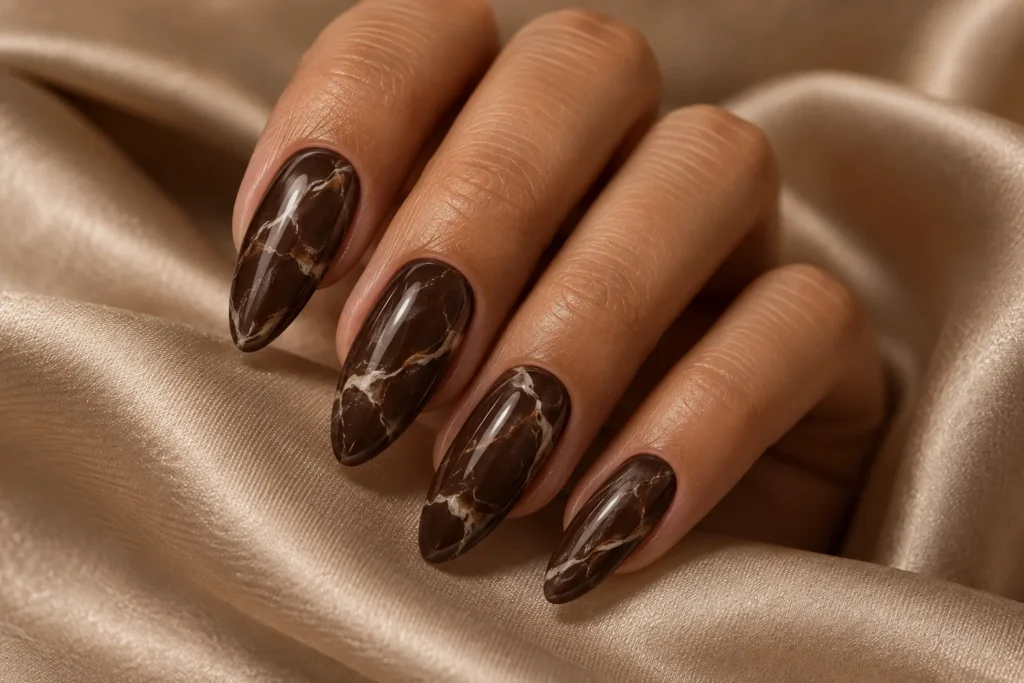
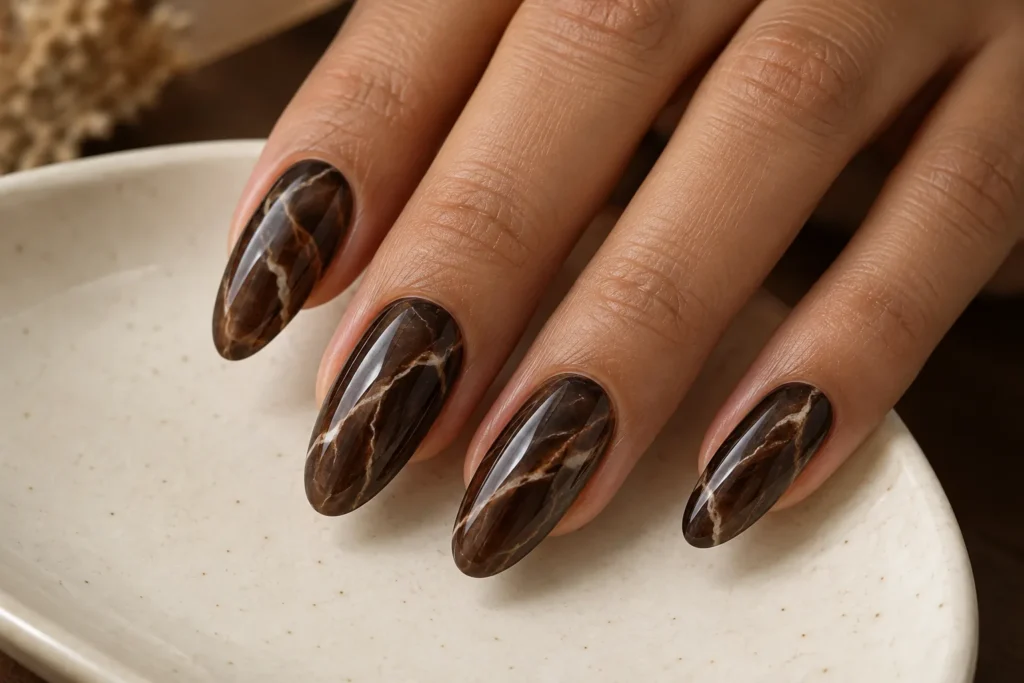
    Espresso marble uses fine cream veins to break up a deep brown base. Keep the lines irregular and sparse rather than creating an identical web on every nail. Long almond tips give the pattern room, although two marble accents beside plain espresso nails can create a calmer overall result.

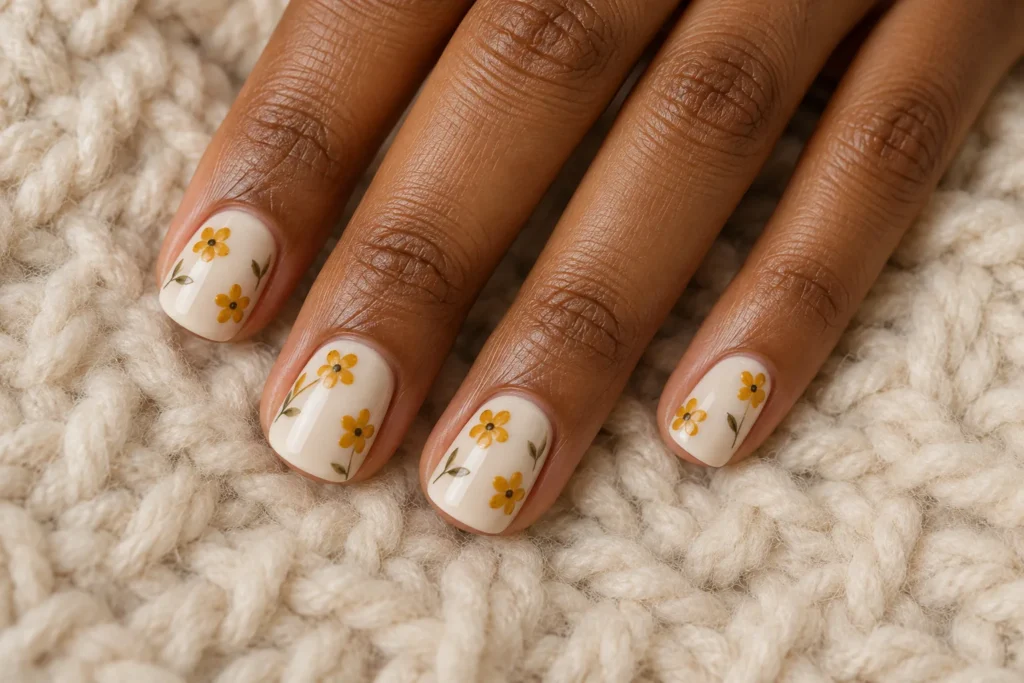
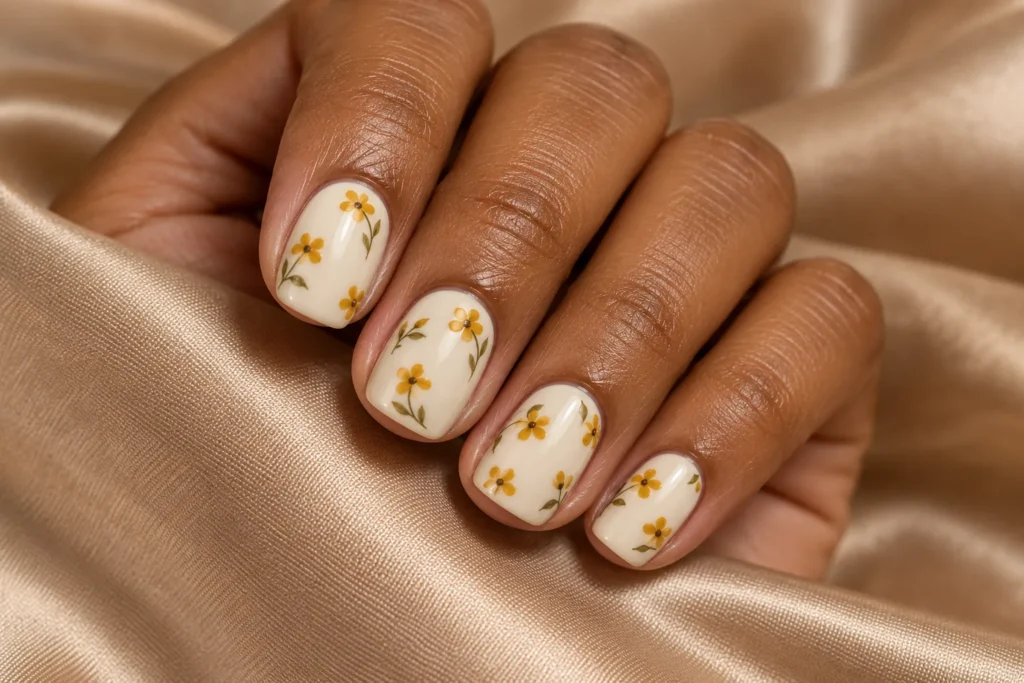
    13. Mustard Floral Details

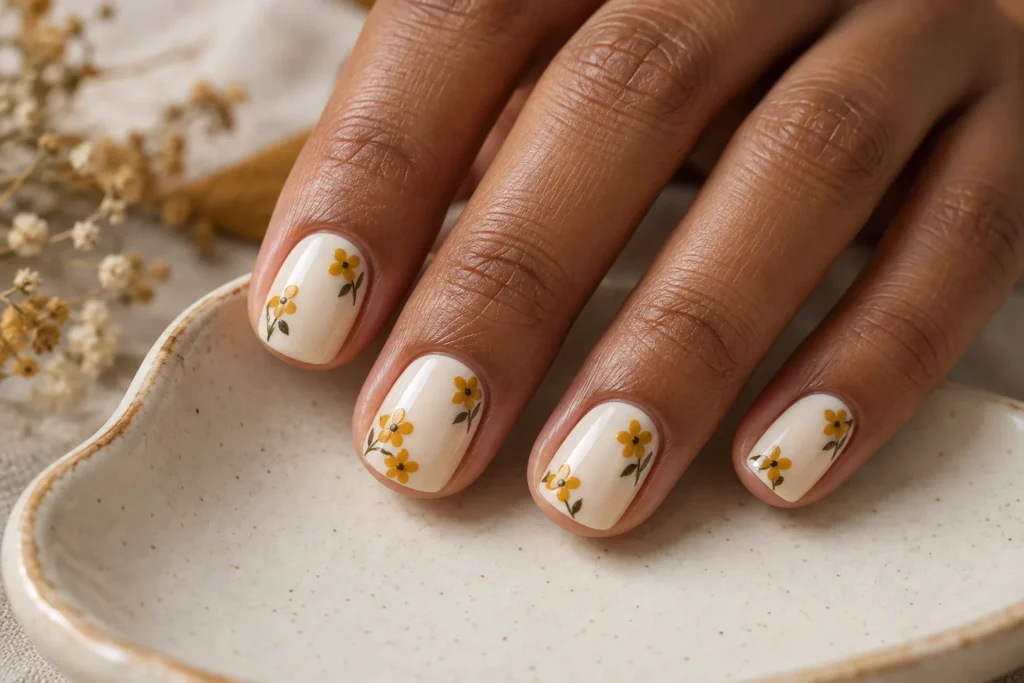
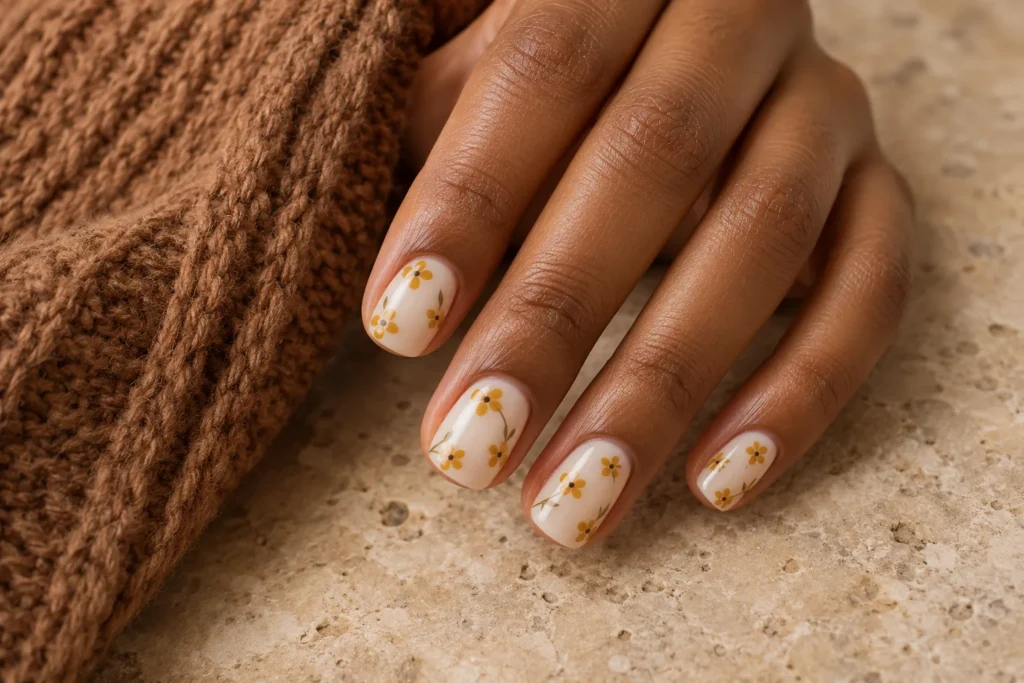
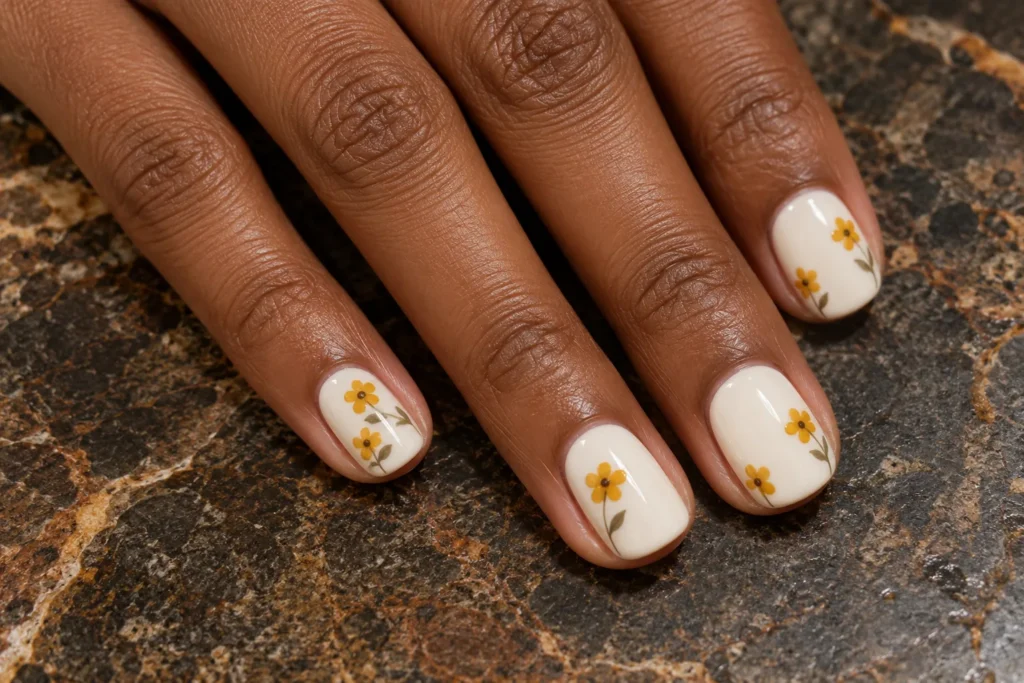
    Tiny mustard flowers on cream polish offer cute fall designs for nails without relying on a full floral background. Small painted petals feel lighter than raised blooms. Leave space between the flowers and keep neighbouring nails plain, allowing the warm yellow detail to become the main seasonal accent.

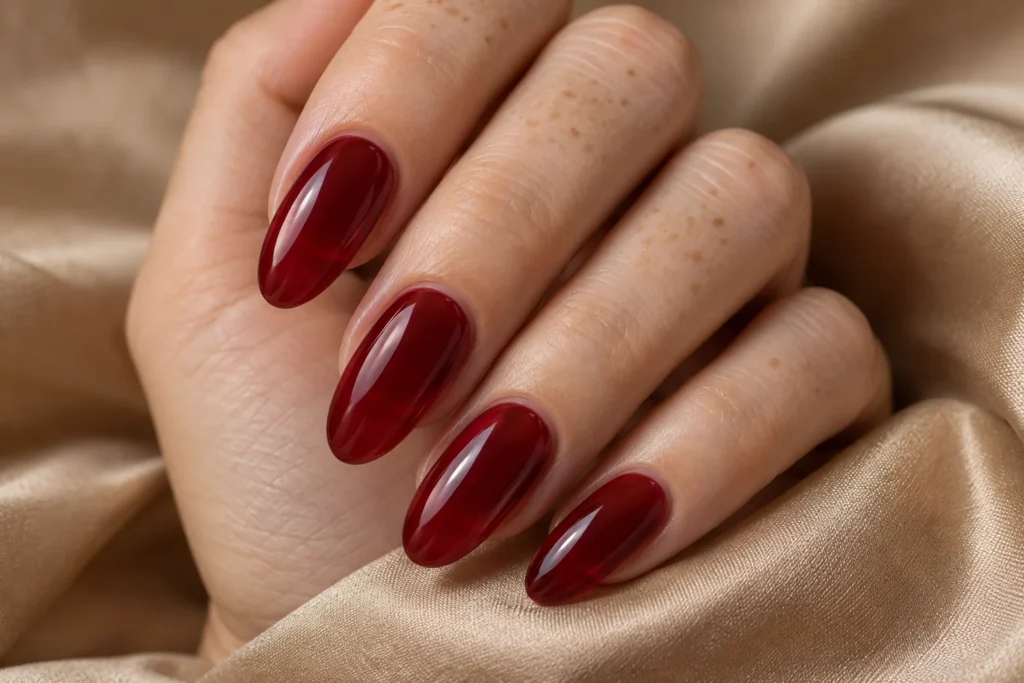
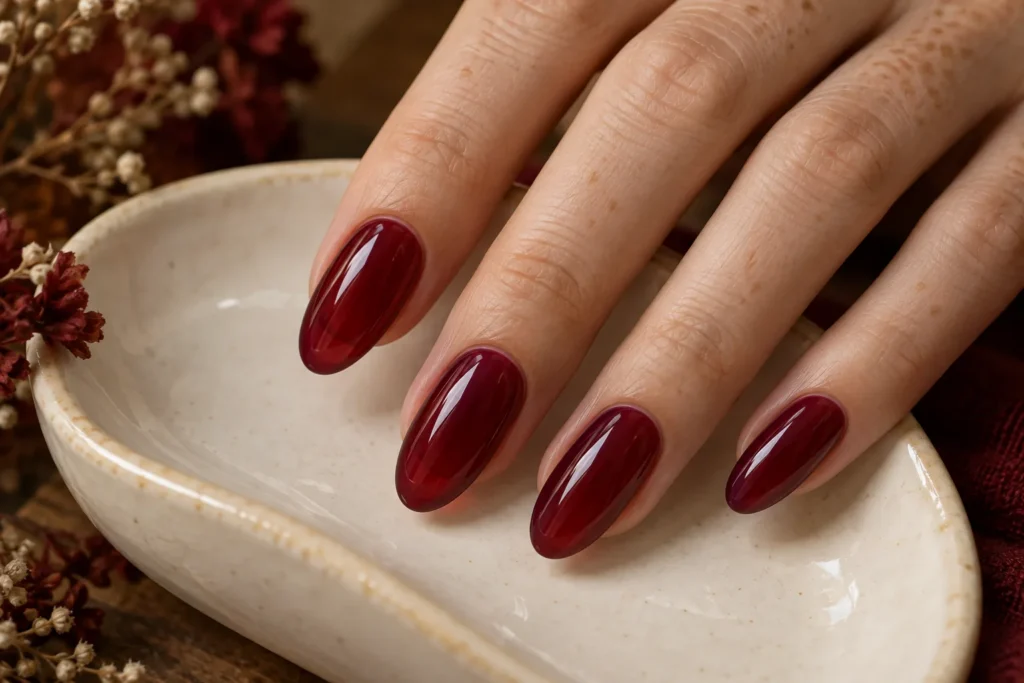
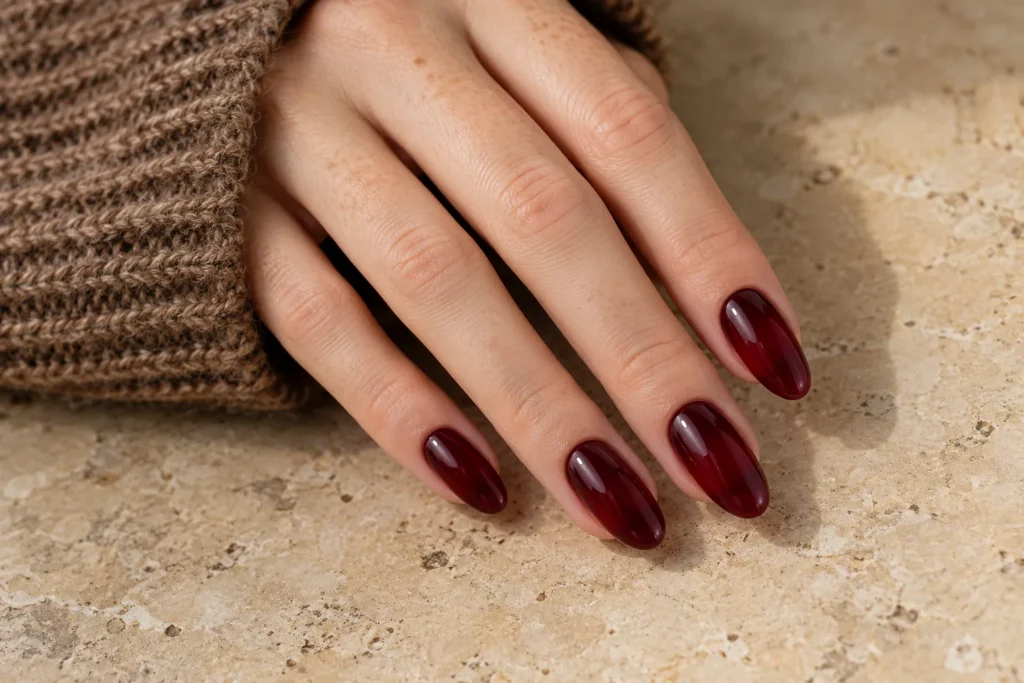
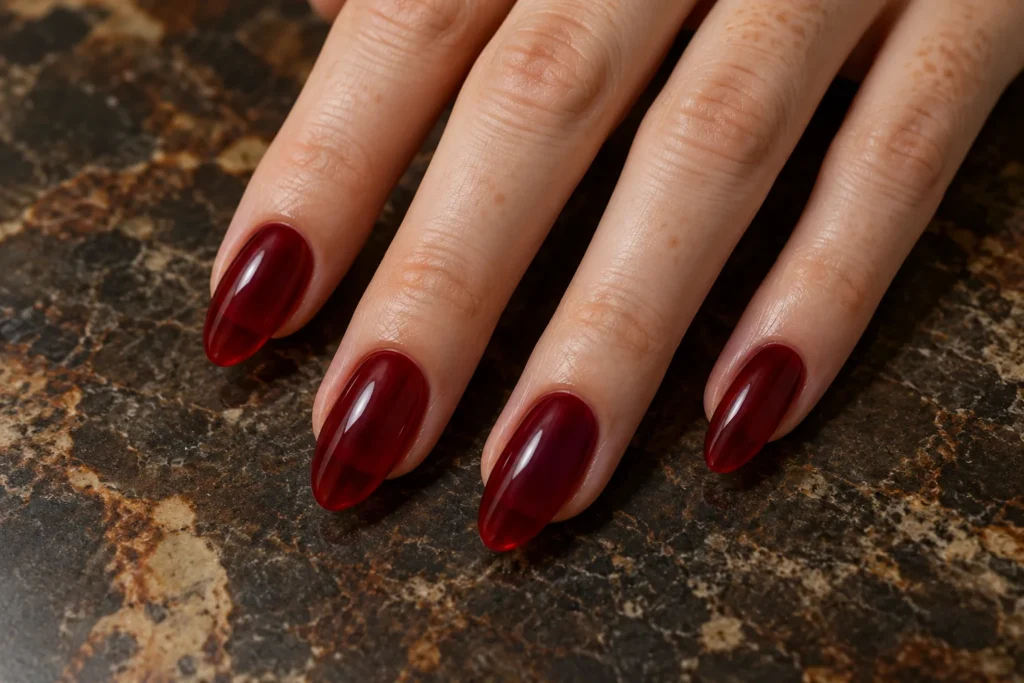
    14. Wine Red Jelly Nails

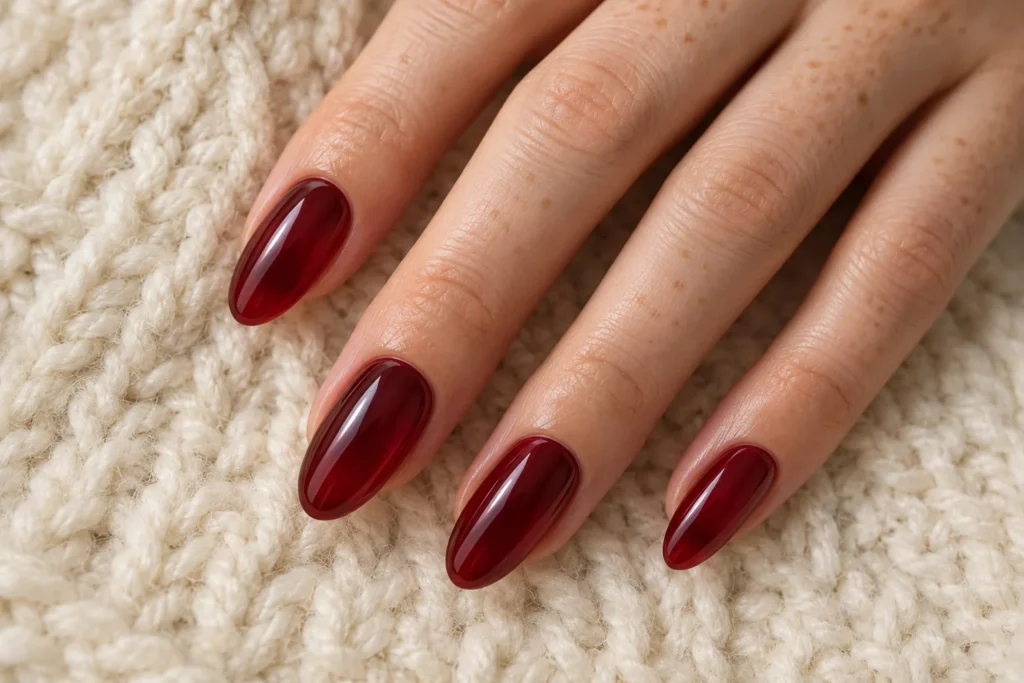
    Wine-red jelly nails have a translucent finish that gives the colour a lighter appearance. An even application and clean nail shape matter more than extra embellishments here. Longer oval nails show the see-through effect clearly, while a shorter version can make this rich autumn shade feel less dramatic.

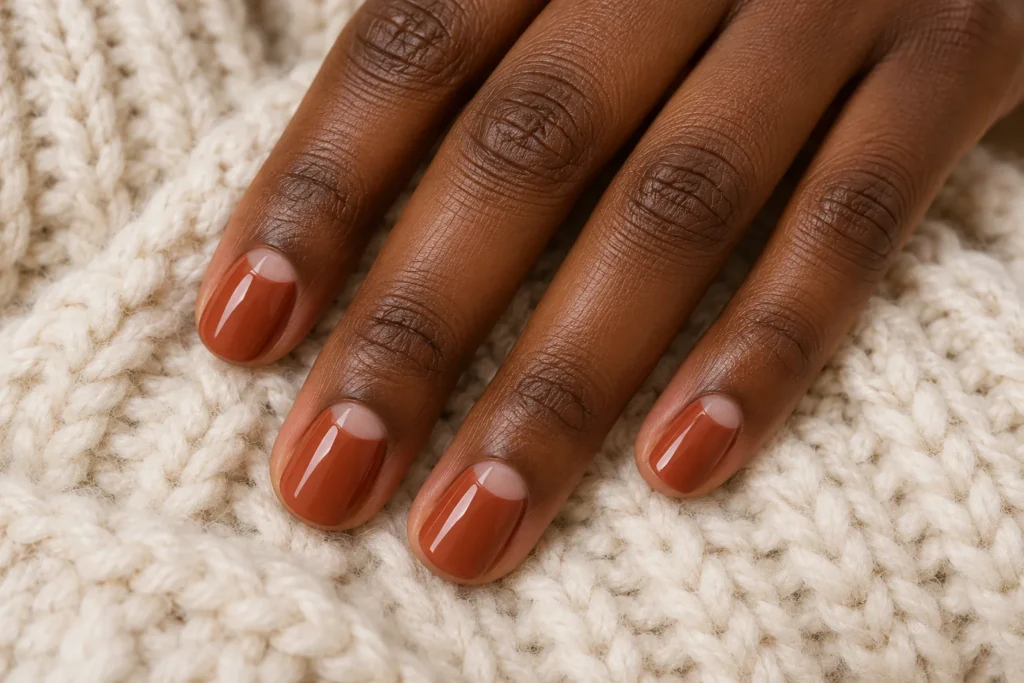
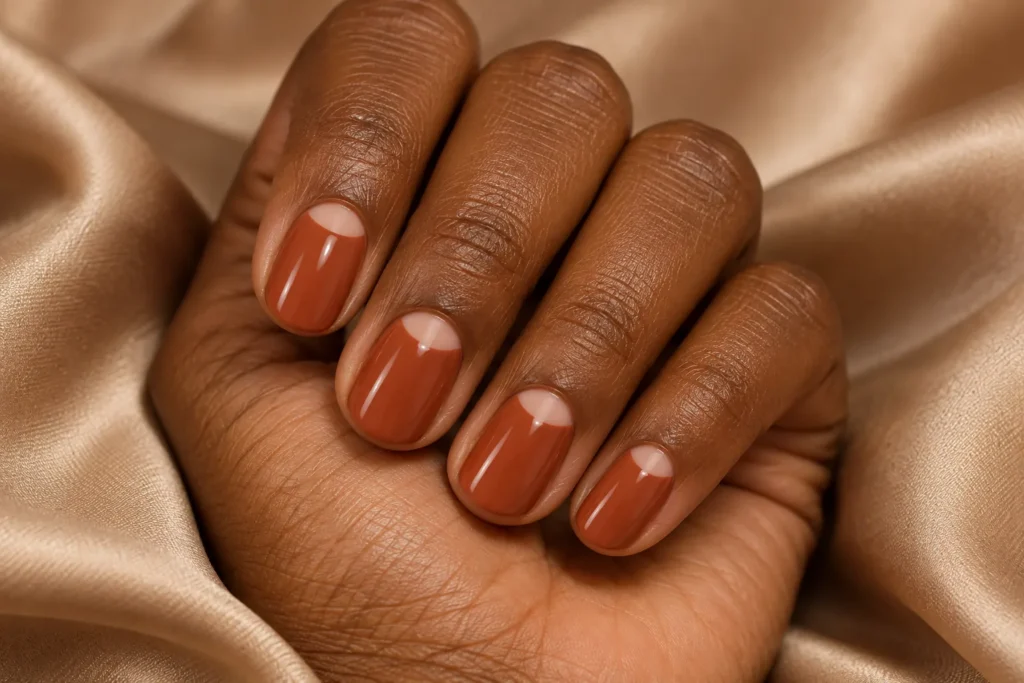
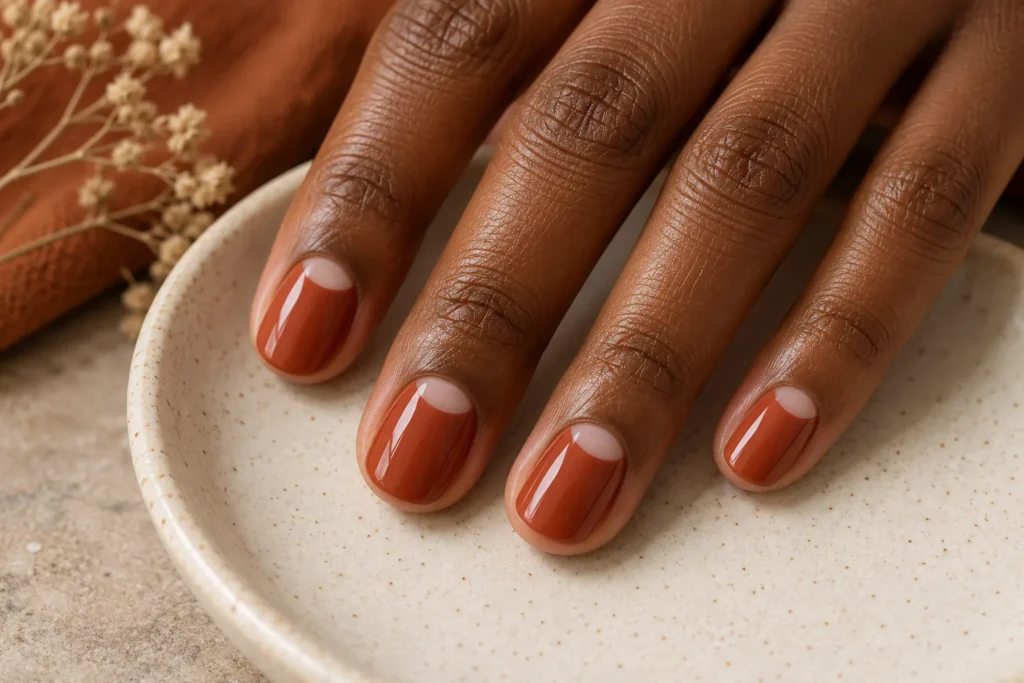
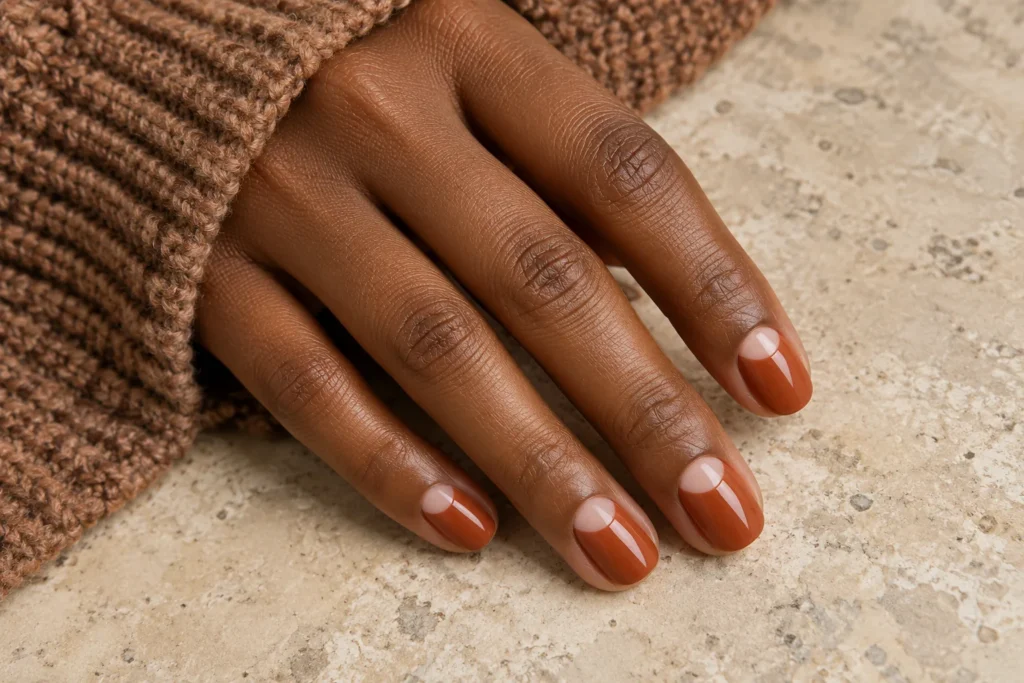
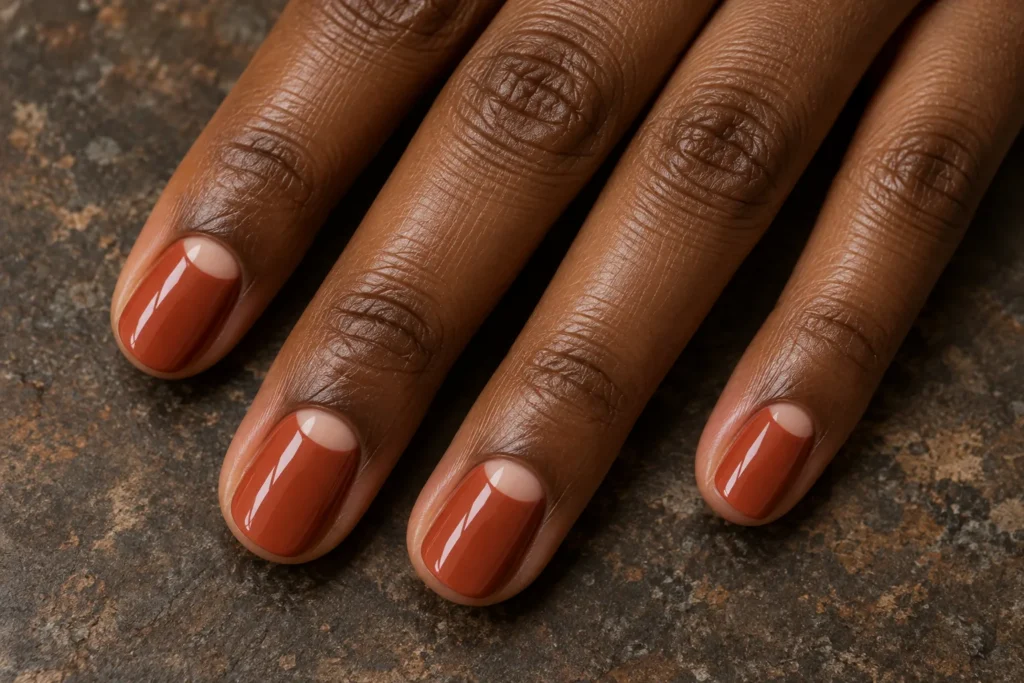
    15. Terracotta Half Moons

    Terracotta half-moons move the design focus toward the cuticle. A small nude crescent contrasts with the warm painted surface, giving short nails a clear decorative detail. Keep the curve proportionate to each nail width rather than making every crescent exactly the same size across the hand.

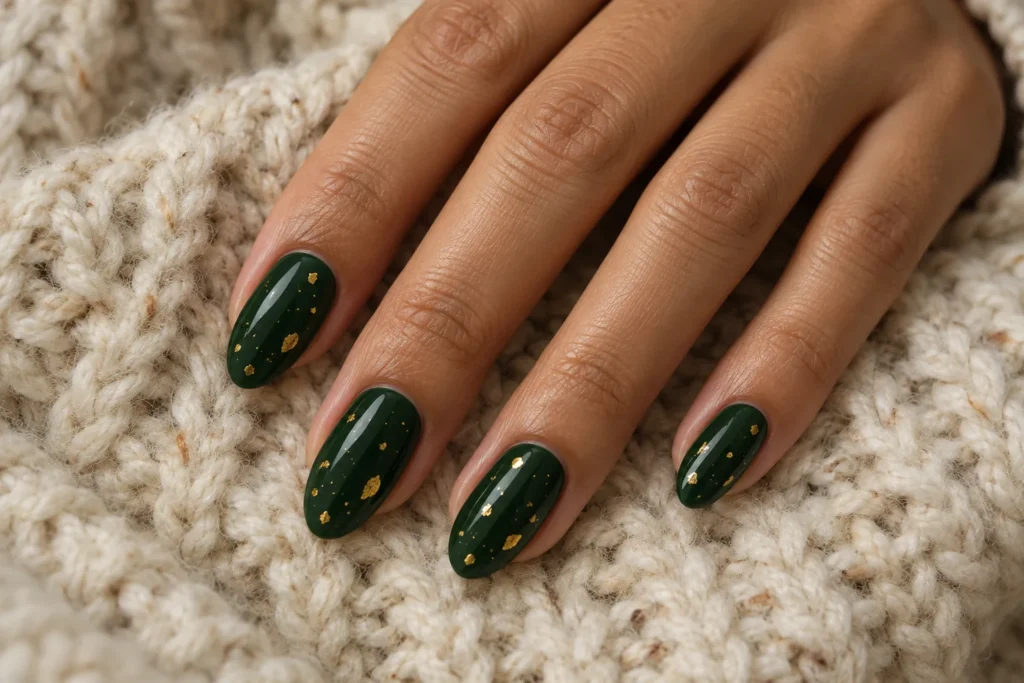
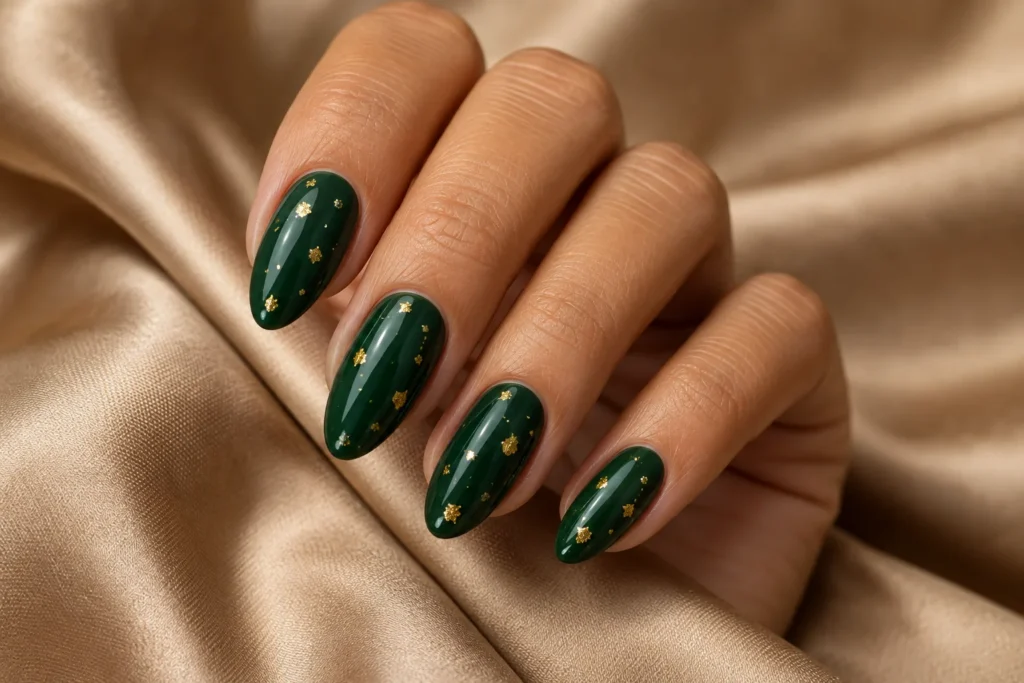
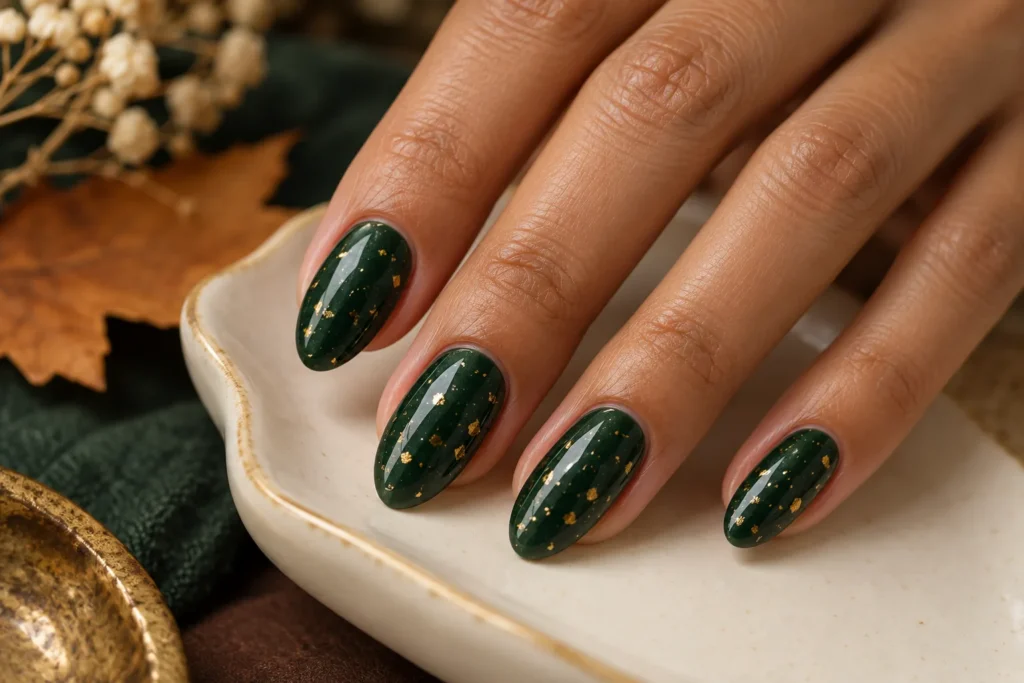
    16. Forest Green Gold Flecks

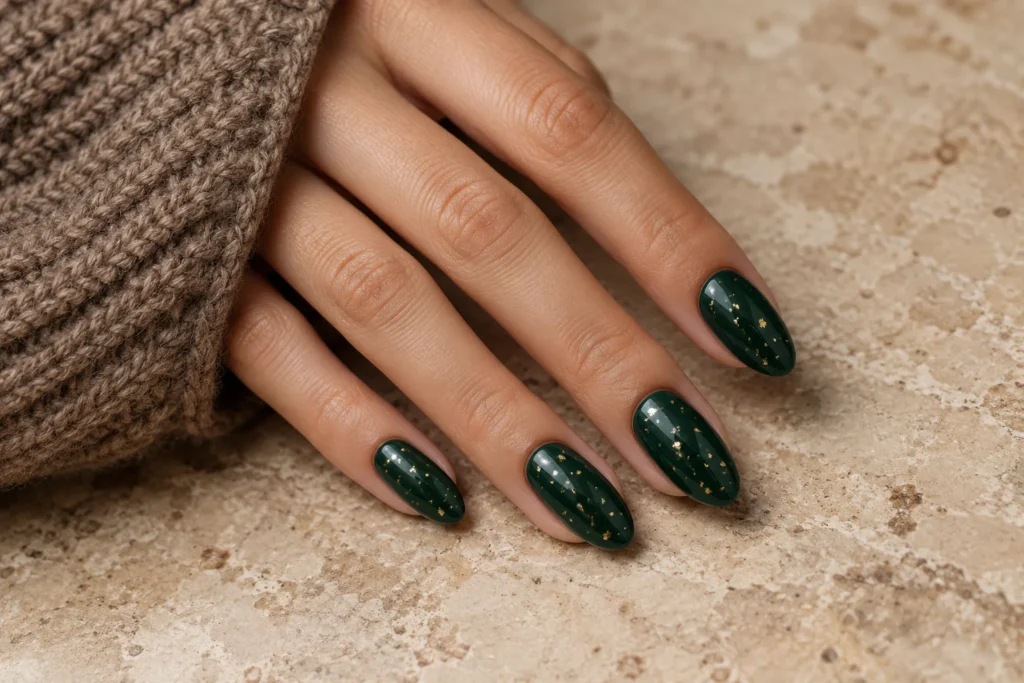
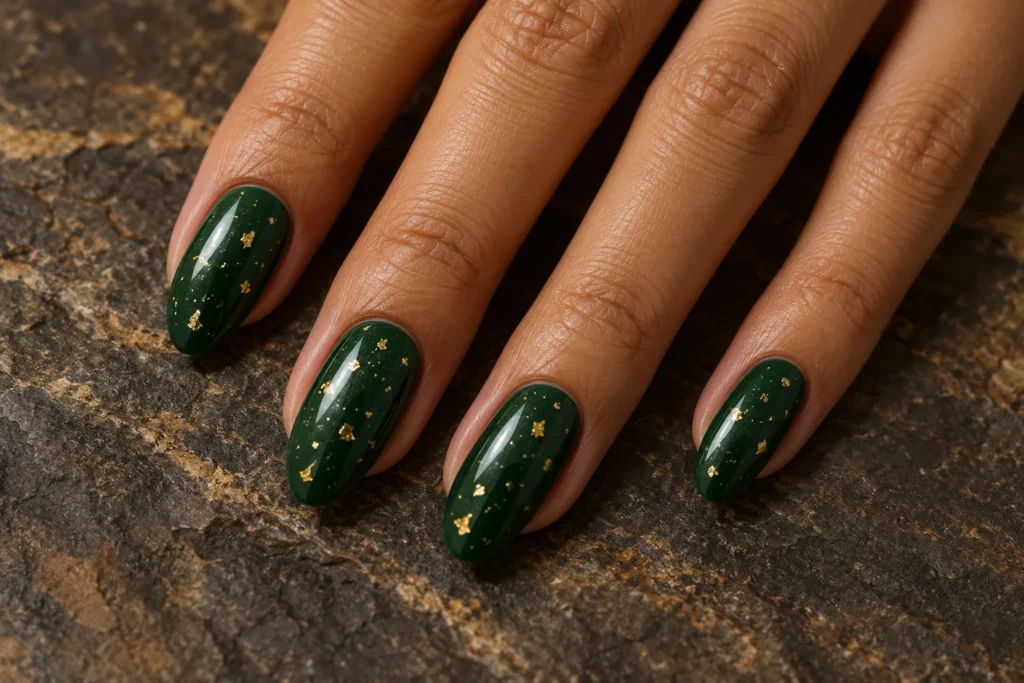
    Forest green and scattered gold flecks create a deeper autumn palette. Use the metallic pieces sparingly so the green remains dominant. Medium almond nails soften the dark colour, while a glossy finish connects the plain and decorated surfaces. More foil is not necessary to make the set feel special.

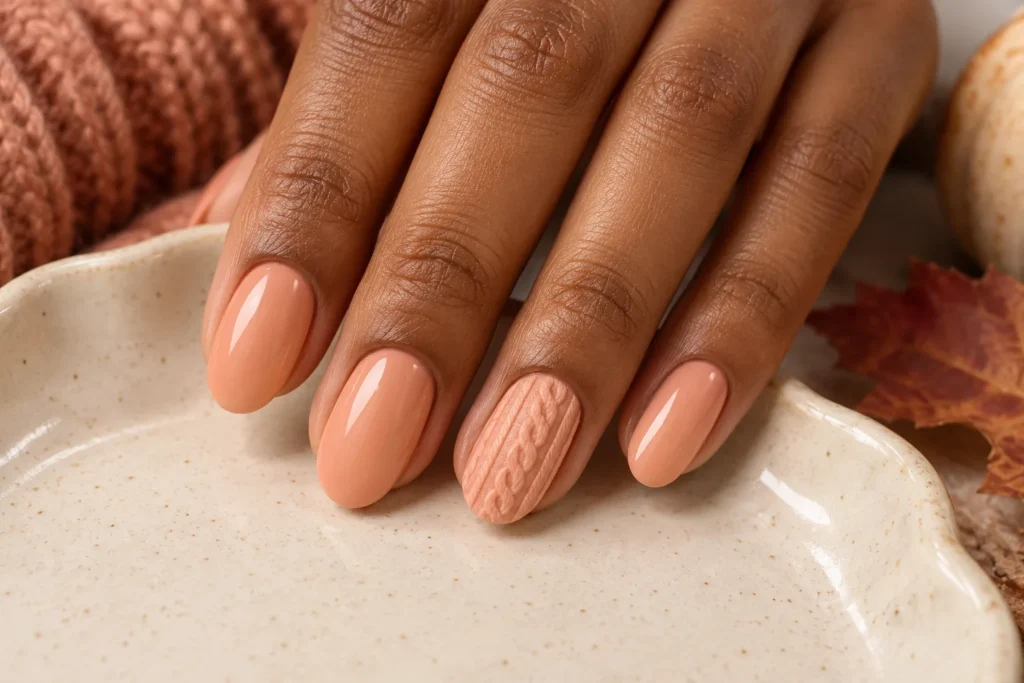
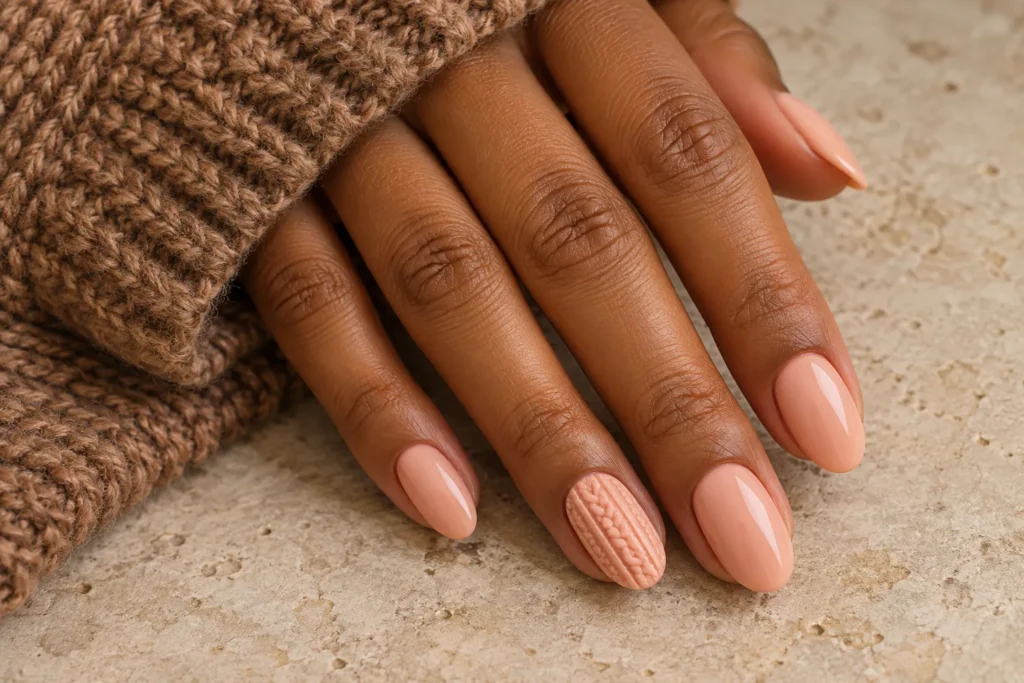
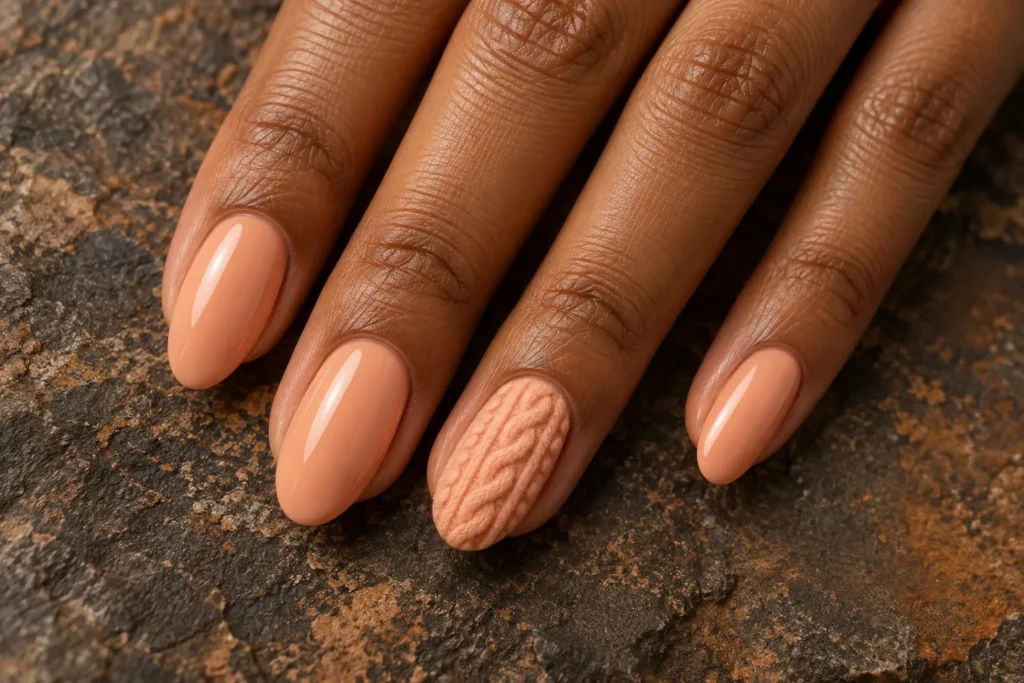
    17. Peach Sweater Texture

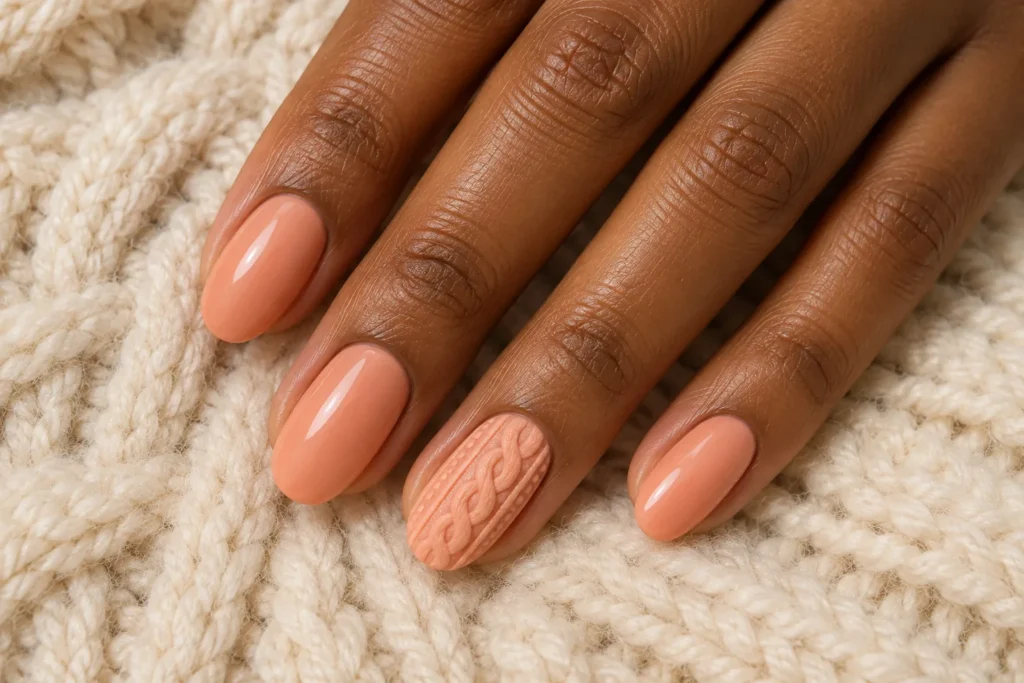
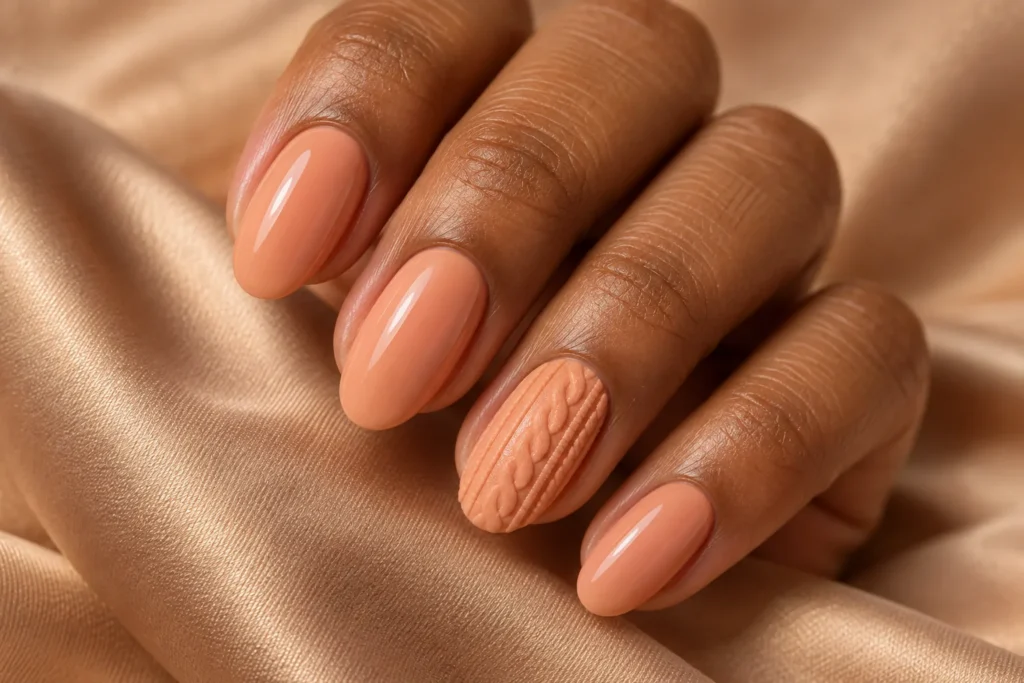
    A peach sweater accent introduces texture beside smooth plain nails. Fine cable-like lines work best on one selected nail, with the remaining nails repeating the same soft colour. Discuss the height of the raised detail with your nail artist so the finished design feels comfortable for your routine.

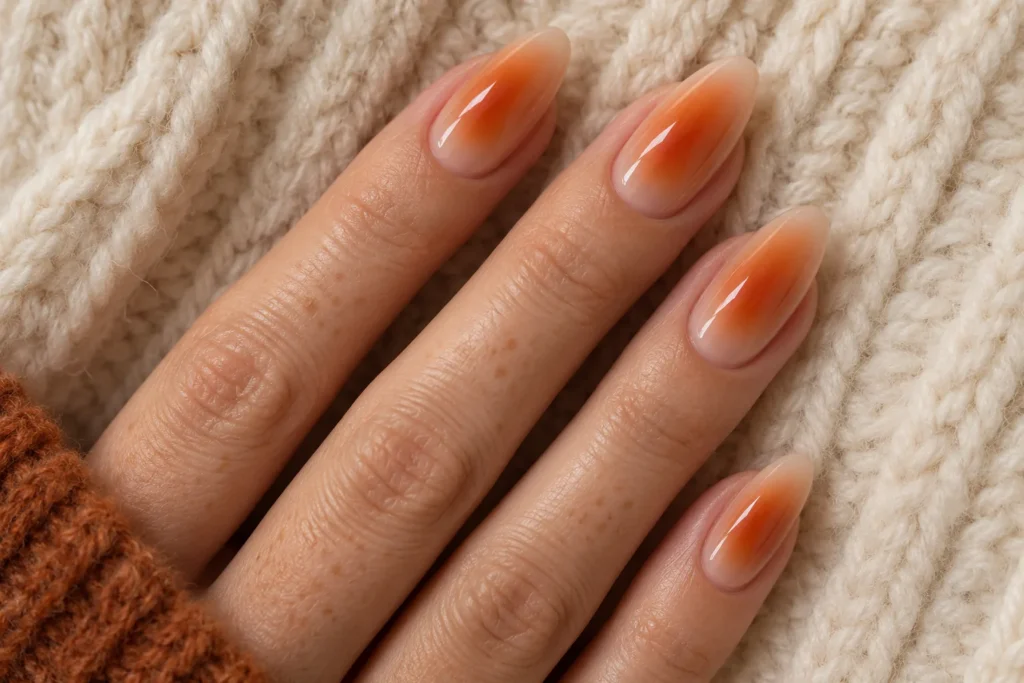
    18. Burnt Orange Aura Nails

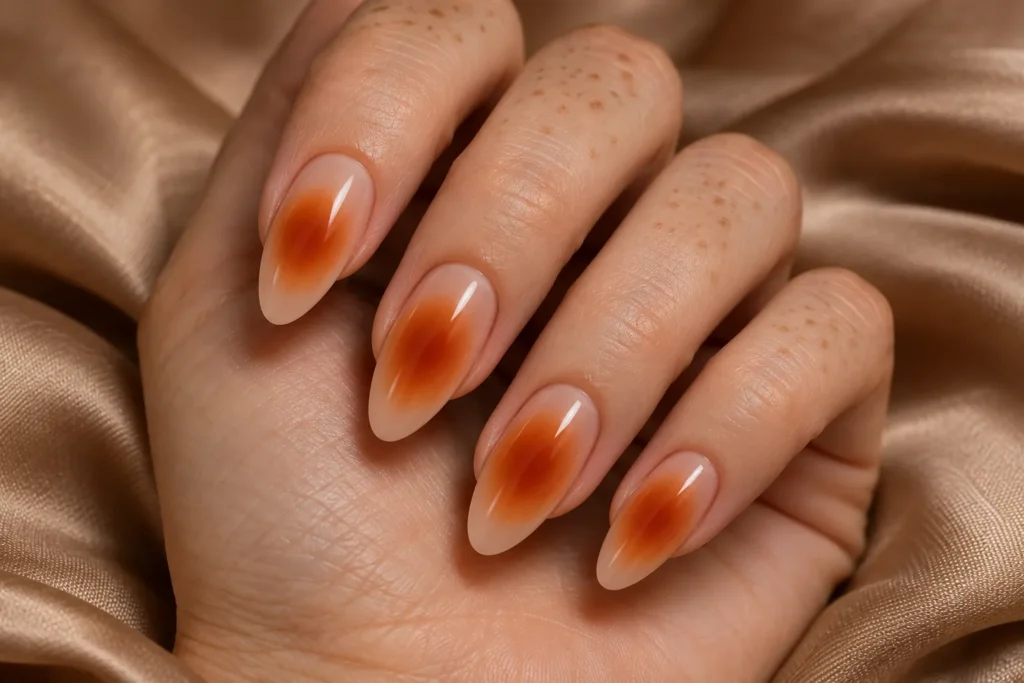
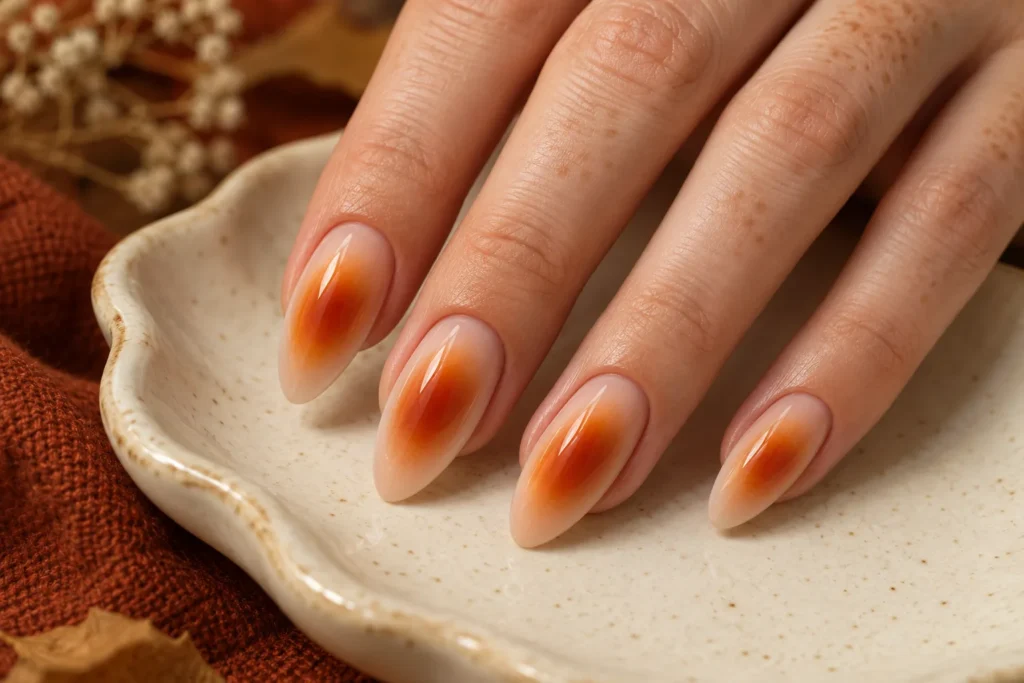
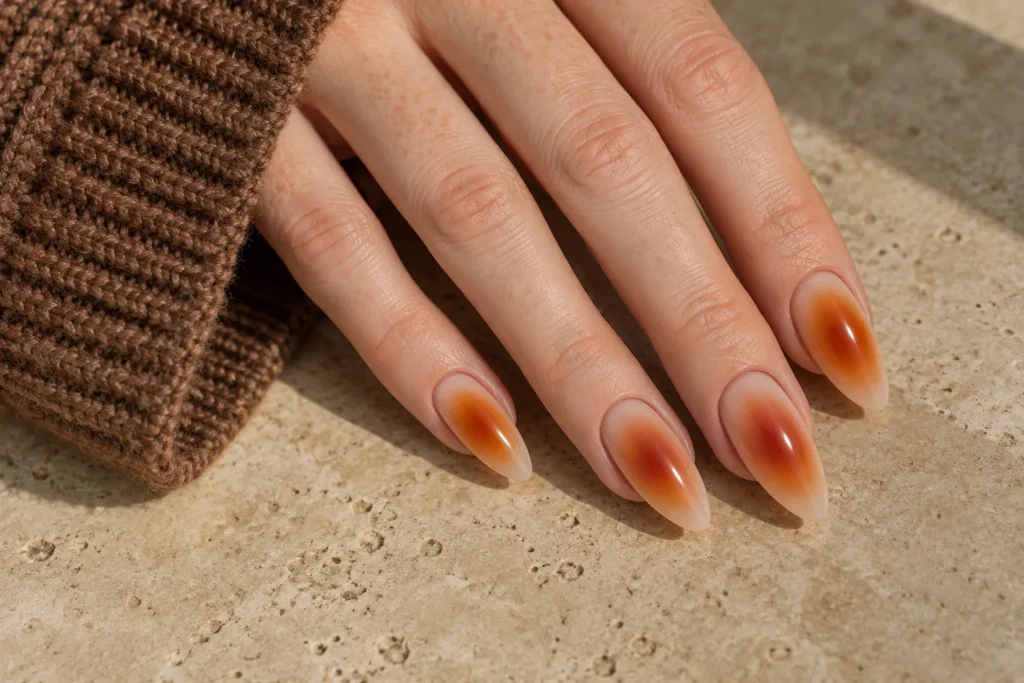
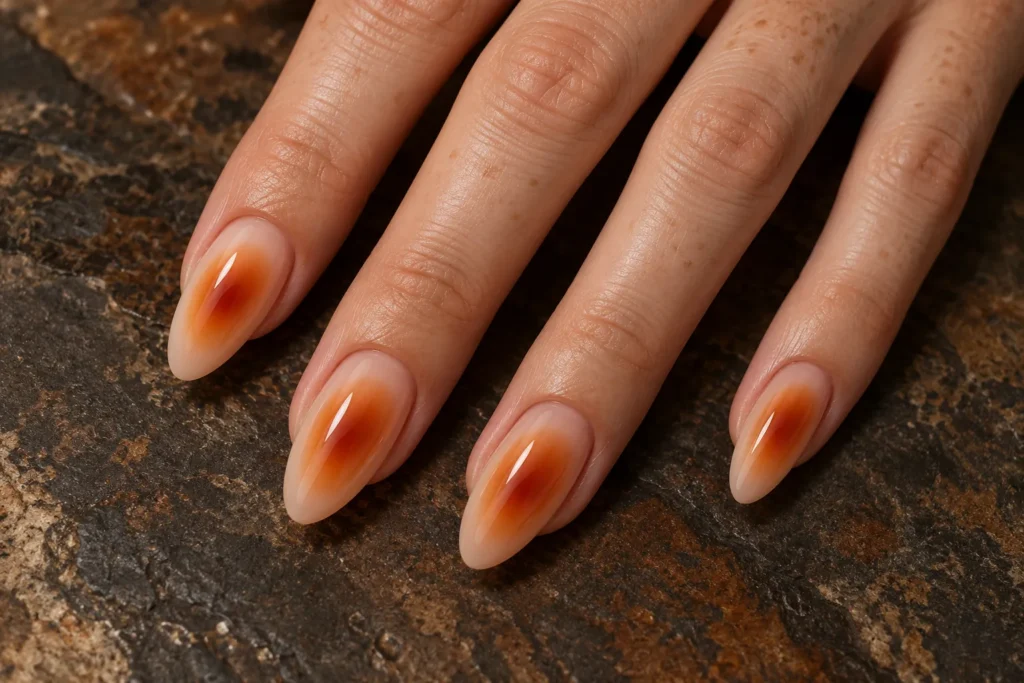
    Burnt-orange aura nails place a soft warm glow inside a nude background. The colour should fade gradually at the edges instead of forming a hard circle. Longer almond nails leave room for the gradient, but a smaller centred glow can adapt the same idea to a shorter manicure.

    19. Bronze Chrome Tips

    Bronze chrome tips add metallic shine while leaving most of the nail neutral. A narrow edge feels restrained; a wider tip makes the look more expressive. Keep the bronze consistent across the set and avoid adding large gems, since the reflective finish already provides a clear focal point.

    20. Maple Leaf Nude Nails

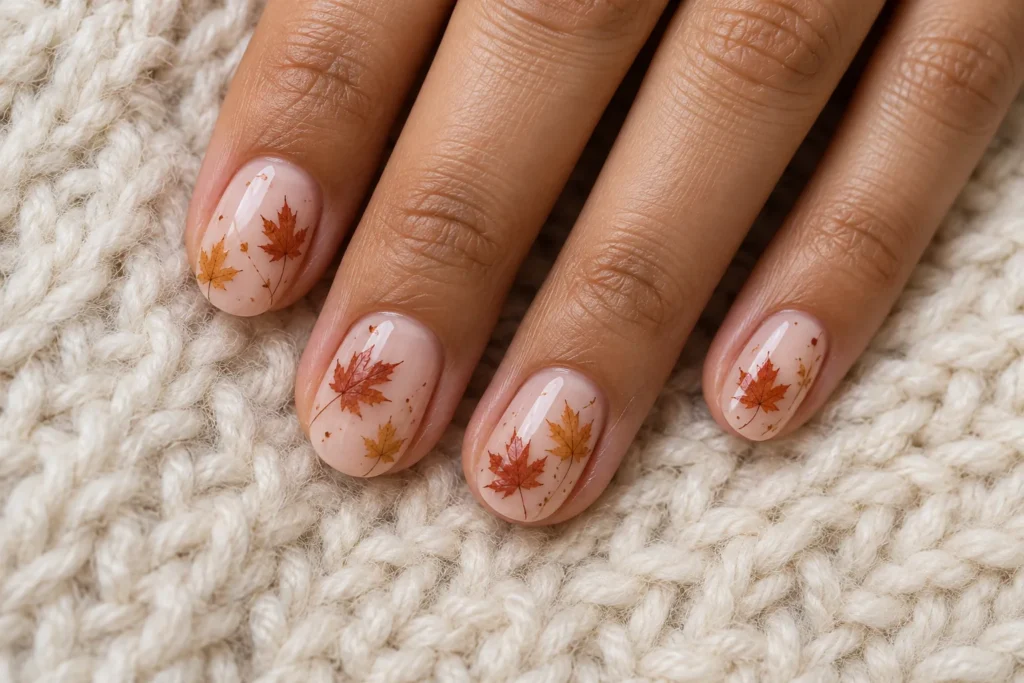
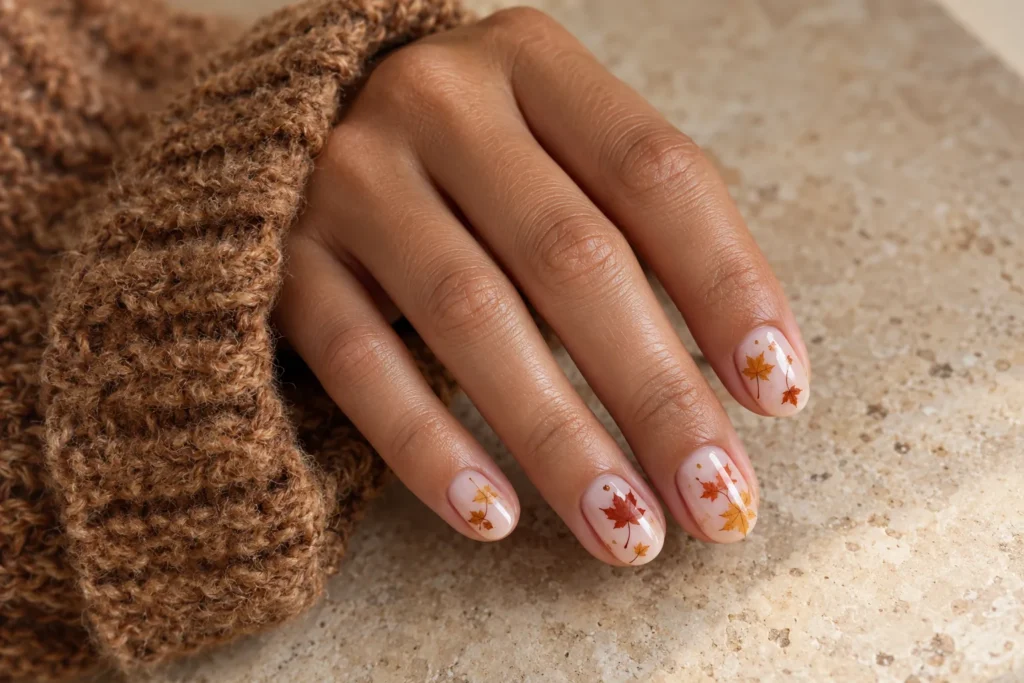
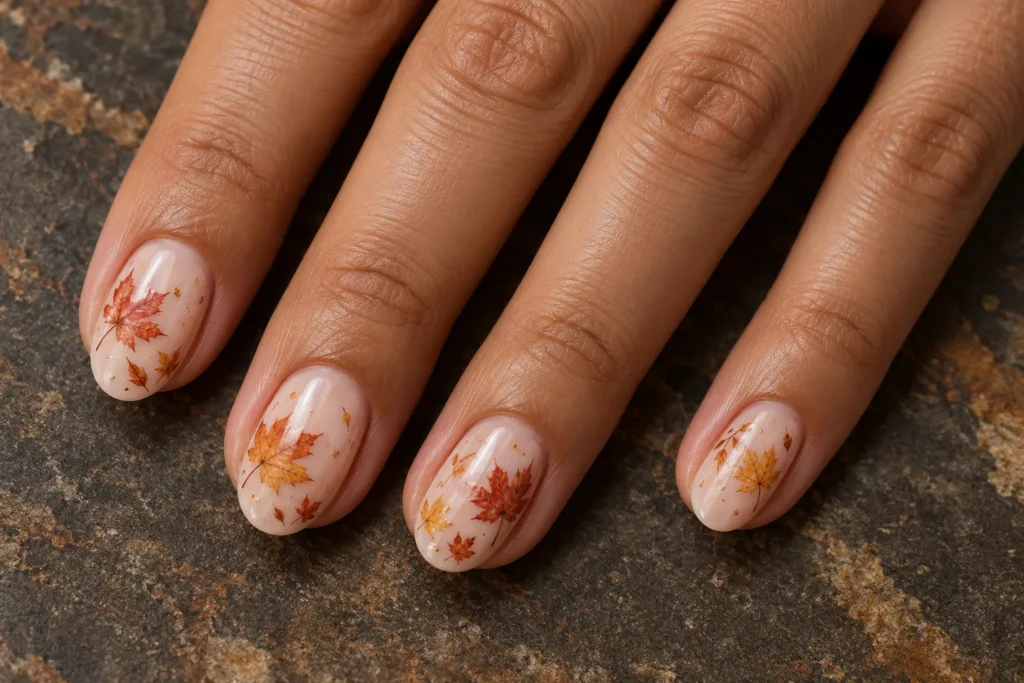
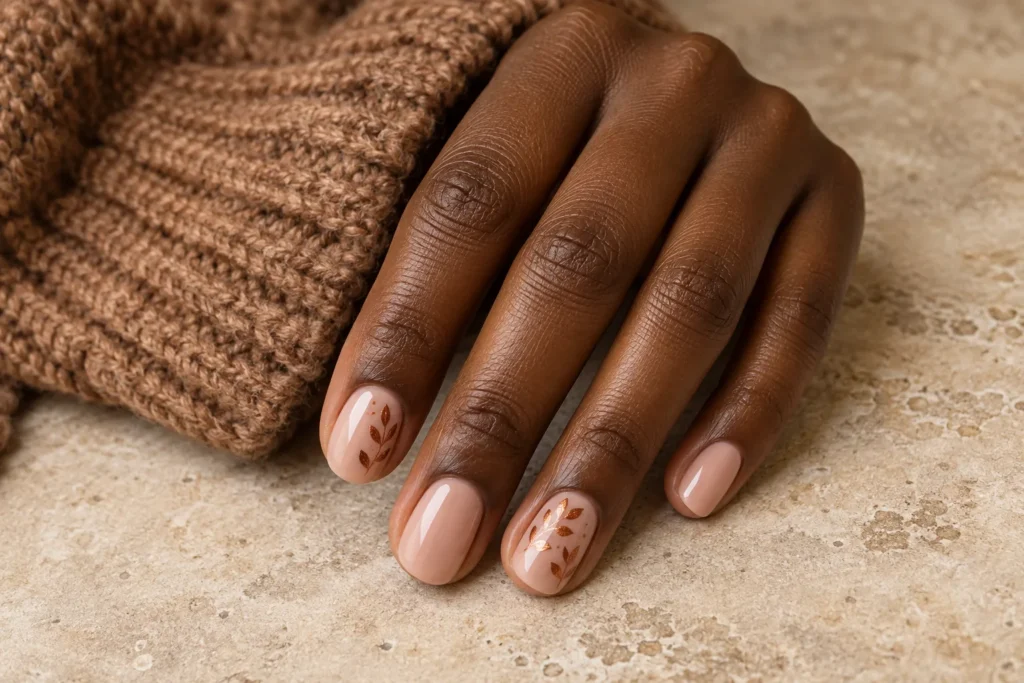
    Fine maple leaves in rust and ochre make a nude manicure feel seasonal. Use a small number of leaves with visible space around them rather than filling every nail. Short oval nails suit this delicate approach, and the warm colours can connect naturally with brown, camel and cream clothing.

    Simple Nails: Fall Colours With Less Detail

    If you prefer a quieter manicure, begin with olive micro tips, mushroom taupe or chocolate glaze. Keep one feature as the focal point and leave the rest considered. A plain seasonal shade can look just as intentional as an intricate pattern when the shape and finish are neat.

    Choosing Long Fall Nails or a Shorter Shape

    Long fall nails leave room for ombre, swirls and fine marble veins, but extra length is a personal preference. Shorter nails can support plaid accents, tiny leaves and half-moons when the artwork is scaled down. Choose the outline first, then adjust the design instead of forcing too much detail into a small surface.

    What to Discuss Before Choosing Gel Fall Nails

    Show your nail artist the finish you want, whether it is jelly, chrome or a velvet effect. Ask how they would adapt the design and maintain it between appointments. Gel fall nails describe a product choice, not one particular pattern; discuss suitable application and removal with a qualified professional.

    Build a Coordinated Autumn Look

    Warm brown and copper nails pair easily with cardigan and jeans outfits, while wine-red shades complement burgundy styling. Save a few favourite designs, compare their patterns and choose the details that feel most like your personal style.

    Your Manicure Checklist

    • Choose a nail length that suits your daily routine.
    • Keep intricate artwork on selected accent nails.
    • Compare colours beside the clothes you wear most.
    • Take your favourite reference images to your appointment.

    For more pattern inspiration, explore our geometric nail art and 3D flower nail art guides.

  • Geometric Nail Art: 14 Fresh Patterns to Try

    Geometric Nail Art: 14 Fresh Patterns to Try

    Geometric nail art uses lines, blocks, curves and clear space to give a manicure its character. You can choose a bold checkerboard or keep things quiet with one dot and a fine stripe. The key is to decide which shape should lead, then give it enough room to be seen.

    These fourteen nail art ideas explore different patterns rather than repeating one flower design in new colours. Every image is an original AI-generated design illustration created for Haya Glam. They show visual concepts to discuss with your nail artist; the final manicure will depend on your nail shape and their technique.

    Use the colour palettes as starting points. You may prefer shorter nails, a smaller accent or a shade that matches your everyday wardrobe. Keep the main pattern recognisable, then adjust its scale so the finished set feels comfortable and personal.

    1. Pink Micro Checkerboard

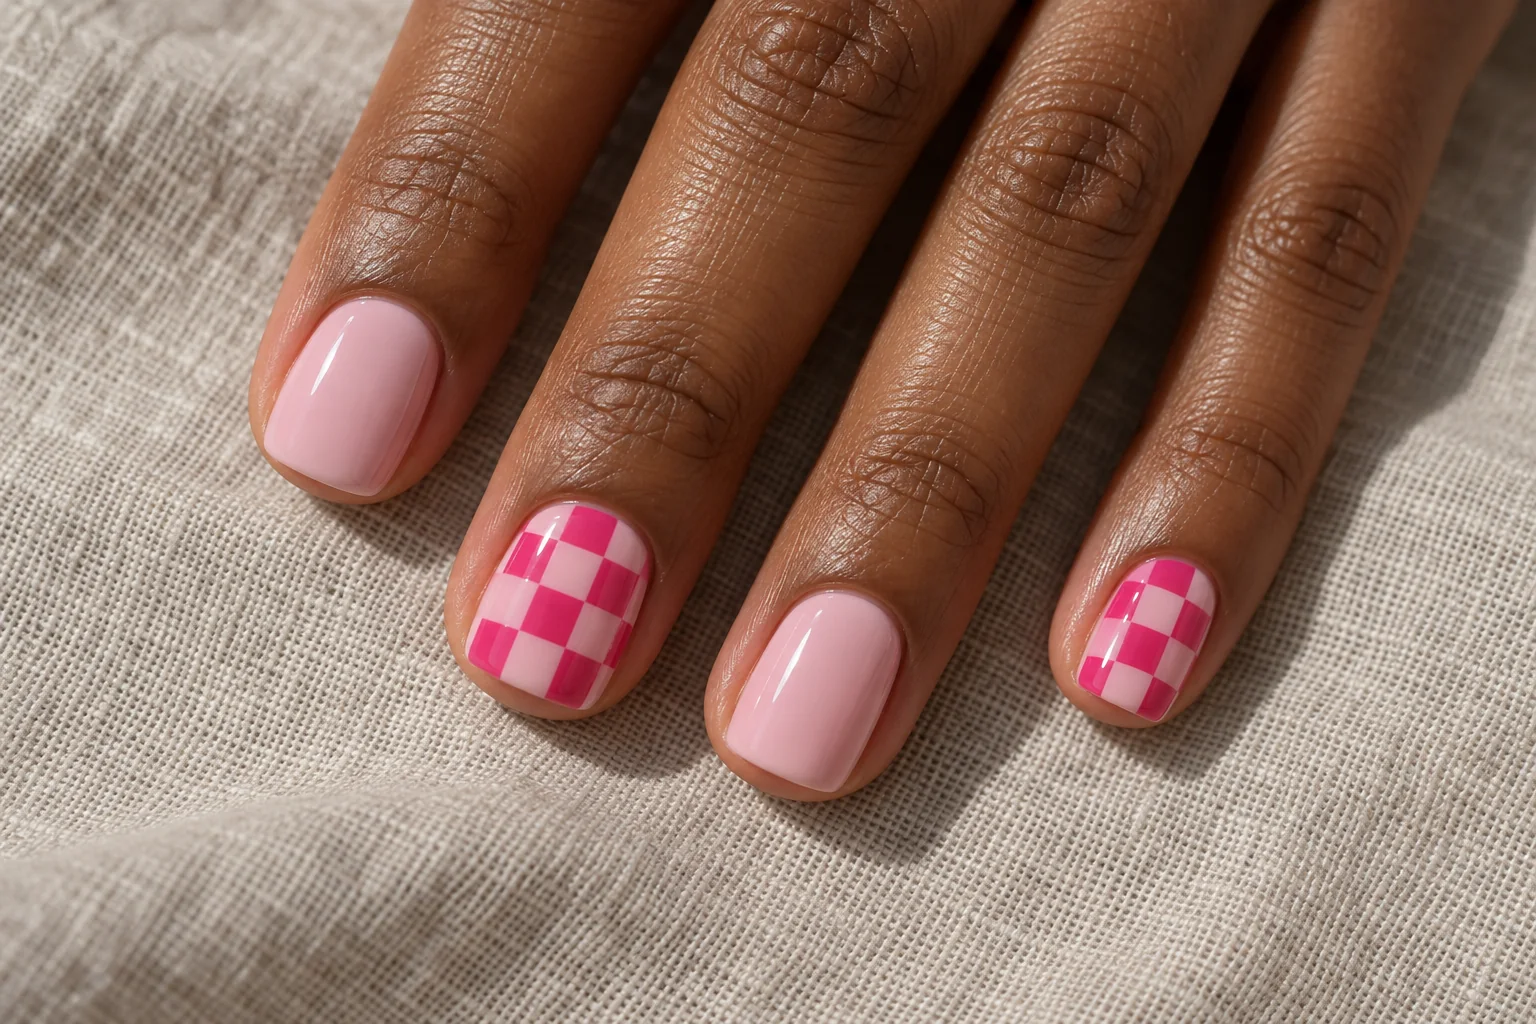
    Pink Micro Checkerboard geometric nail art design

    A tiny checkerboard turns pink polish into a graphic pattern. The mix of hot pink and pale pink gives the squares enough contrast without making the manicure feel heavy. Keep the checks on two accent nails, with plain pink beside them, so the pattern has a clear place to stand out.

    Small Checks, Strong Colour

    Short square nails suit this idea because the straight tip echoes the grid. Ask for small, evenly spaced squares rather than an oversized board covering every finger. A sheer base around the checks can soften the finish and keep the design from looking like a printed sticker.

    2. Terracotta Colour Blocks

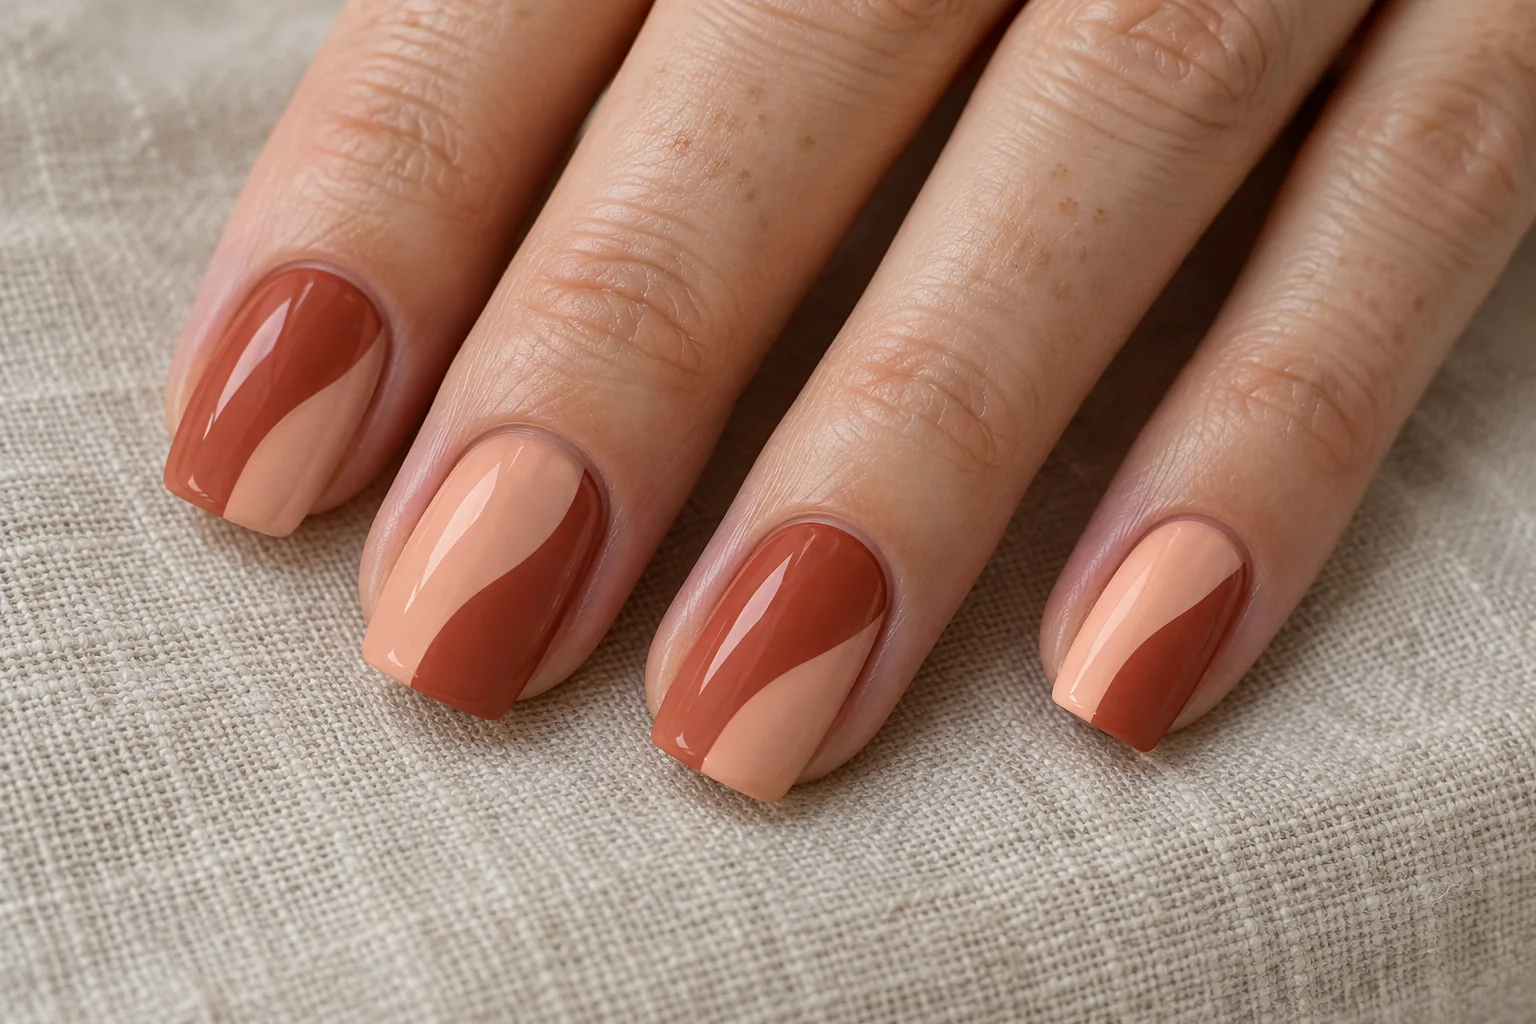
    Terracotta Colour Blocks geometric nail art design

    Terracotta, cream and dusty peach create an earthy colour-block manicure. The interest comes from the boundaries: a wide cream section on one nail, a smaller terracotta corner on the next. The colours belong together, while the shapes prevent the set from feeling repetitive.

    Warm Blocks With Uneven Borders

    Squoval nails offer enough space for the blocks without requiring much length. Choose two or three shades and keep the edges deliberate. If every nail contains too many tiny sections, the simple graphic effect can disappear. A clear glossy finish helps the different colours feel like one coordinated set.

    3. Navy Diagonal French Tips

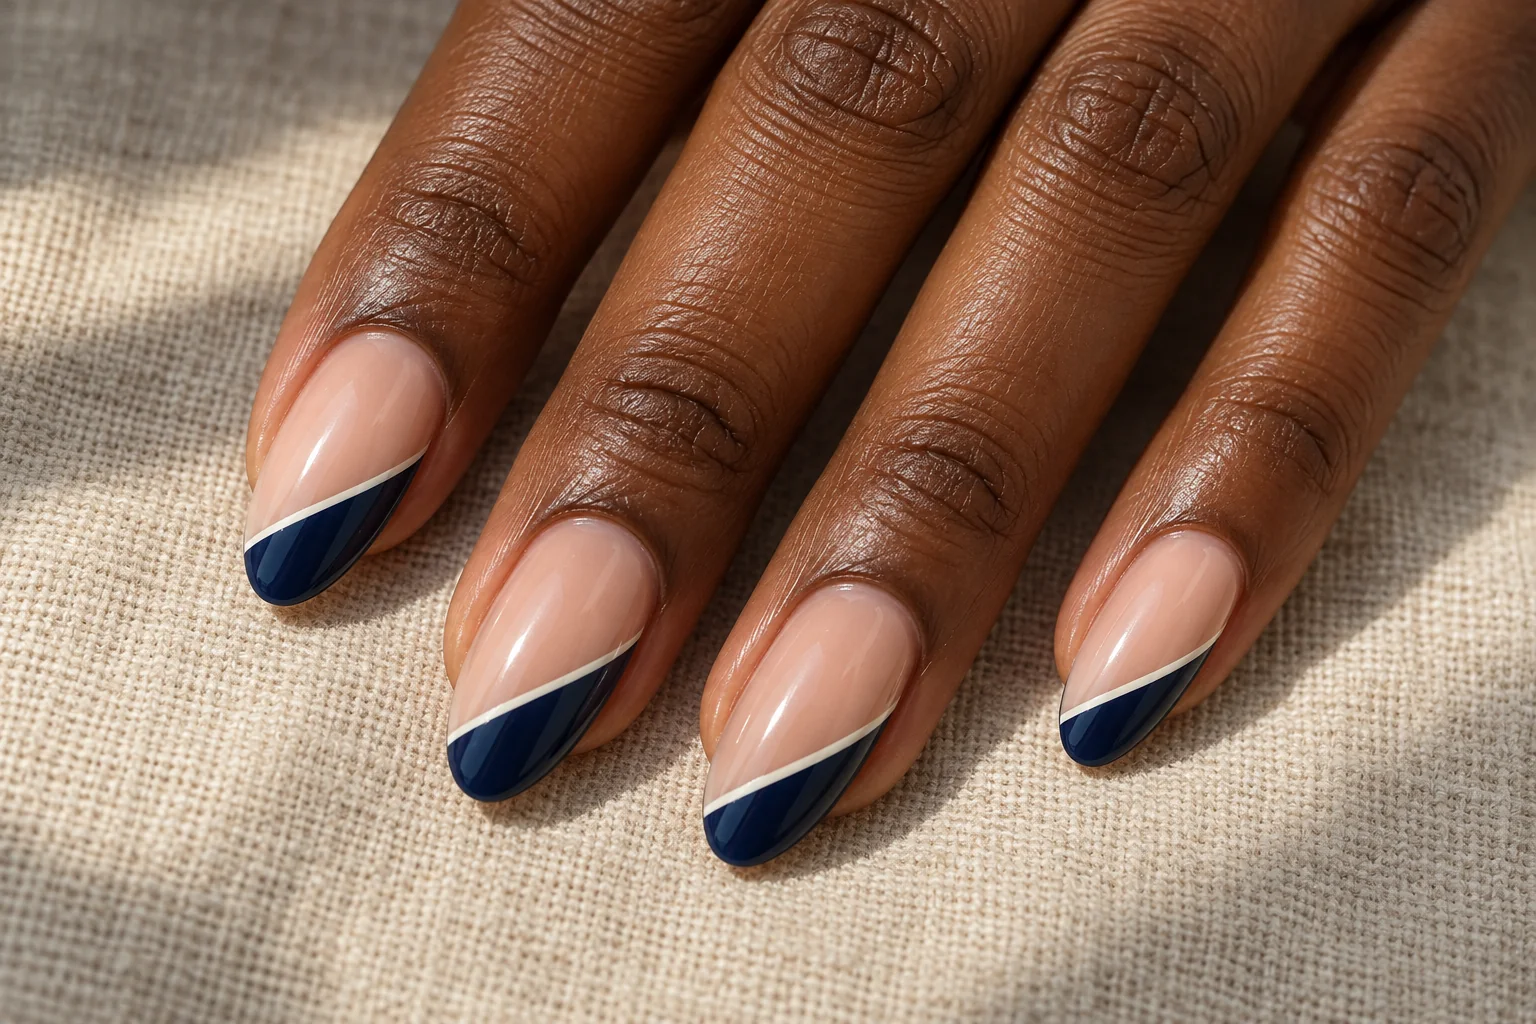
    Navy Diagonal French Tips geometric nail art design

    A diagonal navy tip changes the familiar French manicure by moving its border away from a soft curve. The nude base leaves the slanted shape clearly visible. A narrow ivory line alongside the navy adds definition without becoming another competing pattern.

    A Sharper Take on French Tips

    Medium almond nails make the diagonal feel elegant, although the idea can work on a shorter shape with a smaller painted tip. Keep the slope similar across the set. The line should follow the navy border cleanly, rather than wandering into the bare centre of the nail.

    4. Sage Half-Moon Nails

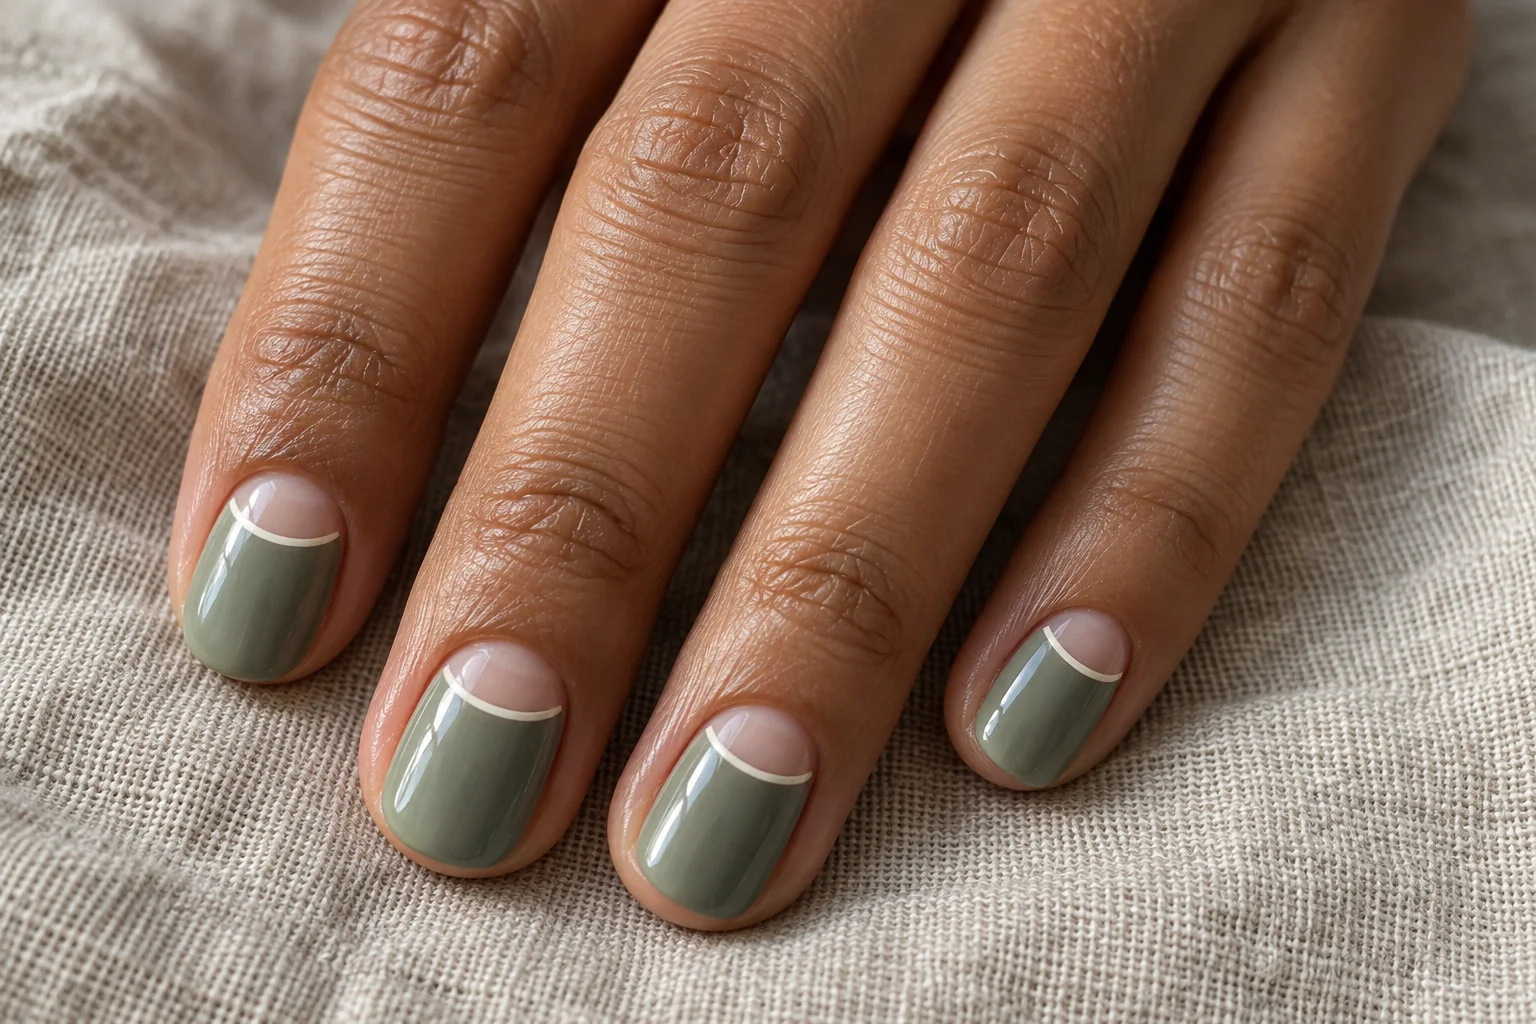
    Sage Half-Moon Nails geometric nail art design

    Sage half-moon nails leave a nude semicircle near the cuticle and colour the rest of the nail green. A fine ivory outline makes the curve feel intentional. Unlike a French tip, the focal point sits at the base, giving the manicure a different visual balance.

    Show the Natural Crescent

    Short rounded nails complement the curved detail. Ask for a consistent crescent size across the fingers, adjusted slightly for nail width. Leave enough nude space to recognise the half-moon. A tiny cuticle gap alone will not create the same effect, especially with a soft sage shade.

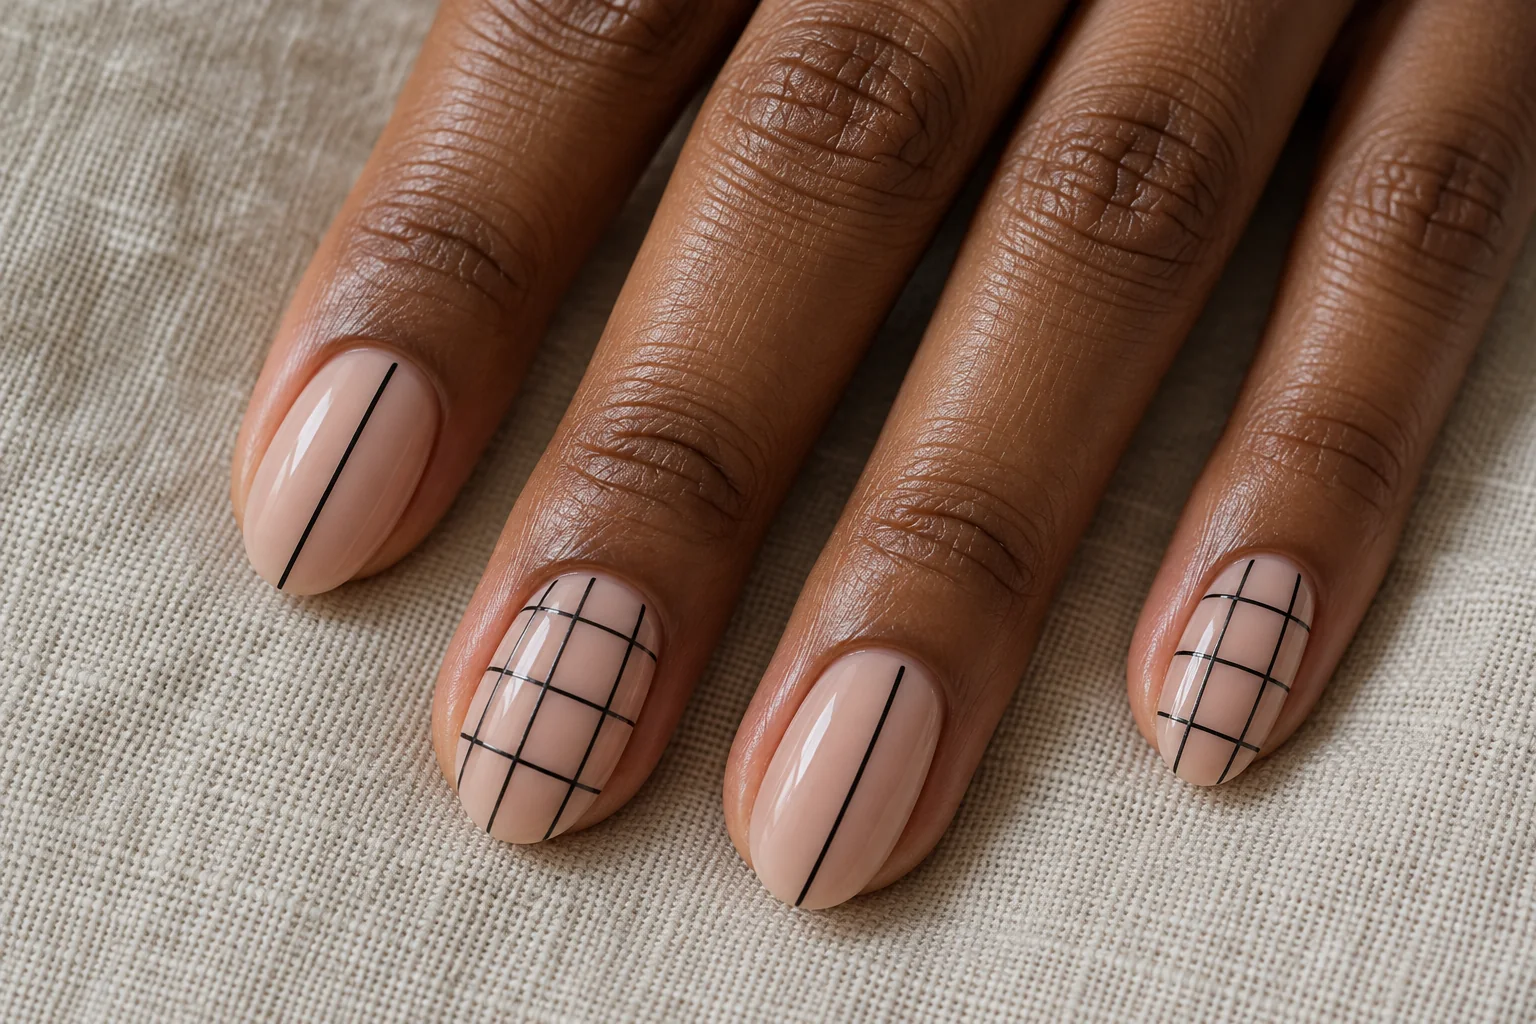
    5. Fine Black Grid

    Fine Black Grid geometric nail art design

    Black grid lines on sheer nude polish make a graphic accent without covering the nail in solid colour. Two patterned nails are enough to establish the idea. A single black stripe on the remaining nails repeats the colour while keeping the overall set open.

    Let a Fine Grid Stay Light

    The spacing matters as much as the line thickness. Wider rectangles feel calmer; tightly packed squares look busier. Choose a fine line that is still visible at normal viewing distance. Avoid adding extra dots or glitter inside every cell, since the grid already provides the main decoration.

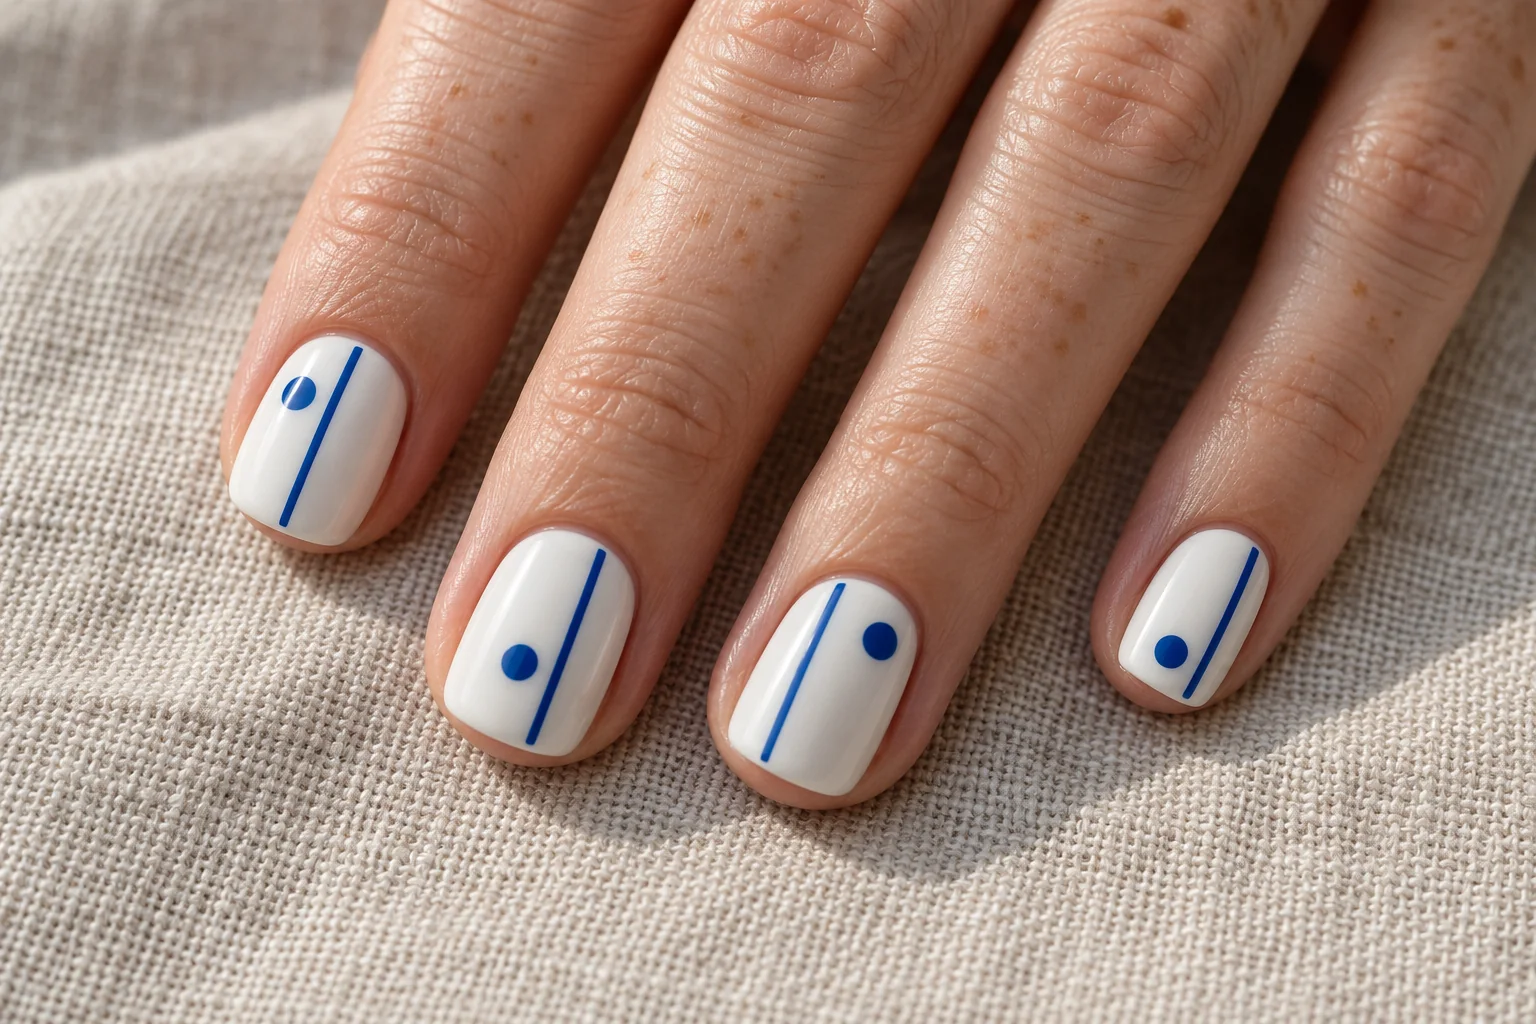
    6. Cobalt Dot and Line

    Cobalt Dot and Line geometric nail art design

    Cobalt blue looks fresh against a clean white base. A single dot and one slim line create a compact design with a clear focal point. Moving the dot slightly from nail to nail gives the set variety while preserving the same simple visual language.

    One Dot, One Line

    Short squoval nails make this pattern easy to read. Keep the dot separate from the line instead of joining them into an accidental symbol. The blue does not need to cover much surface to make an impression. Its strong contrast with white supplies the impact.

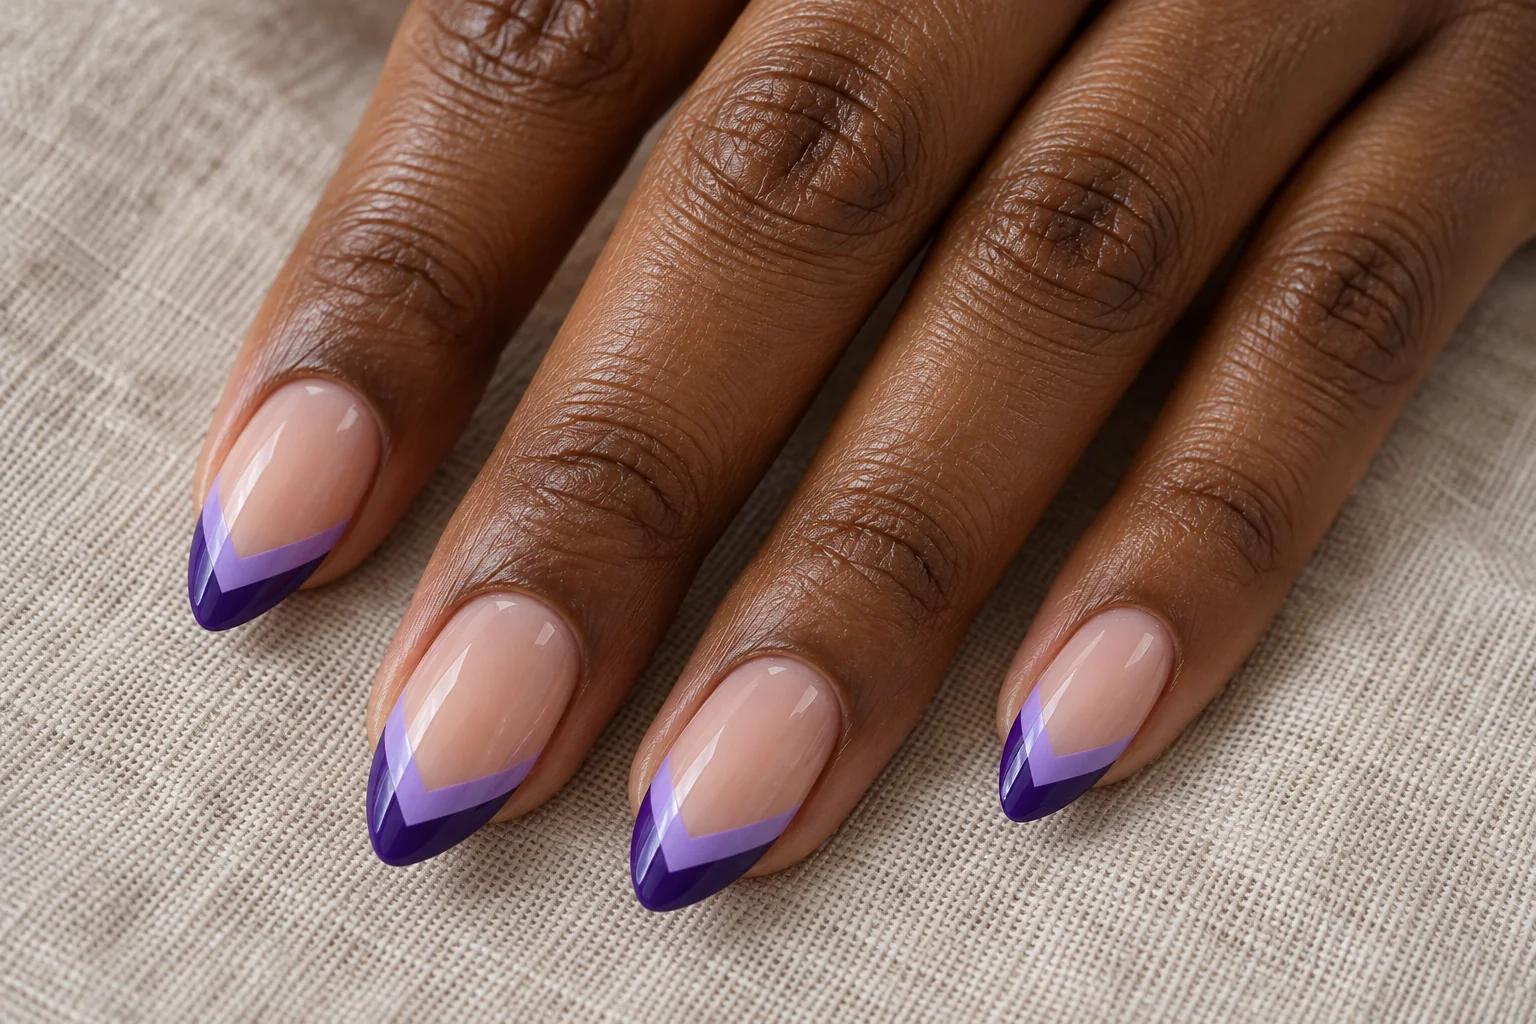
    7. Lilac Chevron Tips

    Lilac Chevron Tips geometric nail art design

    Lilac chevron tips replace the rounded French border with a pointed V. A second purple edge gives the tip more depth without adding raised decoration. The nude base keeps the shapes crisp and makes the two shades easier to distinguish.

    Use Two V-Shaped Edges

    Almond nails naturally support the pointed design, but the chevrons should not extend too far toward the cuticle. Leave a generous clear centre. Ask for the V to meet neatly near the middle of each tip, with similar line widths on both sides for a balanced finish.

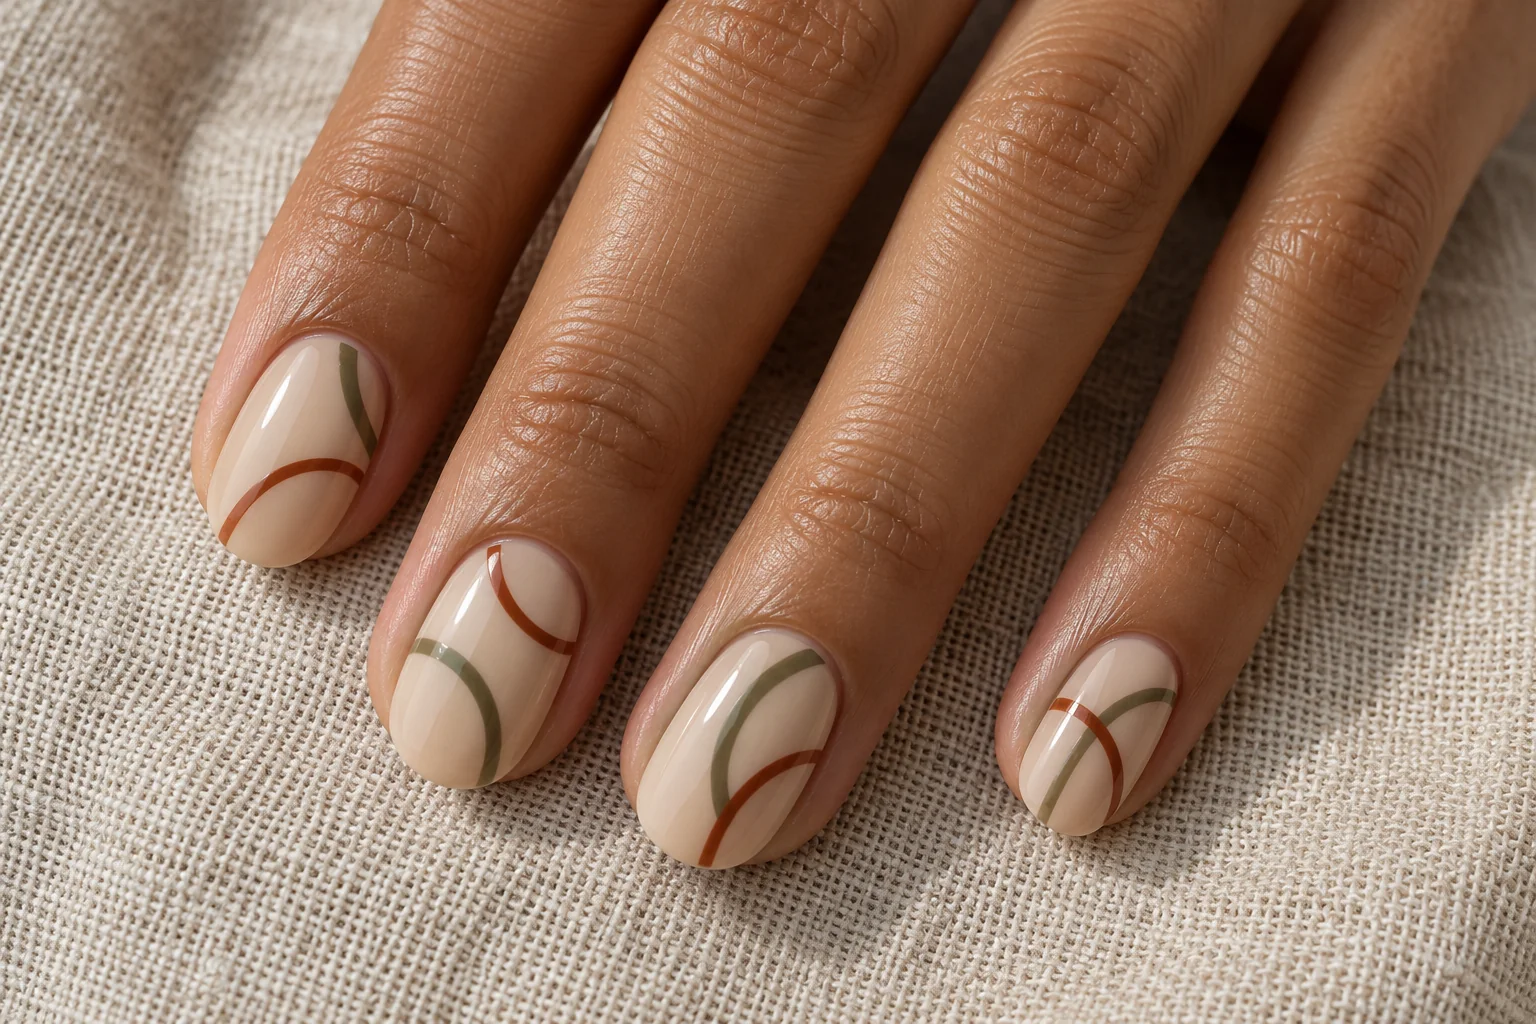
    8. Olive Abstract Arches

    Olive Abstract Arches geometric nail art design

    Olive and rust arches bring a softer geometry to a beige manicure. Their curved lines can overlap or sit at different heights, creating movement without using floral motifs. The warm background connects the colours and leaves room for the arches to stay visible.

    Curves That Move Across the Set

    Rounded nails suit this relaxed pattern. Keep the lines thin and let some curves continue beyond the nail edge rather than squeezing every arch into a complete shape. Different placements work well here, provided the colour palette and brush thickness remain consistent across the manicure.

    9. Silver Triangle Accent

    Silver Triangle Accent geometric nail art design

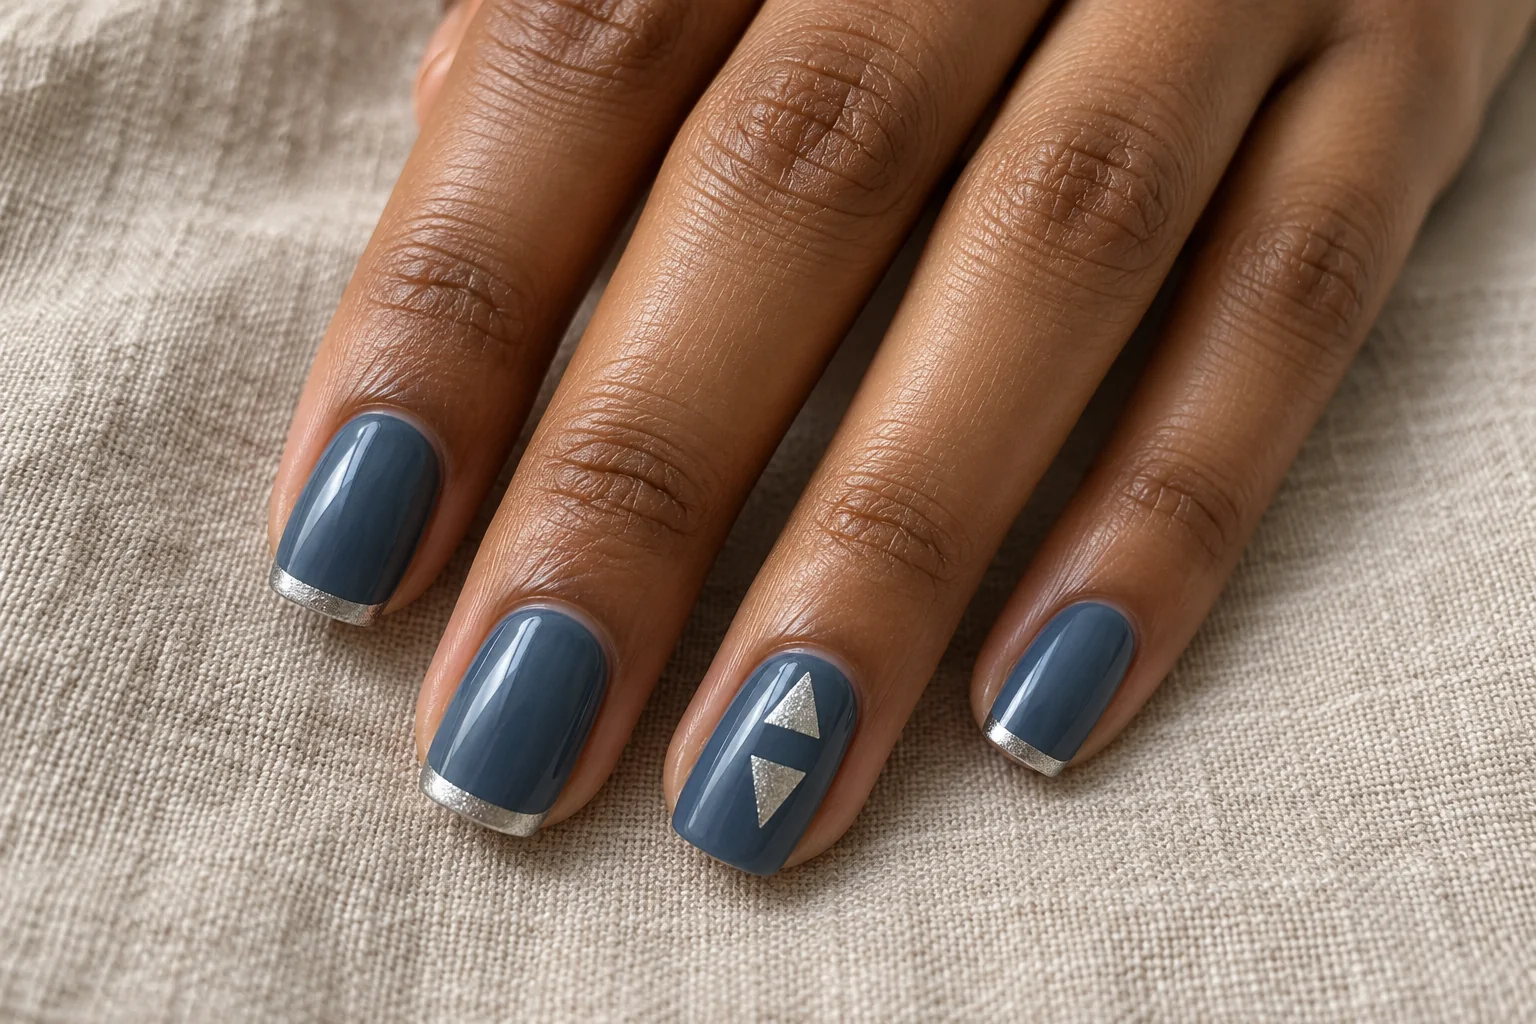
    Silver triangles add a focused metallic detail to slate-blue nails. Their straight sides contrast with the softer nail outline. Place the triangles on one accent nail and use a narrow silver tip elsewhere, rather than covering every finger with a repeated metallic badge.

    A Small Metallic Shape

    The triangles should have enough space around them to read as separate shapes. Two small pieces can be more effective than one large panel. A squoval shape provides a useful background for the angular detail. Keep the silver restrained so it complements the blue instead of hiding it.

    10. Red Split-Tone Nails

    Red Split-Tone Nails geometric nail art design

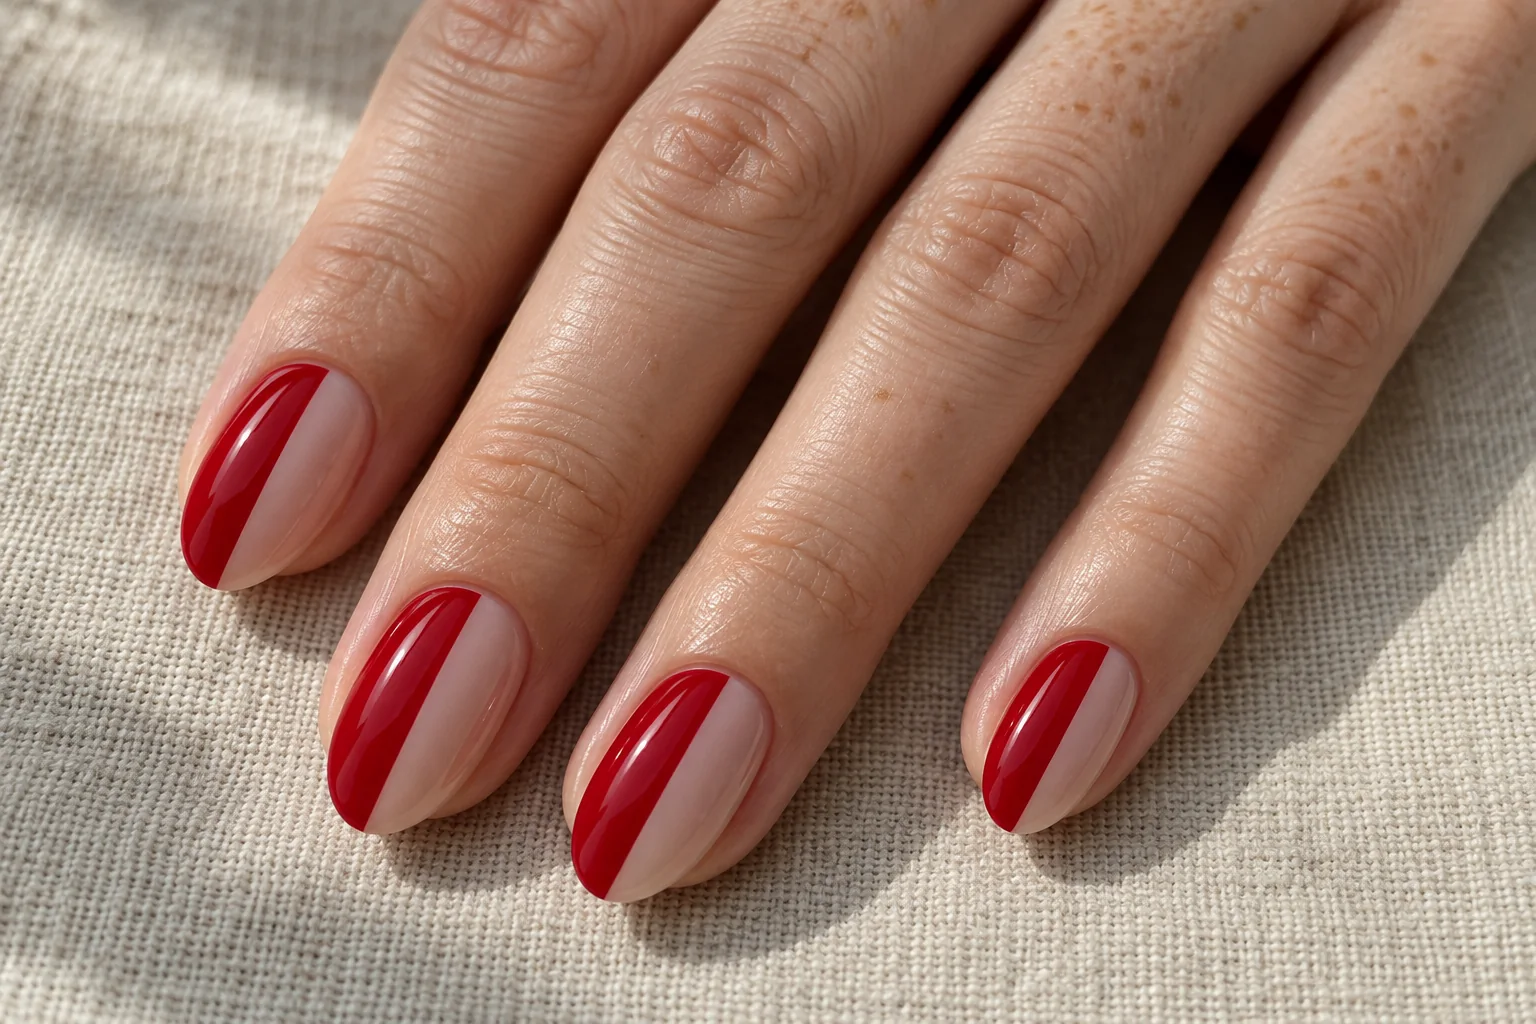
    A cherry-red section beside sheer nude polish creates a bold split-tone manicure. The straight lengthwise boundary becomes the design, so there is no need for flowers, gems or extra outlines. Red supplies the colour; the clear portion supplies the breathing room.

    Divide the Nail Into Two Stories

    Oval nails soften the strong division. You can place the red on the same side of every nail or alternate sides for a more playful arrangement. Keep the boundary clean and the nude portion wide enough to remain visible. A very narrow clear strip changes the effect into a stripe.

    11. Peach Concentric Circles

    Peach Concentric Circles geometric nail art design

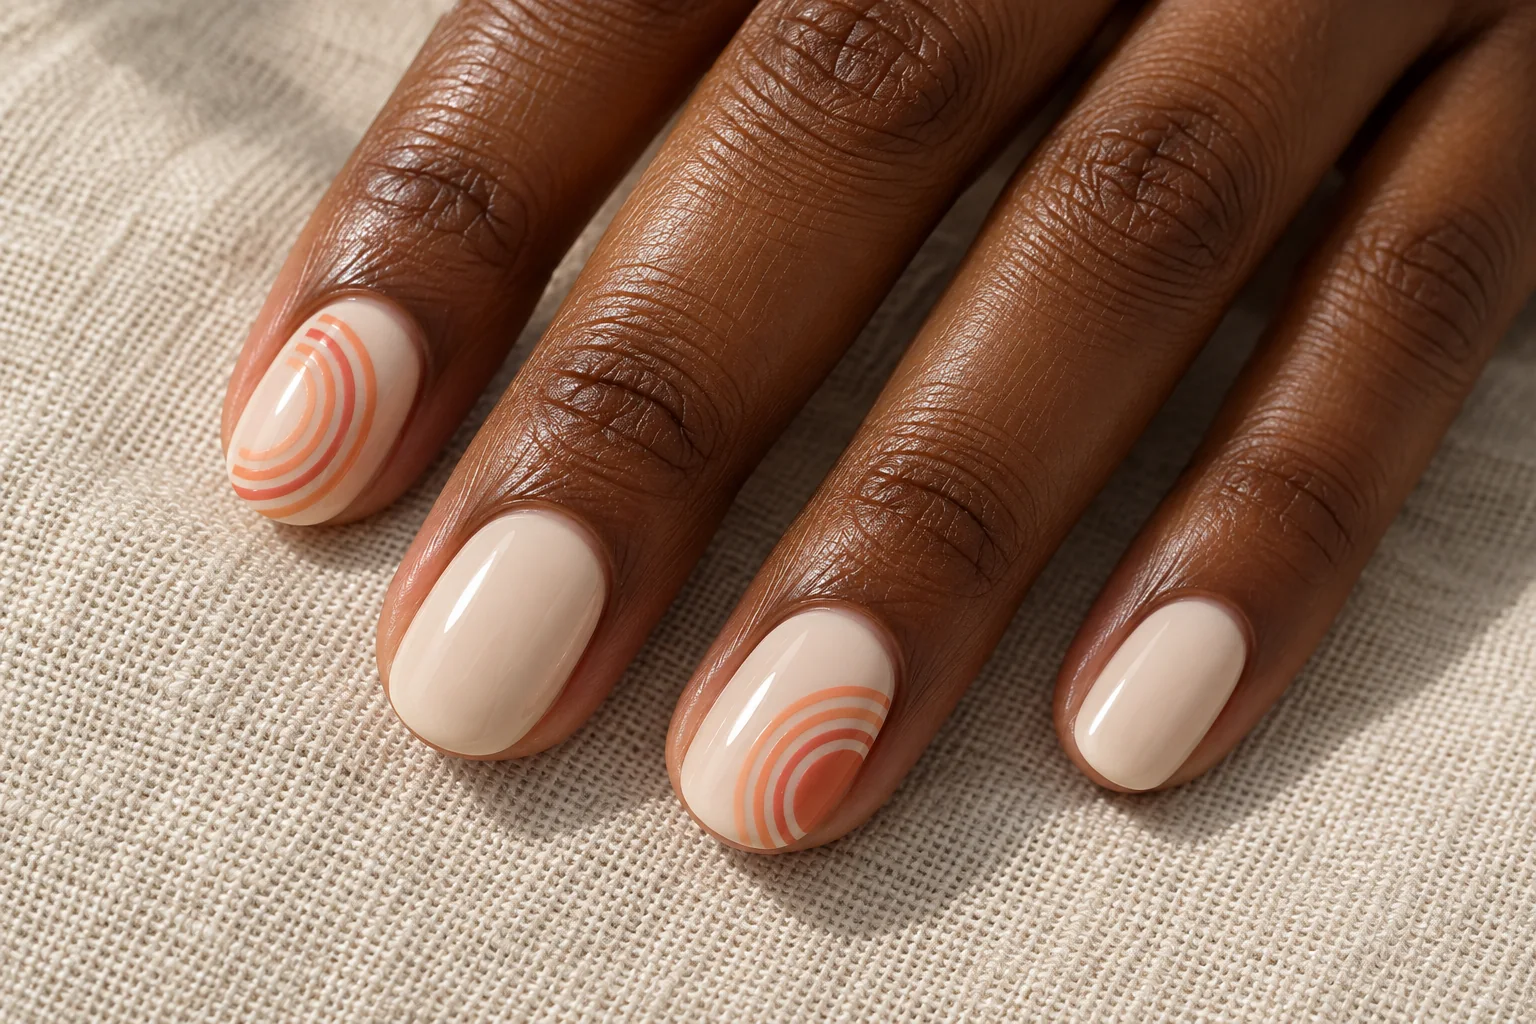
    Peach and coral rings on cream polish create a gentler graphic design. Concentric circles give the accent nail a clear centre without filling it with a solid spot. The warm tones remain subtle, but the repeated outline makes the pattern recognisable.

    Circular Details With Room Around Them

    Short oval nails work well with these rounded shapes. Keep the circles on selected nails and use plain cream beside them. The rings need visible space between their edges. If they are painted too close together, they can merge into a thick patch rather than a light circular pattern.

    12. Teal Zigzag Edge

    Teal Zigzag Edge geometric nail art design

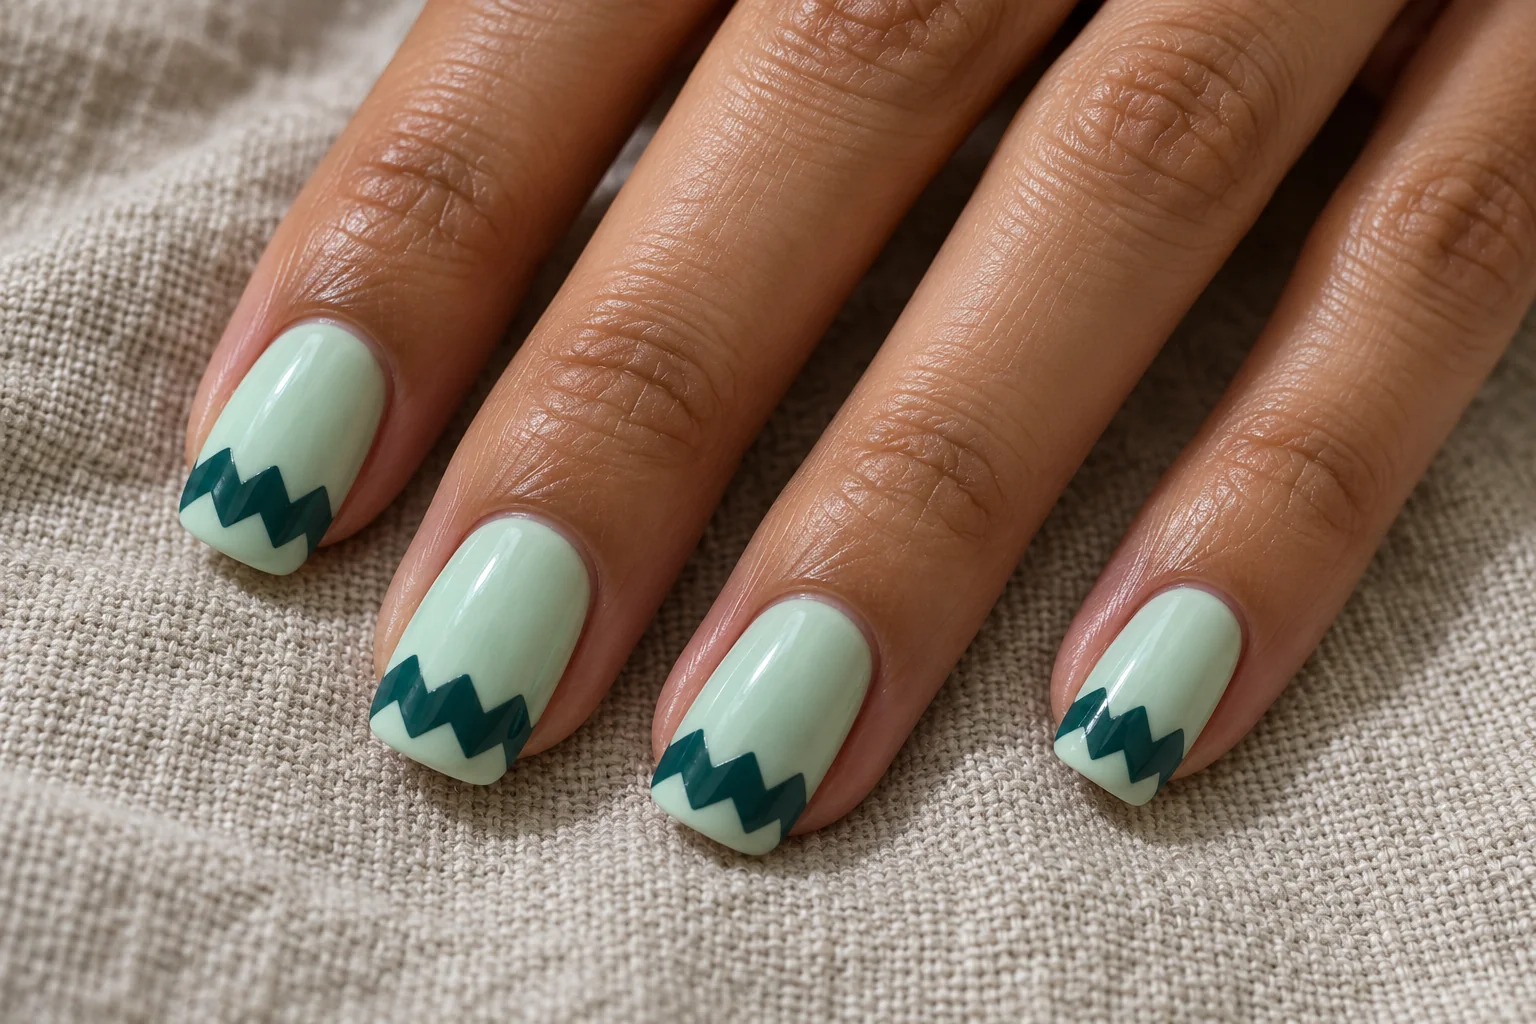
    A dark teal zigzag band brings a sharper edge to pale mint nails. The pattern sits near the tip, leaving the rest of the nail simple. Its repeated peaks create movement while the limited palette keeps the manicure coordinated.

    A Zigzag Instead of a Straight Tip

    Square nails give the zigzag a clear horizontal setting. Ask for similar peak heights and a narrow band rather than a large sawtooth shape covering half the nail. Keep other decoration minimal. The contrast between mint and teal already makes the edges visible without extra metallic outlines.

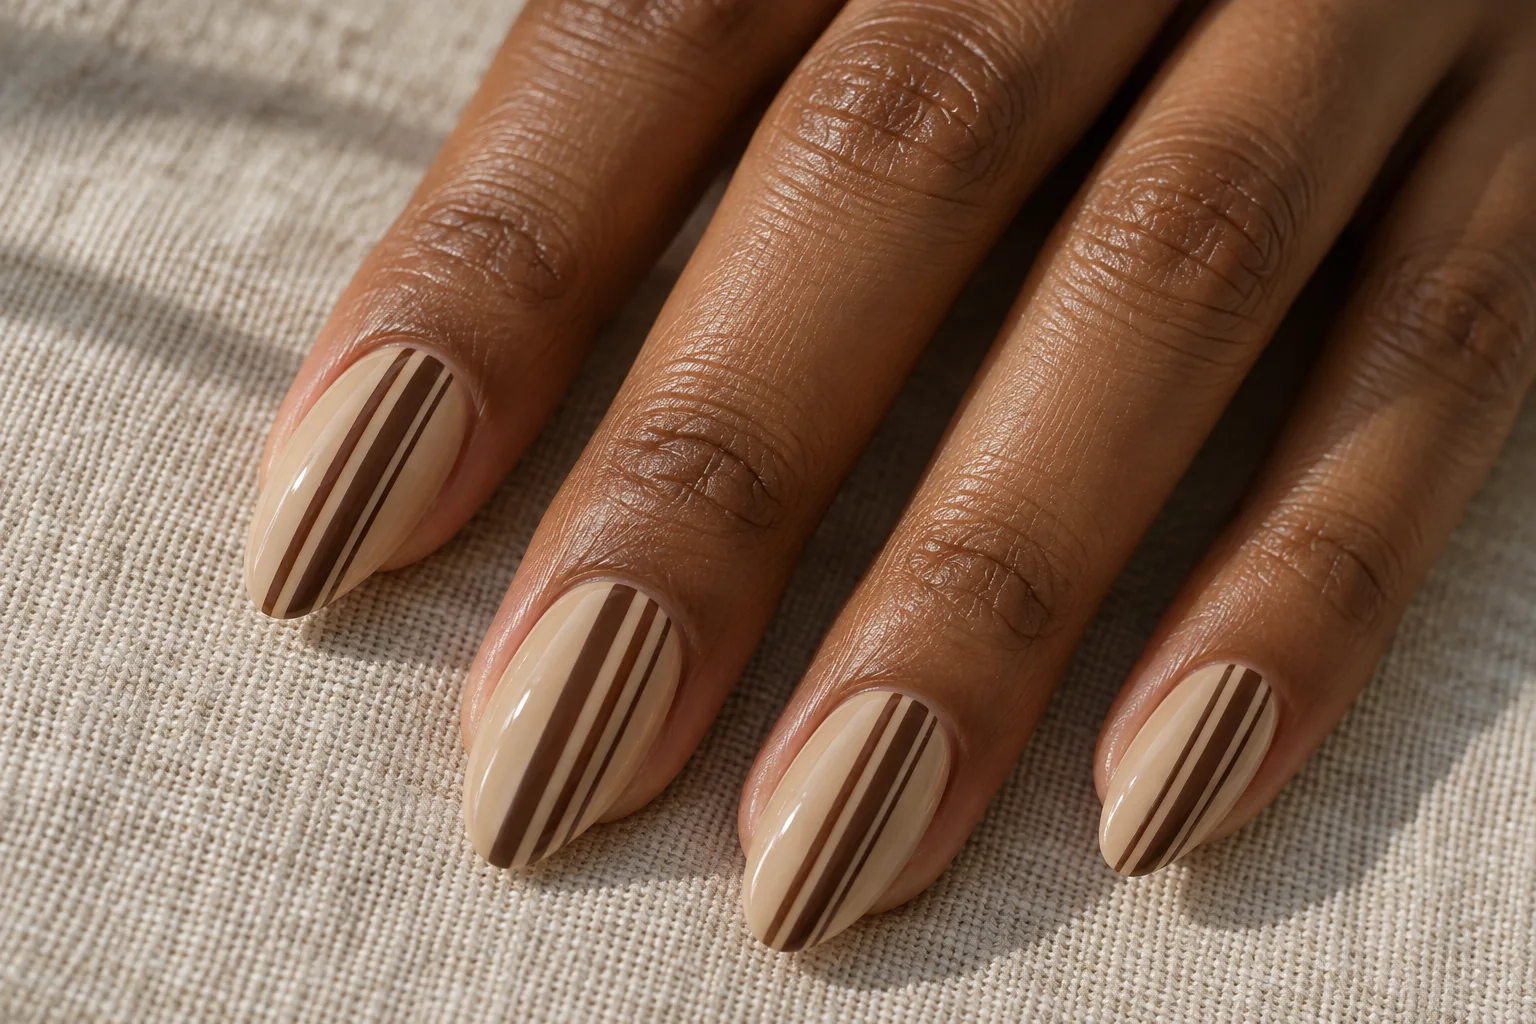
    13. Chocolate Uneven Stripes

    Chocolate Uneven Stripes geometric nail art design

    Chocolate stripes on beige polish create a warm, understated graphic set. The lines run lengthwise, but their different widths prevent them from looking like a rigid uniform. Offset placement gives each nail a little individuality while keeping the overall direction consistent.

    Vary the Width, Keep the Direction

    Almond nails complement the longer lines. Leave plenty of beige between the stripes so the background remains part of the design. A mix of one slightly wider stripe and two fine ones can feel more considered than several identical bands. Keep the brown clear and rich rather than muddy.

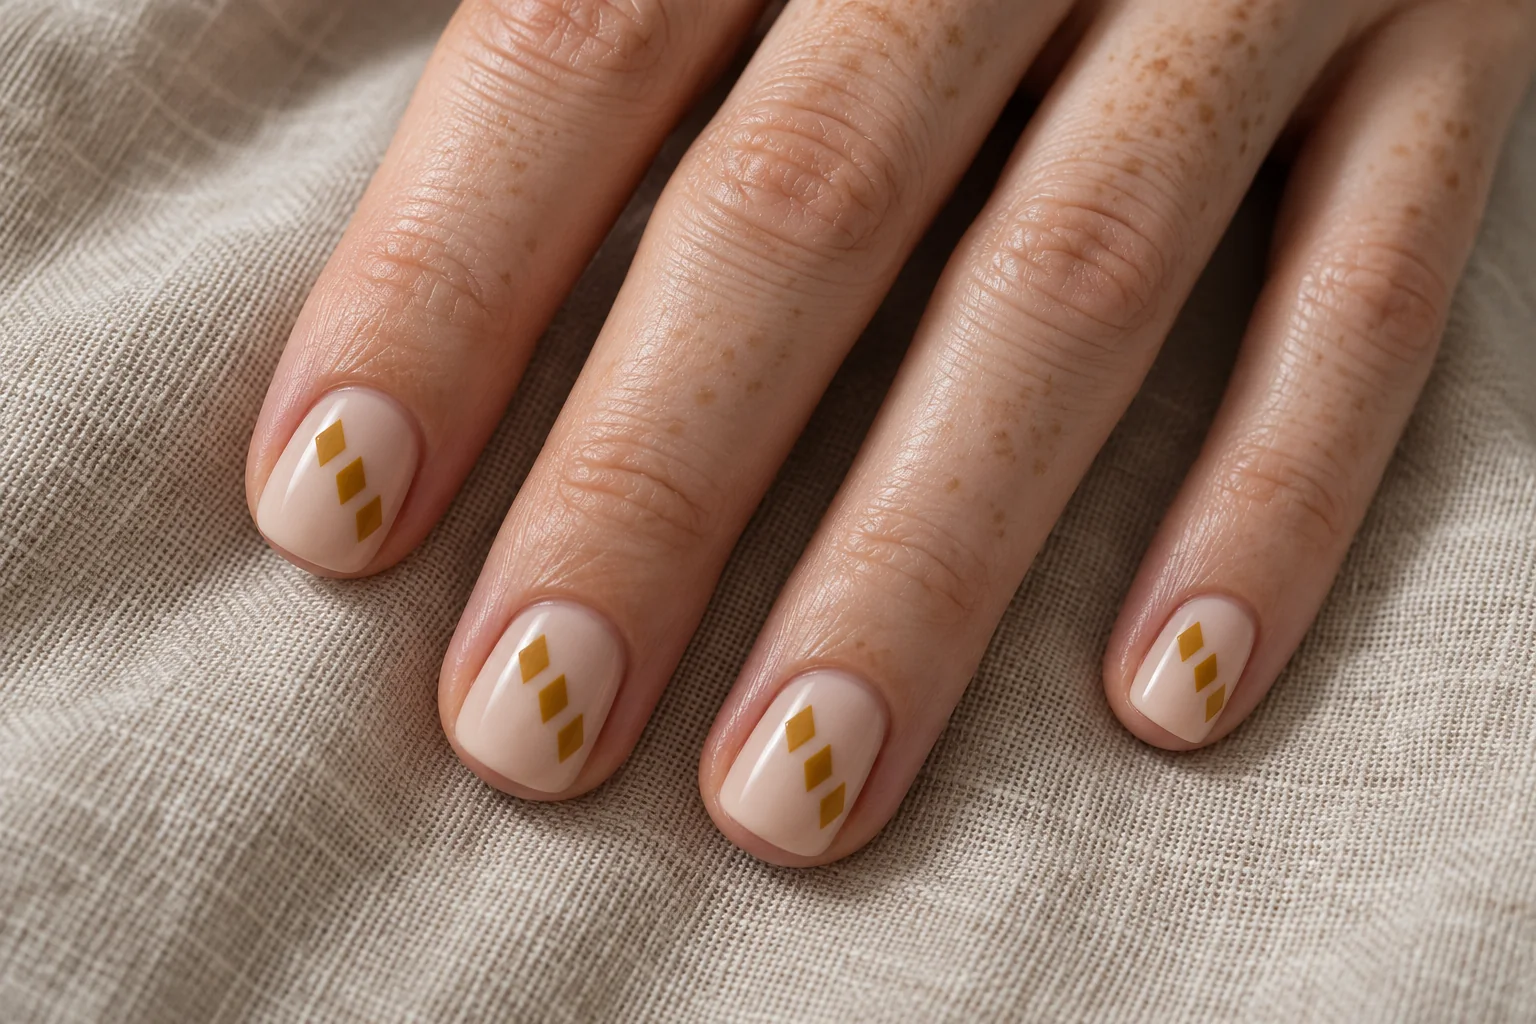
    14. Mustard Diamond Tiles

    Mustard Diamond Tiles geometric nail art design

    Mustard and ochre diamonds create a tile-like detail on creamy nude nails. A staggered row adds movement without using a full checkerboard. The shapes should remain separate, with a little background visible around each one, so the design stays light.

    Turn Small Diamonds Into a Rhythm

    Short squoval nails suit this compact pattern. Choose small diamonds that fit comfortably inside the nail outline rather than cutting large shapes awkwardly at the sides. Repeating the same warm palette connects the fingers. The arrangement can vary slightly while the number and scale of the diamonds stay similar.

    How to Choose Your Geometric Nail Art Pattern

    Start with the amount of detail you want to see across the whole hand. Checkerboards and diamond tiles create a repeated rhythm, while a split-tone nail relies on one strong boundary. If you prefer a quieter look, choose dots, fine grids or metallic triangles on a small number of accent nails.

    Think about the nail outline as well. Square and squoval tips give straight patterns a natural setting. Almond and oval nails can soften angular shapes or support curves. These are design suggestions rather than fixed rules: a good nail artist can change the scale and placement to suit the surface available.

    Make the Colours Work With Your Wardrobe

    A manicure can connect with clothes you already enjoy. Warm terracotta and chocolate shades pair easily with our cardigan and jeans outfit ideas. If you prefer richer colours, explore our burgundy outfit inspiration and use a small matching detail rather than copying the entire outfit palette.

    For a softer finish, choose a pale base and keep the pattern to one or two colours. A natural makeup look can complement a detailed manicure without competing with it. If you want raised texture for a future appointment, our 3D flower nail art collection offers a different direction.

    Save the designs that appeal to you, then compare their shapes as well as their colours. Ask your artist to explain how the spacing and line thickness will change on your own nails. A simple pattern with clear placement often has more impact than adding every detail at once.

  • 3D Flower Nail Art: 12 Fresh Designs to Inspire Your Next Manicure

    3D Flower Nail Art: 12 Fresh Designs to Inspire Your Next Manicure

    3D flower nail art brings small sculpted petals above the nail surface, creating detail you can see from more than one angle. The most interesting designs do not always have the largest flowers. Colour, placement and the amount of clear space can make a small bloom feel just as memorable.

    This collection features twelve original design concepts created for Haya Glam. Pinterest floral styling ideas informed the general direction, while the colour pairings, flower choices and arrangements were developed into new illustrations. The images are AI-generated manicure concepts, not photographs of completed salon work.

    Use them to explain a mood to your nail artist rather than treating every petal as a fixed requirement. Nail length, width and your daily routine may call for a smaller flower or a simpler accent. Below, each design has its own image, colour story and practical suggestion.

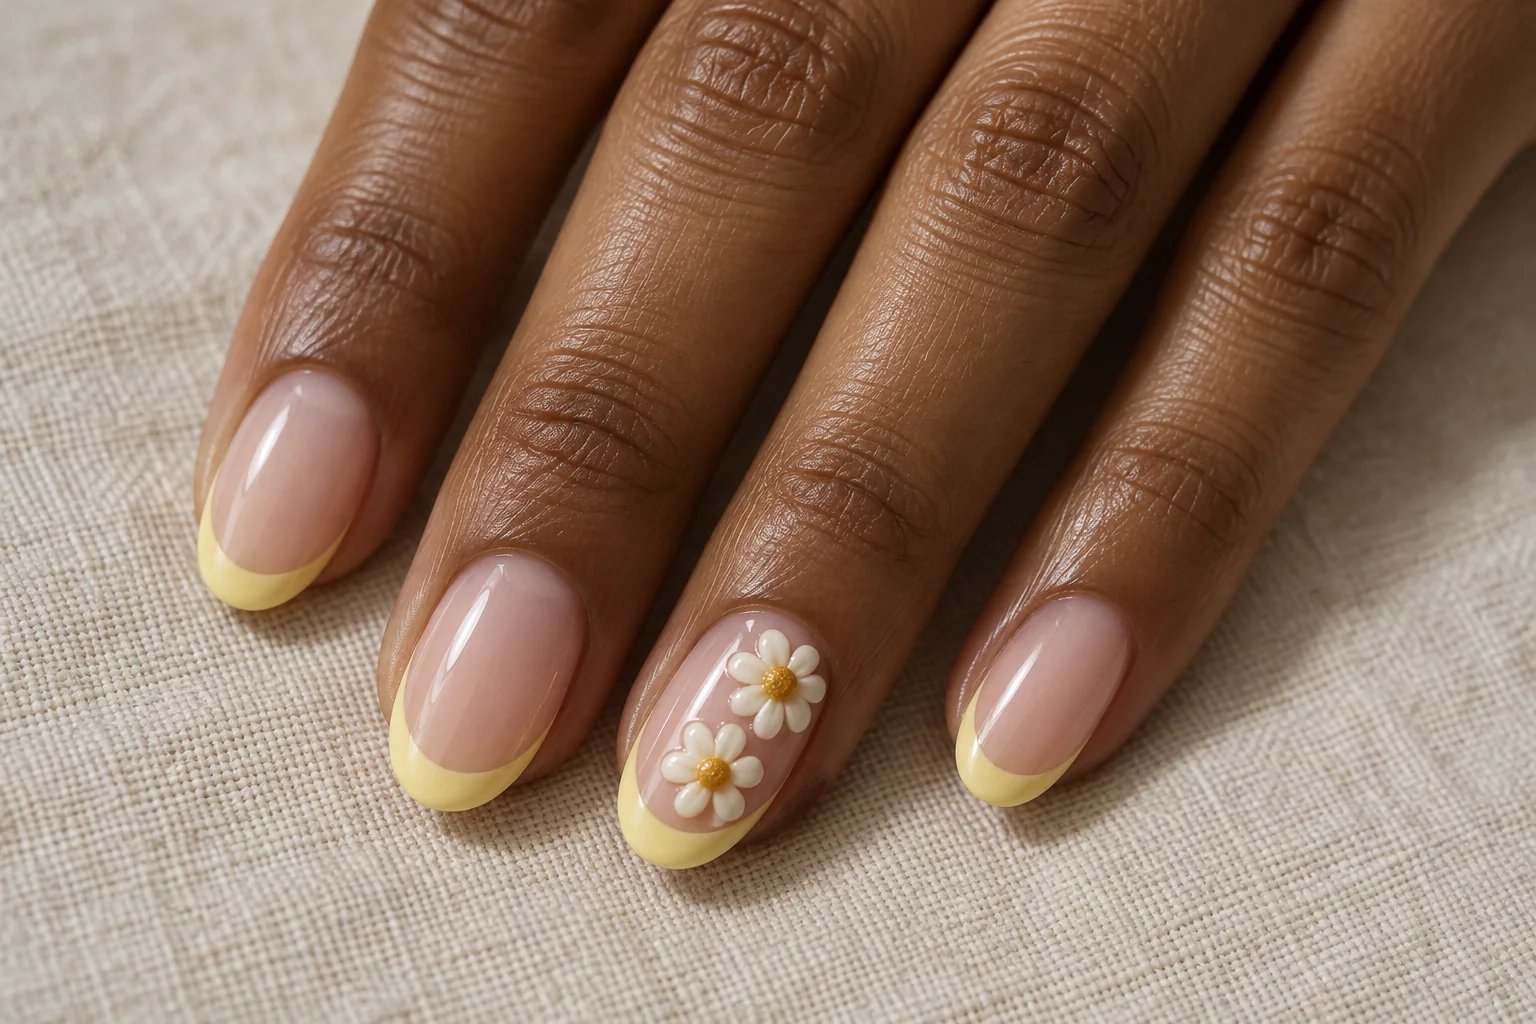
    1. Porcelain Daisies With Butter-Yellow Tips

    Porcelain Daisy and Butter Yellow 3D flower nail art design

    A milky pink base gives these tiny ivory daisies room to stand out. Butter-yellow tips repeat the warmth of the flower centres without filling every nail with decoration. The result is a soft, light manicure that works particularly well when you want the raised detail to feel delicate.

    Keep the daisies slightly off-centre on one accent nail instead of placing an identical flower on every finger. Two small blooms can create more movement than one large, perfectly symmetrical shape. Oval nails support the rounded petals, while the narrow tips keep the design from looking crowded.

    Keep the Petals Low

    Ask for a shallow sculpted finish so the flowers remain visible without becoming bulky. The shape and spacing matter more than adding extra stones or glitter.

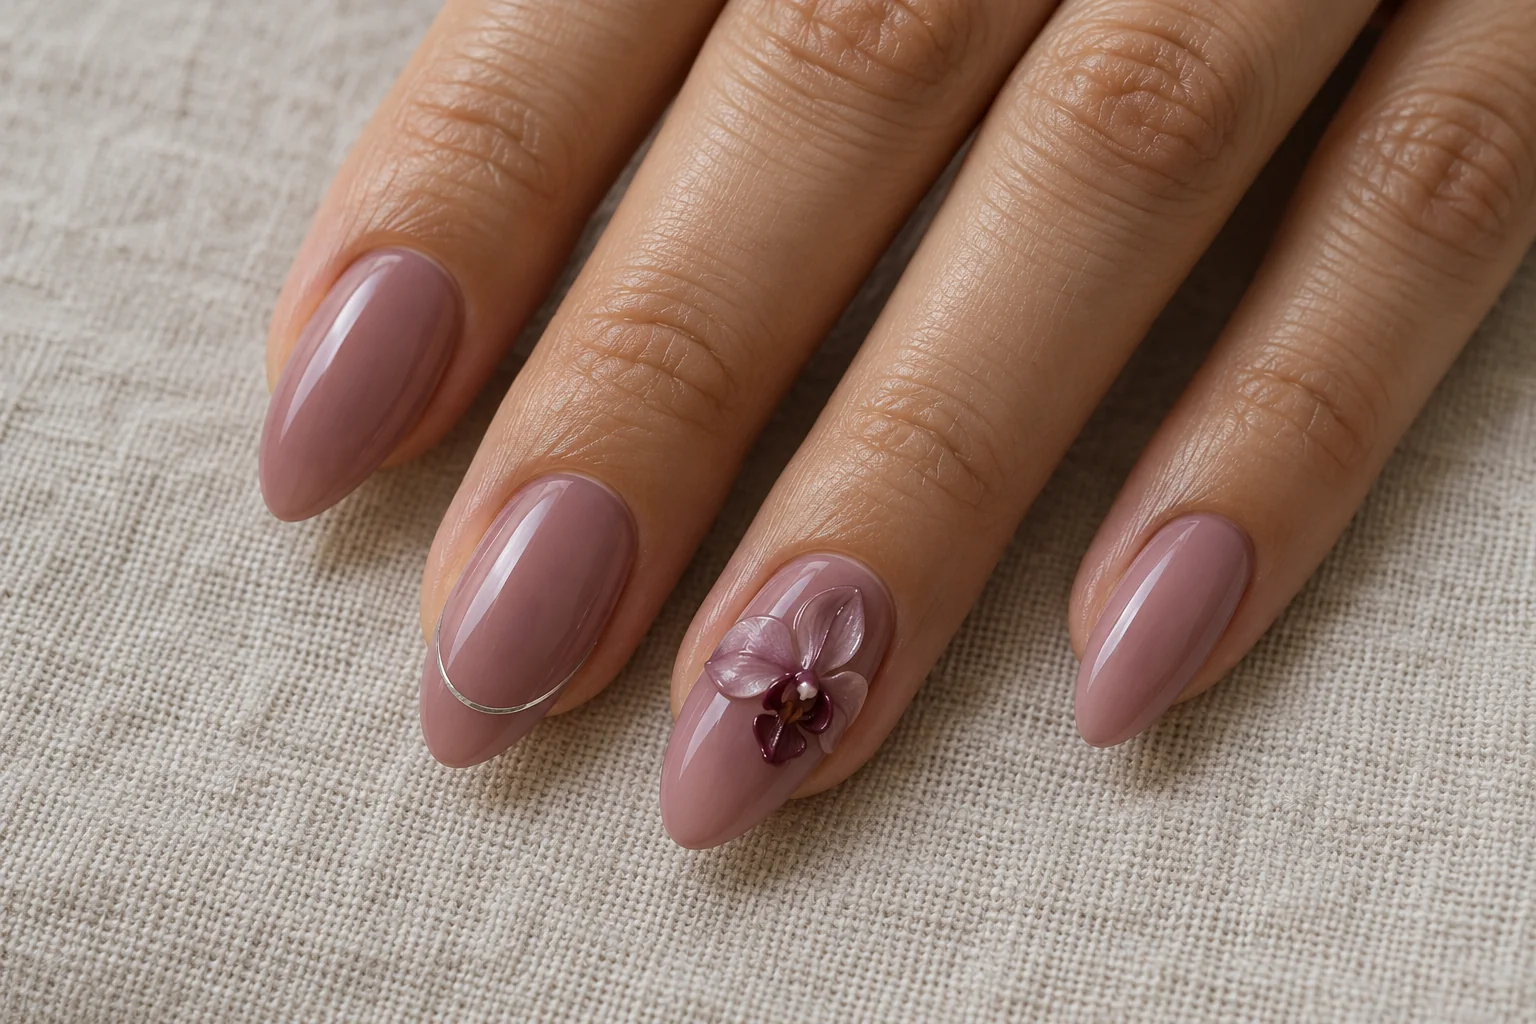
    2. Mauve Orchid on a Smoky-Rose Base

    Mauve Orchid on Smoky Rose 3D flower nail art design

    This design pairs a muted rose background with one sculpted mauve orchid. A darker plum centre gives the flower depth, while a thin silver arc on a neighbouring nail creates a quiet contrast. The colour palette feels expressive without relying on neon shades.

    An orchid looks most interesting when its petals have a little asymmetry. Let the bloom sit diagonally rather than forcing it into the centre of the nail. Medium almond nails leave enough space for the flower’s shape and a clear border around it.

    Leave Some Space

    Keep the other nails simple so the orchid remains the focal point. A single metallic line is enough to connect the accent nail to the rest of the manicure.

    3. Sage Camellia With Cream Accents

    Sage Camellia and Cream 3D flower nail art design

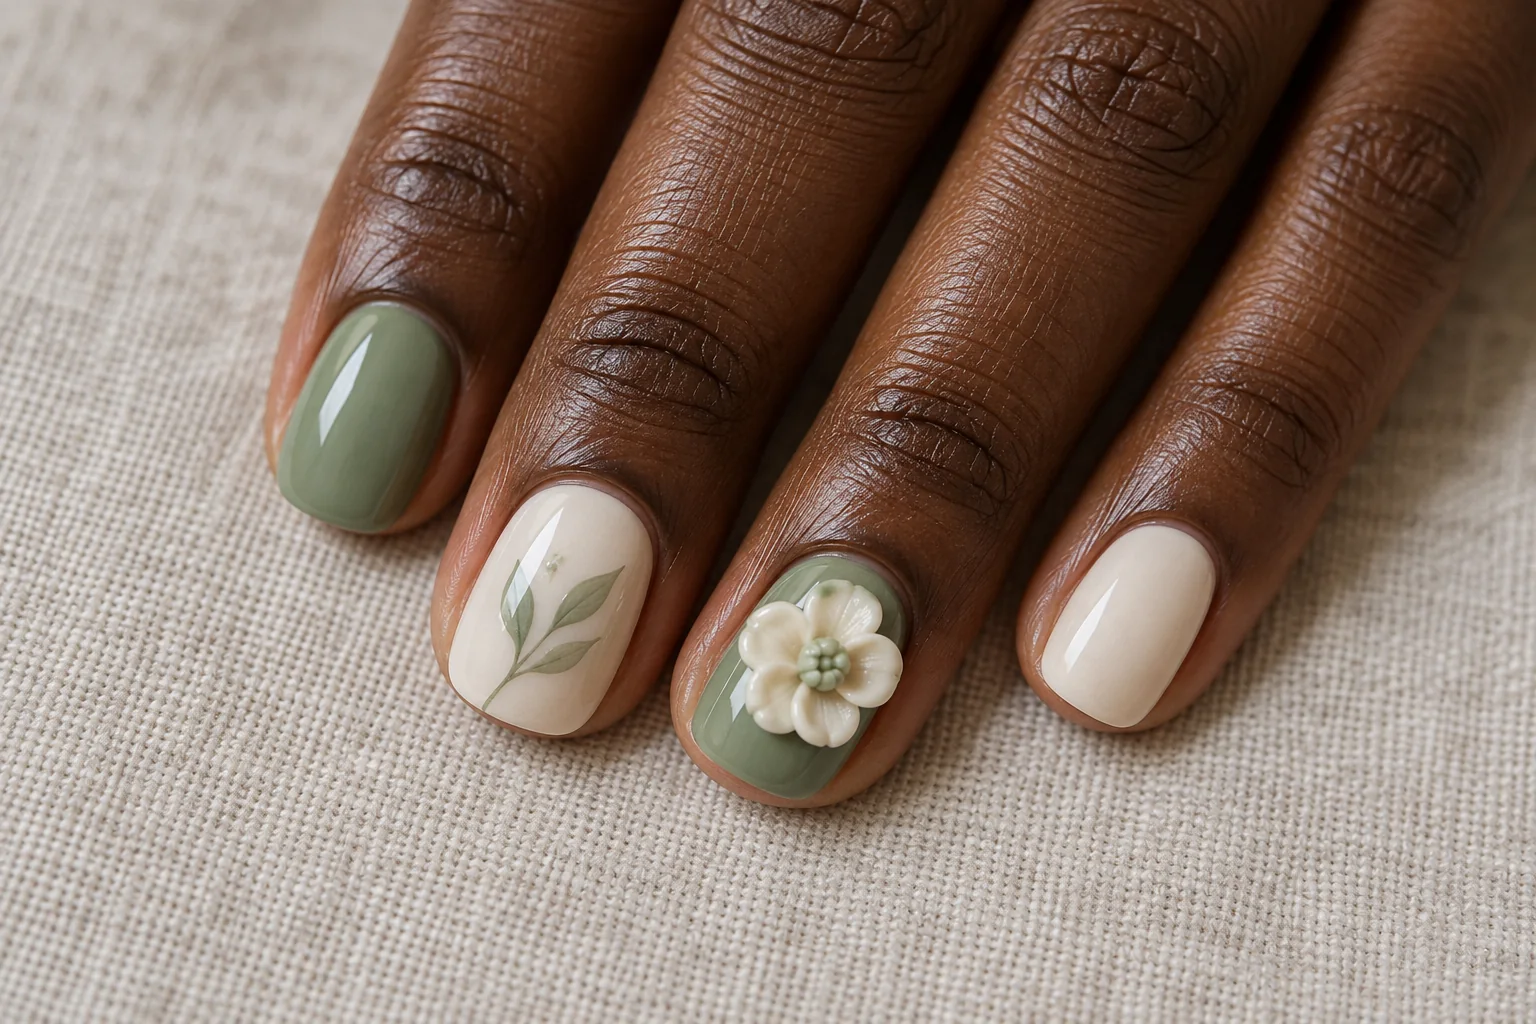
    Sage and cream create a calm setting for an ivory camellia. Overlapping, rounded petals give the bloom a fuller shape than a simple five-petal flower. A small painted leaf on another nail introduces the botanical idea without adding more raised decoration.

    Short rounded-square nails make this concept feel practical and considered. Alternate the background colours rather than repeating the same accent on every finger. The cream nail can carry the sculpted flower, while the sage nails provide a clear colour block beside it.

    Balance Soft and Solid

    Choose a gentle green rather than a very saturated one if you want the ivory petals to remain prominent. Keep the leaf fine and avoid filling all the remaining space.

    4. Powder-Blue Hydrangea on Sheer Nude

    Blue Hydrangea on Sheer Nude 3D flower nail art design

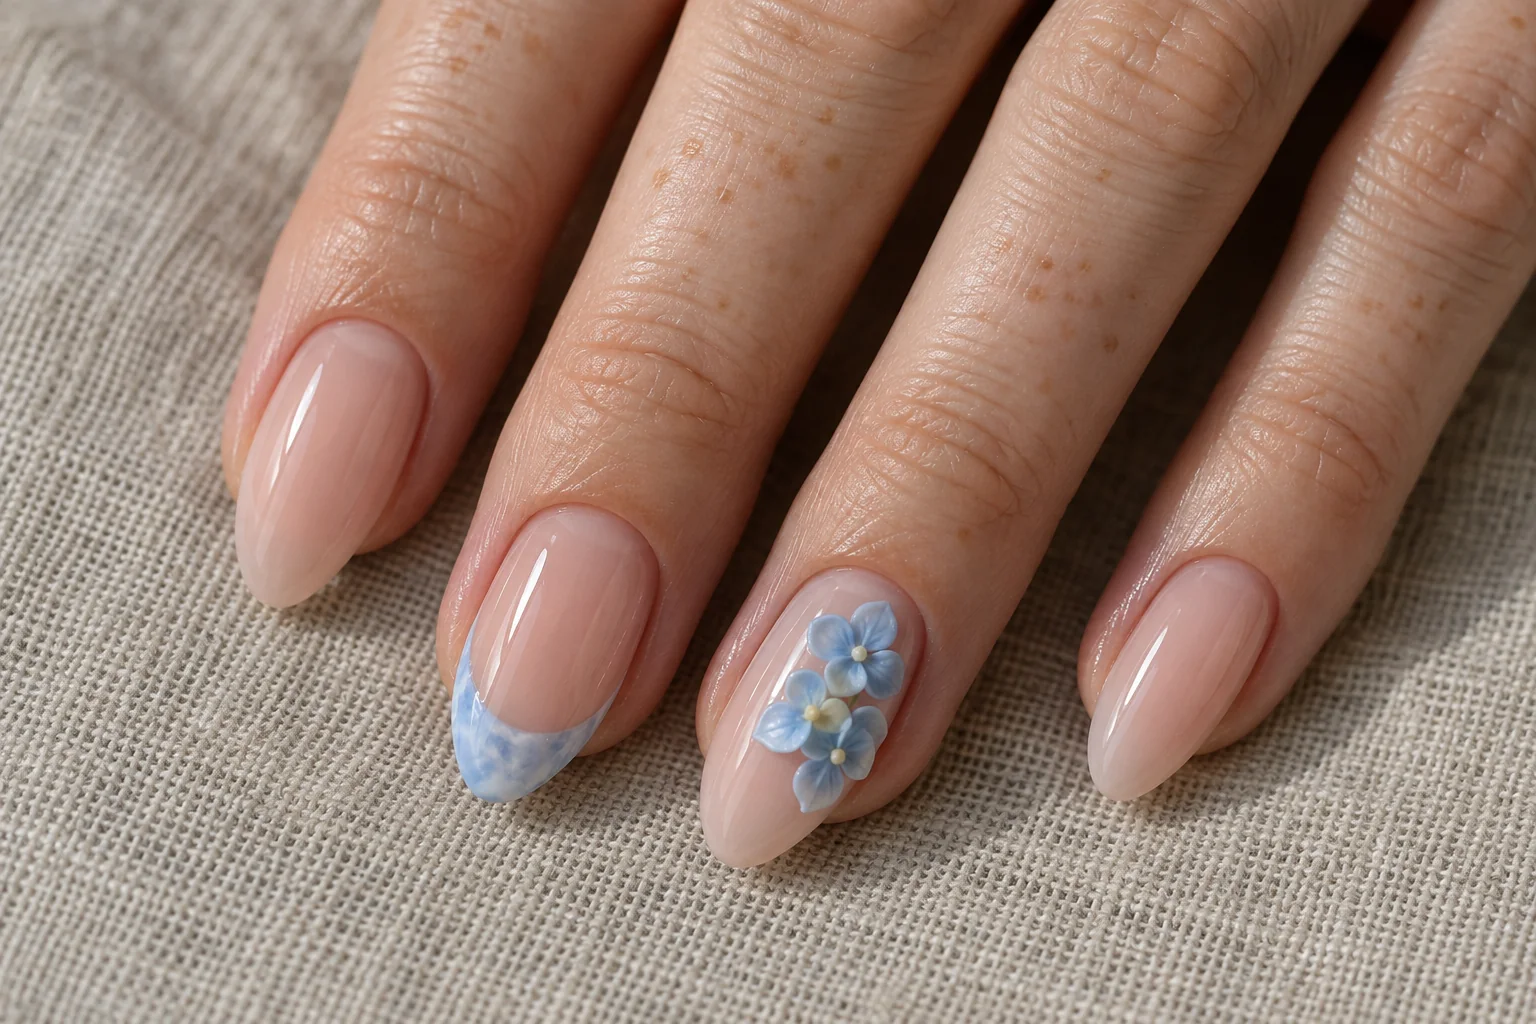
    A cluster of tiny blue florets gives this 3D flower nail art a different rhythm from a single statement bloom. The sheer nude base keeps the cluster visible, while an irregular icy-blue tip on another nail repeats the colour in a lighter way.

    Hydrangeas work best here as a small grouped detail. Vary the position of the florets slightly so they look gathered rather than arranged in a rigid grid. Keep their centres subtle and let the raised petals provide most of the texture.

    Choose a Compact Cluster

    Ask the nail artist to scale the flowers to your nail width. A compact arrangement can feel detailed without covering the entire surface or spilling beyond the nail edge.

    5. Coral Hibiscus With Apricot Tips

    Coral Hibiscus and Apricot Tips 3D flower nail art design

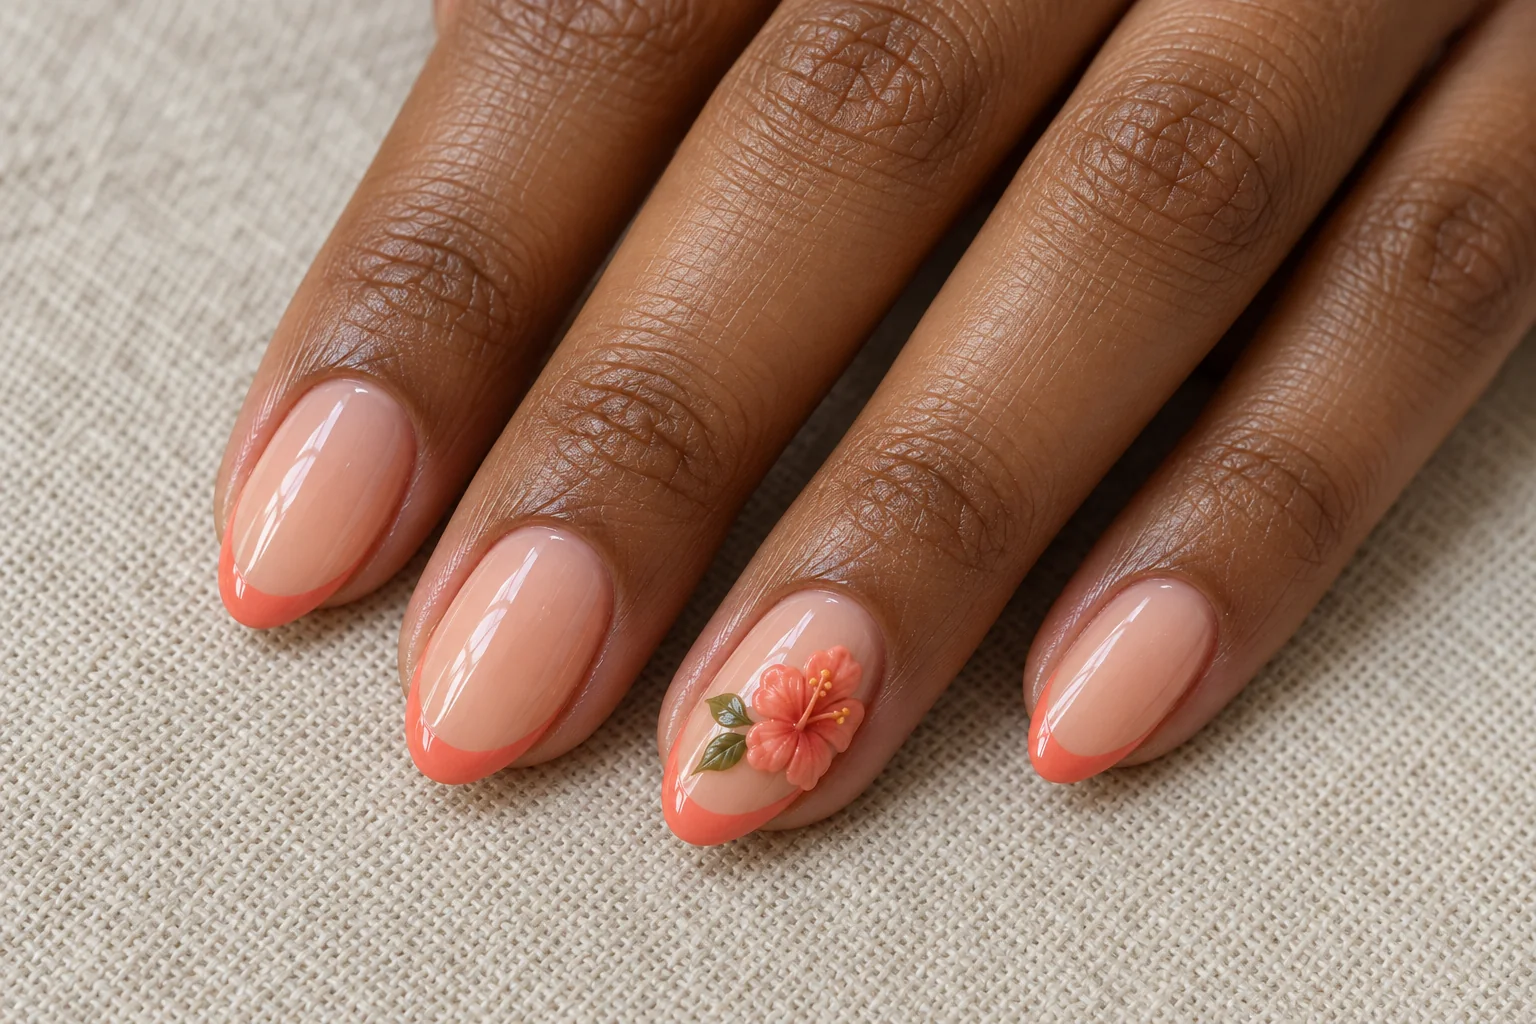
    Coral petals bring a warmer mood to the collection. An apricot base and narrow coral tips connect the accent flower to the plain nails, while a tiny olive leaf adds a small colour change. The combination feels lively without needing a tropical scene painted on every finger.

    Use one hibiscus as the main feature and keep the orange centre restrained. Its broad petals should read clearly against the lighter base. Oval nails suit the soft outline, but the concept can be adjusted to another shape by making the bloom smaller.

    Repeat One Warm Shade

    Echo the flower colour in the tips, then stop there. Adding several different bright colours can make the manicure harder to read and distract from the sculpted detail.

    6. Pearl-Sheen Cherry Blossoms on Blush

    Pearl Cherry Blossom on Blush 3D flower nail art design

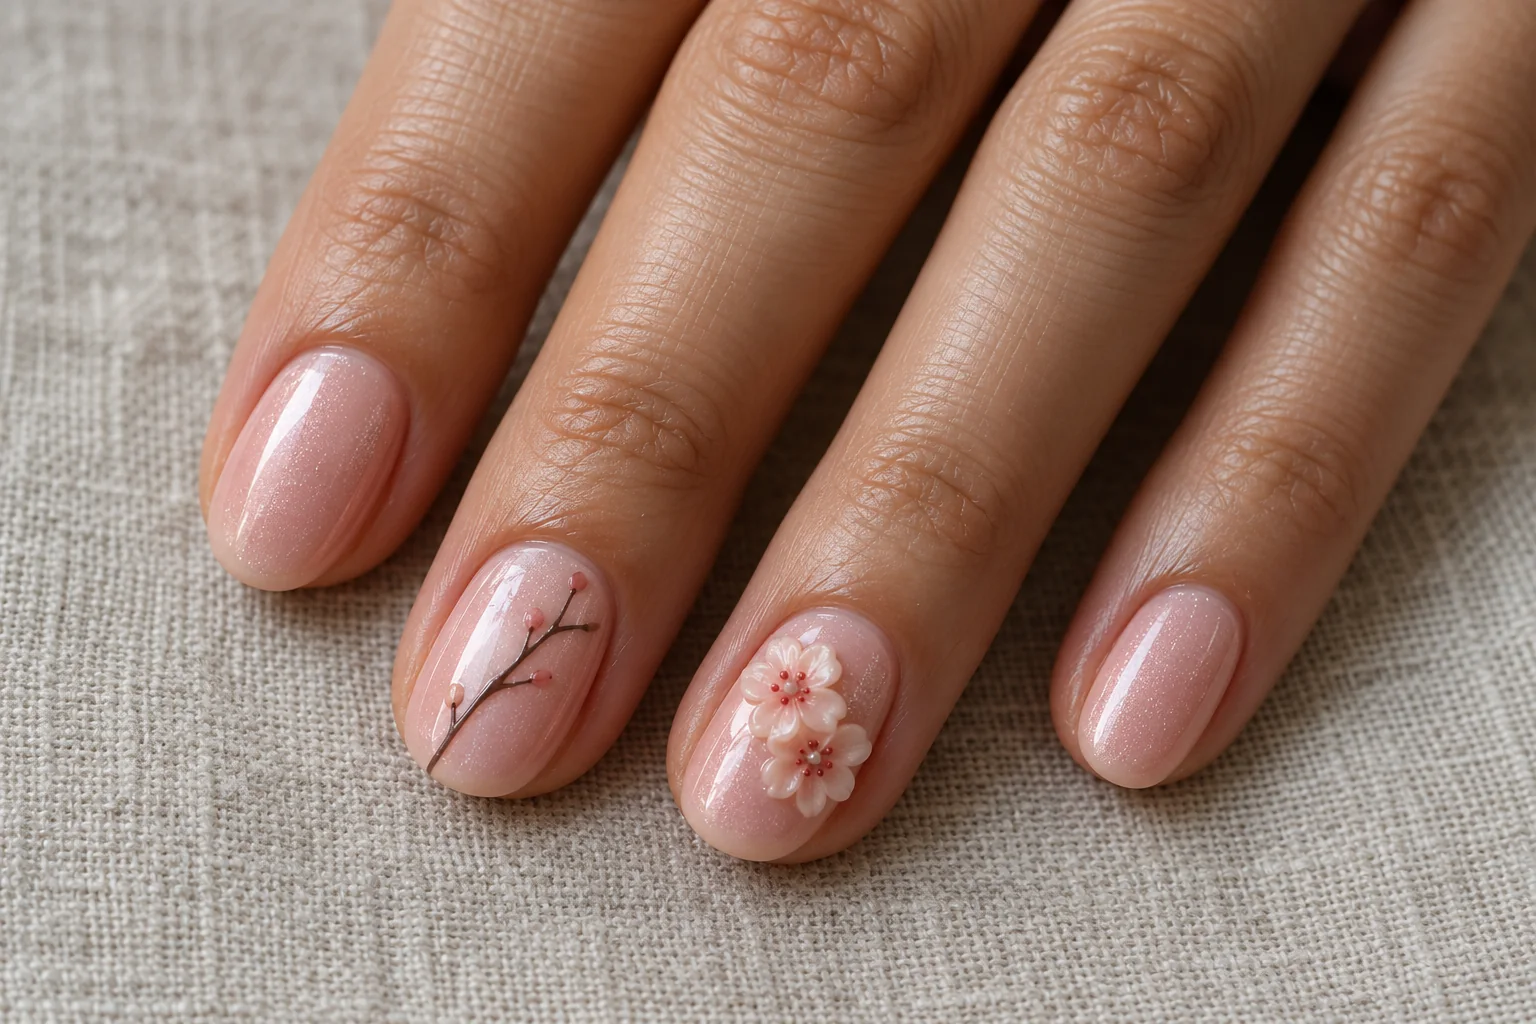
    Blush pink and a subtle pearl sheen create a soft background for two pale cherry blossoms. Fine red centres make the flowers readable without introducing large gems. A delicate painted branch on another nail adds a connected detail while keeping most of the surface clear.

    This is an option for short oval nails because the blossoms do not need to be large. Place them at slightly different heights rather than lining them up exactly. The variation gives the accent nail a more natural composition.

    Keep the Shine Gentle

    Choose a quiet pearly finish instead of a strong mirror effect. The light should help show the petal shapes, not overpower them or make every nail look like a different design.

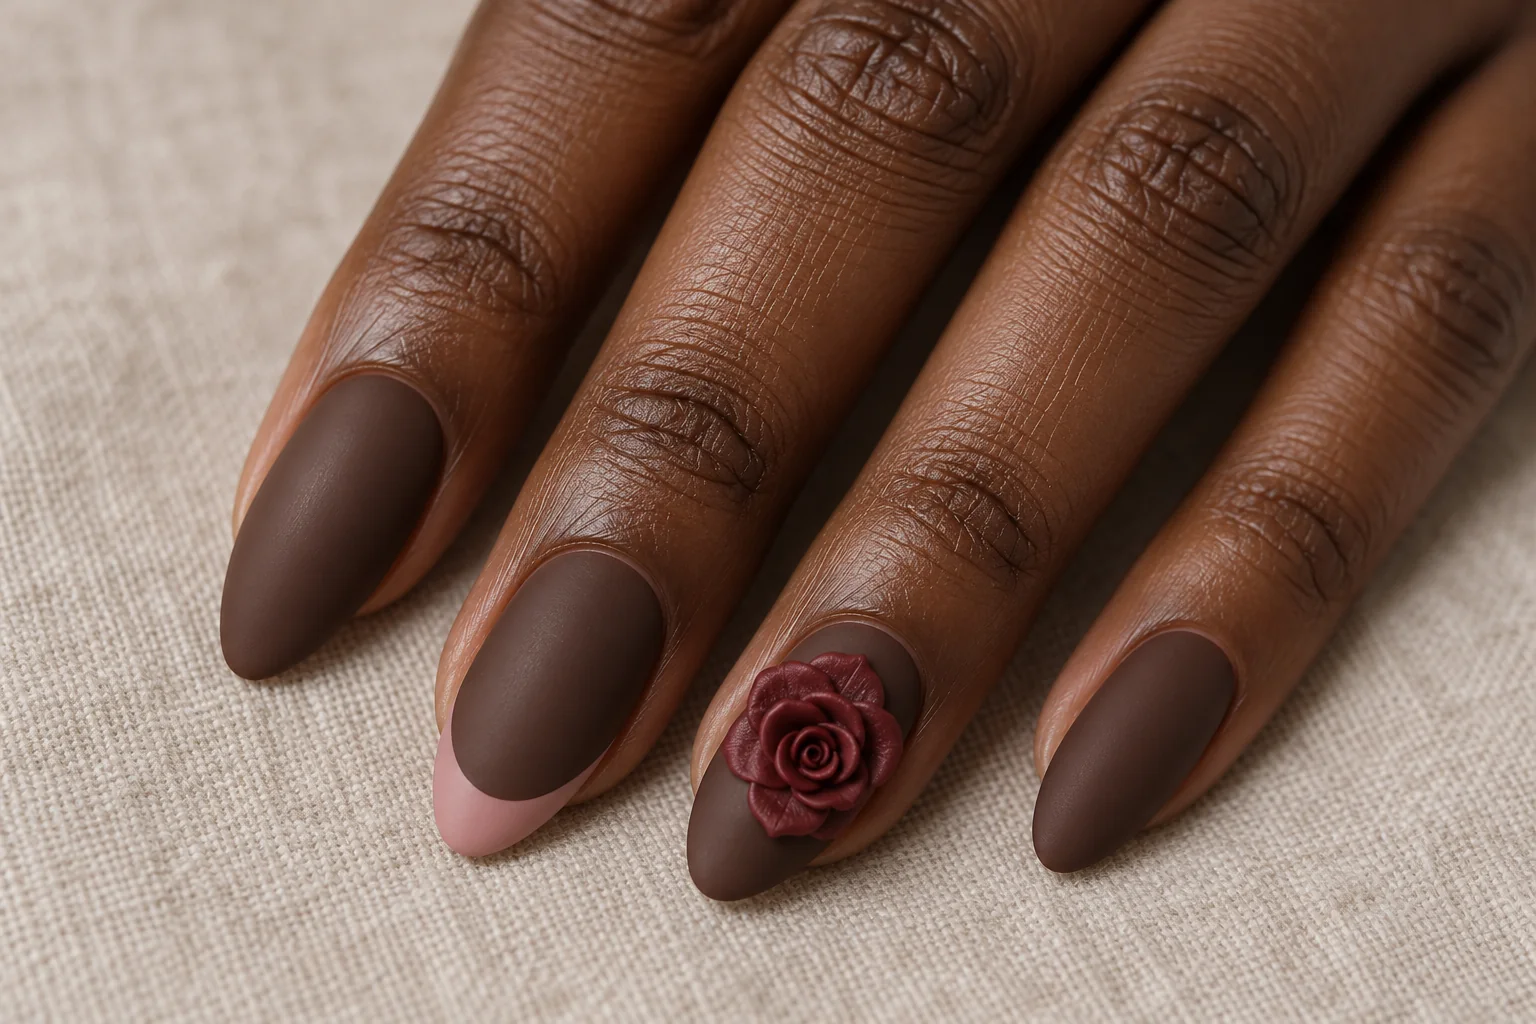
    7. Burgundy Rose on Matte Cocoa

    Burgundy Rose and Matte Cocoa 3D flower nail art design

    A sculpted burgundy rose against matte cocoa creates a richer floral look. The satin petals stand out because their finish differs from the flat background. A dusty-pink crescent on a neighbouring nail adds a lighter note without breaking the colour story.

    The rose needs visible overlapping edges to feel sculpted rather than like a flat flower sticker. Keep its height controlled and its outline compact. Medium almond nails give the bloom a tapered setting while leaving room around the sides.

    Use Finish as Contrast

    Matte and satin surfaces provide enough variety on their own. Avoid adding heavy sparkle over the rose, since it can hide the curled petal edges that make the design interesting.
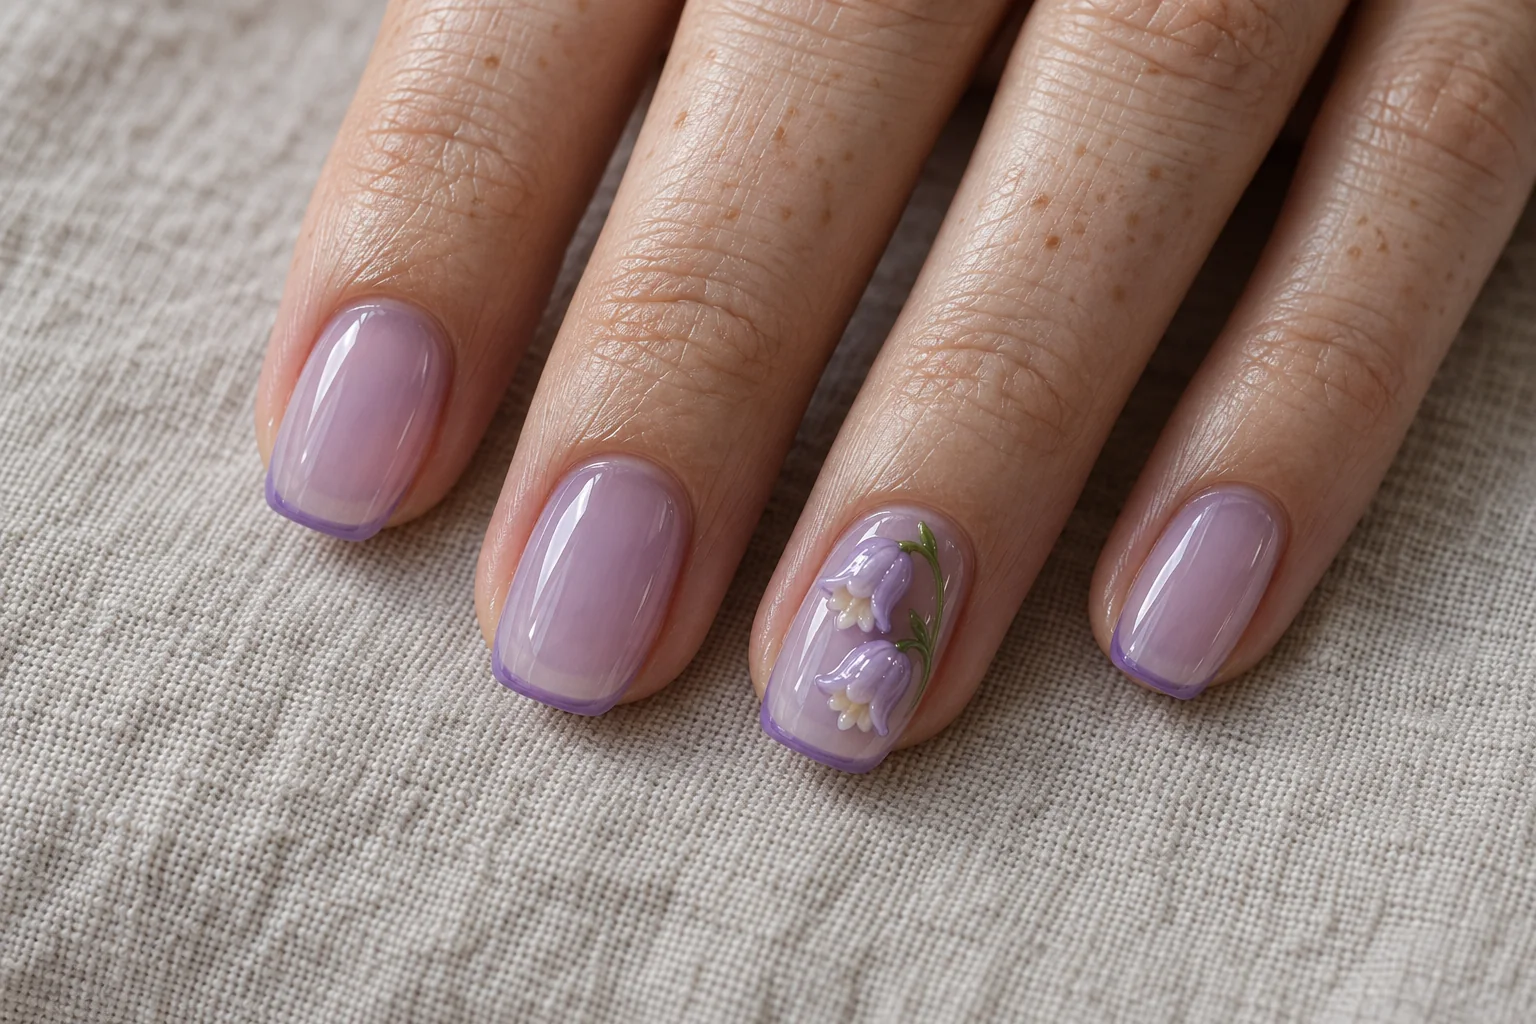
    8. Lavender Bellflowers on Clear Jelly

    Lavender Bellflowers on Clear Jelly 3D flower nail art design

    A transparent lavender base lets the bell-shaped flowers feel light and airy. Two small blooms angled in different directions make the accent nail more playful than a centred floral badge. Narrow violet edges give the plain nails a little definition.

    Leave clear space between the flowers so their shapes remain separate. Fine green stems can help explain the design, but they should stay secondary to the pale sculpted blooms. Squoval nails provide a useful balance between a straight tip and softer corners.

    Protect the Transparency

    Keep the background sheer and the extra details minimal. Too many painted marks or scattered crystals would reduce the open, jelly-like effect that makes this concept distinctive.

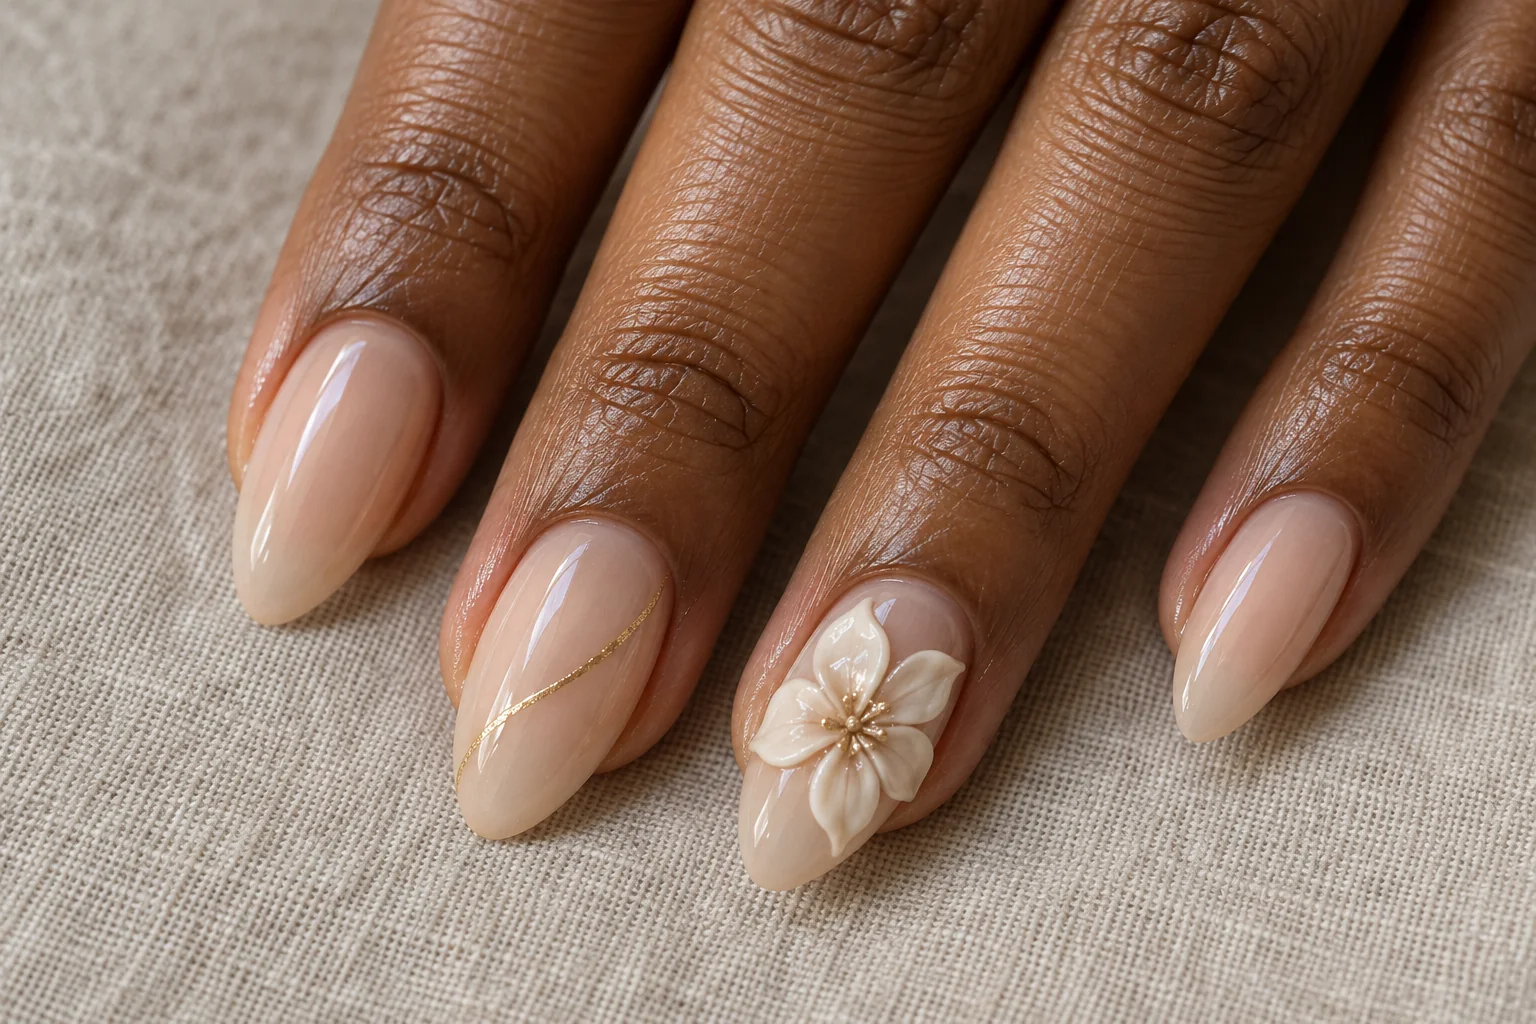
    9. Ivory Magnolia With Champagne Lines

    White Magnolia and Champagne Lines 3D flower nail art design

    An ivory magnolia brings a broader, calmer flower shape to a sheer beige manicure. Five curved petals create a clear silhouette, while a thin champagne line across another nail adds a measured touch of shine. The palette can work for an occasion or an understated everyday set.

    Let the flower occupy one accent nail and keep the remaining nails mostly plain. The petals should curve gently rather than rise into a tall, heavy sculpture. Almond nails create an elegant outline, but a smaller magnolia can also fit a shorter shape.

    Keep the Metallic Detail Fine

    A narrow diagonal line looks more intentional than a wide band competing with the flower. This is also an easy palette to pair with a natural makeup look.

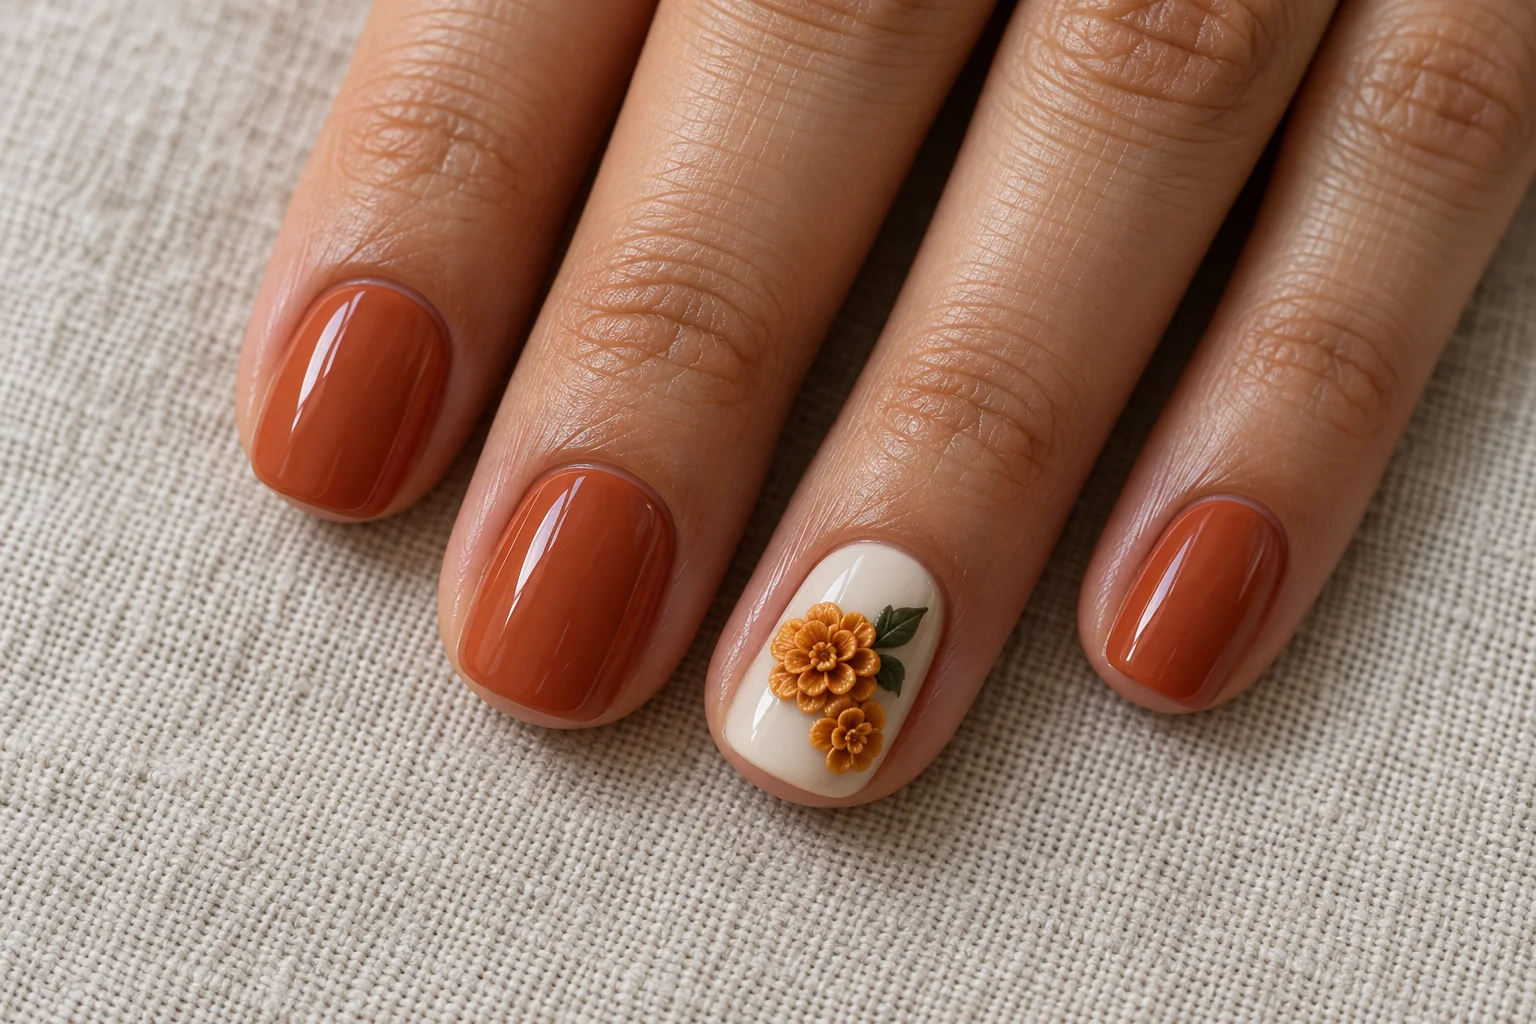
    10. Mini Marigolds With Terracotta

    Mini Marigolds on Terracotta 3D flower nail art design

    Terracotta polish gives tiny mustard-orange marigolds a grounded setting. A cream accent nail separates the flowers from the warmer background, making their ruffled petals easier to see. One small green leaf is enough to complete the botanical idea.

    Short rounded-square nails keep this design compact. A miniature flower cluster works better than an oversized pom-pom shape. Keep the petals within the nail edges. The texture can be intricate while the overall manicure remains simple.

    Control the Texture

    Ask for clear petal definition without excessive height. The cream base and warm plain nails already create contrast, so the flowers do not need added jewels to make an impression.

    11. Mint Water Lily on Pale Aqua

    Mint Water Lily on Aqua 3D flower nail art design

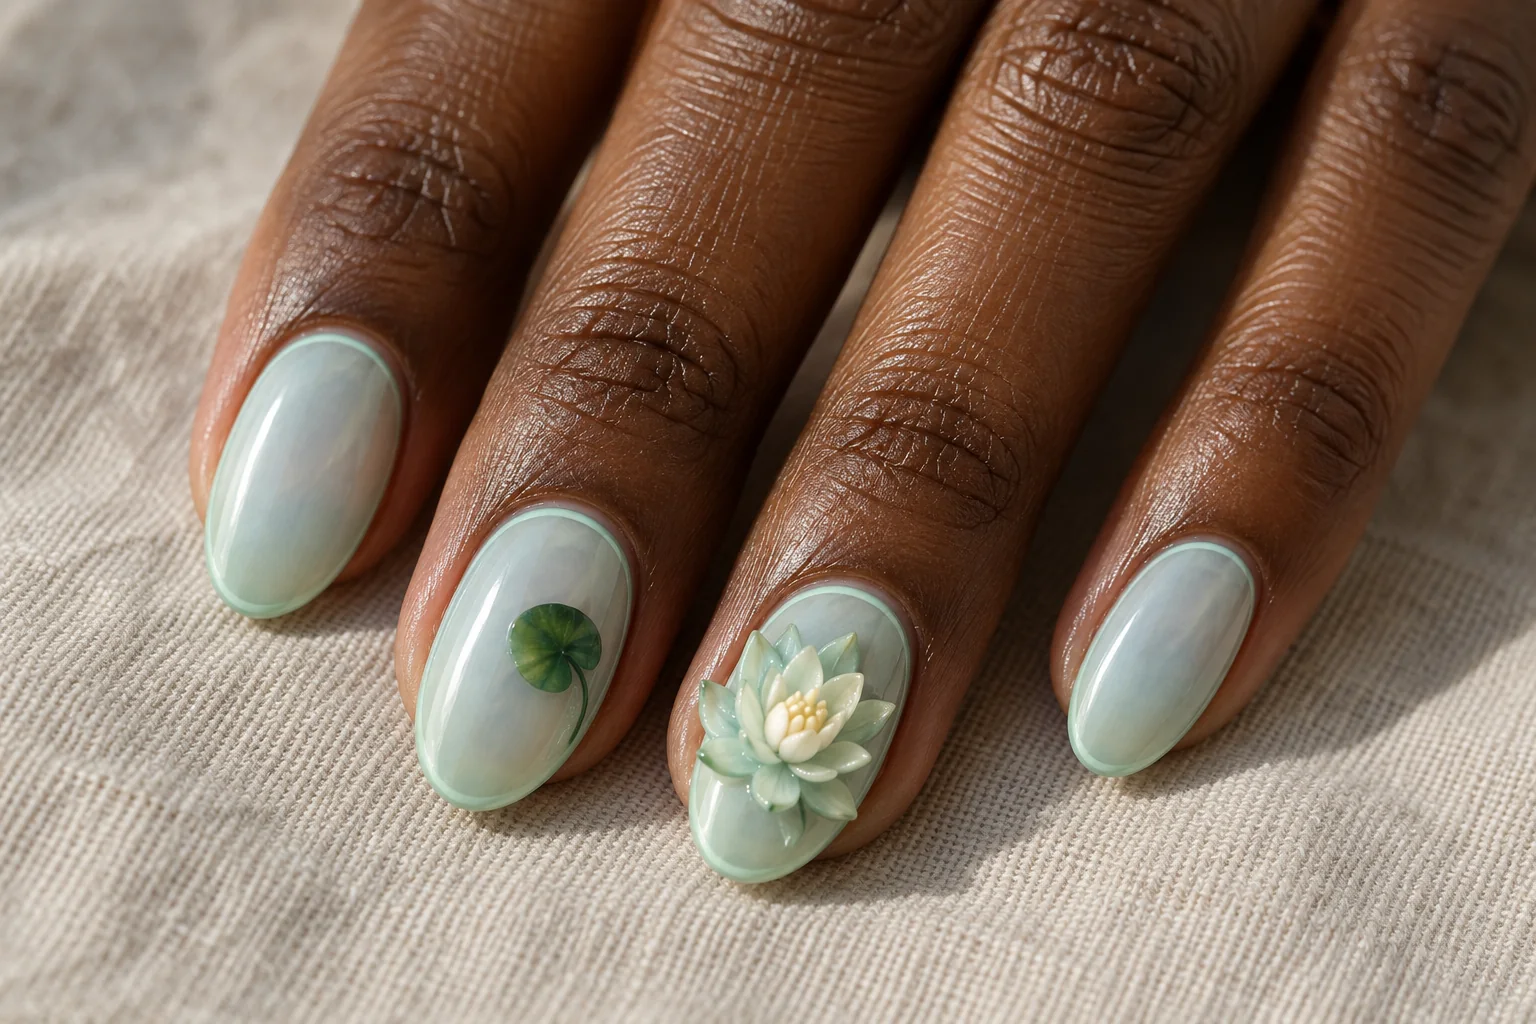
    Very pale aqua and mint give this water-lily concept a fresh, cool finish. The ring nail carries one low sculpted bloom with tapered petals and an ivory centre. A small painted green crescent on another nail suggests a leaf without becoming a full illustration.

    The flower should sit comfortably within the nail outline. Keep its layers shallow and avoid making every petal identical in size. Oval nails support the rounded composition, while the thin mint rim gives the other nails a connected finishing detail.

    Let the Base Stay Light

    A translucent background helps the sculpted petals remain the main feature. If you prefer a stronger colour, change only the rim before darkening the whole manicure.

    12. Ivory Anemone on Charcoal Gloss

    Ivory Anemone on Black Gloss 3D flower nail art design

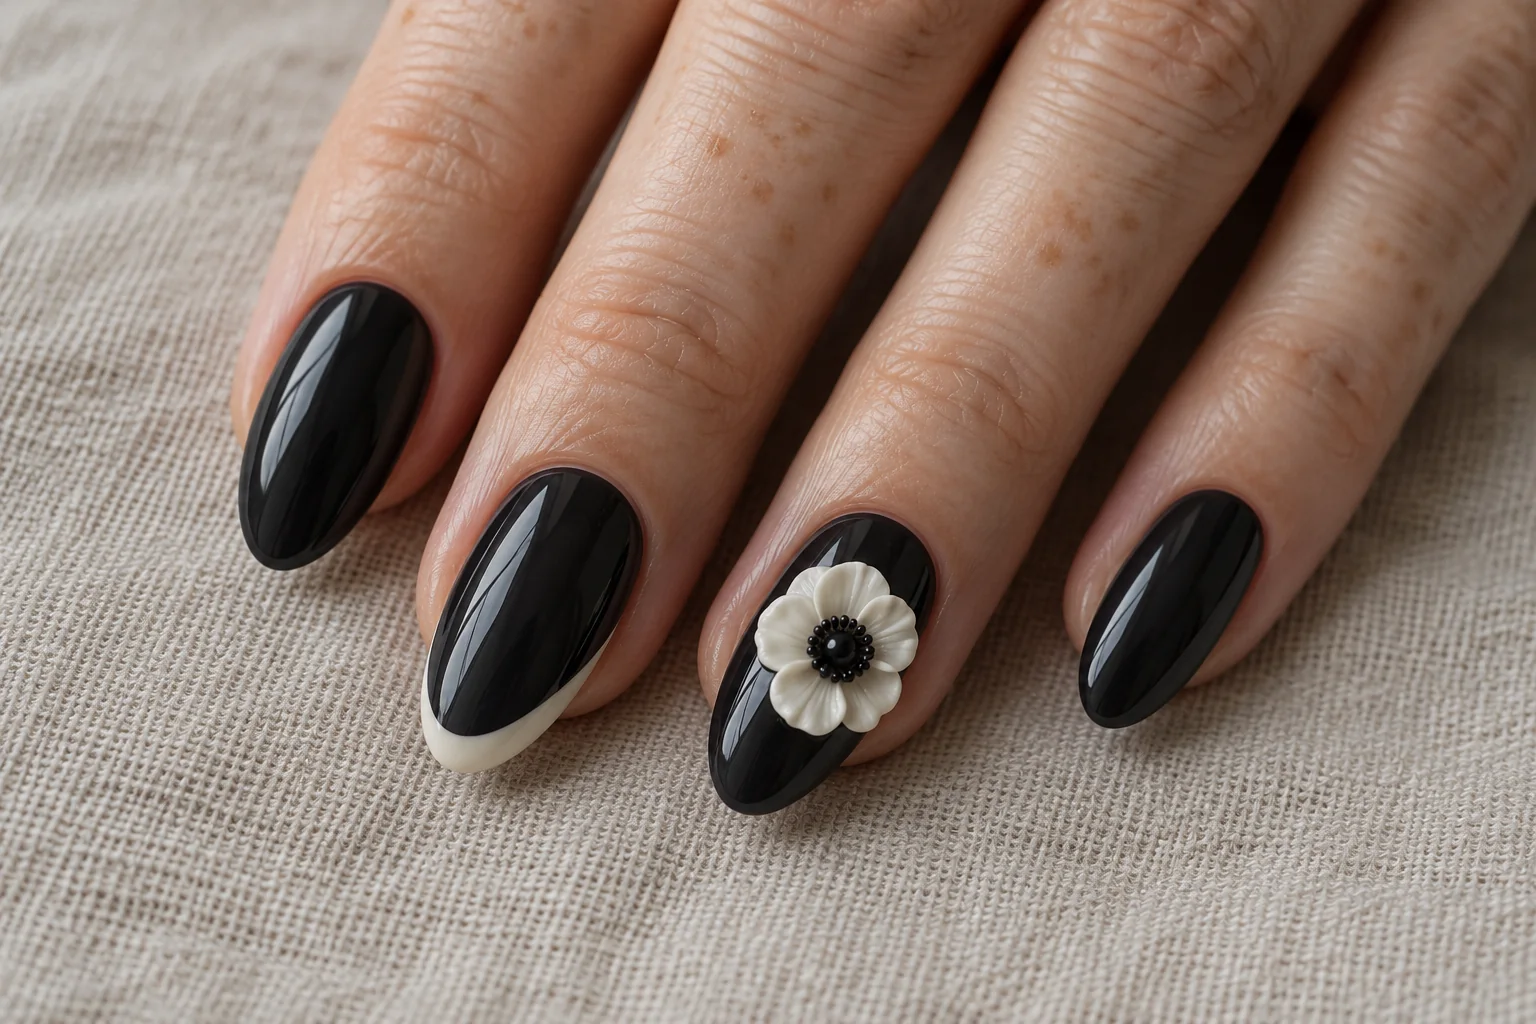
    An ivory anemone against glossy charcoal creates the strongest contrast in this collection. A tiny dark centre connects the flower to the base, and an asymmetric ivory edge on a neighbouring nail repeats the light colour without adding another bloom.

    Keep the petals thin-looking and the flower compact so the manicure feels intentional rather than overloaded. The dark background makes even a small raised detail visible. Medium almond nails provide room for the accent while preserving a clean outline.

    Choose One Statement Nail

    Let the anemone do most of the work. A clear colour contrast can be more striking than multiple flowers, glitter and stones competing across every nail.

    How to Adapt 3D Flower Nail Art to Your Routine

    Begin with the size of the flower, then choose the nail shape. A dramatic bloom might suit an occasion set, while small, low-profile petals can feel easier for everyday wear. Ask your nail artist how to adjust the height and placement so the finished design feels comfortable for your hands.

    A single sculpted accent nail is a useful starting point if you have never worn raised nail art. You can repeat its colour in a French tip, a fine line or a painted leaf on the other nails. This creates a connected manicure without needing the same decoration on every finger.

    Show the artist the exact detail you like: the orchid shape, the transparent base or the contrast between matte polish and satin petals. Discuss suitable materials and the application process with them. The generated images demonstrate design ideas; the real manicure will depend on the artist’s technique and your nail shape.

    Make the Manicure Part of Your Look

    Choose a palette you already enjoy wearing. Soft cream and sage work with quiet neutrals, while burgundy and cocoa can complement burgundy outfit ideas. For an easy everyday combination, try your chosen manicure with one of our cardigan and jeans outfits.

    Save two or three favourite designs and compare them before your appointment. You might love the colour from one and the flower placement from another. Start with the feature that matters most, keep the rest considered and let the final 3D flower nail art feel personal.

  • Top Trending Hairstyles: 12 Looks to Try in 2026

    Top Trending Hairstyles: 12 Looks to Try in 2026

    Looking for hairstyles that feel fresh without becoming difficult to wear? This guide brings together twelve options, from layered cuts and short bobs to curls, braids and simple updos. Some involve a salon appointment; others let you change your look using the hair you already have.

    These are editorial picks inspired by current hairstyle coverage and Pinterest styling ideas, rather than a statistical ranking of the most popular looks. Choose according to your texture, density and routine. All twelve images are original AI-generated hairstyle illustrations, intended as visual inspiration rather than photographs of real salon results.

    A useful reference shows the front, side and back, but the conversation with your stylist matters just as much. Explain how you usually dry your hair, whether you tie it up and how much time you want to spend styling. A hairstyle should fit your life as well as your inspiration board.

    1. Butterfly Layers for Soft Movement

    Butterfly Layers hairstyle illustration
    Original AI-generated hairstyle illustration.

    Butterfly layers create shorter pieces around the face while keeping length through the back. The airy shape is useful when you like long hair but want the front to feel lighter. A soft blowout makes the different lengths visible, although the cut can also look relaxed with your natural wave.

    Ask your stylist where the shortest layer should begin and how it will blend into the rest. Hair density matters: removing too much weight can leave fine ends looking sparse. Start with longer face-framing pieces if you want a cautious change, and check whether those pieces will still reach your usual ponytail.

    Style the Front First

    Work with small front sections and direct them away from your face using a round brush or rollers. Let the shape cool before loosening it with your fingers. For more ideas about movement, read our soft volume hair guide.

    2. Soft French Bob With Wispy Fringe

    Soft French Bob hairstyle illustration
    Original AI-generated hairstyle illustration.

    A French bob brings the focus close to the face, usually with a chin-length outline and a softly lived-in finish. The wispy fringe in this example keeps the shape lighter than a heavy straight bang. It feels deliberate without needing every strand to sit in exactly the same place.

    Bring a front and side reference to your appointment. Explain whether you want to tuck the sides behind your ears and how much daily styling you can manage. A bob can be easy to wear, but maintaining a particular length still means returning for trims.

    Keep the Finish Soft

    Try a small amount of a styling product suited to your texture and gently bend the ends rather than creating tight curls. If your hair dries with a wave, work with that movement. A little natural irregularity is part of this hairstyle’s appeal.

    3. Collarbone Lob for an Easy Length Change

    Collarbone Lob hairstyle illustration
    Original AI-generated hairstyle illustration.

    The collarbone lob sits between a short bob and longer hair, making it a useful option when you want a change without losing all your length. A clean outline and one loose bend can make the haircut look neat while preserving a relaxed feel.

    Check where the ends will fall against your shoulders. Hair can kick outward at that point, which might be a detail you enjoy rather than something to correct. Ask your stylist how the proposed length behaves with your normal parting and drying routine.

    Use One Gentle Bend

    Create a loose curve through the mid-lengths and leave the tips relatively straight. Avoid repeatedly working the same section just to make both sides identical. A lob with slight variation often feels more natural than a rigid, perfectly matched finish.

    4. Curtain Bangs With Long Layers

    Curtain Bangs and Long Layers hairstyle illustration
    Original AI-generated hairstyle illustration.

    Curtain bangs divide near the centre and frame the face with longer pieces at the sides. They can refresh long hair while keeping most of its familiar shape. The transition into the layers is the important detail: a smooth blend usually feels easier to wear than an abrupt step.

    Think about your hairline, cowlicks and preferred part before choosing the length. A photo shows the finished look, but your stylist can explain how much effort that fringe might take on your own hair. Begin a little longer if you want room to adjust.

    Dry the Fringe Before It Sets

    Style the fringe while it is still manageable, moving it gently across the forehead before directing each side outward. Use a light touch with products near the roots. Too much product can weigh down the airy shape you were trying to create.

    5. Soft Modern Shag With Natural Texture

    Soft Modern Shag hairstyle illustration
    Original AI-generated hairstyle illustration.

    A modern shag uses layers around the crown and face to create a more textured outline. This softer version keeps the ends wearable and the fringe light. It is an appealing choice if you prefer hair that looks a little tousled rather than carefully smoothed.

    The amount of layering should fit your density and curl pattern. Ask how the cut will look after air-drying, not only after a salon blowout. A shape that works with your natural movement can be more practical than one requiring you to restyle every section.

    Encourage Movement Without Overworking

    Scrunch lightly or arrange individual pieces with your fingers, then leave the hair alone as it dries. Choose a product based on your texture and desired hold. Touching and rearranging every strand can disrupt the soft finish and make styling take longer.

    6. Textured Pixie With a Longer Crown

    Textured Pixie hairstyle illustration
    Original AI-generated hairstyle illustration.

    A textured pixie keeps the sides shorter while leaving enough length on top for a soft, piecey finish. The contrast creates a clear shape without needing a dramatic undercut. A longer fringe can also give you different ways to change the direction of the style.

    Short hair deserves a proper consultation. Discuss your natural growth pattern, how often you want trims and whether you prefer a tidy or grown-out outline. Those decisions matter more than trying to copy another person’s face shape or exact hairline.

    Use Product in Small Amounts

    Warm a little suitable styling product between your fingers and separate a few pieces at the crown. Start with less than you think you need. You can add a touch more, but a heavy coating can flatten the texture and make the haircut feel stiff.

    7. Natural Curly Bob With a Rounded Shape

    Natural Curly Bob hairstyle illustration
    Original AI-generated hairstyle illustration.

    A curly bob lets the curl pattern become the main feature. The rounded outline in this example gives the hair a balanced shape while keeping individual curl clumps visible. Some gentle frizz is normal and can contribute to an authentic, soft appearance.

    Talk with a stylist familiar with your texture about shrinkage and how the finished length will look when dry. Avoid choosing the cut solely from a straightened reference. Your usual styling routine should guide the shape, especially if you normally wear your curls naturally.

    Keep Definition Flexible

    Apply your preferred curl products in manageable sections and let the curls set before separating them. Adjust product amounts to your density rather than following a fixed quantity. Our healthy hair habits guide offers more everyday care ideas.

    8. Loose Everyday Waves With Straight Ends

    Loose Everyday Waves hairstyle illustration
    Original AI-generated hairstyle illustration.

    Loose waves offer movement without the formal appearance of identical ringlets. Leaving the ends softer or relatively straight makes the style feel casual. This is a flexible option for longer hair when you want to change the finish without committing to a haircut.

    Use larger sections for a looser result and vary the direction slightly if that suits your hair. The goal is a flowing shape, not a row of matching curls. When using a heated tool, follow its instructions and use an appropriate heat protectant.

    Try a Heatless Alternative

    If you prefer to avoid heat styling, experiment with a loose overnight method and adjust it for comfort. Results depend on texture, moisture and how the hair is wrapped. See our heatless waves guide for a gentler styling approach.

    9. Relaxed Low Bun With a Clean Part

    Relaxed Low Bun hairstyle illustration
    Original AI-generated hairstyle illustration.

    A low bun brings the hair together at the nape and leaves the neckline clear. A clean part gives it some definition, while a few fine flyaways keep the finish soft. It works for a casual day as well as an occasion when you want your accessories to stand out.

    Gather the hair gently, twist it into a loose shape and secure it with pins or a comfortable tie. The bun should feel stable without pulling tightly at the hairline. If it feels uncomfortable, loosen and rebuild it rather than adding more tension.

    Choose the Shape From the Side

    Check the bun in a second mirror so you can see its position. A slightly flatter twist and a rounder coil create different effects. Leave a little softness around the face if you prefer it, instead of forcing every short strand into place.

    10. Braided Ponytail for a Defined Outline

    Braided Ponytail hairstyle illustration
    Original AI-generated hairstyle illustration.

    A braided ponytail combines the clear shape of a ponytail with the detail of a three-strand braid. The example here uses a medium-height placement so the braid is visible from the back without sitting extremely high. It can make a simple outfit feel more considered.

    Detangle gently, secure a comfortable ponytail and divide the length into three even sections. Cross the outer sections over the centre until you reach the ends, then fasten with a suitable tie. Avoid pulling harder simply to make the braid look sharper.

    Keep the Base Comfortable

    Check that the ponytail does not tug when you turn your head. A braid can feel heavier than loose hair, especially at longer lengths. Adjust the placement or choose a lower ponytail if that feels better for your day.

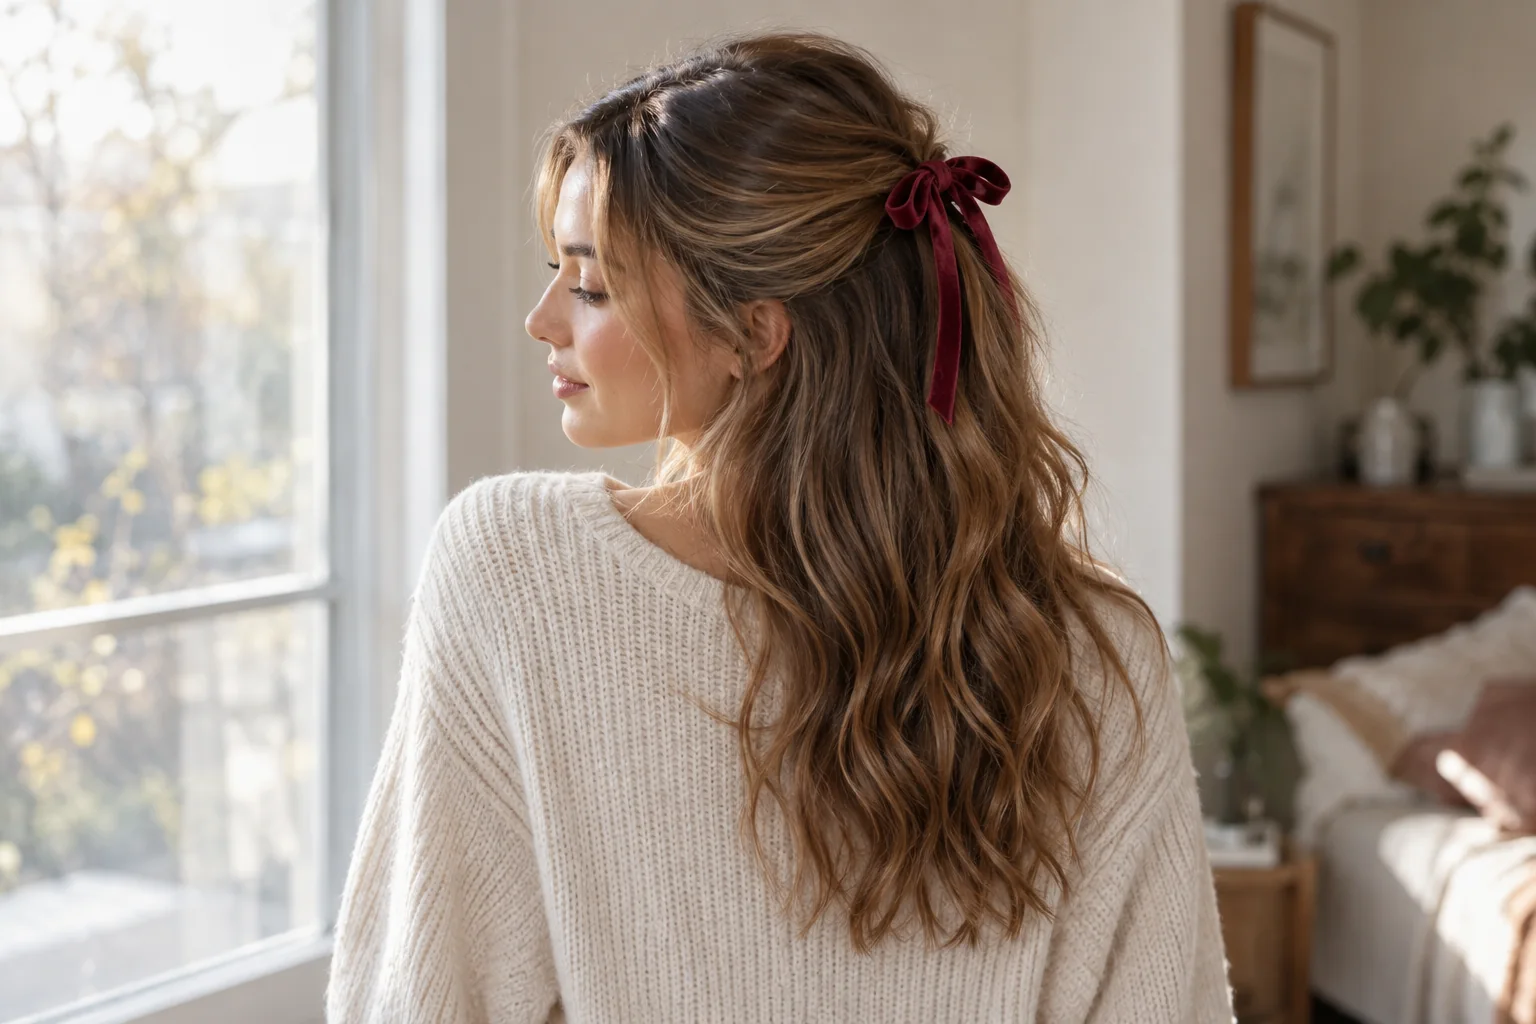
    11. Half-Up Hair With a Ribbon Bow

    Half-Up Ribbon Hairstyle hairstyle illustration
    Original AI-generated hairstyle illustration.

    A half-up hairstyle lifts the upper section while leaving the lower lengths loose. A small ribbon adds a clear finishing detail without requiring an elaborate updo. Soft waves make the contrast between the tied section and the loose hair easy to see.

    Take a modest section from above the ears and secure it before adding the ribbon. Keeping the section smaller can preserve more fullness underneath. Choose a bow that suits your hair length; an oversized ribbon is optional, not a requirement for the look.

    Let the Accessory Stay Simple

    Match the ribbon to one colour in your outfit or use a quiet neutral. Make sure it is tied securely without squeezing the hair. The bow should complement the shape, while the hair itself remains the main feature.

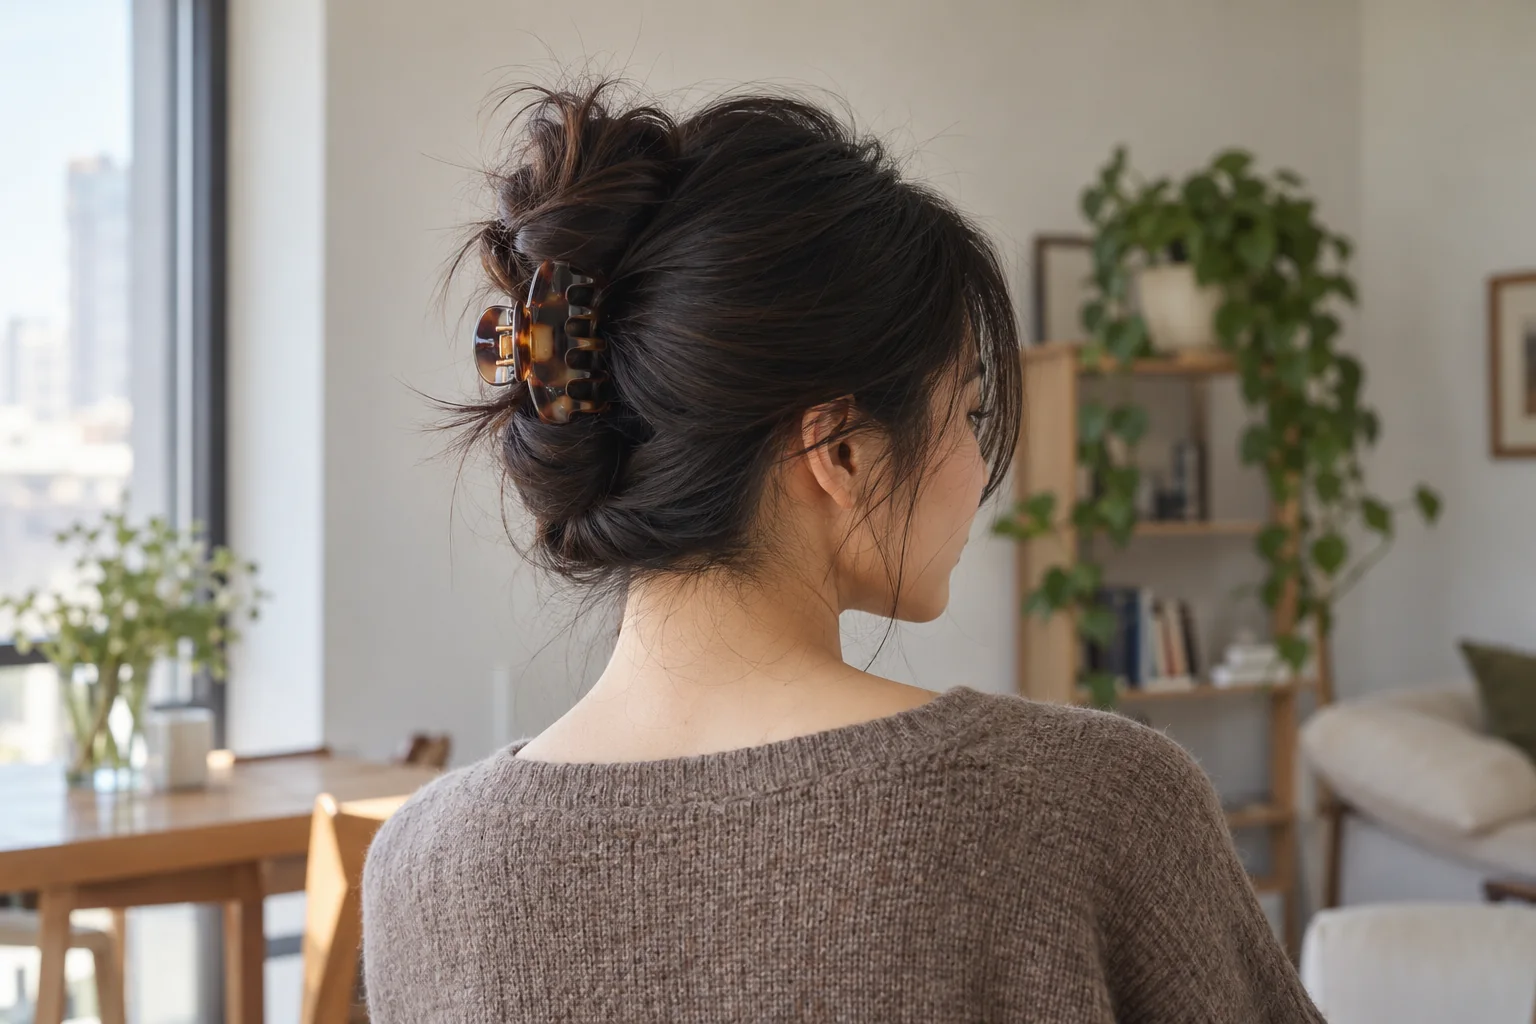
    12. Claw-Clip Twist for a Quick Updo

    Claw-Clip French Twist hairstyle illustration
    Original AI-generated hairstyle illustration.

    A claw-clip twist gathers the hair vertically and holds it with one clip. A few wispy ends at the top give this everyday style a relaxed finish. It is useful when you want to keep hair away from your face without creating a polished occasion updo.

    Choose a clip that can comfortably hold your hair density. Twist the gathered hair upward, fold or arrange the remaining length and secure the clip over the twist. If the clip barely closes or pulls at the roots, use a different size.

    Check the Hold Before Leaving

    Turn your head and move around to make sure the clip stays in place. You can adjust the twist without tightening it excessively. Our cool hair styles guide includes more practical looks for everyday confidence.

    How to Choose Between These Hairstyles

    Start by separating cuts from temporary styles. A ribbon, bun or claw clip lets you experiment immediately, while a pixie, bob or shag changes the shape of your hair for longer. Save a few examples and compare what you actually like about them: the fringe, length, volume or finishing detail.

    Ask your stylist which features can be adapted to your own texture. You do not need the same colour or density as the model to take inspiration from a shape. Keep your routine realistic and choose a result you would enjoy wearing on an ordinary day, not only after professional styling.

    Trend references: current coverage from ELLE on butterfly haircuts and Allure on fall hair trends helped inform the selection. The descriptions and generated illustrations in this guide were created for Haya Glam.

  • Cardigan and Jeans Outfits: 5 Easy Looks to Try

    Cardigan and Jeans Outfits: 5 Easy Looks to Try

    Cardigan and jeans outfits are useful because they start with pieces many of us already own. The combination can feel relaxed, neat or slightly dressed up depending on the knit, denim shape and shoes you choose. You do not need a new wardrobe to make it work; you need a few clear ways to put the pieces together.
    This guide shares five outfit formulas with five outfit examples: a cream cardigan with blue jeans, a black cardigan with wide-leg denim, a grey cardigan with classic blue jeans, a cropped knit with washed-black jeans and a striped cardigan with denim. Treat the images as visual references, then adapt the colours and proportions to clothes you actually enjoy wearing.

    Start With Fit, Proportion and Your Existing Wardrobe

    Before choosing accessories, try on the cardigan and jeans together. Notice where the cardigan finishes, how the waistband sits and whether the knit bunches when you move. A short cardigan and a longer one can both look good, but they create different shapes. The aim is a comfortable combination that feels deliberate.

    Decide which piece will carry most of the volume. If the cardigan is roomy, straight or more fitted jeans can give it a clear outline. If the jeans have a wide leg, a shorter knit or a tidy front can balance the silhouette. These are starting points rather than rules about which body shapes can wear which clothes.

    Use your favourite jeans as the first experiment. Their fit is already familiar, so you can focus on changing the cardigan, shoes or layering piece. Our capsule wardrobe guide explains how to build more combinations from a smaller collection of useful pieces.

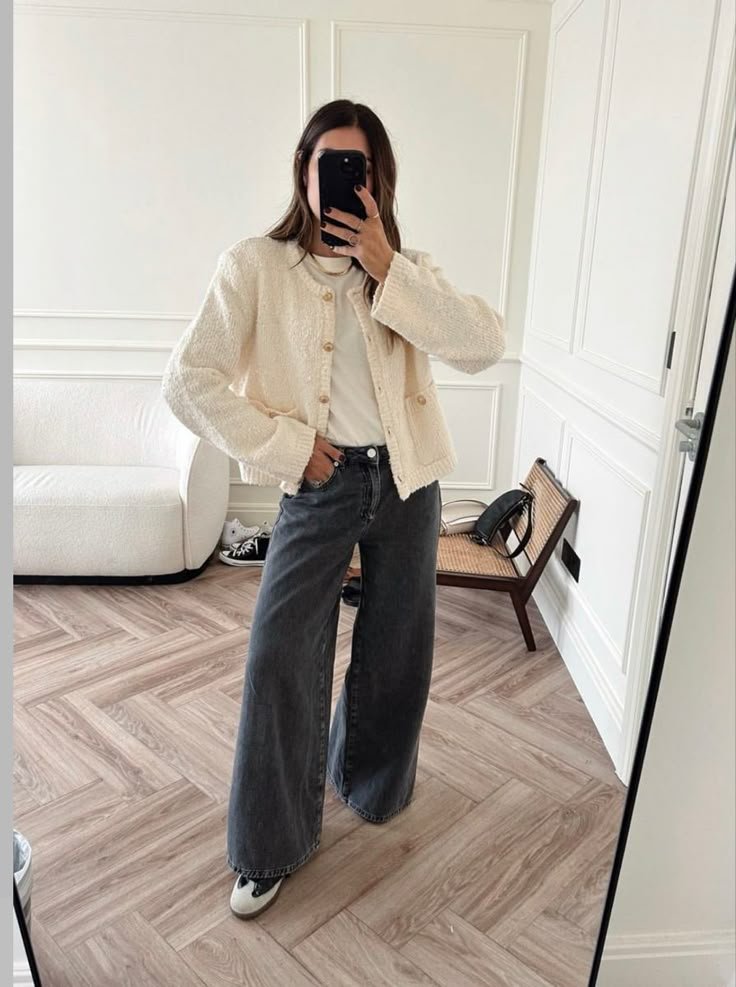
    1. Cream Cardigan and Blue Jeans: A Soft Everyday Combination

    Cream textured cardigan with denim jeans

    Cream knitwear and blue denim create a gentle contrast that is easy to repeat. A cardigan with a little texture adds interest without needing a busy print. This formula works for a coffee outing, a casual office day or a weekend when you want something more considered than a basic sweatshirt.

    Choose Your Denim Shape

    Start with straight jeans if you want a simple outline, or try wide-leg jeans when you prefer more room through the leg. Check the hem with the shoes you plan to wear. Denim that drags along the ground can be inconvenient, especially when the weather is wet, so length matters as much as the leg shape.

    Wear the cardigan buttoned over a comfortable camisole, or open it over a plain T-shirt. A white base keeps the colours light, while a darker top adds contrast. If the knit is delicate or loosely woven, choose an underlayer you would be comfortable showing through it.

    Finish With Quiet Accessories

    Brown loafers, simple trainers or flats can all fit this combination. Pick a bag you can comfortably carry rather than adding an accessory only because it matches a photograph. Small earrings and a belt are enough if you want a tidy finish. Leave some texture visible instead of covering the cardigan with several competing details.

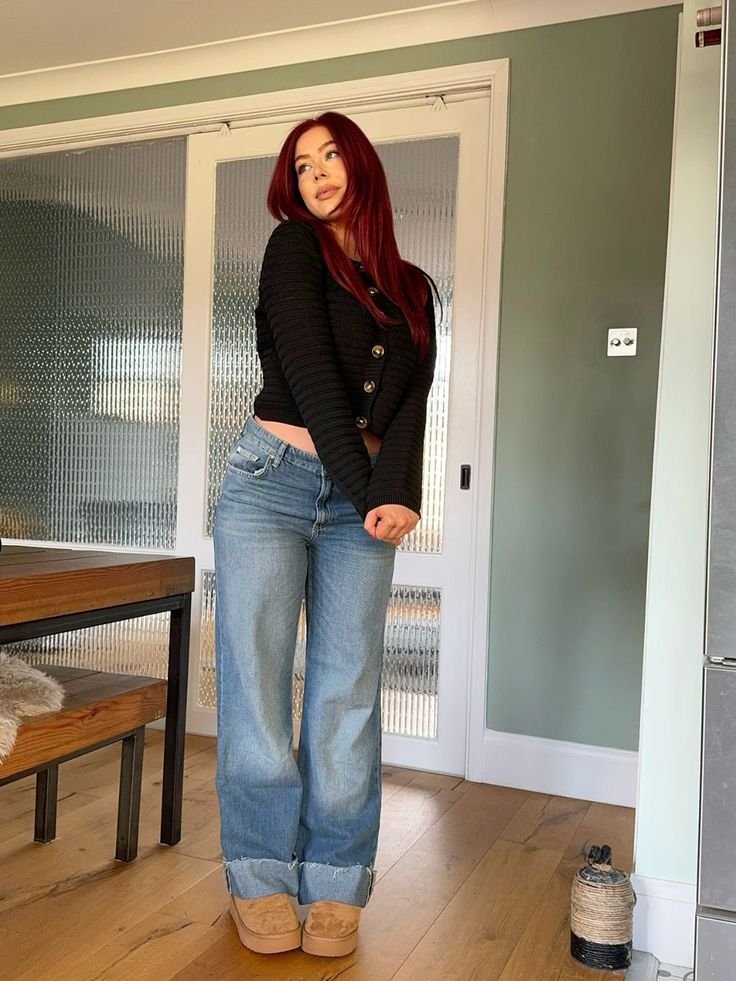
    2. Black Cardigan and Wide-Leg Jeans: Simple With Definition

    Black cardigan with wide-leg blue jeans

    A black cardigan gives wide-leg denim a clear point of contrast. The darker top can feel polished while the jeans keep the outfit relaxed. You can make the combination sharper with loafers or softer with trainers, using the same two main pieces.

    Keep the Top Section Intentional

    If your cardigan is long, try it open over a fitted base layer so the waistband remains visible. A shorter cardigan can be worn buttoned when that feels comfortable. Pay attention to the fabric around the buttons: if it pulls or gaps, adjust the fastening or choose a different layer underneath.

    Wide-leg jeans do not need a tight top to work. A softly shaped knit can look equally considered if the shoulder fit and hem position feel right. Try the outfit from the side as well as the front, then move around before deciding whether you like the proportions.

    Choose One Strong Finishing Detail

    A structured bag, a silver necklace or a neat belt can become the focal point. You do not need all three to make the look complete. For a more defined denim colour, our dark denim styling guide offers useful combinations that can also work with a black cardigan.

    3. Grey Cardigan and Blue Jeans: Relaxed Layers for Everyday Wear

    Grey cardigan with blue jeans

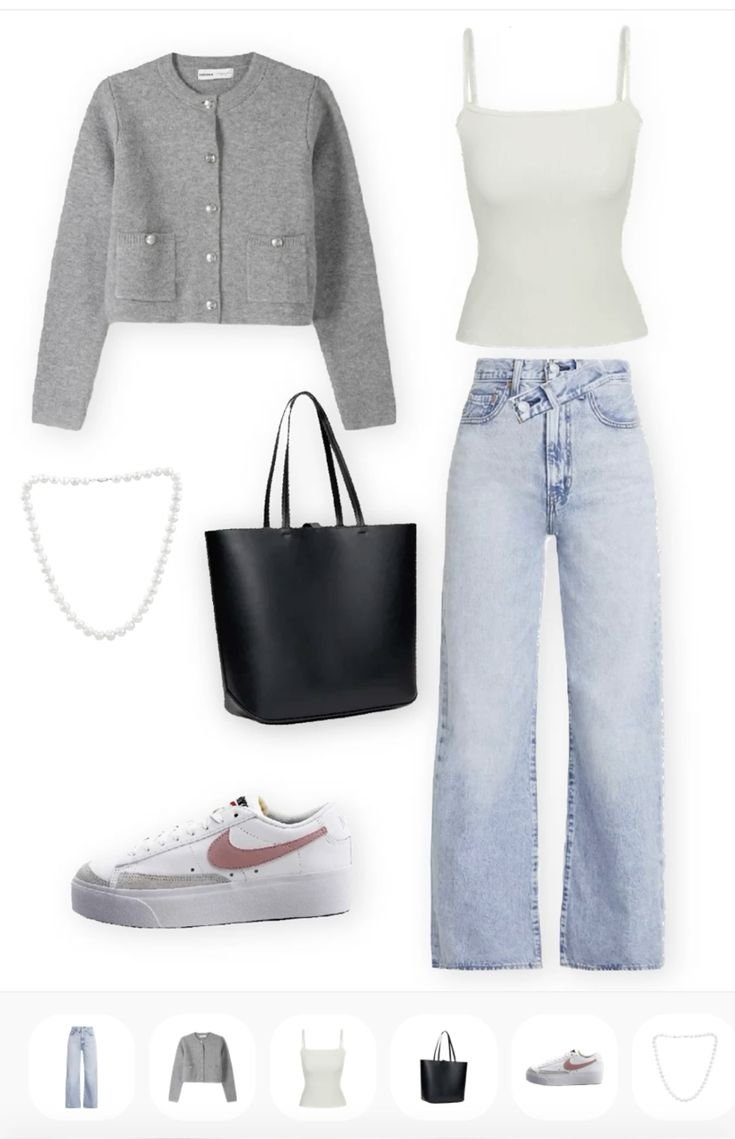
    Grey and blue are an easy pairing when you want a neutral outfit with a little softness. A grey cardigan can sit over a white T-shirt, a fine striped top or a simple shirt. The result depends on the thickness of the knit and how much of the underlayer you leave visible.

    Build Layers Without Extra Bulk

    Try a thinner base layer beneath a chunkier cardigan so the sleeves do not feel crowded. If the cardigan itself is lightweight, a shirt can add structure at the collar and cuffs. Make sure you can bend your arms comfortably; an outfit that looks good standing still should also work while you wear it.

    Straight blue jeans provide a familiar starting point. A lighter wash feels casual, while a deeper wash creates more contrast with pale grey. Instead of changing the whole outfit, compare both washes with the same cardigan and shoes to see which mood you prefer.

    Add Colour in a Small Area

    A burgundy bag, coloured trainers or a printed scarf can interrupt the neutral palette without taking over. Choose one accent first and repeat it only if you like the effect. Our burgundy outfit ideas show how a richer shade can work beside everyday neutrals.

    4. Cropped Cardigan and Washed-Black Jeans: A Clear Waistline

    Cropped cardigan with washed-black jeans

    A cropped cardigan finishes higher than a traditional long knit, making the waistband easier to see. Paired with washed-black jeans, it can feel compact and slightly sharper than a loose layered outfit. Cropped does not have to mean exposing your midriff; the length of the cardigan and rise of the jeans can meet comfortably.

    Check Where the Two Pieces Meet

    Try the cardigan with the jeans before choosing a base layer. Raise your arms and sit down to see how the knit moves. If you want more coverage, add a fitted top underneath. You can also choose a cardigan that ends just below the waistband rather than a very short cut.

    A charcoal denim wash gives the outfit a softer effect than a completely black pair. Try cream, grey or a muted colour on top before adding a bold shade. If the cardigan has decorative buttons, let those provide the detail rather than adding a necklace that competes with them.

    Use Shoes to Set the Mood

    Ankle boots can make the outfit feel more dressed, while trainers keep it informal. Flats work well when you want a lighter finish. Check how the hem sits above each option. A small change in jean length can alter the whole impression, so avoid judging the outfit before putting the shoes on.

    5. Striped Cardigan and Jeans: Pattern Without Complication

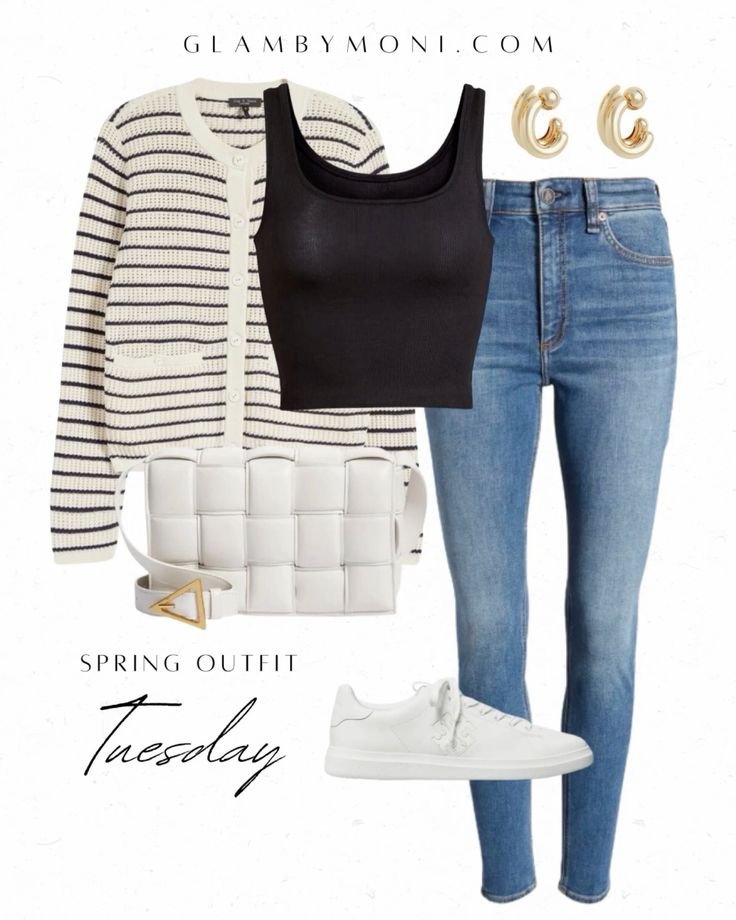
    Striped cardigan with blue jeans

    A striped cardigan adds a visible pattern while keeping the outfit familiar. It can be especially useful when your jeans, bag and shoes are plain. The stripe becomes the main detail, so the rest of the combination can stay straightforward.

    Let the Pattern Do the Work

    Start with blue straight-leg jeans and a plain underlayer. If the cardigan is buttoned, leave the neckline as open or closed as feels comfortable. Wider stripes create a different effect from fine ones, so choose the version you like rather than treating a particular stripe width as a requirement.

    Repeat one colour from the cardigan in your shoes or bag if you want a connected finish. For example, a cream-and-dark stripe can work with cream trainers or a dark loafer. You can also leave the accessories neutral and let the knit remain the single point of interest.

    Try a Simple Accessory Change

    A scarf tied to a bag can add a small extra detail without adding bulk around your neck. If you prefer wearing it, check that the print and stripes feel comfortable together. Our silk scarf styling ideas offer practical ways to experiment with that finishing touch.

    Make Your Cardigan and Jeans Outfits Easy to Repeat

    Once you find a combination you like, take a quick outfit photo for your own reference. Note the shoes and layering piece as well as the cardigan and denim. Small details are often what make a familiar formula work, and remembering them can save time on a busy morning.

    Before buying another knit, test the cardigans you already own with more than one pair of jeans. Change the fastening, try a different T-shirt or swap the shoes. If you want to organise those combinations, start with our autumn wardrobe reset guide and keep the pieces that work comfortably together.

    The strongest cardigan and jeans outfits feel like a natural part of your day. Use these five formulas as a starting point, then adjust the proportions, colours and accessories to your preferences. A repeatable outfit that feels good is more useful than a complicated look you never want to wear again.

  • Cool Hair Styles: 5 Easy Looks for Everyday Confidence

    Cool Hair Styles: 5 Easy Looks for Everyday Confidence

    Cool hair styles do not have to involve a dramatic haircut or an hour in front of the mirror. Often, a different parting, a softer finish or a simple change in how you gather your hair is enough to refresh your look. The most useful style is one that feels comfortable, works with your texture and fits the time you actually have.

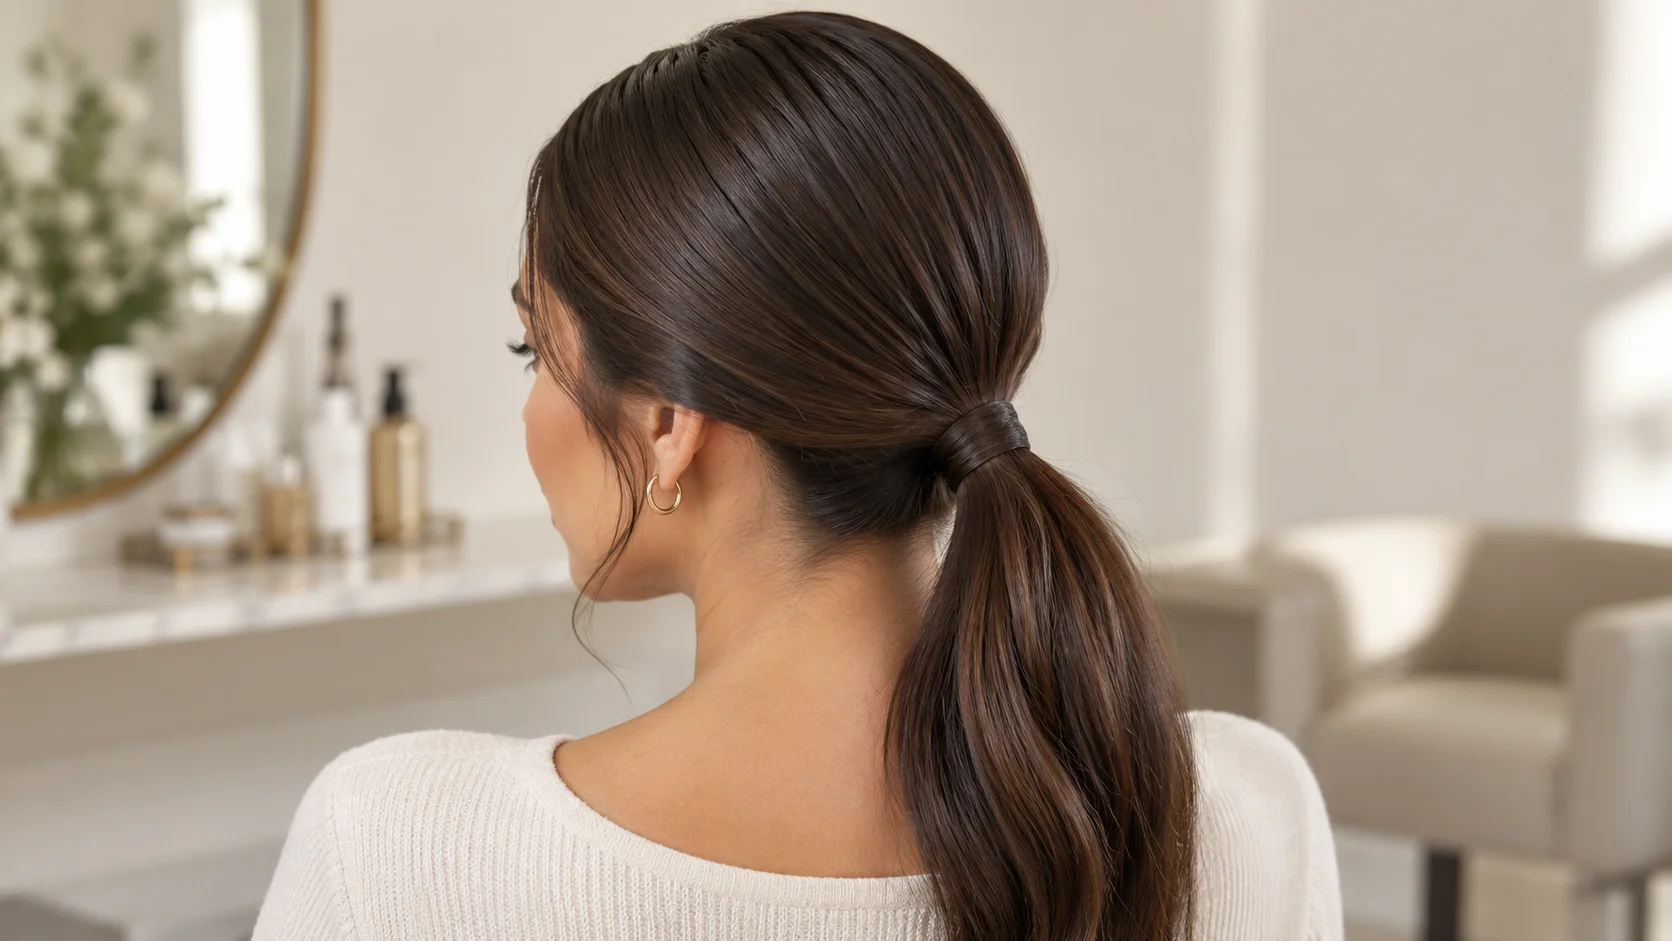
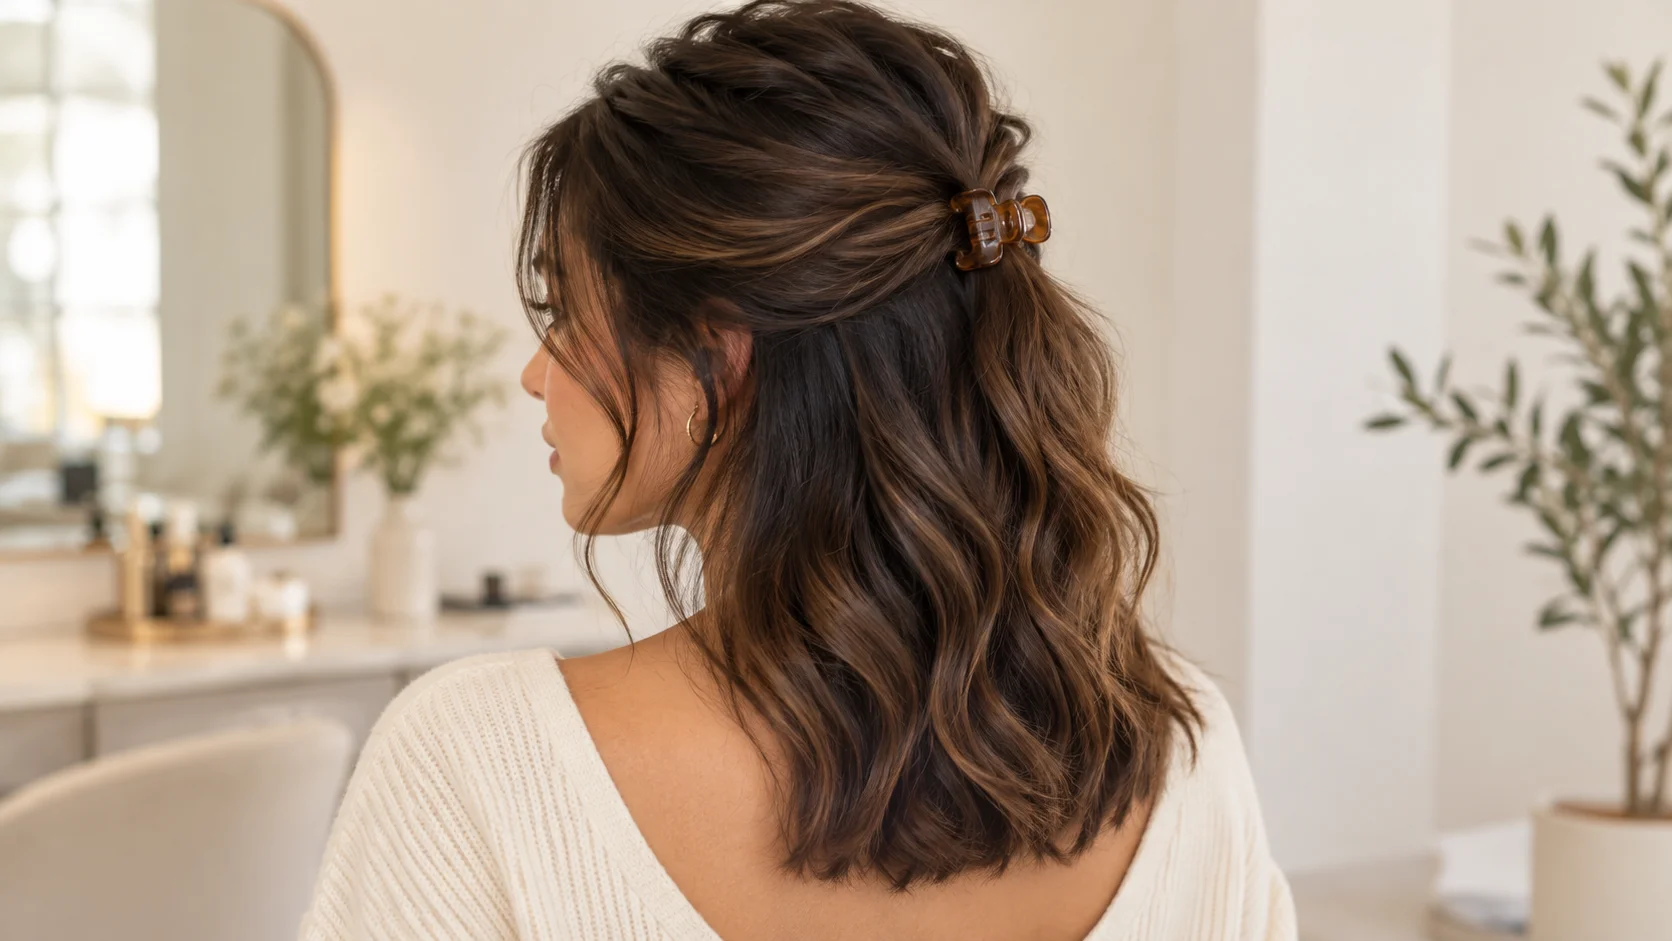
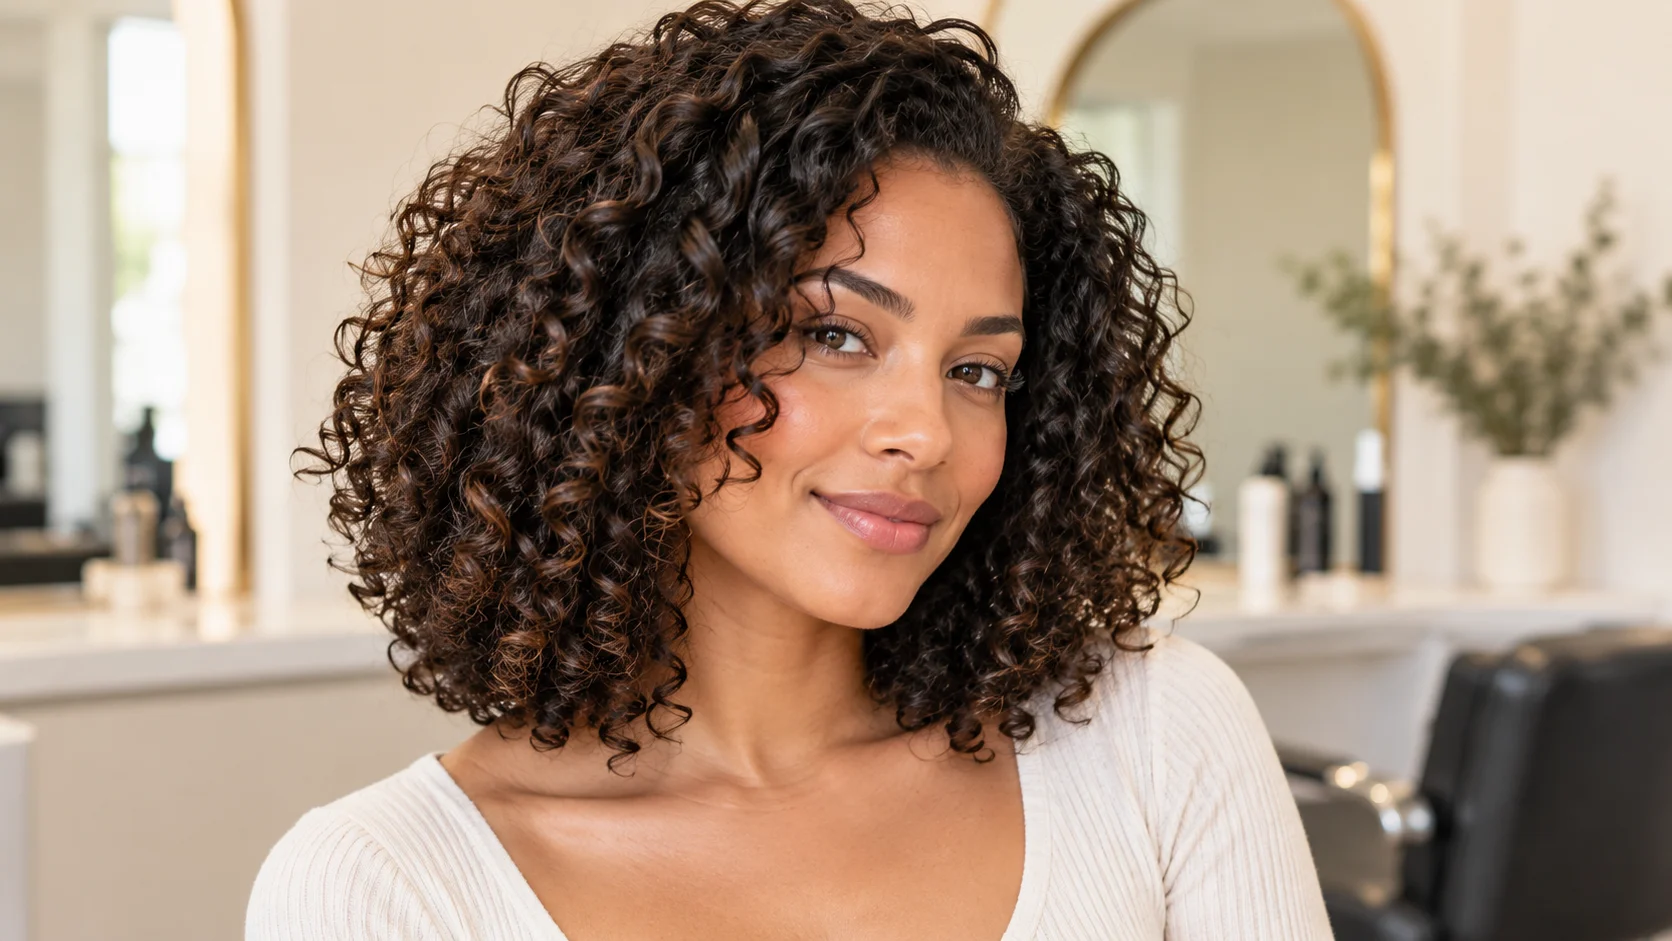
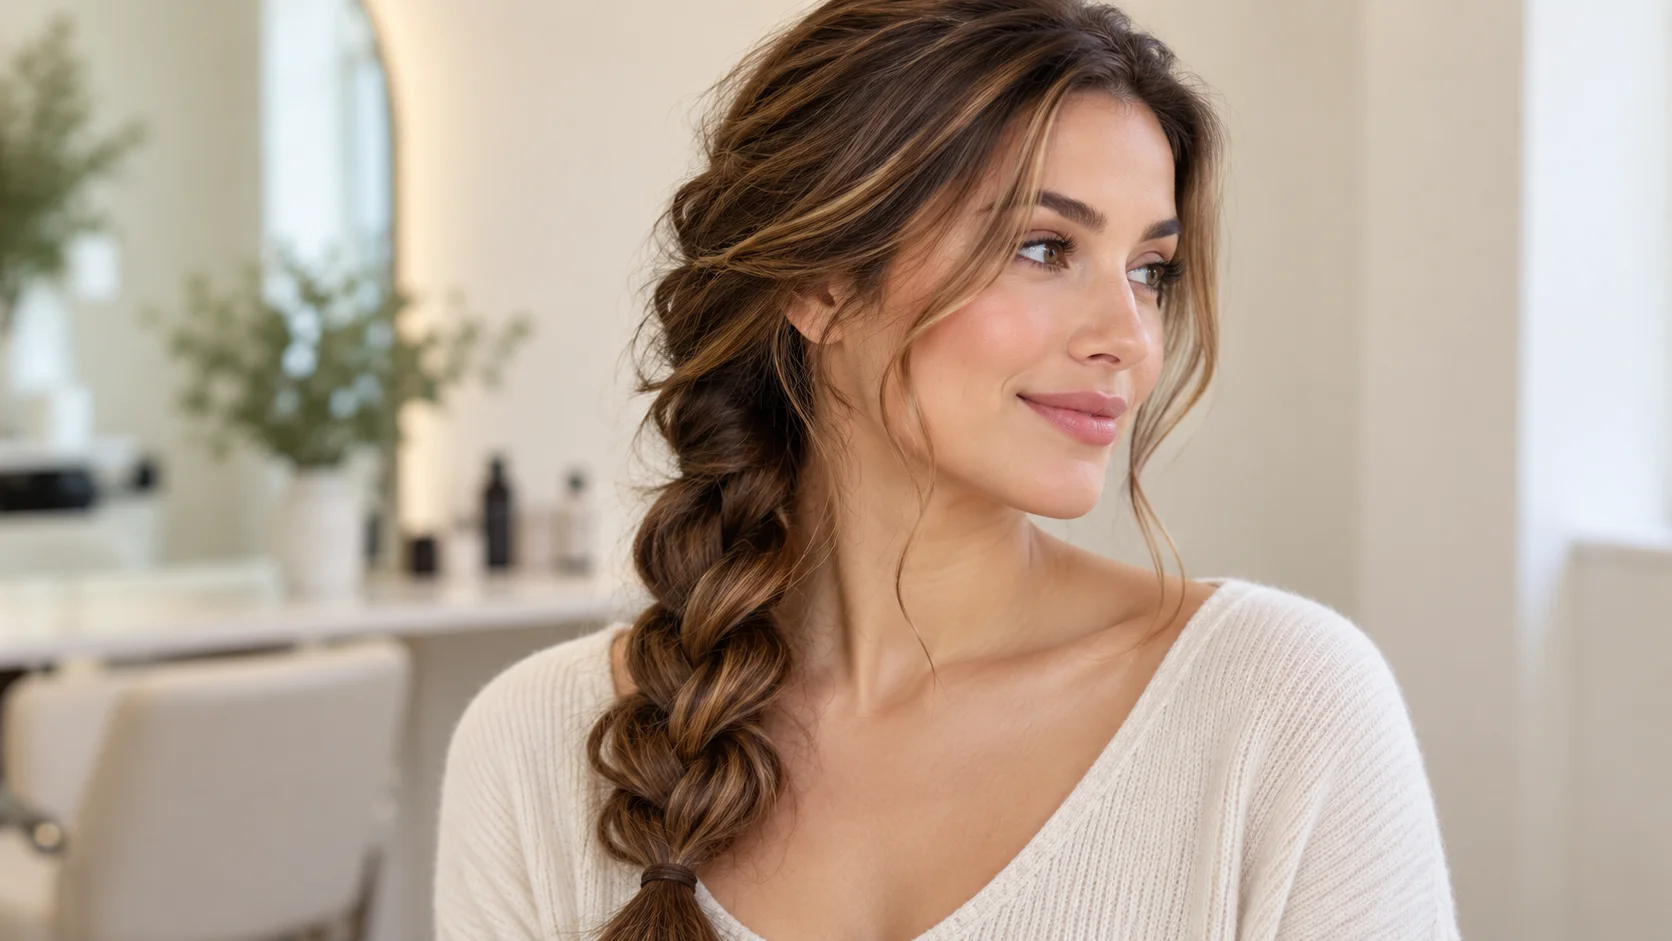
    This guide covers five wearable ideas: a textured lob, a sleek low ponytail, a half-up claw-clip style, defined natural curls and a loose side braid. Each section includes a matching image, practical styling steps and ways to adapt the look. Use the photographs as inspiration rather than a promise that every hair type will produce the same result.

    How to Choose Cool Hair Styles That Work for You

    Start with your current length and natural texture. Hair that falls above the shoulders behaves differently from long hair, and a dense curl pattern needs a different approach from fine, straight strands. Choose a look that cooperates with those features instead of assuming you need to change them.

    Next, think about your day. A loose style can suit an evening out, while a ponytail or clip may be easier when you need your face clear. Consider how a neckline, earrings or scarf will sit beside the hairstyle. You can keep the same outfit and change its overall impression simply by moving your hair.

    Make your first attempt on a day when you have a little extra time. Check the back with a second mirror and notice whether a clip slips or an elastic feels tight. Those small observations are more useful than buying several new products before you know what the style needs.

    1. The Textured Lob: Soft Movement Without a Complicated Finish

    Shoulder-length textured lob with softly tousled waves
    Illustrative hairstyle inspiration.

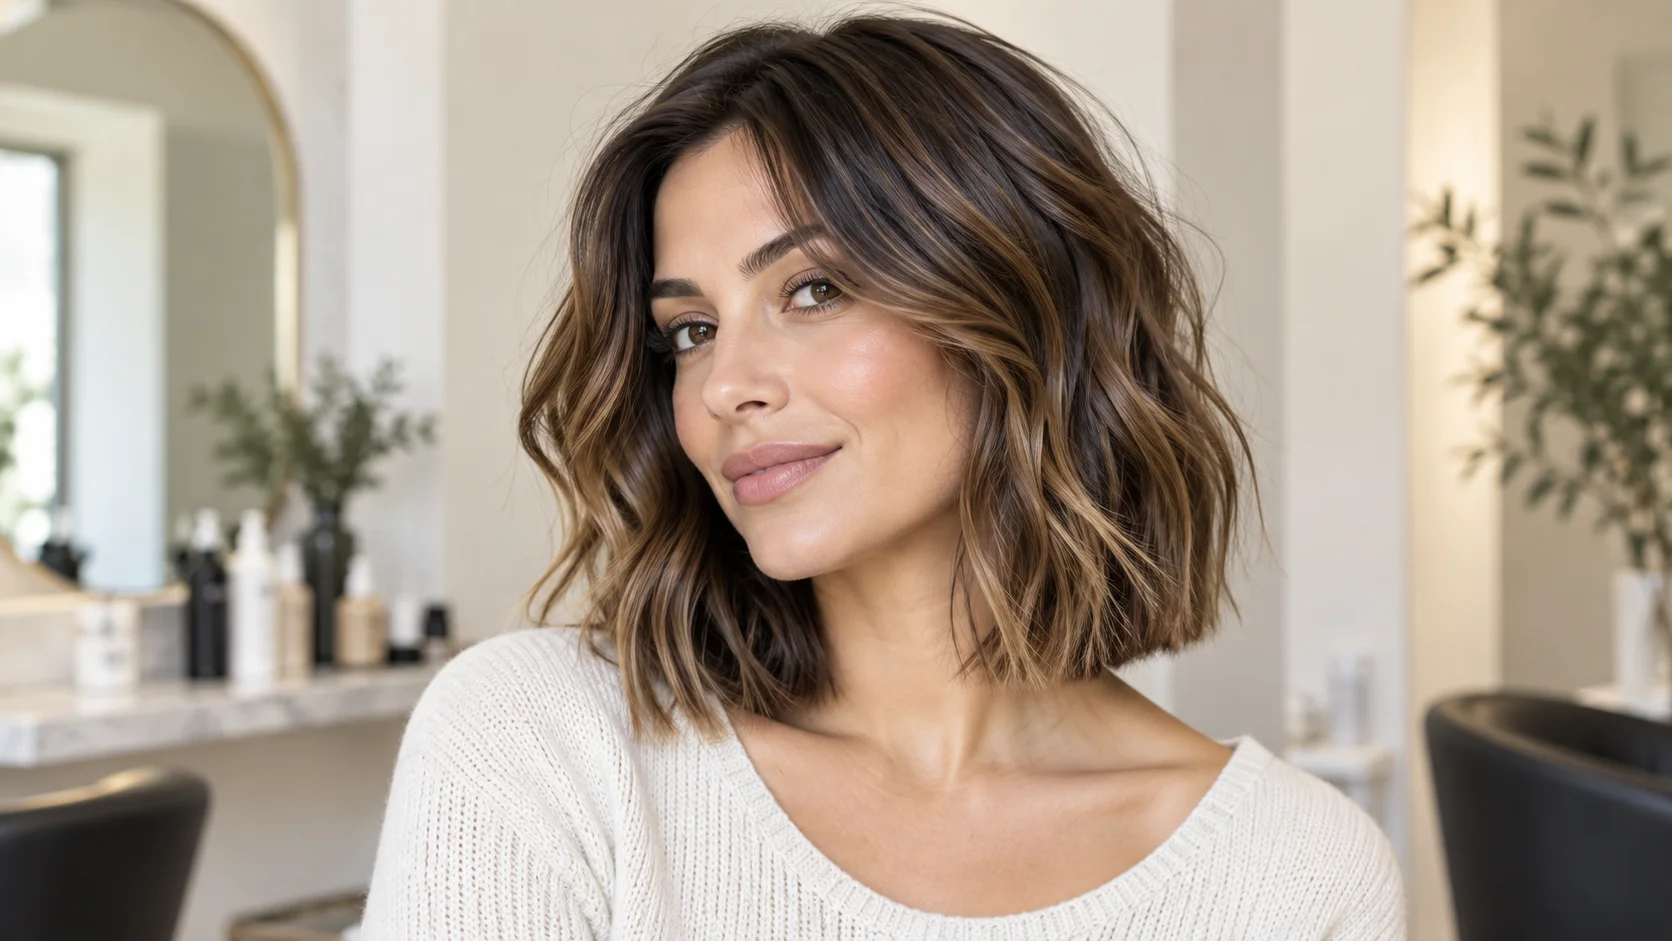
    A lob is a longer bob, commonly sitting around the shoulders. A textured finish gives the shape movement rather than making every strand lie perfectly flat. It can feel relaxed with a T-shirt and more polished beside a tailored jacket, which makes it a versatile starting point for everyday styling.

    How to Style a Textured Lob

    Begin with detangled hair and choose your parting before shaping the lengths. If your hair already has a wave, work a small amount of your usual styling product through damp lengths and gently encourage that pattern. Let the ends keep a little variation instead of forcing them into identical bends.

    On straighter hair, you can try a heatless method on slightly damp hair, then release it only once dry. The outcome depends on the method and your texture, so expect some experimentation. Our guide to heatless waves offers another way to explore movement without making a hot tool your daily starting point.

    Make the Shape Your Own

    A centre part gives the style a balanced appearance, while a side part changes the distribution of volume. Tuck one side behind your ear to show an earring or neckline. If you want the haircut itself, take reference images to a stylist and discuss your density, shrinkage and usual styling routine before choosing a length.

    2. The Sleek Low Ponytail: Clean Lines for Busy Days

    Sleek low ponytail secured at the nape
    Illustrative hairstyle inspiration.

    A low ponytail sits close to the nape rather than high on the head. Its appeal is the contrast between a tidy top section and free-moving lengths. It is a useful option for work, a dinner outfit or a morning when you want your face clear without creating a complicated updo.

    Build a Smooth Shape Without Pulling Hard

    Set your parting first, then gather your hair with your hands. Smooth the surface gently with a brush suited to your texture, concentrating on the areas you want to tidy. Secure the ponytail with a covered hair elastic and check that the hold feels comfortable rather than tight.

    If you use a styling product, start with a small amount and add only where needed. A sleek appearance does not require flattening every short hair. Leave the tail straight, softly waved or naturally curly according to your existing texture. Avoid repeatedly tugging the ponytail tighter once it is secured.

    Small Details That Change the Look

    A slim ribbon or simple barrette can echo an outfit colour without turning the hairstyle into a costume. Keep accessories light enough that they do not drag on the ponytail. For a softer version, leave a small amount of face-framing hair loose. Smooth should describe the finish, not uncomfortable tension at your hairline.

    3. Half-Up Hair With a Claw Clip: Practical and Relaxed

    Half-up hairstyle secured with a small claw clip
    Illustrative hairstyle inspiration.

    A half-up style gathers the upper section while leaving the lower lengths loose. It is especially useful when you like wearing your hair down but want the front pieces out of your way. A small claw clip adds a visible detail and can be easier to reposition than a tightly secured arrangement.

    Choose the Right Amount of Hair

    Take a section from above your ears and guide it towards the back of your head. Start with less hair than you think you need; you can add more if the clip feels secure. Twist the gathered section lightly, then close the clip around it without catching or scraping your scalp.

    Check whether the clip can hold the section comfortably. If it keeps opening, use a slightly larger clip or a smaller section rather than forcing it shut. Fine hair may need a lighter accessory, while thick hair often needs more room inside the clip. The fit matters more than the accessory’s appearance.

    Keep the Lower Lengths Natural

    Let the loose hair follow its normal pattern. You can arrange a few front pieces with your fingers, but you do not need to restyle the entire head. This look pairs well with a casual shirt, knitwear or a simple dress. Try it alongside a calm getting-ready routine when you want fewer morning decisions.

    4. Defined Natural Curls: Let Texture Lead the Style

    Defined natural curls in a rounded shoulder-length shape
    Illustrative hairstyle inspiration.

    Defined curls can look distinctive without a complex arrangement. The aim is to bring out a curl pattern you already have, not to make every section identical. Some areas may curl more tightly than others, and that variation can be part of the finished shape rather than something to hide.

    Style in Manageable Sections

    After your usual wash and conditioning routine, divide damp hair into sections you can comfortably handle. Distribute your chosen curl product evenly, starting with a modest amount. Use your fingers or a suitable detangling tool to arrange the sections, then gently encourage the curls without repeatedly pulling them apart.

    Let your hair dry with as little unnecessary handling as possible. Once dry, decide whether you prefer a more defined finish or a little extra volume. You can lift gently at the roots without dragging through the lengths. If your product leaves the hair feeling coated, adjust the amount on your next attempt.

    Balance Definition and Volume

    A rounded shape, a side part or a tucked-back section can change the look while keeping the same texture. There is no requirement to eliminate every flyaway. Our soft volume hair guide explores movement and shape when you prefer a less rigid finish. Choose the balance that feels like you.

    5. The Loose Side Braid: An Easy Way to Wear Longer Hair

    Loose three-strand side braid over one shoulder
    Illustrative hairstyle inspiration.

    A side braid brings the hair over one shoulder, making the detail visible from the front. A simple three-strand plait is enough to create the look. It suits many casual outfits and can also work beside an open neckline when you want an alternative to wearing all your hair loose.

    Create a Comfortable Three-Strand Braid

    Gently detangle the lengths and gather them towards one side. Divide the hair into three sections, then alternate the outer sections over the middle section. Keep the movement controlled but the hold relaxed. Secure the end with a covered elastic before adjusting the shape.

    If you want a fuller appearance, ease the outer edges of the braid slightly with your fingers. Stop if the sections begin to unravel or your shorter layers slip out too much. Face-framing strands can stay loose, and the braid does not need to start tightly against the scalp.

    Adapt It to Your Length

    Longer hair usually gives you more room for a visible side braid. With shorter layers, a smaller plait or a partly braided section may be easier than gathering everything. Try the style before an event so you know how it behaves when you move. Keep spare elastics handy rather than over-tightening the first one.

    Keep Your Styling Routine Gentle

    Comfort is a useful check for any of these cool hair styles. If an elastic, braid or clip feels uncomfortable, loosen or reposition it. Rotate between loose hair and gathered styles instead of repeatedly pulling the same sections in the same direction.

    The American Academy of Dermatology’s hair-care guidance recommends loose styling, covered hair bands and reducing heat exposure. If you use hot tools, avoid unnecessary repeat passes and follow the tool’s instructions. For everyday habits around washing and handling, read our healthy hair care guide.

    Find Your Everyday Favourite

    You do not need to master all five looks at once. Choose one that matches your current length, try it a few times and change one detail at a time. A different parting, a lighter clip or a looser finish can make a familiar hairstyle feel new. The best cool hair styles are the ones you enjoy wearing and can comfortably repeat.

  • Getting Ready Routine: A Calm Plan for Busy Mornings

    Getting Ready Routine: A Calm Plan for Busy Mornings

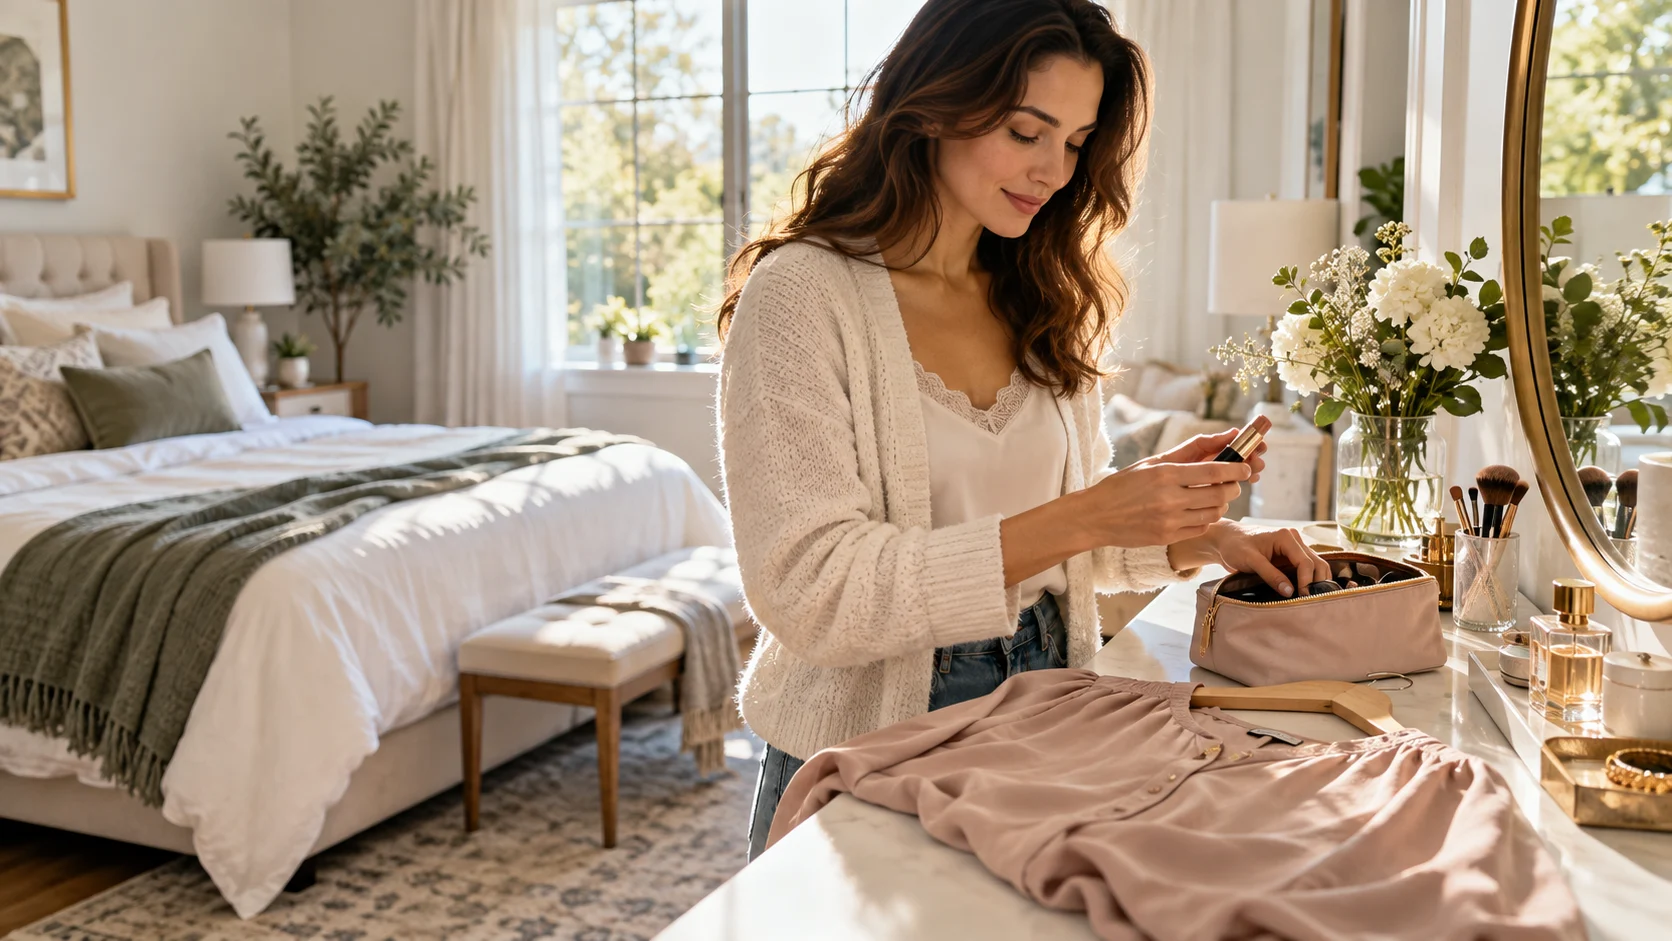
    A getting ready routine works best when it reduces decisions rather than adds rules. You do not need a long sequence of perfect habits before leaving home. A dependable outfit, a manageable beauty kit and a realistic order of tasks can make an ordinary morning feel less rushed.

    The useful starting point is your actual schedule. Notice where time disappears: searching for clothes, changing an outfit repeatedly, finding a missing brush or trying an unfamiliar makeup technique. This guide helps you build a routine around those practical problems, with room for different days instead of one rigid version.

    Observe a normal morning before changing it

    Choose an ordinary day and note what you do between waking and leaving. You do not need precise tracking for every minute. Write down the moments when you pause, search for something or repeat a task because the first attempt did not work.

    Look for patterns rather than blaming yourself for being disorganised. A missing item may need a better place to live. An outfit that takes several tries may need a saved combination. A routine becomes easier when the environment supports it, not when every step depends on extra willpower.

    Decide what is essential for leaving comfortably

    Separate the things you genuinely need from optional additions. Dressing appropriately, following your care needs and carrying required items belong in the essential group. An elaborate eye look or trying a new hairstyle may be enjoyable without being necessary every morning.

    Keep prescribed treatments or other professional advice outside ordinary routine cuts. Follow the instructions you have been given. The aim is to simplify optional decisions, not to remove important care because it takes more time than a beauty trend suggests.

    Prepare one dependable outfit in advance

    Choose an outfit that suits the next day’s weather and plans, then check the shoes and outer layer. Put the pieces where you can reach them. This is more useful than selecting only a top and leaving the rest of the combination unresolved.

    Our wardrobe reset guide explains how to build and save practical combinations. Keep two or three reliable alternatives available so a change in weather does not force you to restart the whole decision in the morning.

    Keep the beauty kit visible and limited

    Place the products you use daily together and move occasional items elsewhere. You should be able to identify the next step without comparing several similar products. A smaller visible area can help even if you enjoy a larger collection as a hobby.

    Our beauty capsule routine provides a way to organise by function. Keep care and makeup understandable rather than turning every product on the shelf into a compulsory step. Optional colour can stay available without slowing the ordinary routine.

    Build a simple makeup version first

    Choose the look you can comfortably repeat with familiar products and clean tools. It may involve concealer, a little cheek colour and a lip product, or another combination that suits you. There is no requirement to use a full base or several eye shades.

    Our natural makeup tutorial offers a starting point. Once the simple version is dependable, create an expanded version for days when you have more time. You will then know what can be added without rebuilding the entire process.

    Give hair a realistic plan

    Decide whether the morning calls for styling, a simple arrangement or using the shape already in your hair. Keep suitable accessories where you can find them. A clip you know how to use is more practical than an elaborate method you only watched once.

    If you want to learn a new technique, practise when you are not about to leave. Our heatless waves guide explains how to test a method and adjust it gradually. A busy morning should use the version you understand, not become the first trial.

    Put tasks in a useful order

    Overhead flat lay of a small curated beauty capsule: one unlabelled tinted base tube, mascara, blush compact, lip balm, a brush and simple skincare tube, neatly arranged on an ivory vanity.

    Some steps are easier when done before dressing, while others make sense afterwards. Choose an order that suits your products, clothes and available space. Avoid copying a routine that requires facilities or time you do not have.

    Consider where waiting naturally fits. If a product needs time according to its instructions, use that interval for another task instead of rushing the next layer. Keep the order simple enough to remember without an elaborate chart. The purpose is a smoother morning, not another item to manage.

    Create a shorter version for rushed days

    A routine needs a fallback. Decide which optional steps can be reduced and which essentials stay. That might mean a simpler lip, no detailed eye look and an outfit you already photographed. Planning the shorter version makes it easier to use without feeling that the morning has failed.

    Keep the fallback genuinely manageable. If it still asks for several unfamiliar techniques, it is not a useful alternative. Try it once on a normal day so you know how it feels and whether any necessary item is missing.

    Put leaving essentials in one place

    Choose a consistent place for the bag, keys and other items you need. Pack what can be prepared in advance. This prevents the final few minutes from becoming a search through rooms after the clothes and makeup are already finished.

    Check the next day’s specific requirements, not only the usual items. A work document, appointment information or weather appropriate accessory can easily be forgotten if the routine relies entirely on memory. A short list near the bag can help without creating a complicated system.

    Keep maintenance separate from the morning

    Brush cleaning, garment repairs and sorting old products are useful tasks, but they do not need to happen while you are trying to leave. Set aside another time for them so the everyday routine uses clean, ready items.

    Our brush care guide can help you plan tool maintenance. A clean tool available in the morning reduces the temptation to improvise with something unsuitable or add a new purchase because the existing item was never prepared.

    Review what worked after a week

    Notice which changes genuinely helped. You may find that preparing shoes mattered more than laying out makeup, or that moving one product saved repeated searching. Keep those improvements and remove steps that created work without a clear benefit.

    Do not judge the routine by whether every morning looks identical. Plans change and some days remain rushed. A good routine gives you dependable options and makes recovery easier, rather than demanding perfect performance before you can begin the day.

    Getting ready routine checklist

    • Prepare a complete outfit, including shoes.
    • Keep daily beauty products together.
    • Use a familiar makeup and hair version.
    • Plan a shorter routine for rushed days.
    • Put leaving essentials in one place.
    • Maintain tools and clothes at another time.

    You can build the system gradually. Solve the most repeated problem first and observe the difference before adding another habit. A useful routine is often a few small changes that fit your life, not a long list borrowed from someone else’s morning.

    Frequently asked questions

    How early should I start getting ready?

    Base it on your own tasks and travel needs. Observe the routine, allow room for ordinary interruptions and adjust from there. A universal time estimate is less useful than knowing which steps you actually repeat and how long your departure process usually takes.

    What if I enjoy spending longer on beauty?

    Keep an extended version for days when you want it. Enjoyment is a valid reason to use more time, as long as the routine fits your plans. The shorter version is an option for busy days, not a rule that every morning must be minimal.

  • Travel Beauty Kit: Pack a Small Routine You Can Maintain

    Travel Beauty Kit: Pack a Small Routine You Can Maintain

    A travel beauty kit should make your routine easier away from home, not reproduce every product on your bathroom shelf. Pack the care steps and makeup you actually use, with enough flexibility for the plans you have. A smaller kit is useful when you can find each item, store it properly and maintain it during the trip.

    The most common packing mistake is preparing for every imaginary occasion while ignoring ordinary days. Begin with the trip length, climate and activities, then choose familiar products. This guide focuses on practical organisation, clean tools and manageable routines rather than a compulsory list of miniature products.

    Build the kit around your itinerary

    Write down what the trip involves. A relaxed stay, a work visit and an event weekend may need different makeup options. Note how much outdoor time you expect and whether you will have access to a comfortable place to get ready.

    Think about luggage and transport too. If you are flying, check the current liquid and baggage rules for your airports and airline before packing. Do not rely on an old social media list, because the applicable requirements can differ by route and security equipment.

    Separate daily care from occasional makeup

    Put the products needed every day in one group, then add makeup for specific plans. This prevents a party lip or elaborate eye palette from crowding the basic routine. You can bring a special item without making the entire kit more complicated.

    Our beauty capsule guide helps identify the products you repeat. Use those as the starting point. Travel is usually not the most convenient time to test several unfamiliar formulas when your schedule and surroundings have already changed.

    Keep the skincare routine understandable

    Pack the care steps you know and use according to their instructions. Avoid adding a new routine simply because travel sized products are available. Any prescribed treatment should remain part of the plan as advised by your clinician, with suitable storage and enough supply.

    Our skinimalism guide explains how to review optional steps. If a product has no clear role in the trip, it may not need to come. A manageable routine is easier to maintain when you are tired or getting ready in an unfamiliar space.

    Plan sun protection for the activities

    Think about outdoor walks, sightseeing or time near water. Pack suitable sunscreen and follow its label, including reapplication and storage guidance. Shade and protective clothing should be part of the plan rather than treating one morning application as complete coverage for the day.

    If you wear makeup, choose a routine that leaves you willing to maintain sun protection. Our sunscreen under makeup guide discusses practical layering and planning. The cosmetic finish should not make an important care step too inconvenient to repeat.

    Choose makeup that supports more than one look

    A familiar base, one cheek colour and a dependable lip can cover ordinary days. Add a stronger lip or a small eye option if your plans justify it. You do not need several products that create almost the same effect.

    Only use products for purposes permitted by their instructions. A lipstick is not automatically suitable for eyes or every other area. Multi use packaging can be convenient, but read the intended uses rather than assuming that every creamy product can replace several categories.

    Reduce the tool collection

    Bring the clean tools your chosen products actually need. If your ordinary look uses one base tool and a small cheek brush, there is little reason to pack a large brush roll. A smaller set is easier to maintain and less likely to remain damp in a closed case.

    Plan how the tools will dry after cleaning. Give them ventilation where appropriate and avoid sealing a damp sponge in a pouch. Our makeup brush care article explains the basic storage decisions that help keep a kit manageable.

    Overhead flat lay of a small curated beauty capsule: one unlabelled tinted base tube, mascara, blush compact, lip balm, a brush and simple skincare tube, neatly arranged on an ivory vanity.

    Check containers before packing

    Close every lid properly and inspect pumps, caps and seals. Keep products in suitable containers and follow storage instructions. Do not move sunscreen or other products into an unmarked container simply to make the kit look uniform without checking whether that is appropriate.

    If you use permitted travel containers, label them clearly and avoid mixing formulas. You should be able to identify the product and follow its instructions away from home. A matching set of tiny bottles is less useful than knowing exactly what you packed.

    Use pouches according to function

    A simple separation between daily care, makeup and tools can make the kit easier to use. The pouches do not need to be expensive, but they should be clean and suitable for the contents. Keep products that may leak contained so they do not cover every brush or accessory.

    Avoid packing the bag so tightly that you cannot remove one item without emptying everything. Leave enough room to put products away neatly. A kit that is organised only at home may become frustrating after the first morning of the trip.

    Test the packed routine before you leave

    Use the selected kit for one ordinary morning and evening at home. Notice whether an essential step is missing or whether several products are unnecessary. This is a more useful test than deciding from a flat lay photograph.

    Try the makeup look you plan for an event too. If it needs tools you did not pack, simplify the look or add the specific tool. Do not bring a large extra collection just because one technique might require something different.

    Keep a small refresh pouch

    For a long day, you may want a lip product, an appropriate mirror and the items needed for your planned care steps. Choose according to the day’s activities. A refresh pouch should be smaller than the main kit, not a second complete version of it.

    Check the items at the end of the day and return anything that needs cleaning or replacement to the right place. Small habits prevent the kit becoming a mix of clean and used tools, loose products and forgotten receipts.

    Travel beauty kit checklist

    • Confirm current transport and baggage requirements.
    • Pack familiar products with clear purposes.
    • Include required care and any prescribed items as advised.
    • Plan sun protection for outdoor activities.
    • Bring only the tools your makeup needs.
    • Check labels, lids and storage instructions.
    • Test the packed routine once at home.

    For flights involving the United States, the TSA liquid guidance is one official reference. Use the relevant official airport and airline information for your actual route rather than assuming one country’s rules apply everywhere.

    Frequently asked questions

    Should I buy a complete travel sized skincare set?

    Only if the products suit your needs and you understand the routine. Familiar products in appropriate packaging may be more practical. A set is not automatically useful simply because every item is small or comes in a matching pouch.

    What if I want a different makeup look every evening?

    Choose a small range of colours or finishes that can change the mood while keeping the base routine stable. A different lip or one eye detail can provide variety. Pack for the looks you will genuinely practise and wear, rather than every possible occasion.

  • Autumn Wardrobe Reset: Make Your Existing Clothes Work Harder

    Autumn Wardrobe Reset: Make Your Existing Clothes Work Harder

    An autumn wardrobe reset is a chance to make your clothes easier to use before deciding what to buy. You do not need to empty the entire wardrobe, replace every summer piece or follow a complete trend list. Begin with the outfits that fit your current weather, work and everyday plans.

    The change of season often brings new colour and layering ideas, but the useful question is what your own clothes can already do. This guide offers a practical sequence: review, try combinations, solve small problems and make a short list of real gaps. The result should be more wearable outfits, not simply a tidier wardrobe photograph.

    Start with the week you actually live

    Write down your usual activities: work, errands, time at home and any regular social plans. Note how much walking, commuting or outdoor time they involve. A wardrobe should support those situations before it supplies occasional outfits that rarely leave the hanger.

    Look at the weather where you live rather than a seasonal image from another country. Autumn may mean cool mornings, continued heat or changing rain. That affects fabric weight and layering. The right reset is based on your conditions, not a compulsory collection of coats and heavy knits.

    Choose a small area to review first

    Start with one useful category, such as trousers, tops or outer layers. A manageable section is easier to finish and gives you a clear result. Pulling every item out at once can turn a simple review into a long task you abandon halfway through.

    Keep a place for pieces that need trying on or repairing. Do not immediately label everything unworn as unwanted. Some clothes may simply need a better combination, an alteration or a change in storage so you remember they exist.

    Try the dependable pieces together

    Choose the jeans or trousers you wear most often, then test them with three tops and one outer layer. Add the shoes you would actually use. Judge the whole combination rather than assuming that individual pieces will work because they look attractive on their own.
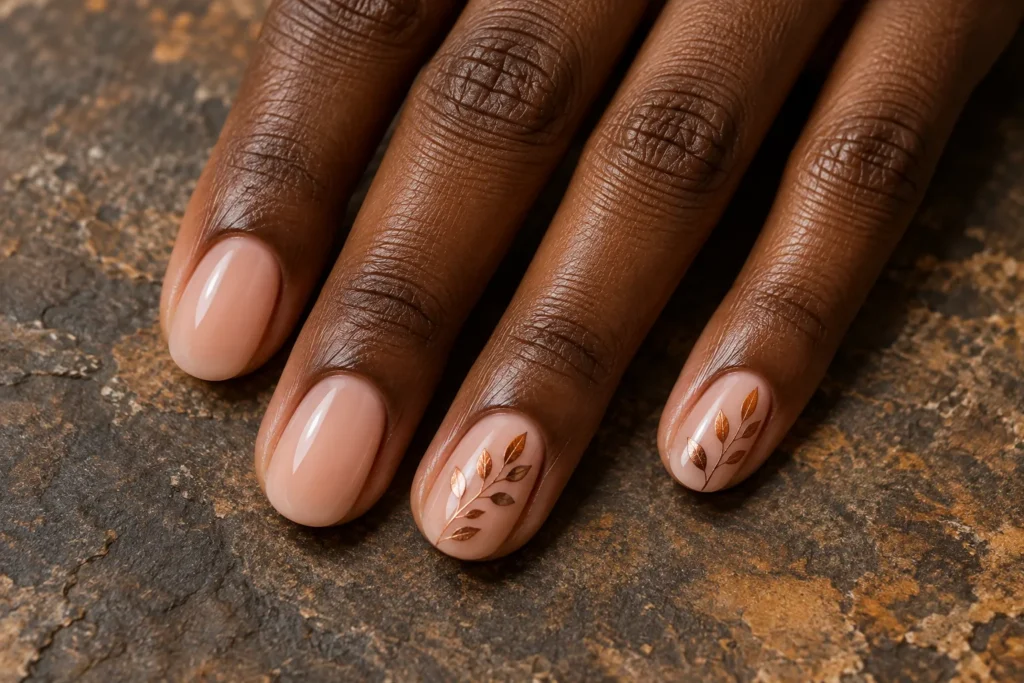
    Our capsule wardrobe guide explains how to build around repeatable basics. You do not need to adopt a strict capsule count. Use the idea to identify the clothes that support several ordinary outfits.

    Check fit before blaming the style

    A hem that drags, a sleeve that feels too long or a waistband that pulls can make a useful garment seem wrong. Try the piece while sitting and walking, then identify the specific problem. A small alteration may improve it more than buying something similar.

    Be realistic about what can be repaired or changed. Ask a suitable professional if the garment is important to you. Do not keep a large pile of imagined alterations indefinitely; choose the repairs you will actually arrange and set the rest aside for a later decision.
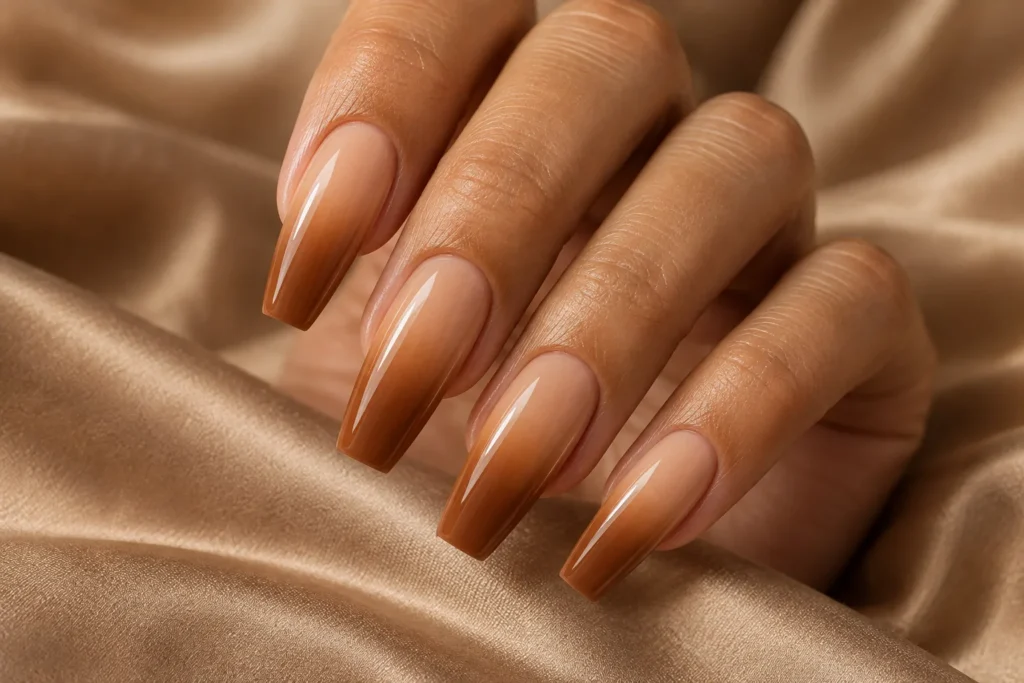
    Use light layers for changing temperatures

    A shirt, cardigan or jacket can make clothes useful across different parts of the day. Test whether the layers fit comfortably together and whether you can remove one without leaving an outfit you dislike. Flexibility is more practical than simply wearing more pieces.
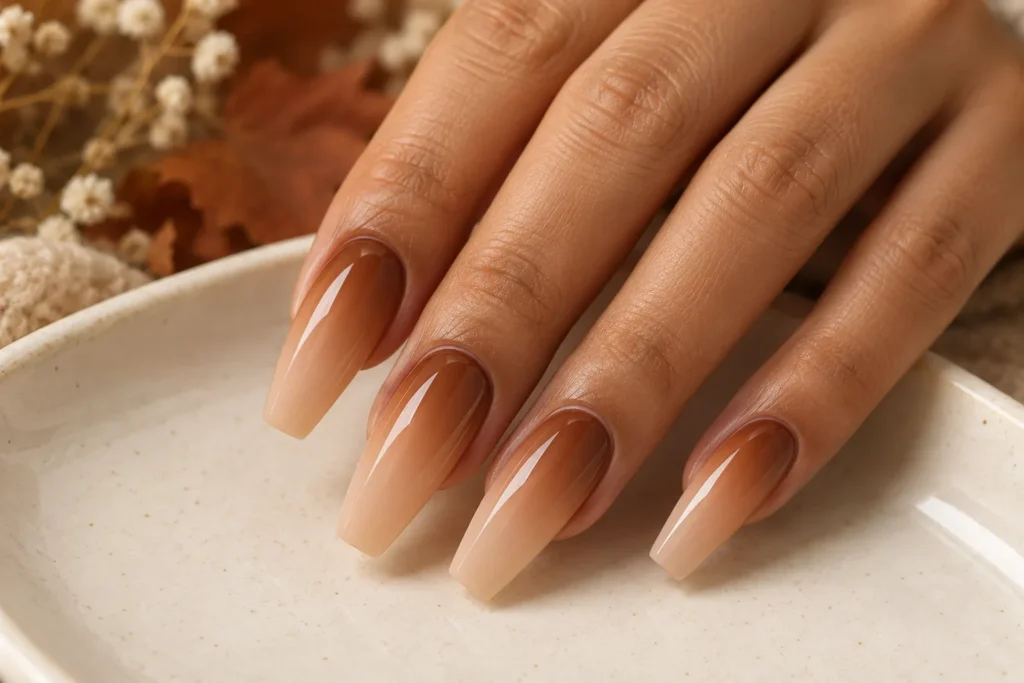
    Look at cuffs and collars, where layers often become crowded. A thinner base can help beneath a structured jacket. If the top has fuller sleeves, choose an outer layer with enough room. Comfort while moving is as important as the front view in a mirror.

    Add one seasonal idea at a time

    Choose a colour, texture or accessory that appeals to you. You might try a richer bag colour, a printed scarf or a different denim combination. Keep the rest of the outfit familiar so the new detail is easy to assess.
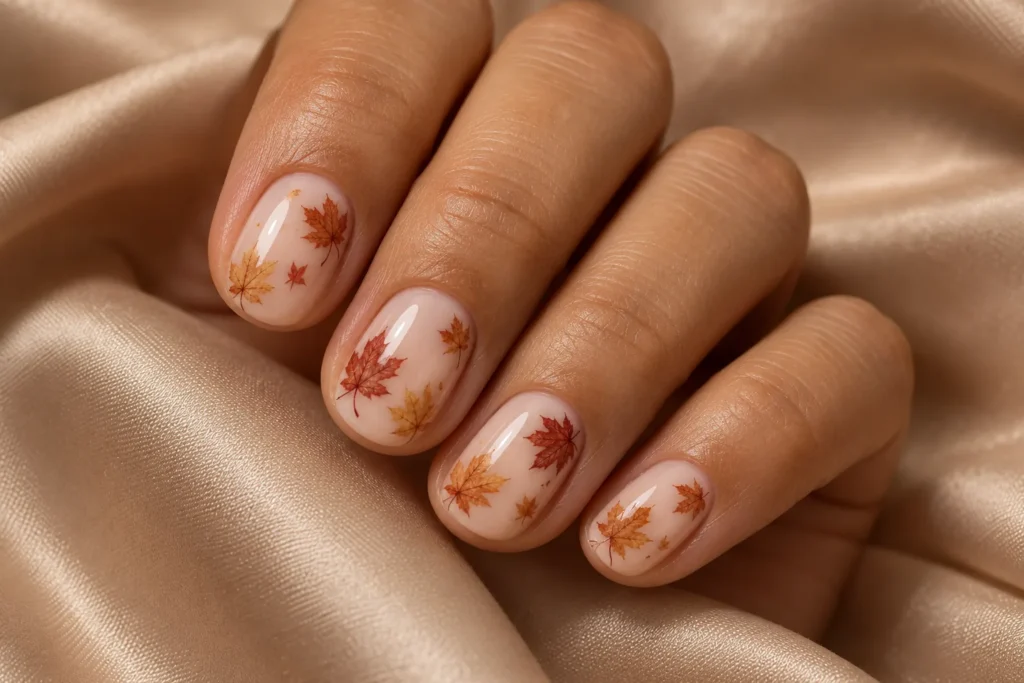
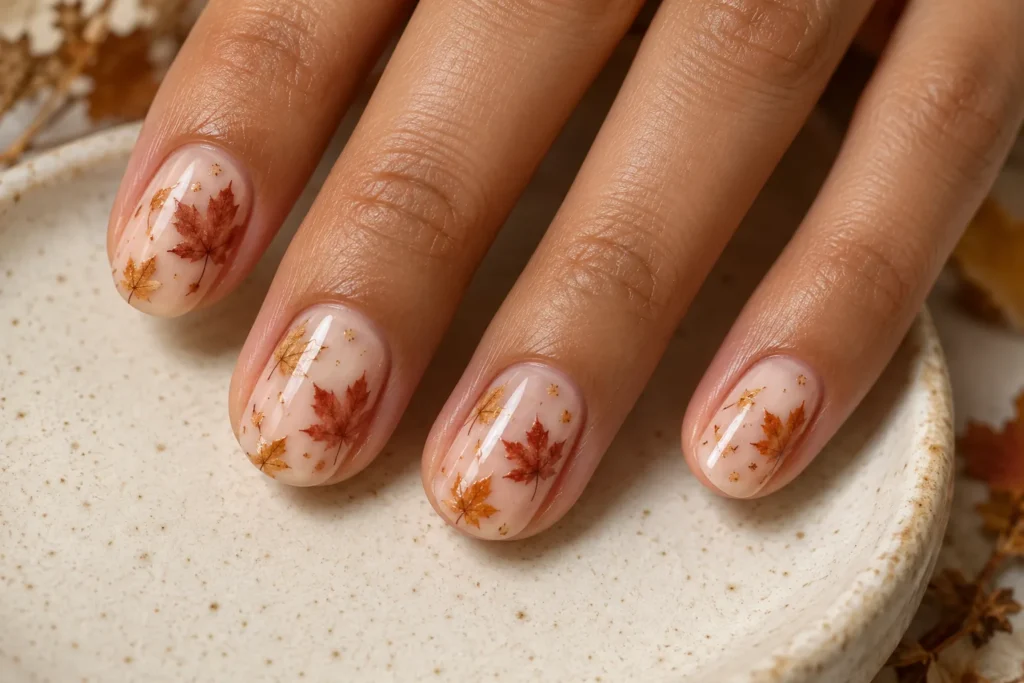
    Our burgundy outfit guide and autumn scarf ideas offer small changes you can make with existing basics. A seasonal refresh does not need every current trend in one outfit.

    Make a repair and care list

    Inspect the pieces you want to use for missing buttons, loose hems, worn soles or stains that need appropriate treatment. Read care labels before washing or steaming. A useful garment can remain unworn simply because a small maintenance task was never completed.

    Keep the list short and actionable. Arrange one repair or cleaning task, then return the garment to the active wardrobe. This creates a visible benefit and prevents the reset becoming only an exercise in moving clothes from one pile to another.

    Store clothes so outfits are easier to see

    Keep frequently used pieces accessible and group them in a way that supports your decisions. You might arrange by garment type or by the outfits you repeat. There is no universal system; choose one that helps you find what you need without digging through unrelated items.

    Move unsuitable seasonal pieces elsewhere if space is limited, but keep flexible basics visible. A tee or light shirt may still be useful under a layer. Do not hide every summer item automatically just because the calendar changed.

    Photograph combinations worth repeating

    Take simple pictures of the outfits you like, including the footwear and bag. Save them together so a rushed morning does not require you to remember every successful combination. Add a short note if the outfit suits a particular temperature or activity.

    Photographs also reveal repeated problems. If every outfit feels incomplete because you lack one practical layer, that is a clearer shopping gap than a general desire for new clothes. Use the evidence from your own wardrobe before browsing long recommendation lists.

    Build a focused shopping list

    Describe the missing function before naming a product. You may need a light outer layer that fits over a knit, trousers suitable for work or shoes comfortable for a longer walk. Those descriptions guide the purchase better than a vague search for autumn essentials.

    Check whether the new piece can work in at least a few combinations you have already tried. Consider care, comfort and budget as well as appearance. A purchase is useful when it joins the wardrobe smoothly rather than creating a need for several more purchases.

    Autumn wardrobe reset checklist

    • Describe your actual weekly activities.
    • Review one garment category at a time.
    • Try complete outfits with suitable shoes.
    • Identify fit and repair problems.
    • Add one seasonal detail if you want it.
    • Photograph the combinations that work.
    • Shop only for clear gaps.

    You can complete the process over several short sessions. A finished review of one useful area is better than an ambitious plan that leaves the entire wardrobe on the floor. Keep each stage small enough to produce an outfit you can wear.

    Frequently asked questions

    Should I remove everything I have not worn recently?

    Not automatically. Ask why it was unworn. The season, fit, care requirements or lack of a useful combination may explain it. Try a practical solution where appropriate, then decide whether the piece still suits your life instead of applying one rigid time rule.

    Do I need to buy new colours for autumn?

    No. You can enjoy the clothes you already own and add a small detail only if you want it. A printed scarf, a different layer or a new pairing may create enough variety without a major purchase.

    For current seasonal context, see Vogue’s autumn colour report. Use the ideas selectively and let your own wardrobe, climate and daily routine decide what is worth trying.