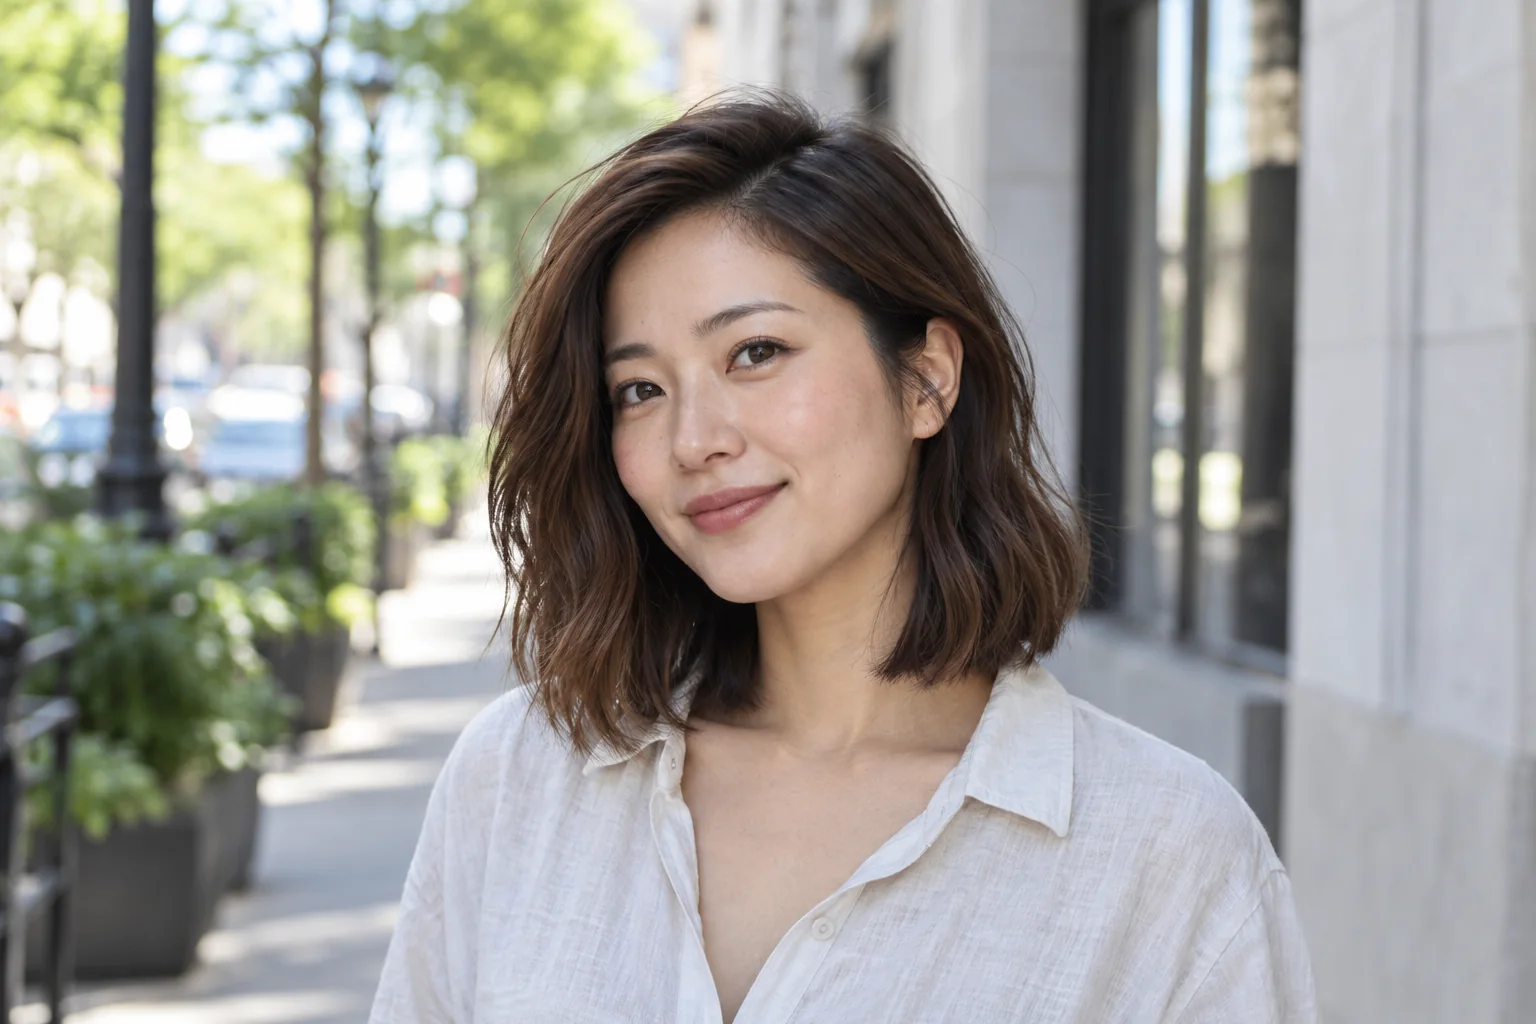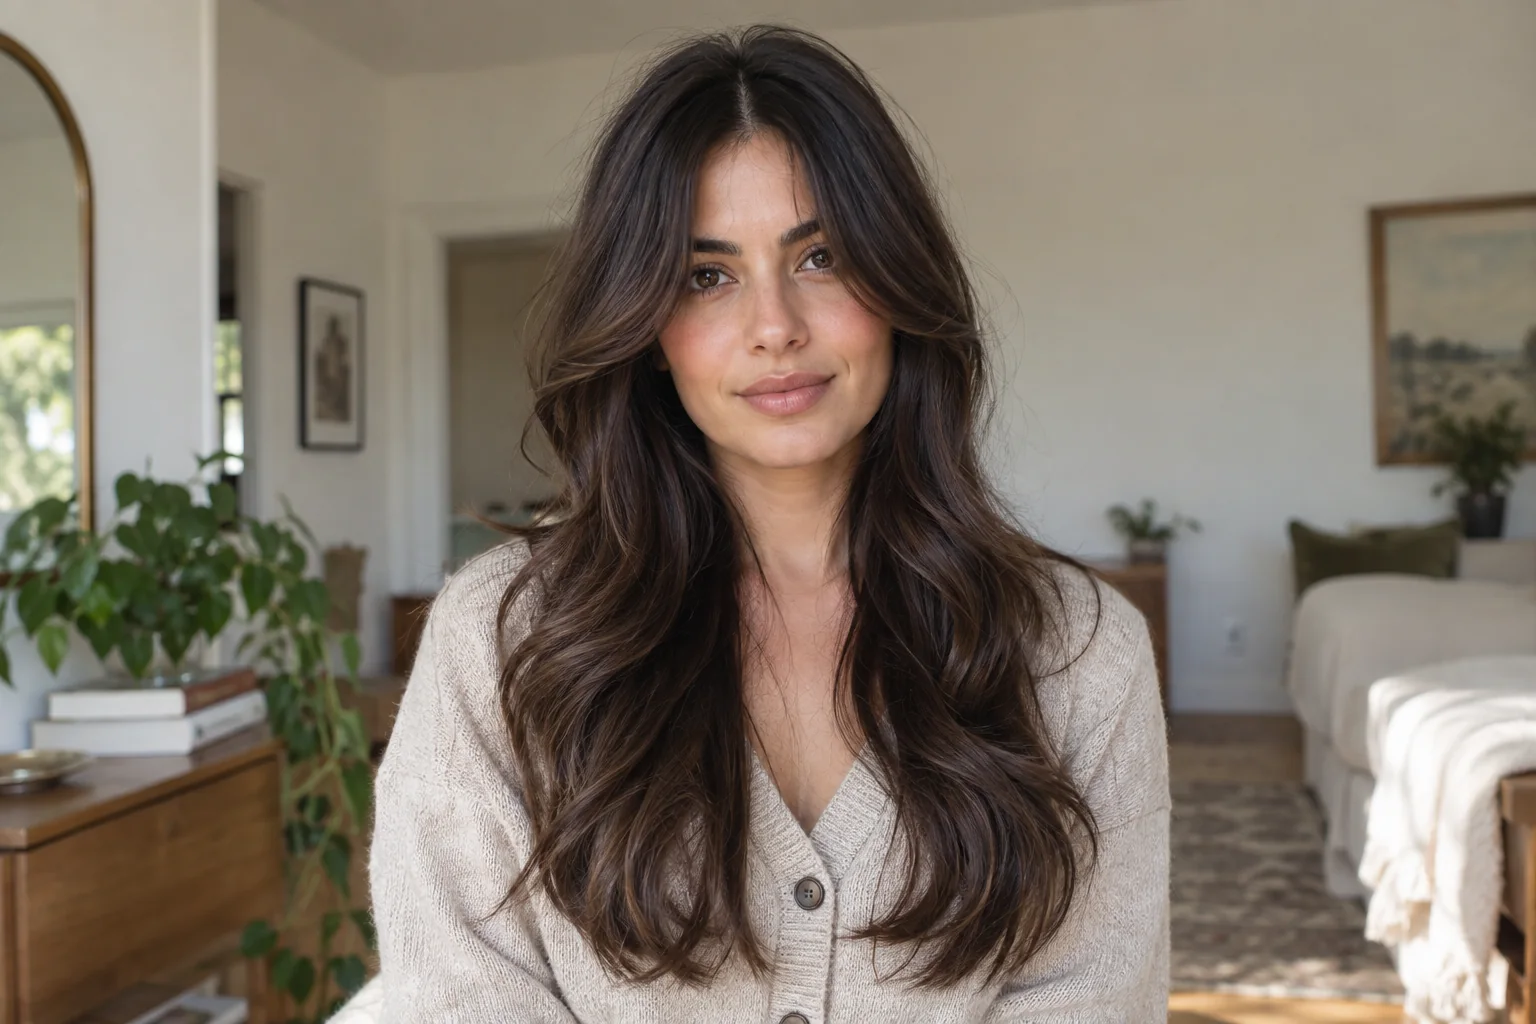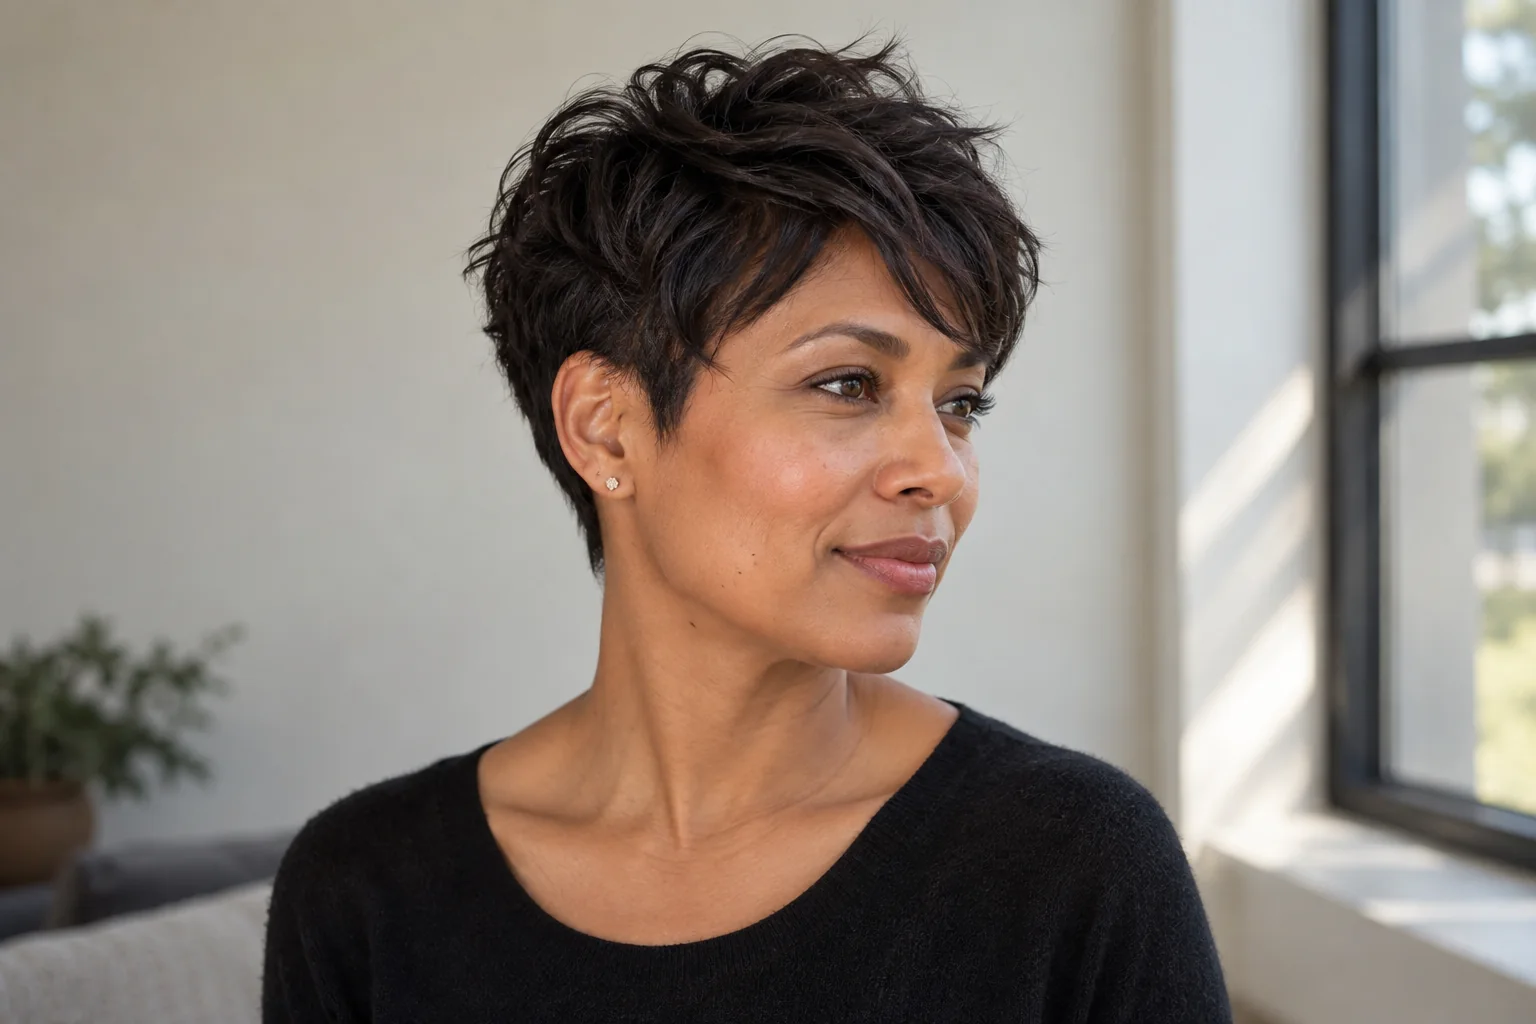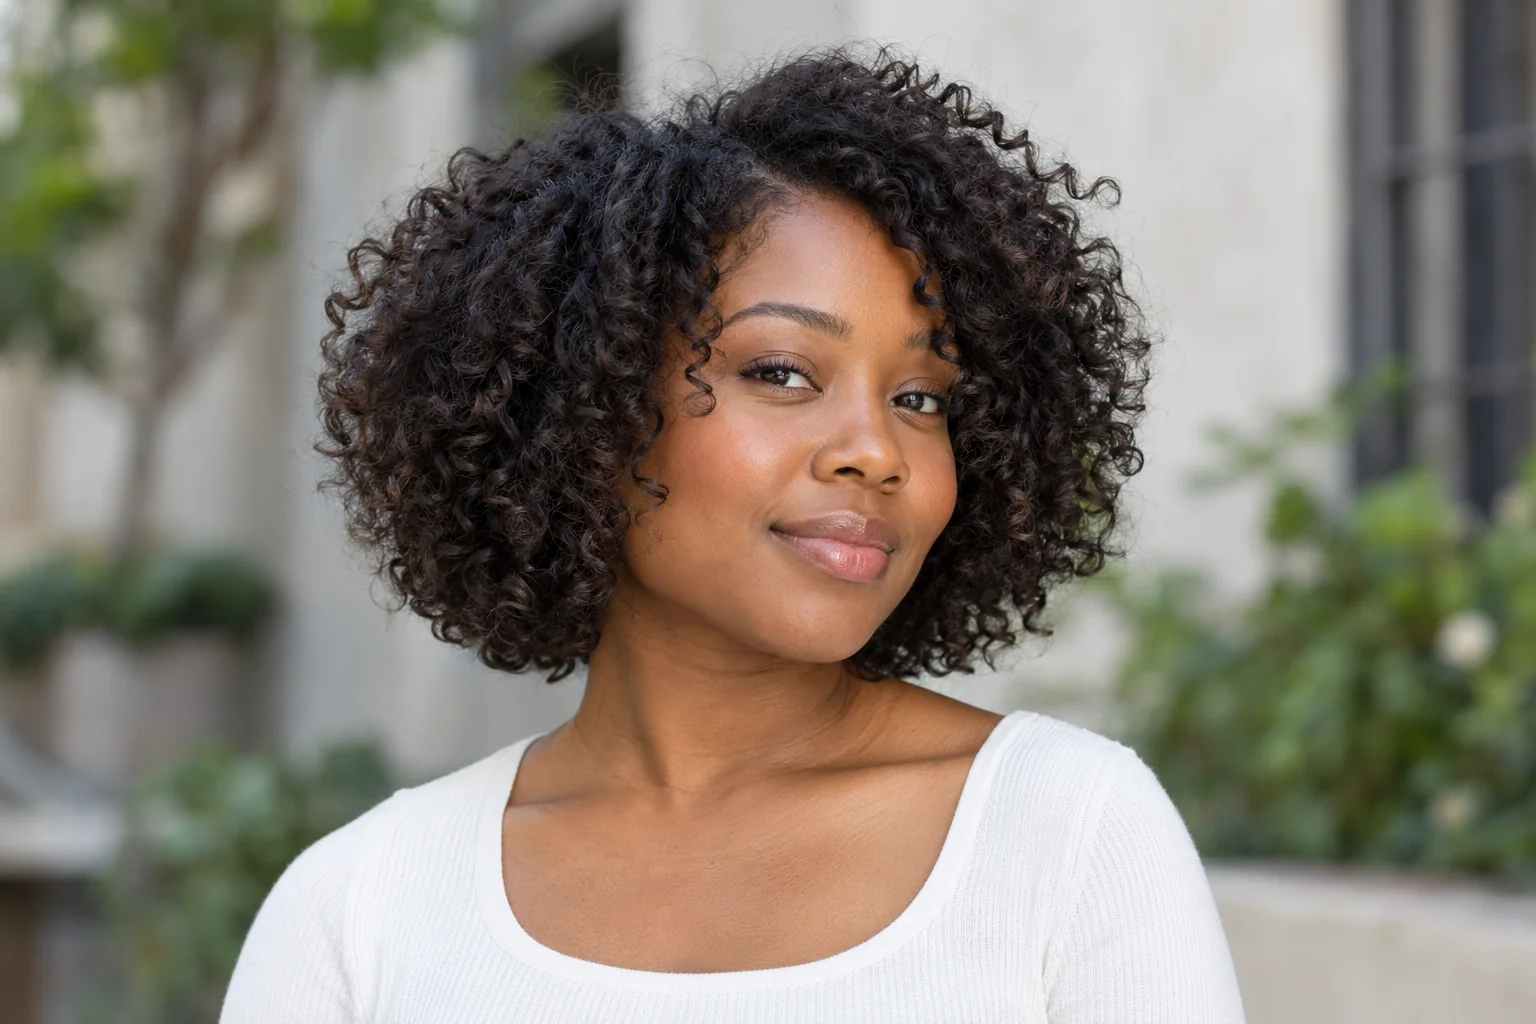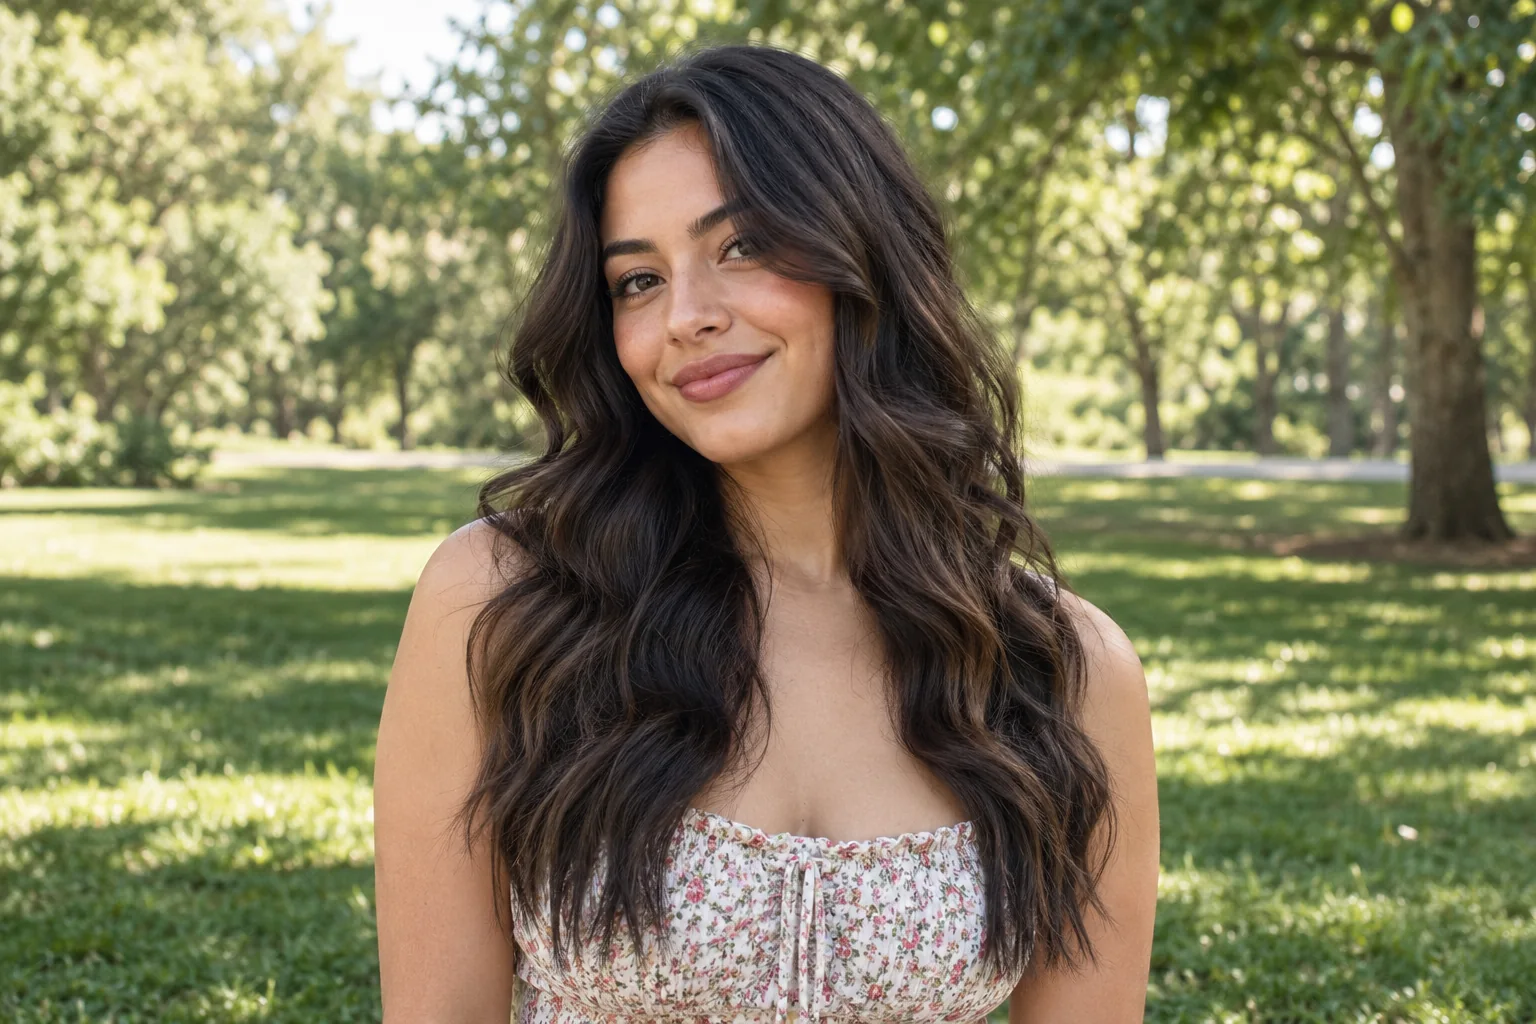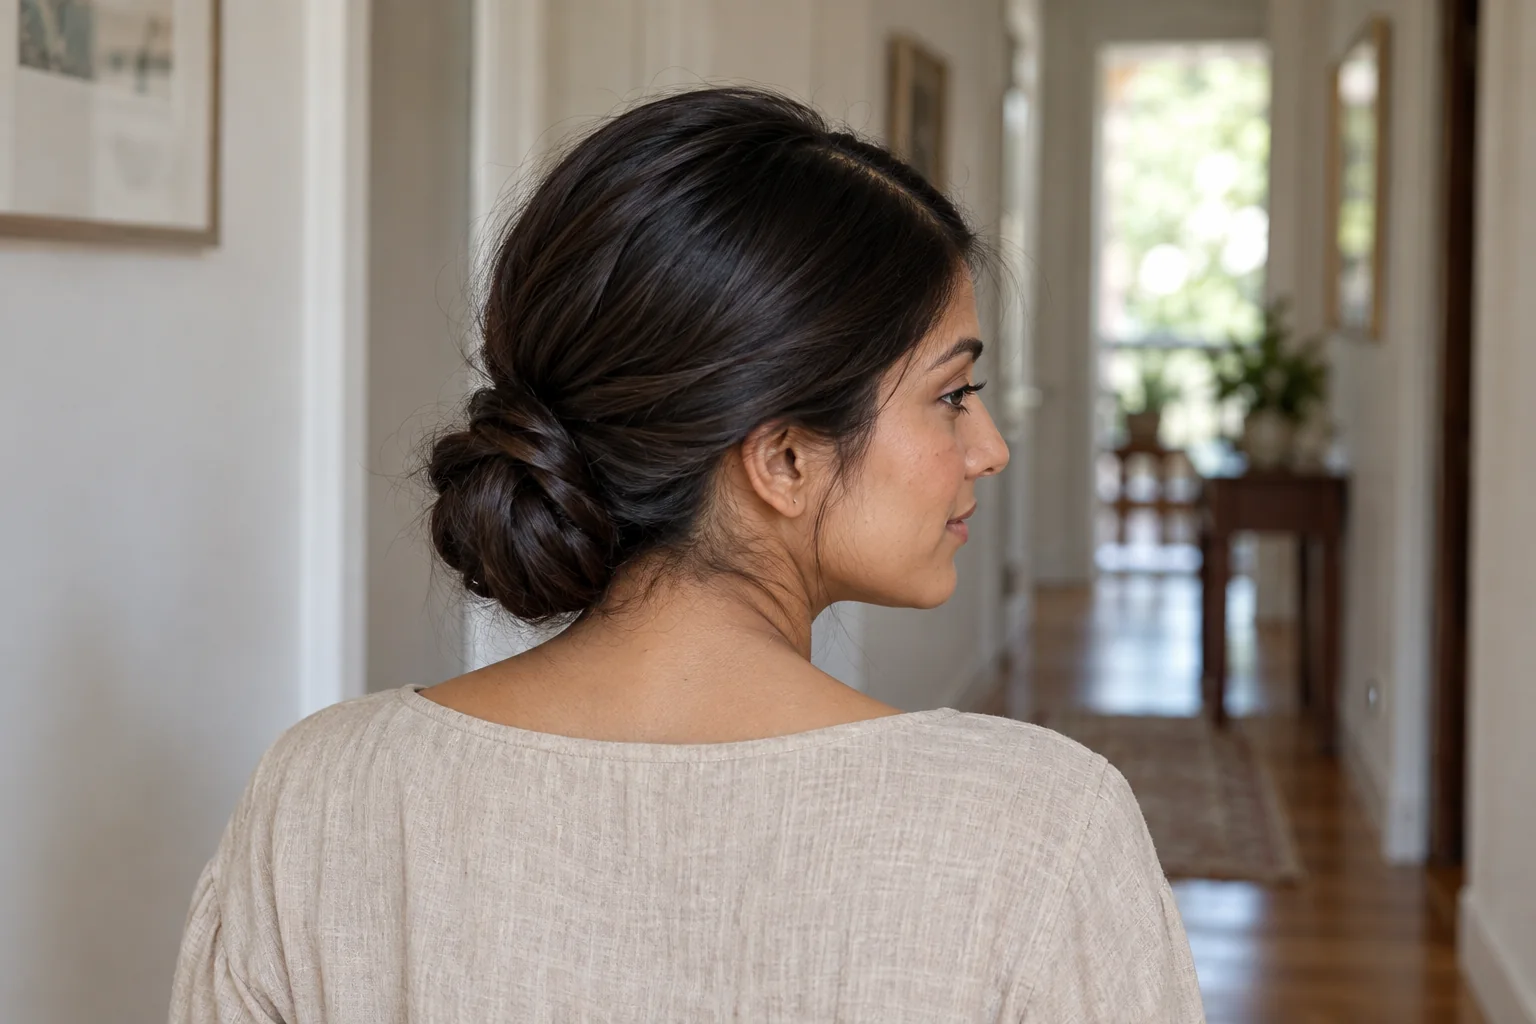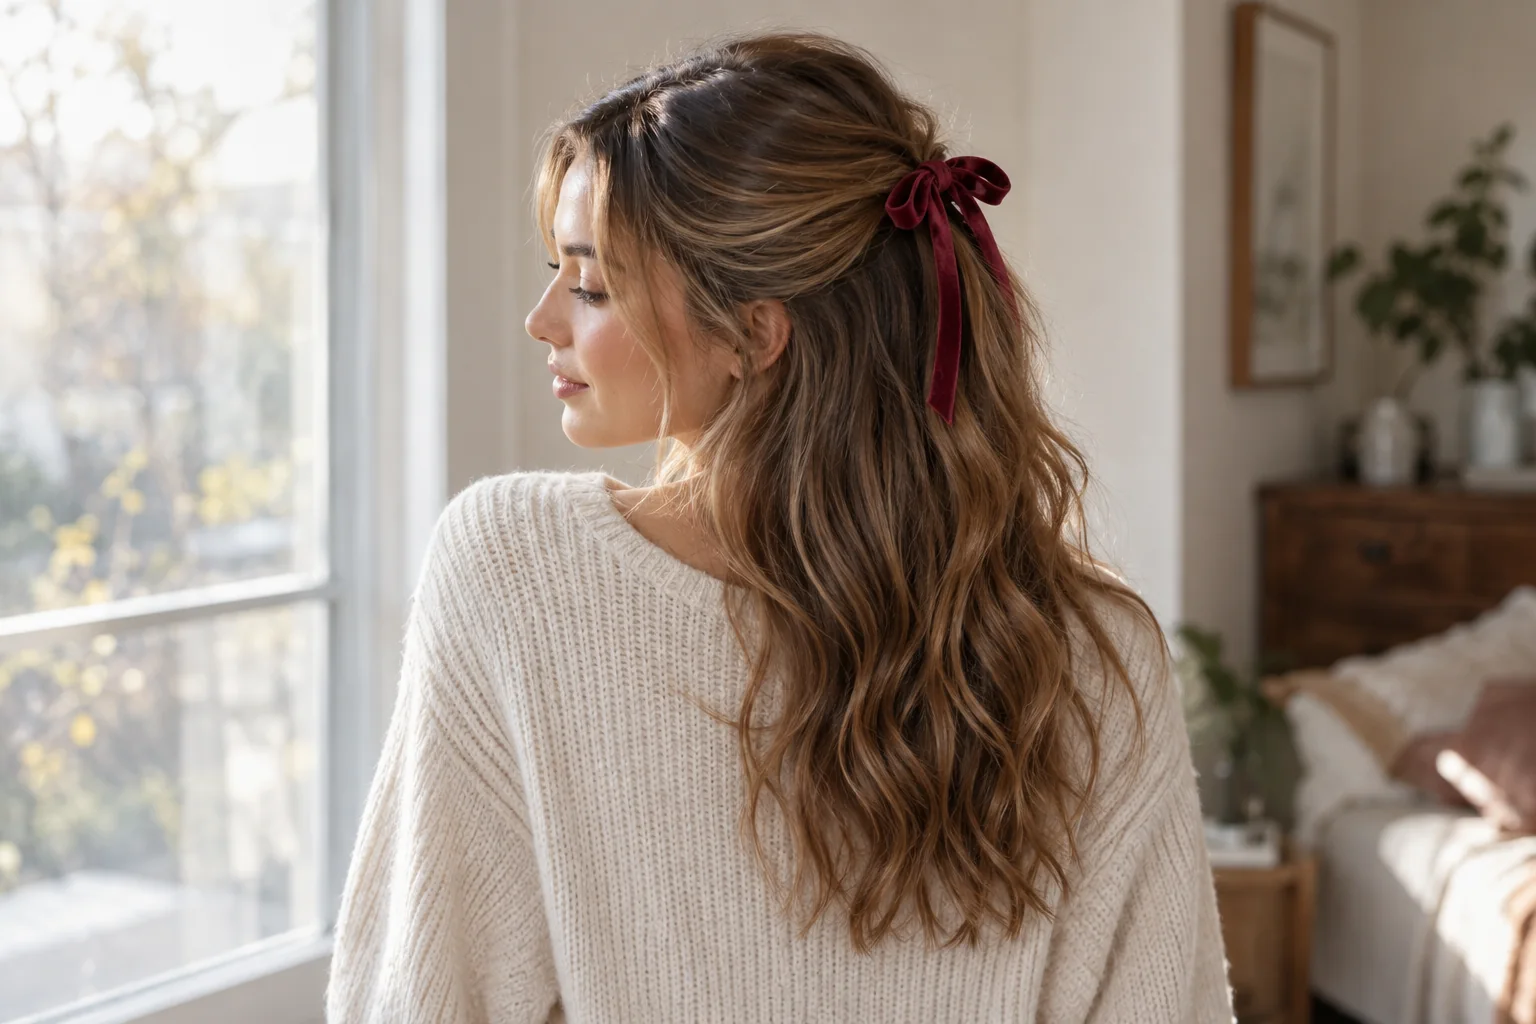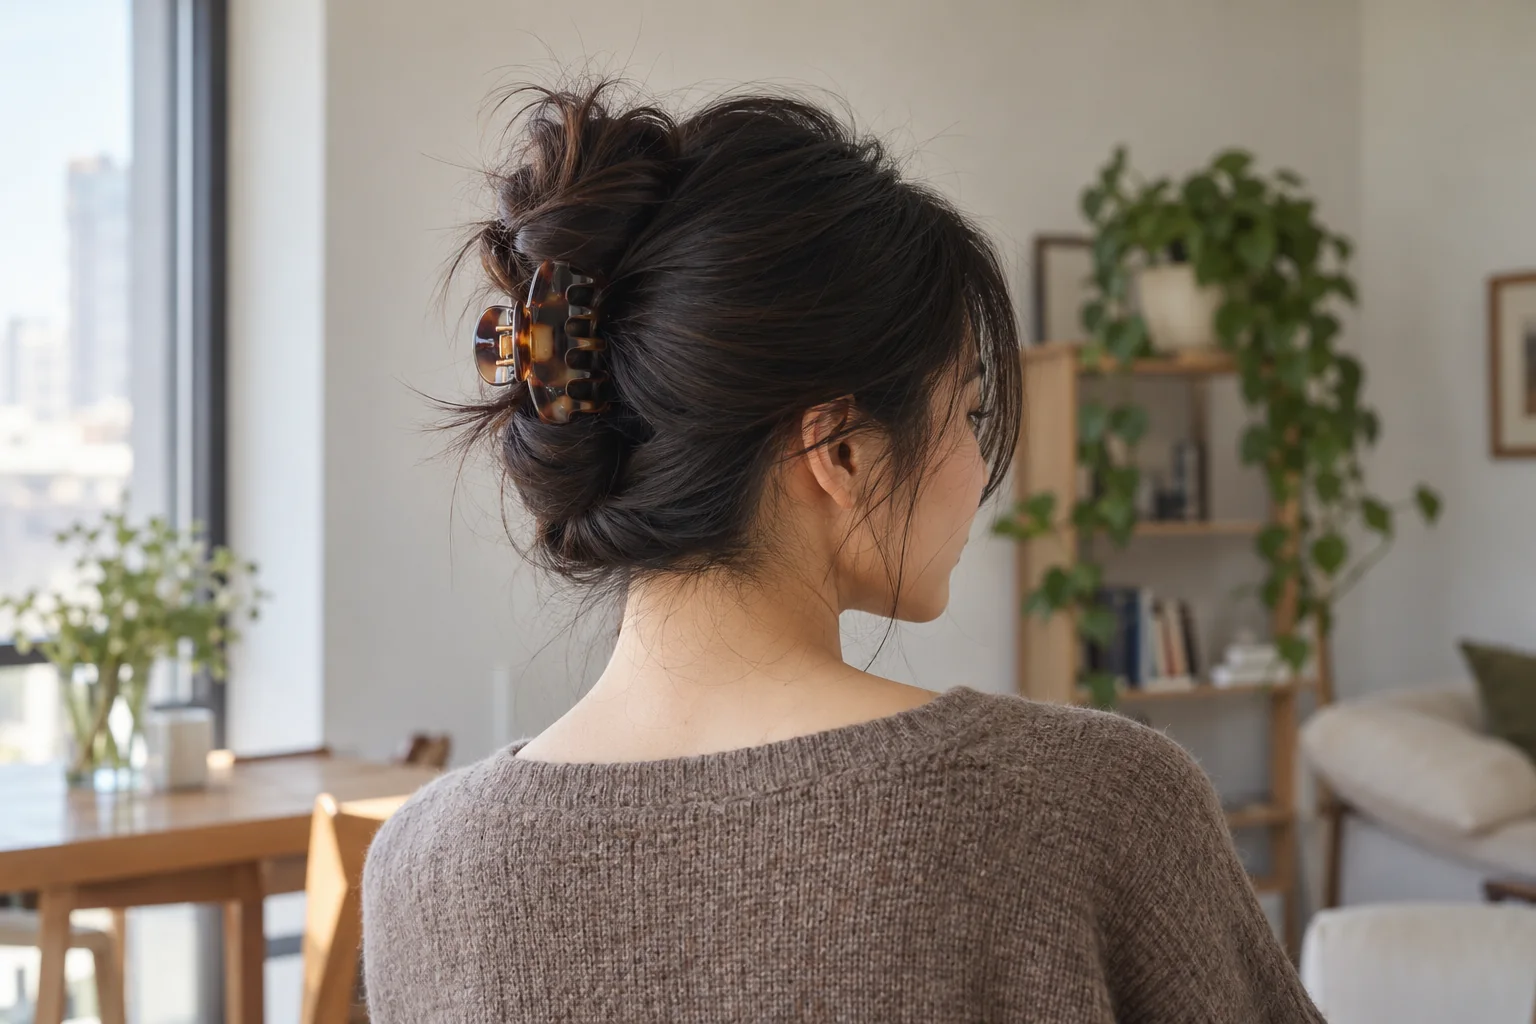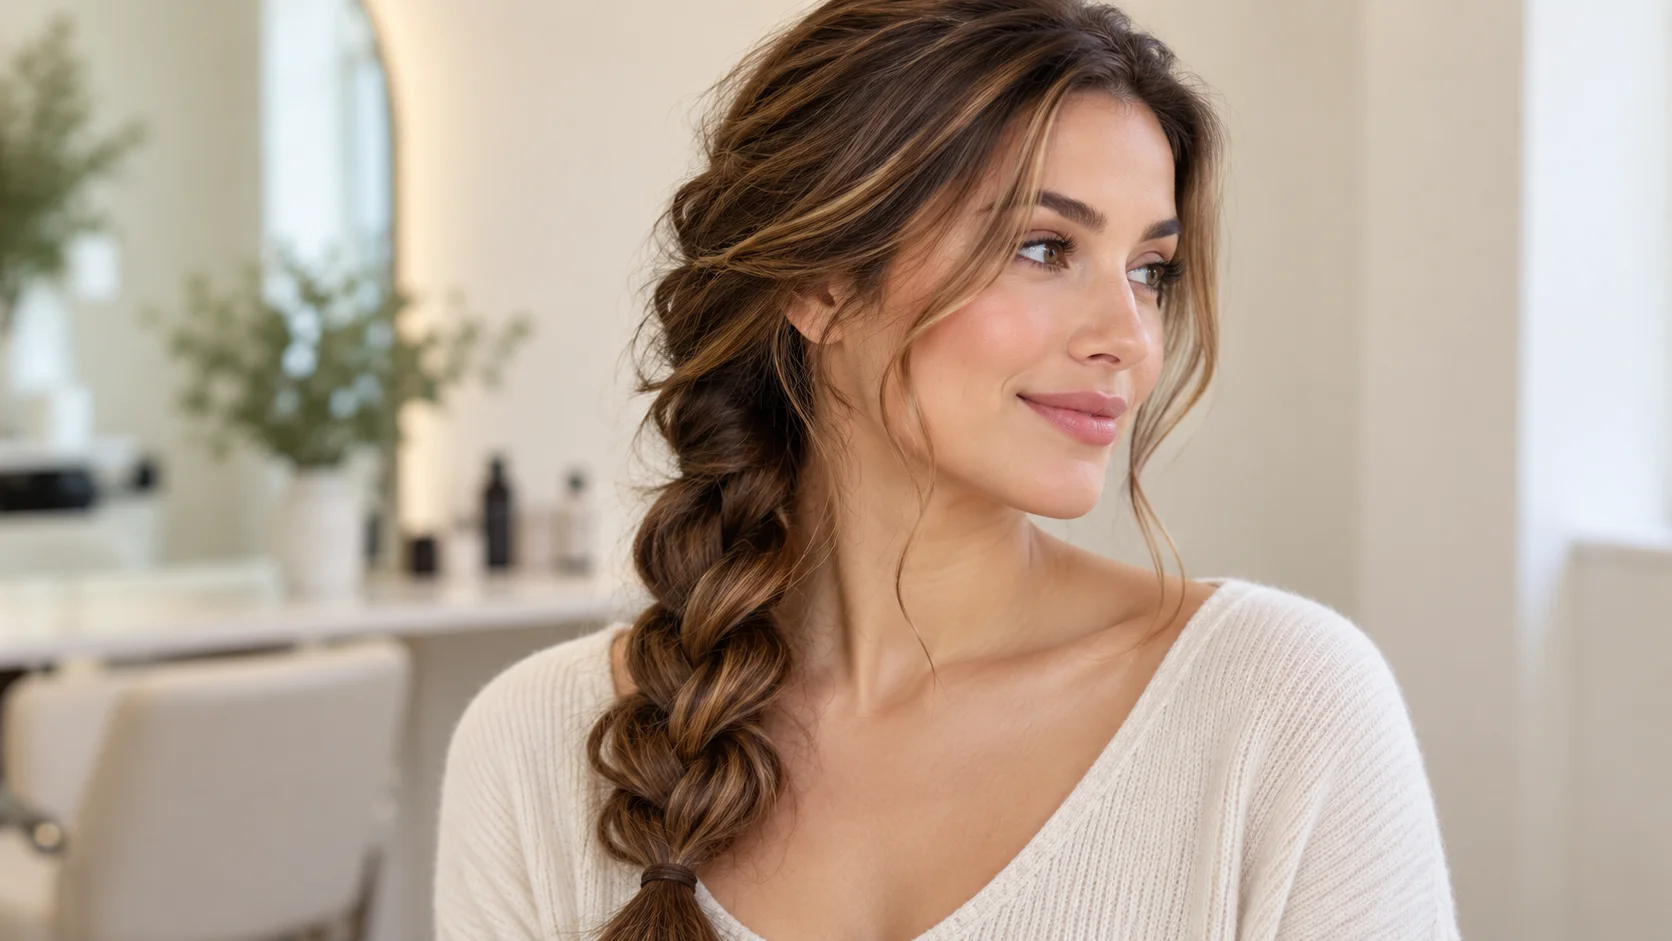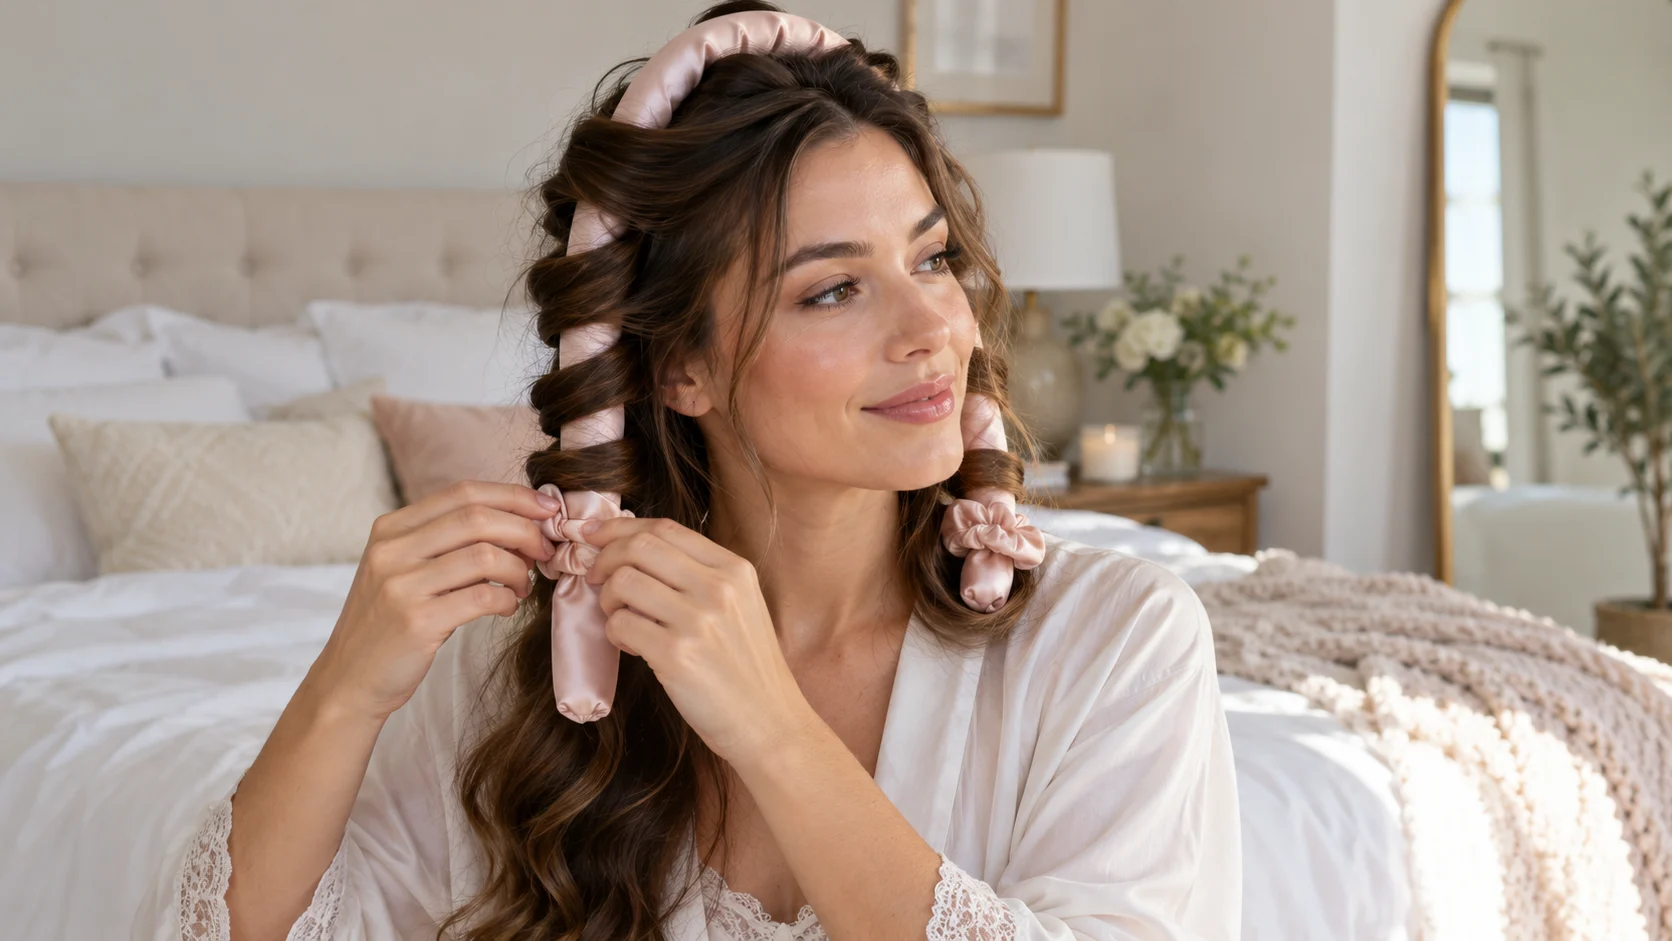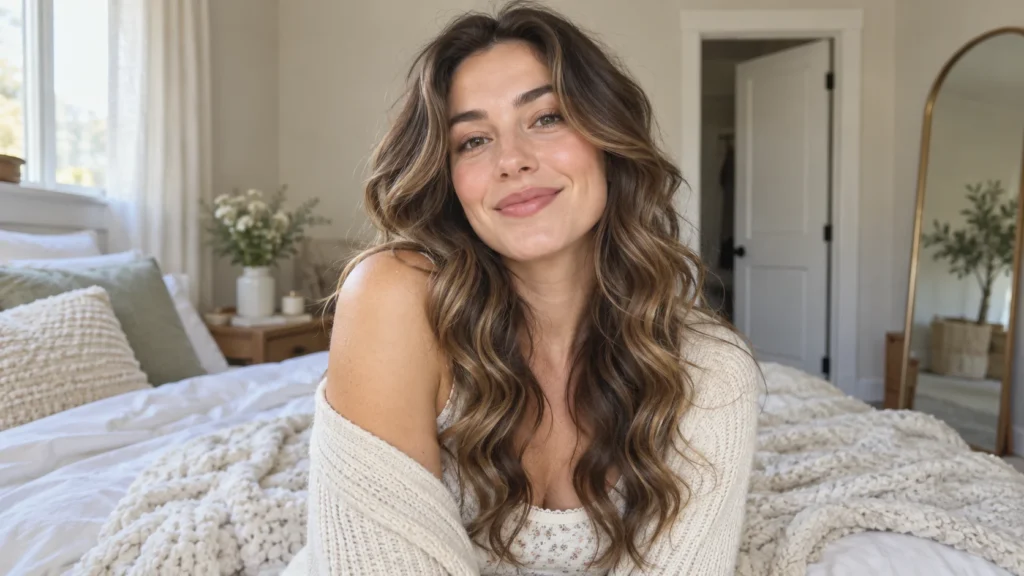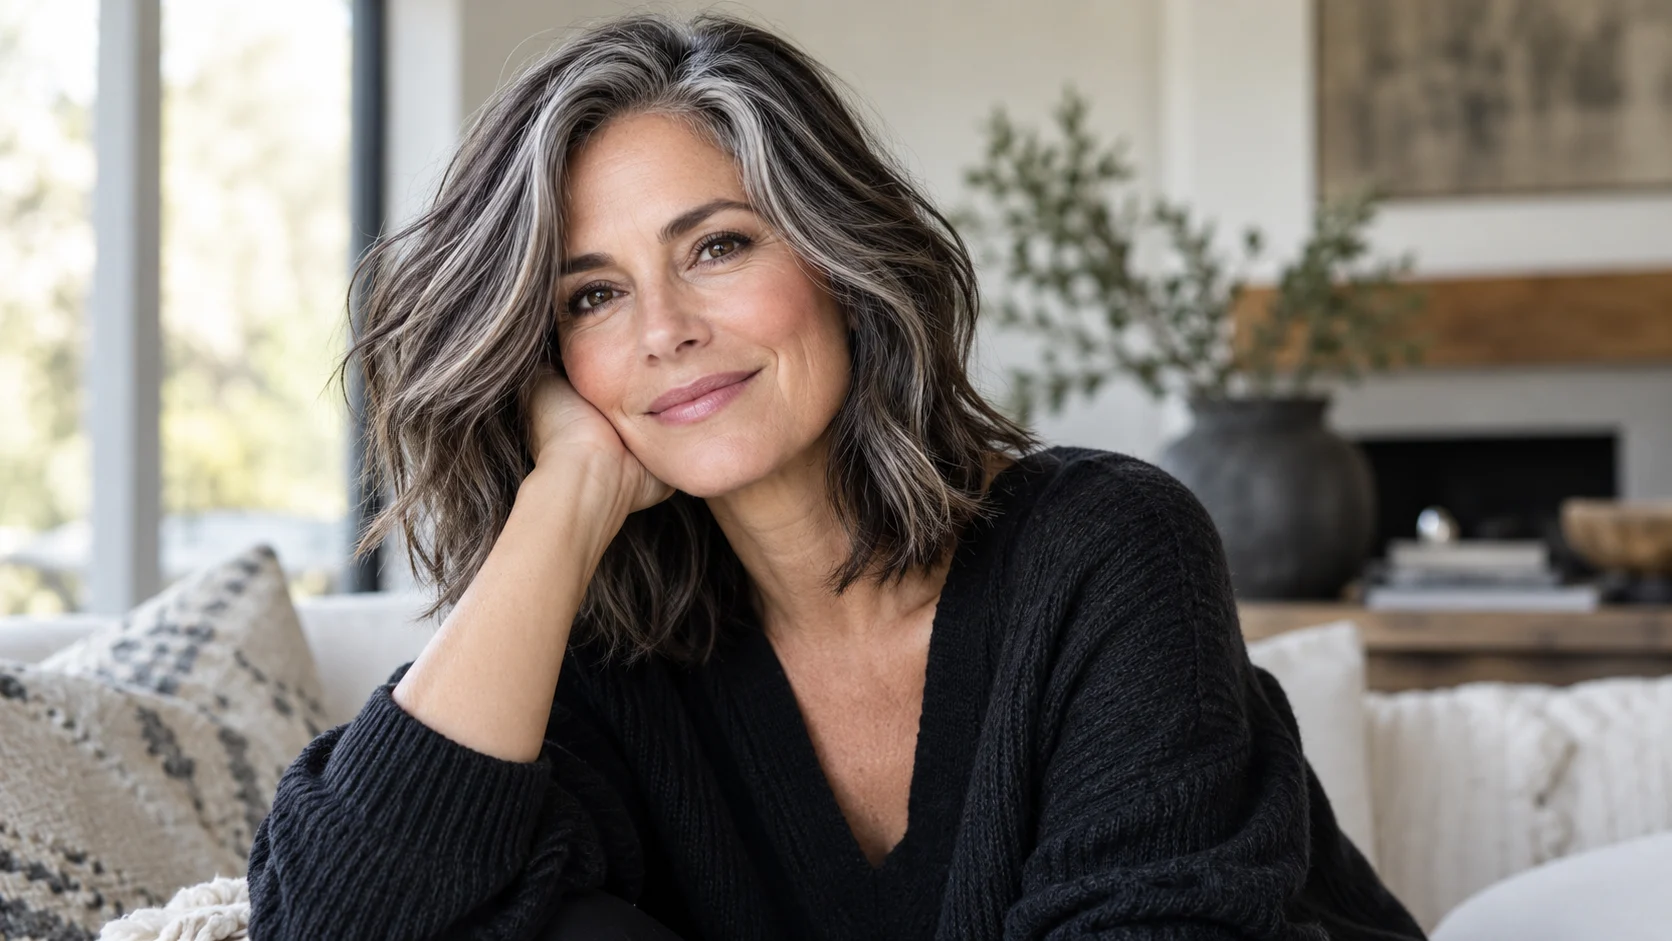
Category: Haircare

Browse hairstyle inspiration and practical haircare ideas. Discover cuts, relaxed updos and styling options for different hair textures, lengths and everyday routines.

  • Curly Hairstyles: 20 Beautiful Cuts and Styling Ideas

    Curly Hairstyles: 20 Beautiful Cuts and Styling Ideas

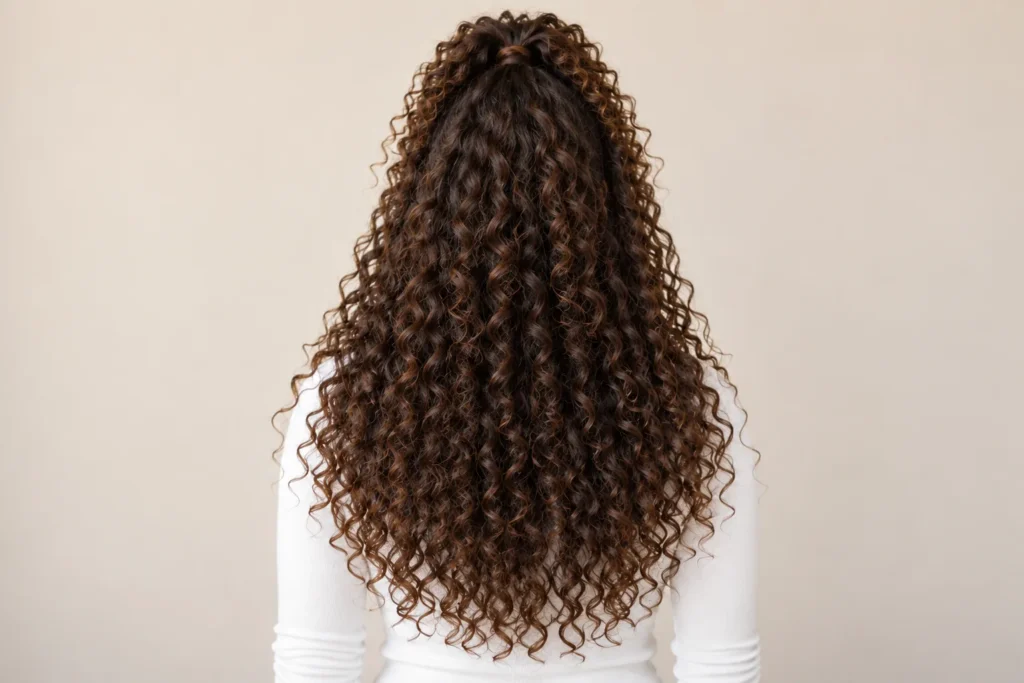
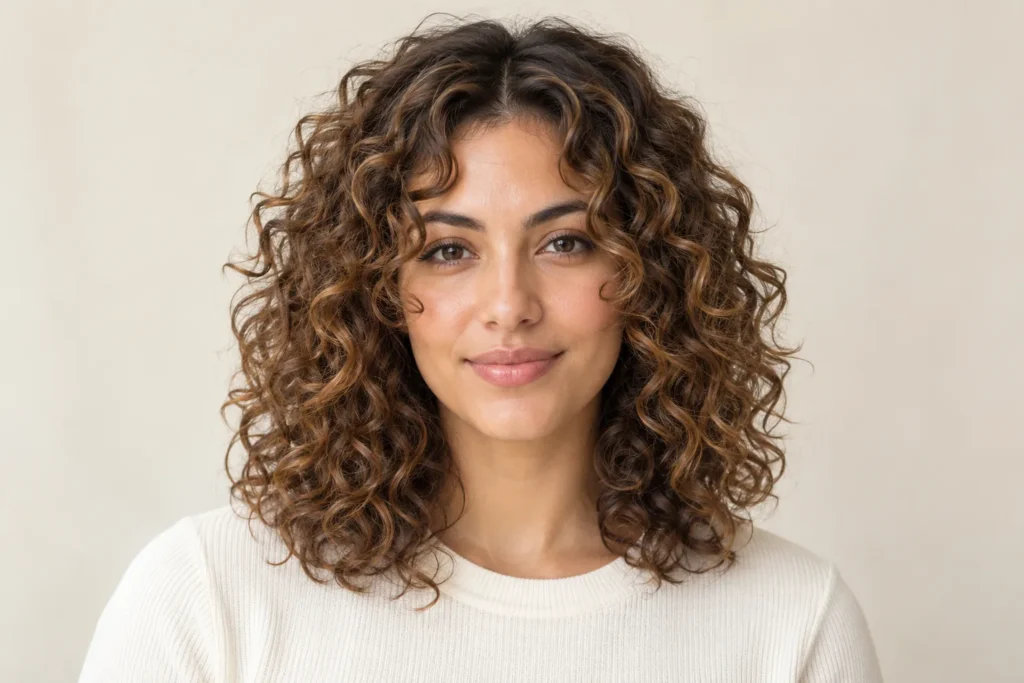
    Curly hairstyles look their best when the shape works with the curls you already have. A short cut can highlight a springy texture, while longer layers create room for movement. Updos offer another way to change your look without committing to a haircut. The right choice depends on your length, density, preferred silhouette and the time you enjoy spending on styling.

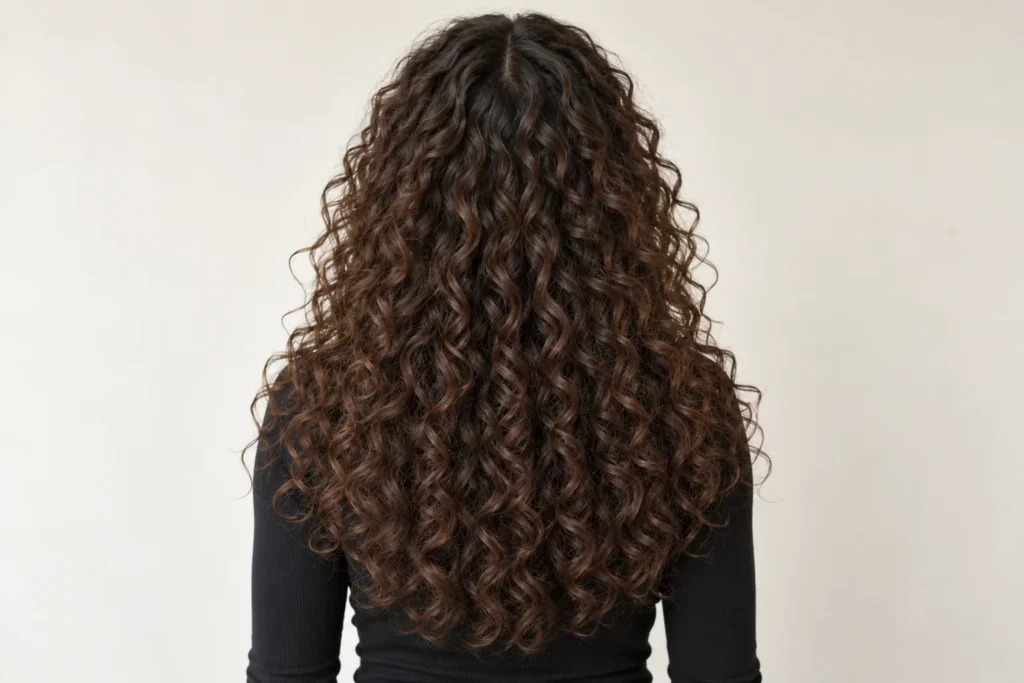
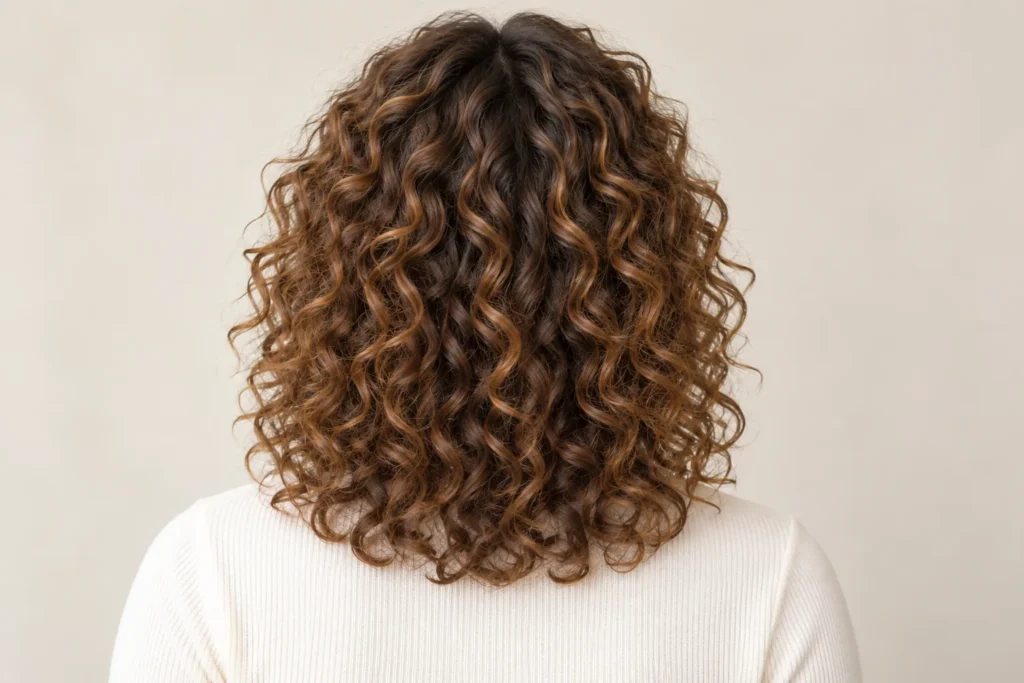
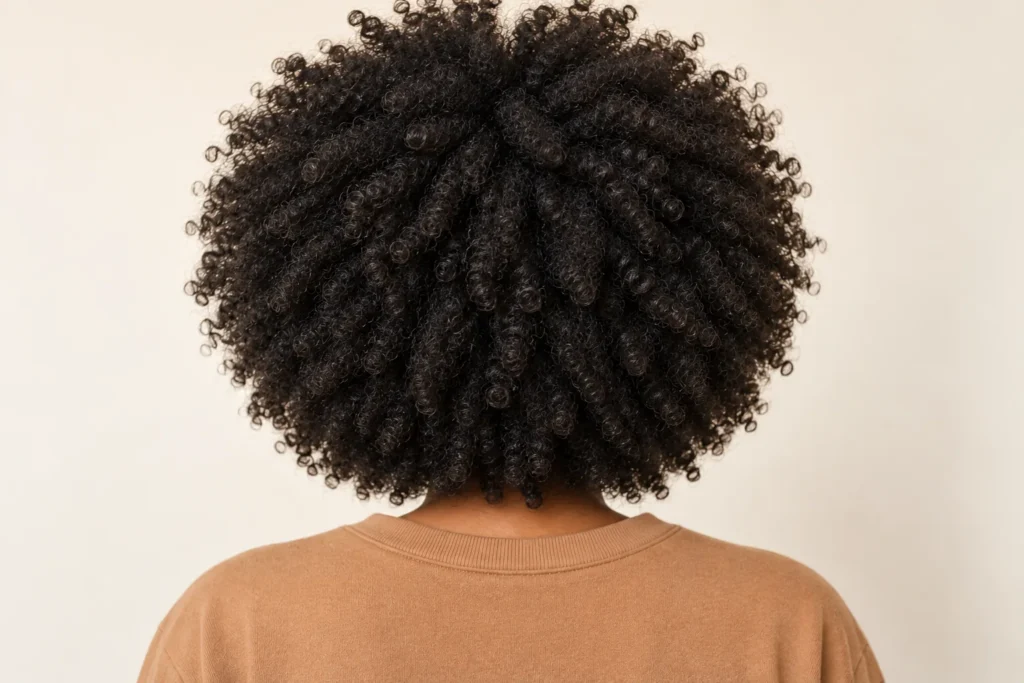
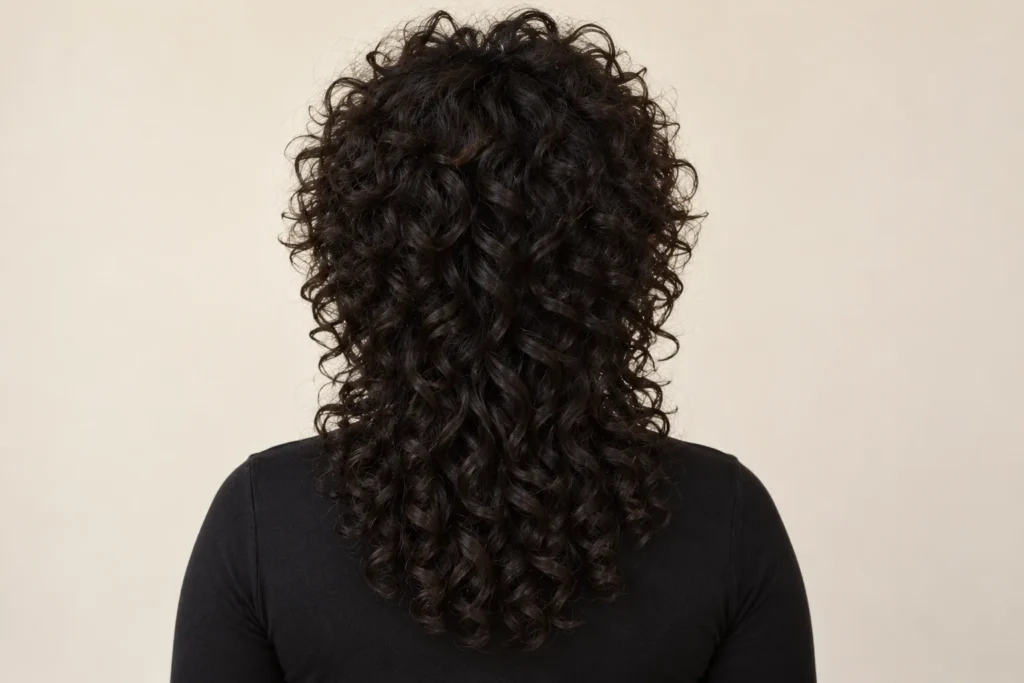
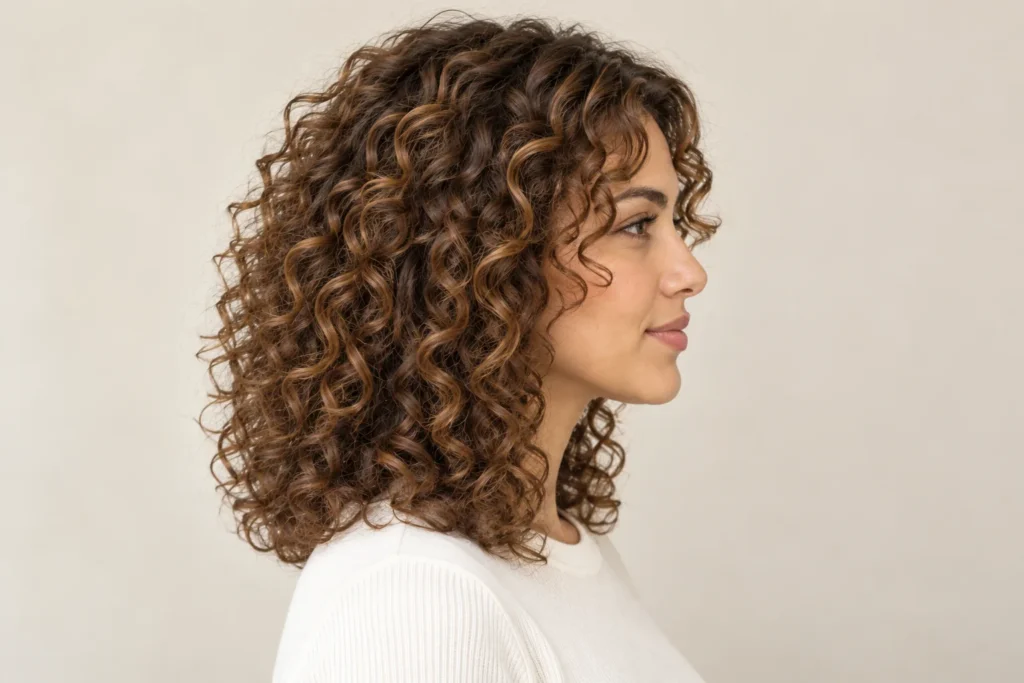
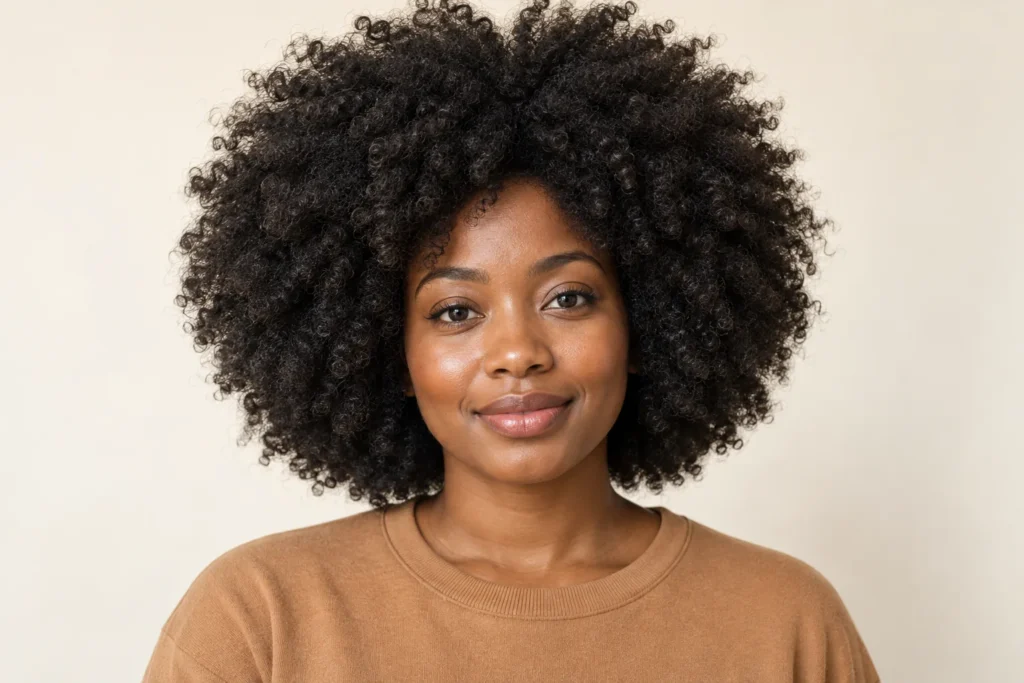
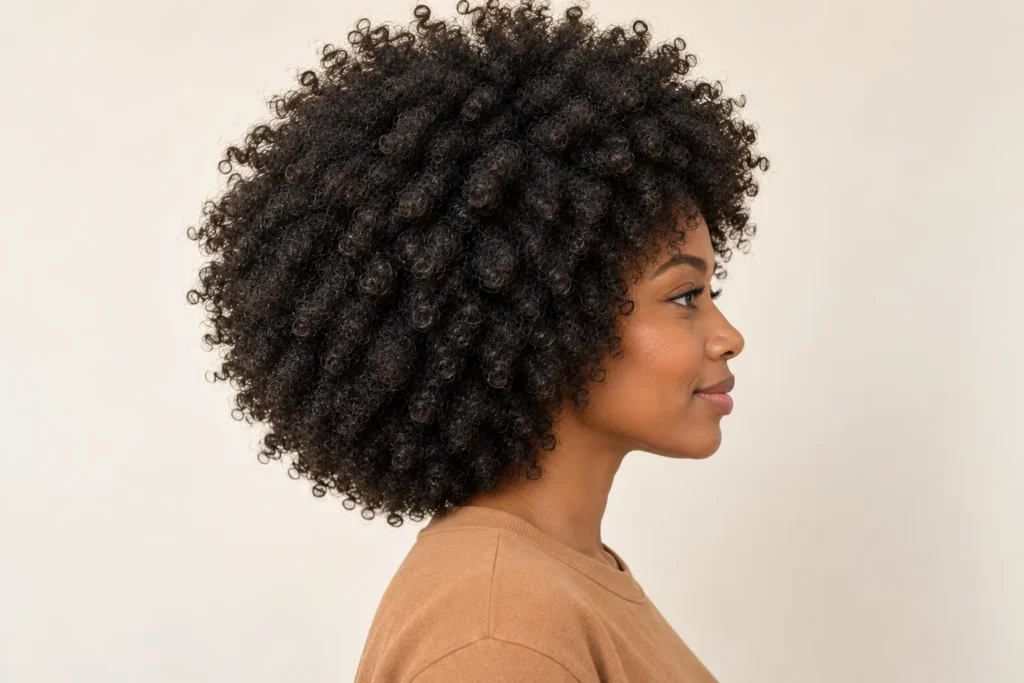
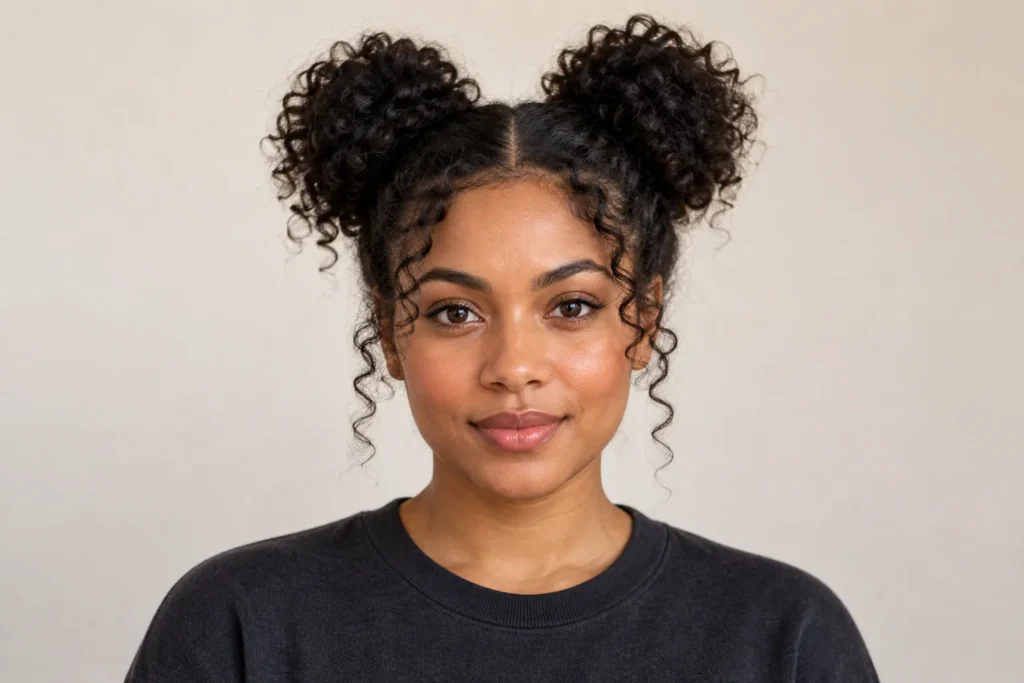
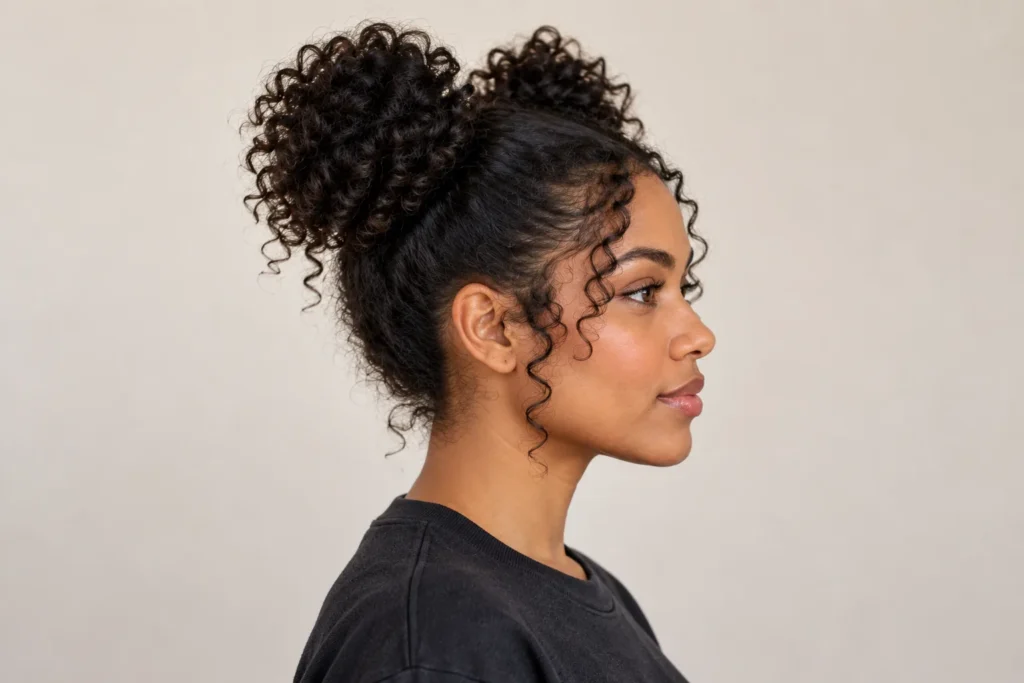
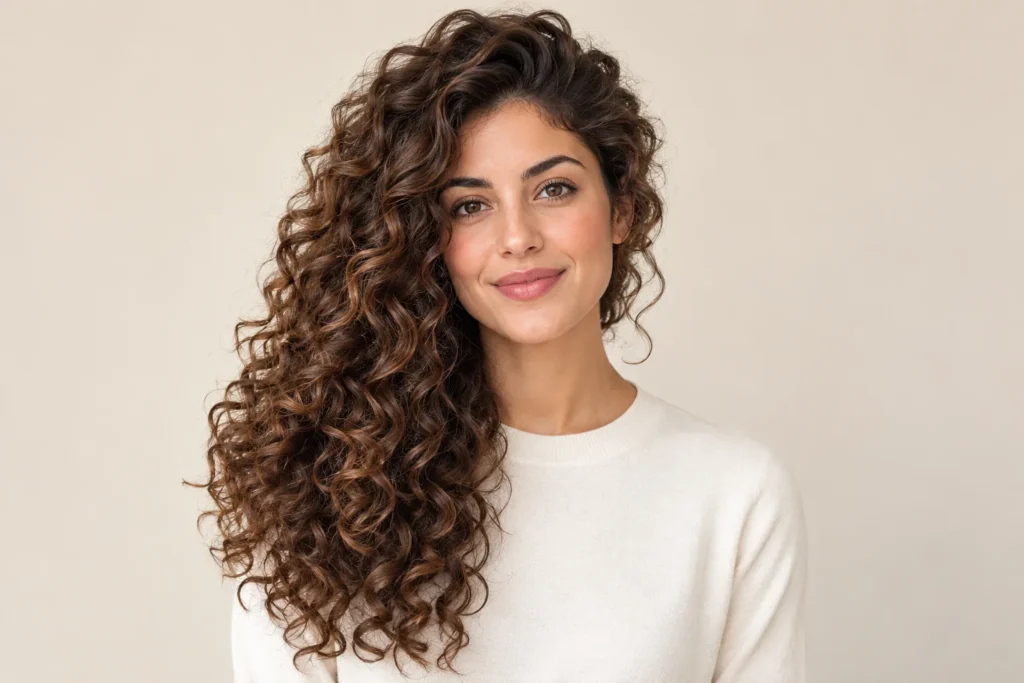
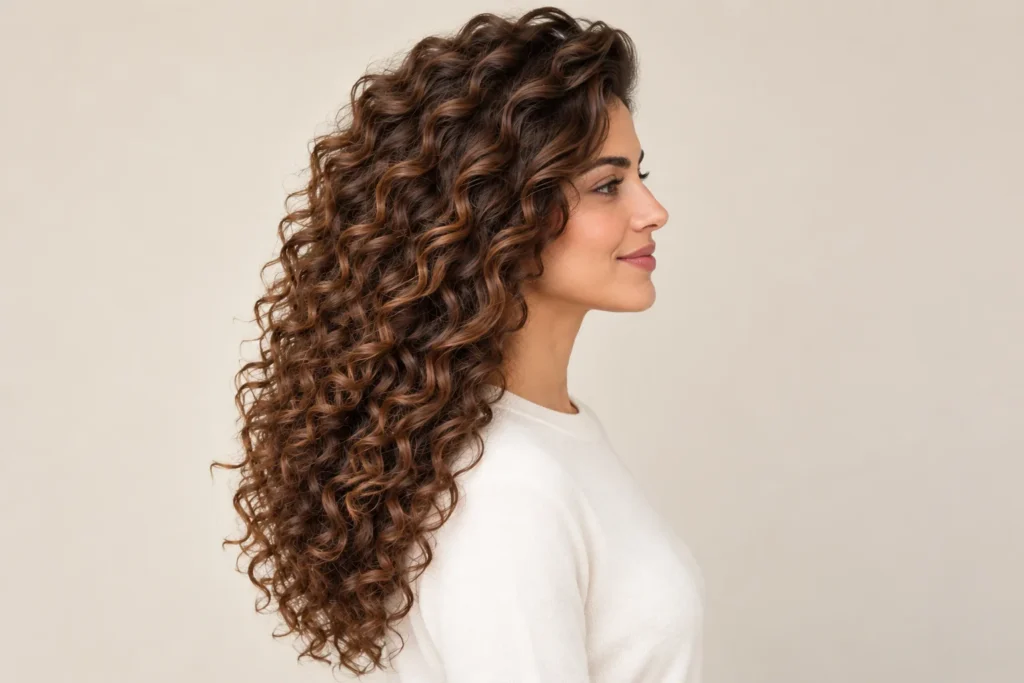
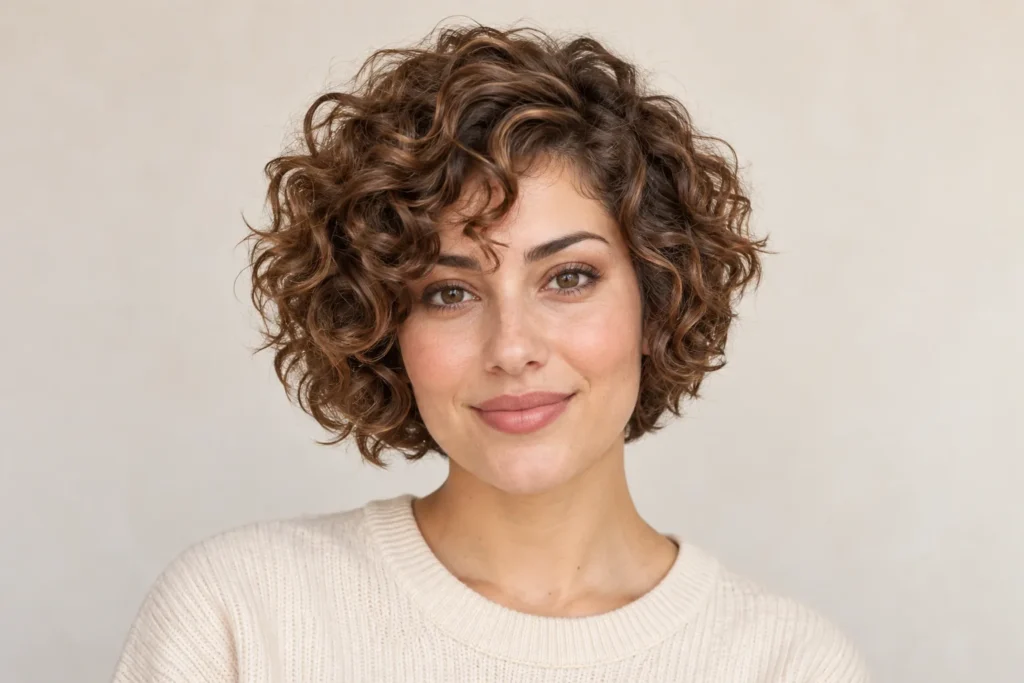
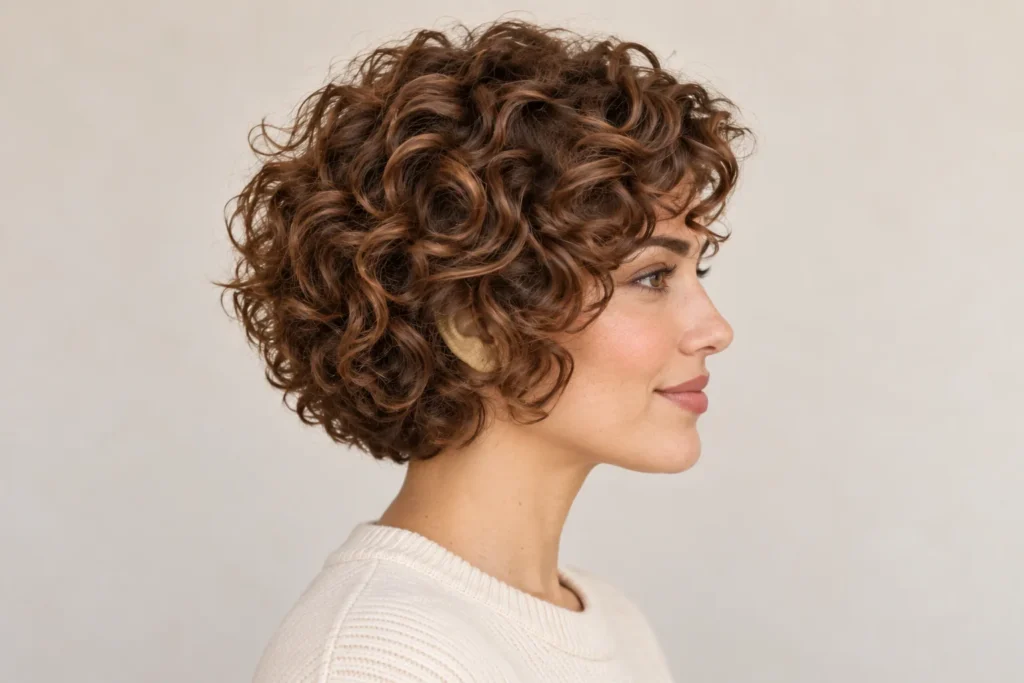
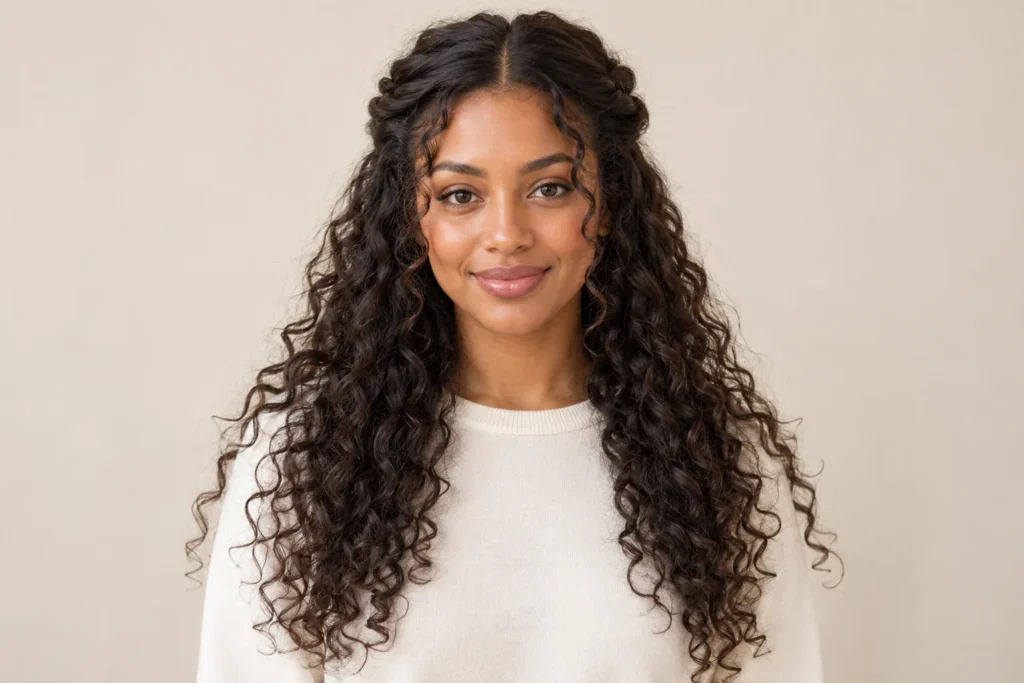
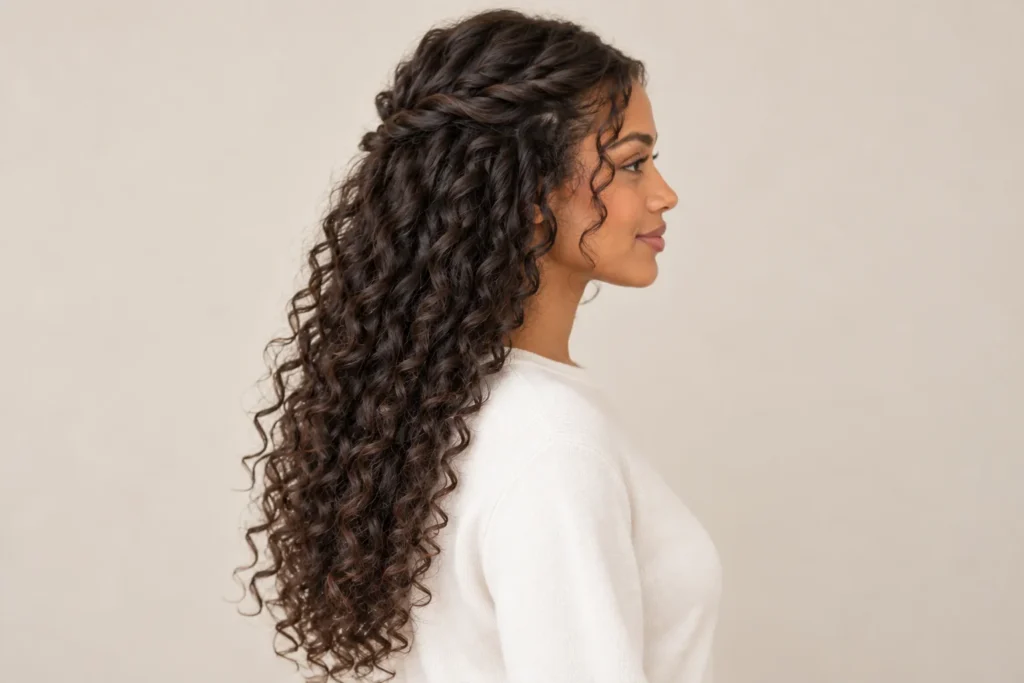
    This guide explores twenty curly hair ideas, from a compact pixie to a loose half-up style. Each comes with front, side and back illustrations so you can compare more than the face-framing detail. The images are original generated styling references, not photographs of salon clients. Bring your favourites to a stylist and discuss how the shape could be adapted to your own curl pattern.

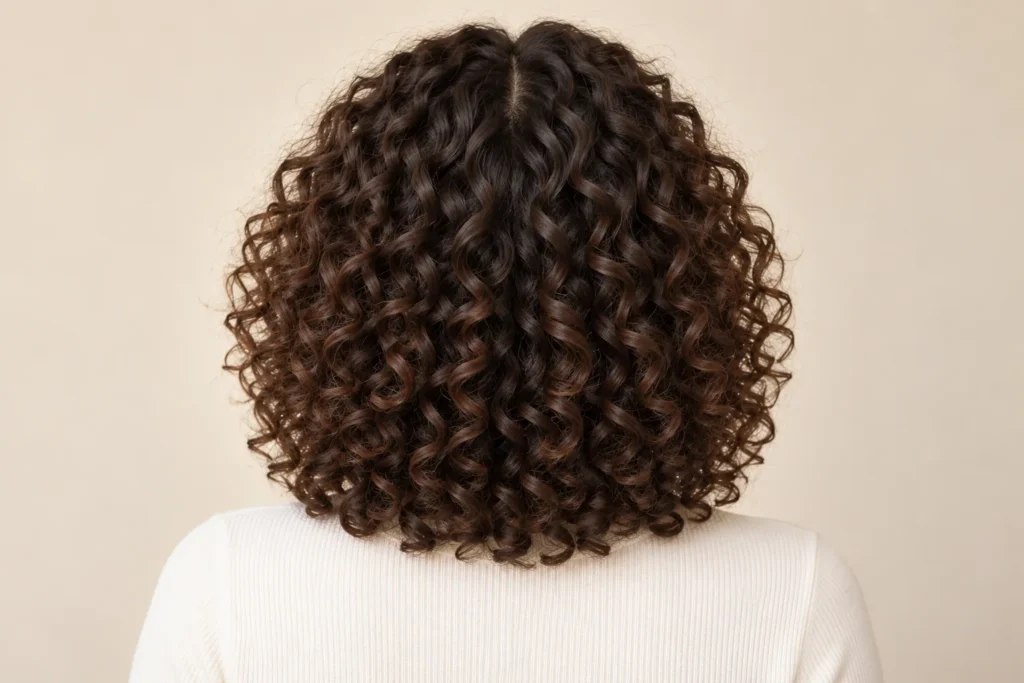
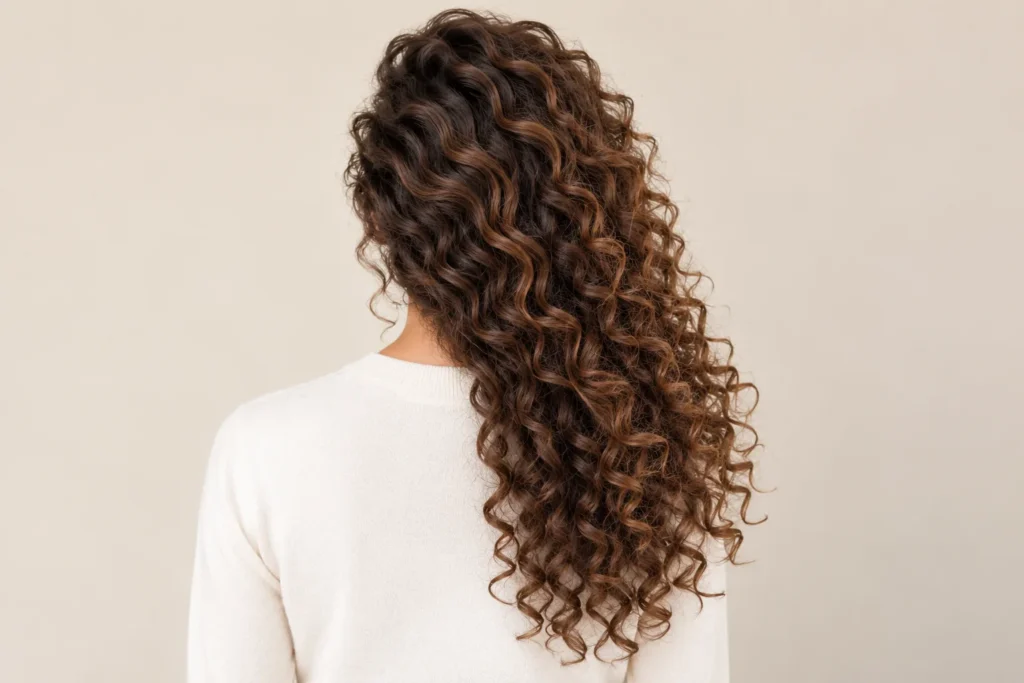
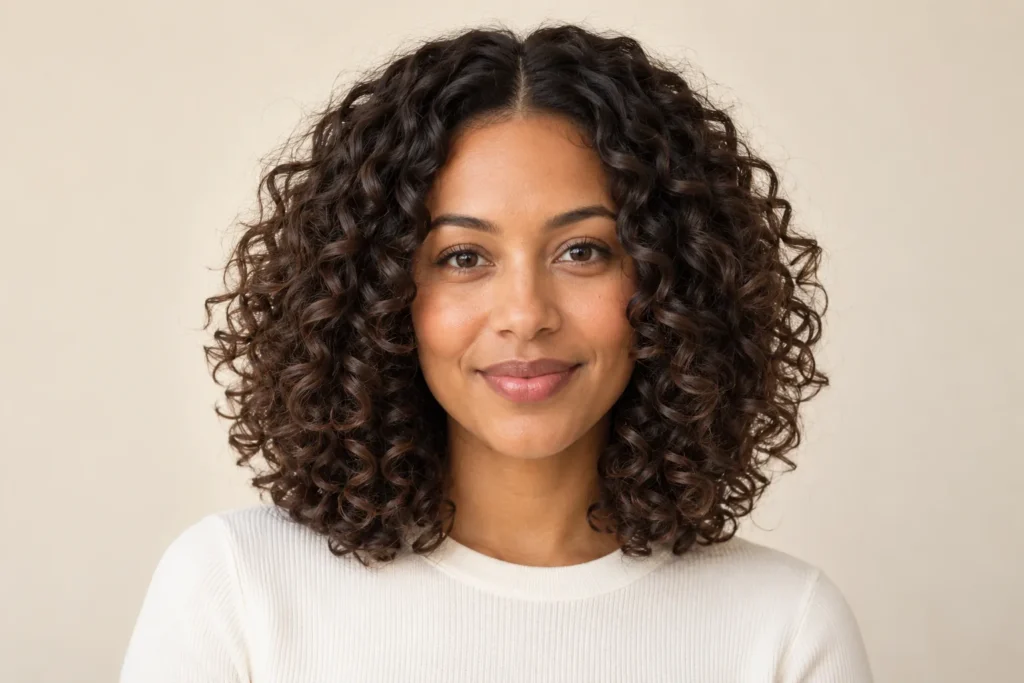
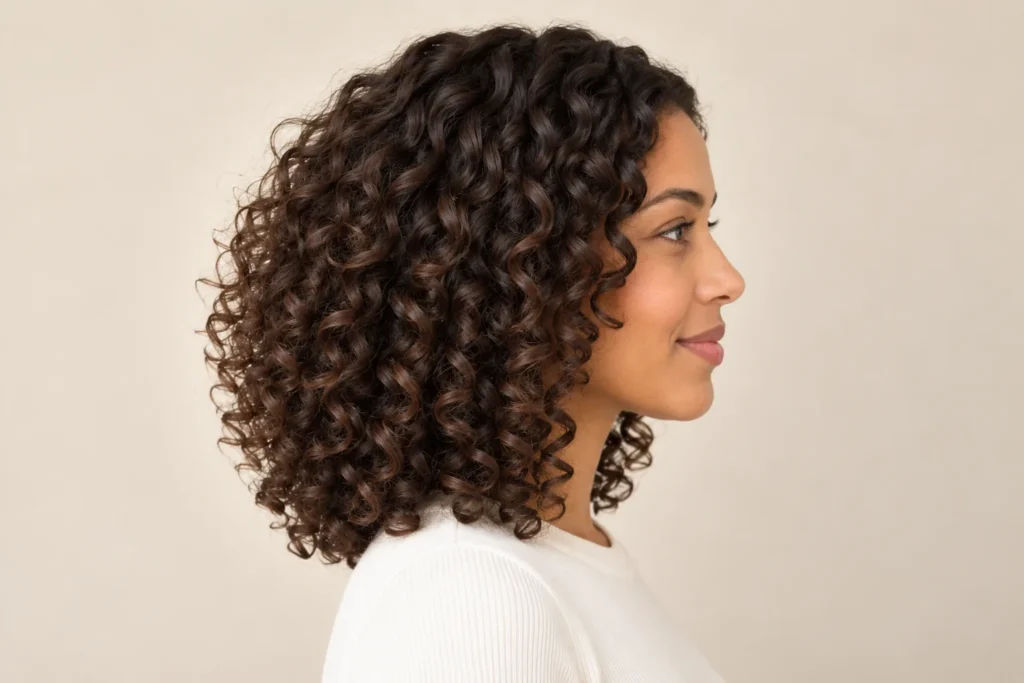
    1. Shoulder-Length Layered Curls

    Shoulder-length layers create a rounded outline without removing all the weight from the ends. Shorter pieces near the crown give the curls space, while the perimeter keeps the cut looking full. It is a flexible starting point if you want a noticeable shape and enough length for small updos.

    Ask your stylist where the shortest layer will sit when your hair is dry. At home, arrange the part while the hair is damp, then let the curls settle before separating a few clumps with your fingertips.
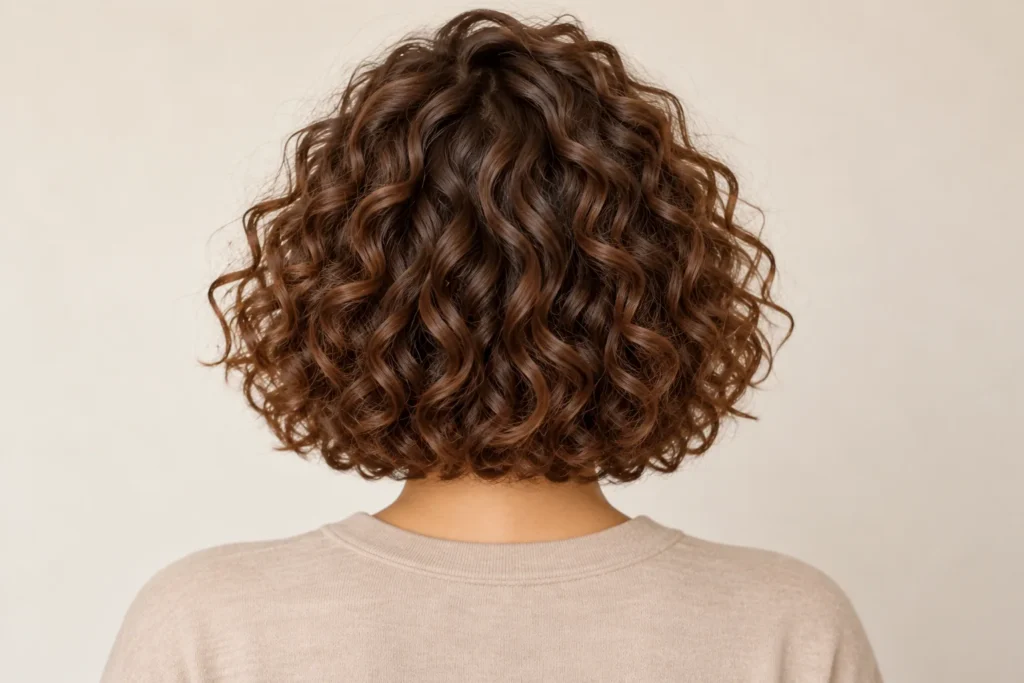
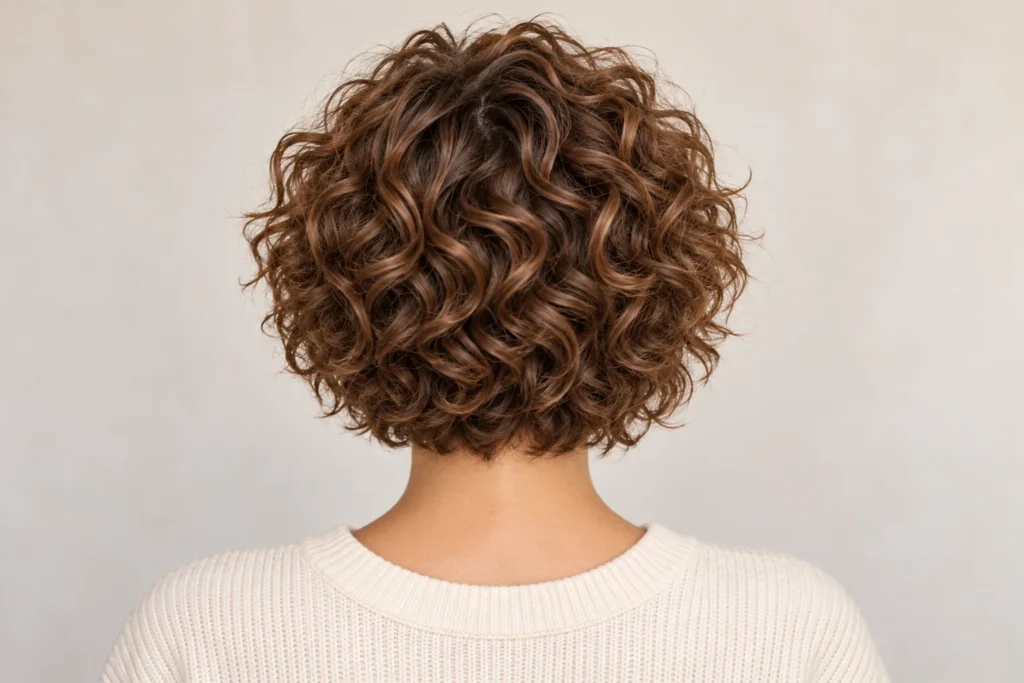
    2. Curly Bob

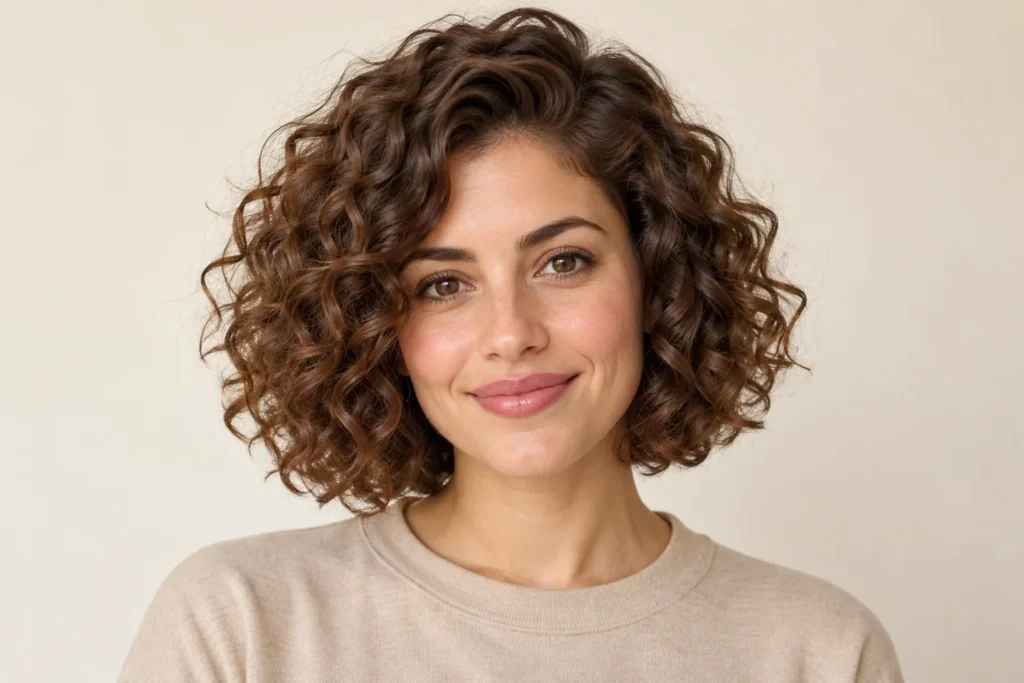
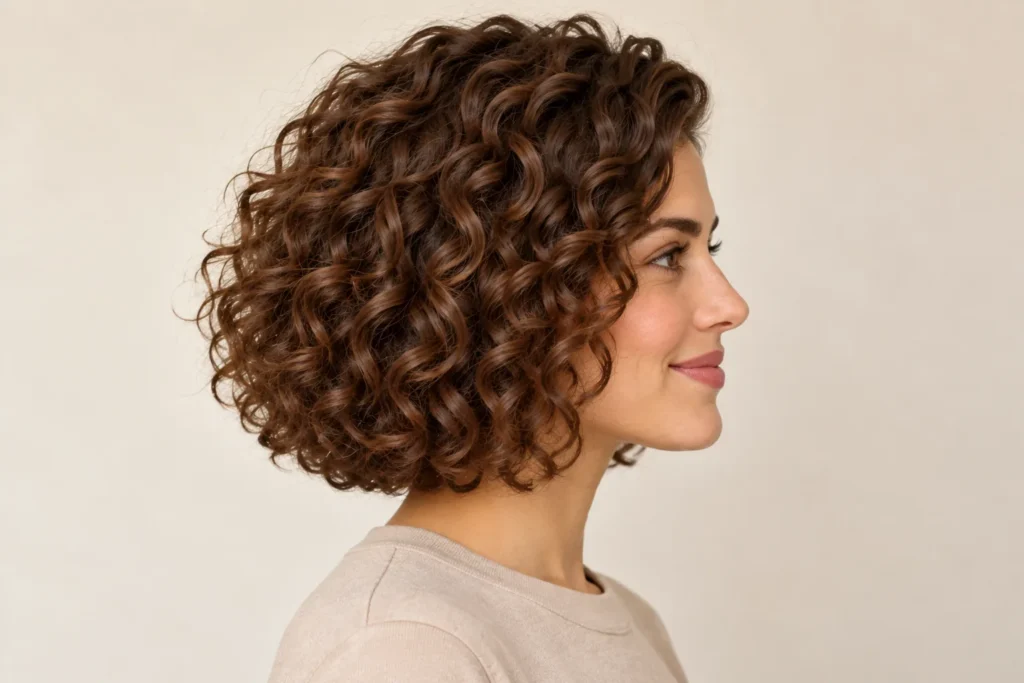
    A curly bob brings the focus toward the jaw and cheekbones. Defined ends make the outline feel deliberate, while a gentle side part stops it from looking overly symmetrical. The exact finished length matters more than a fixed label such as chin-length or shoulder-length.

    Compare the side and back views before choosing your cut. Leave enough length at the nape for the silhouette you want, and discuss how the front curls rise after drying so they do not finish shorter than expected.
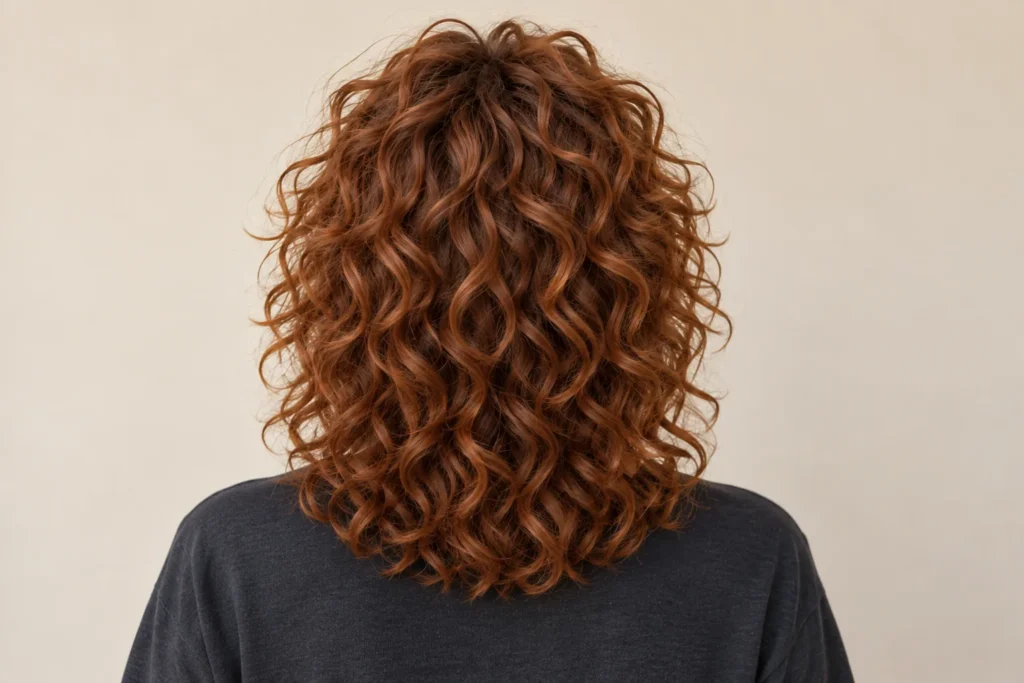
    3. Curly Shag

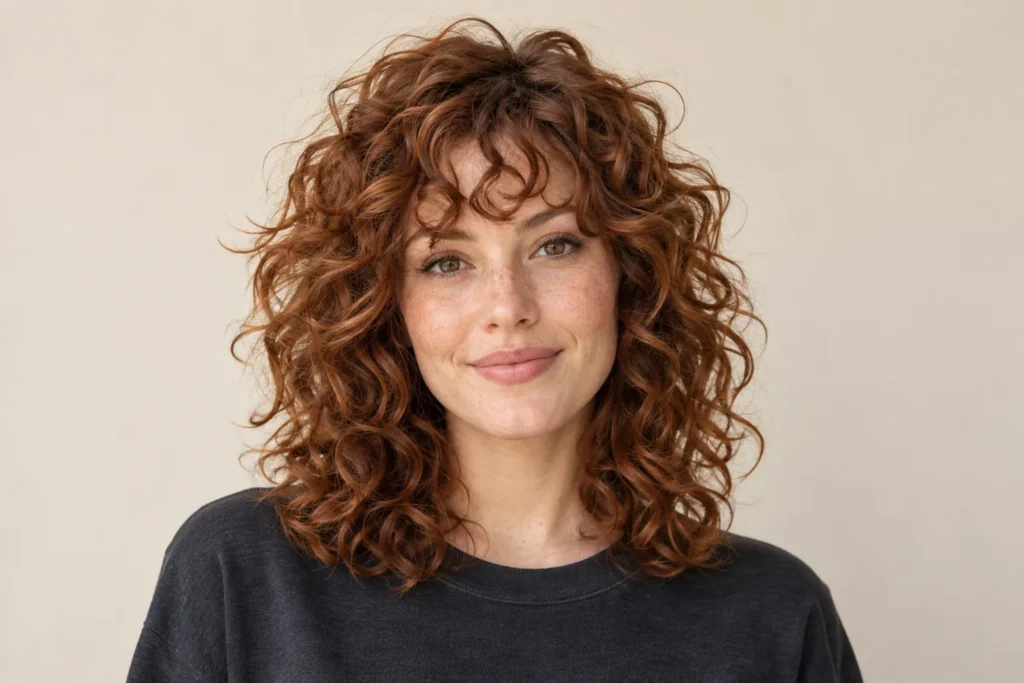
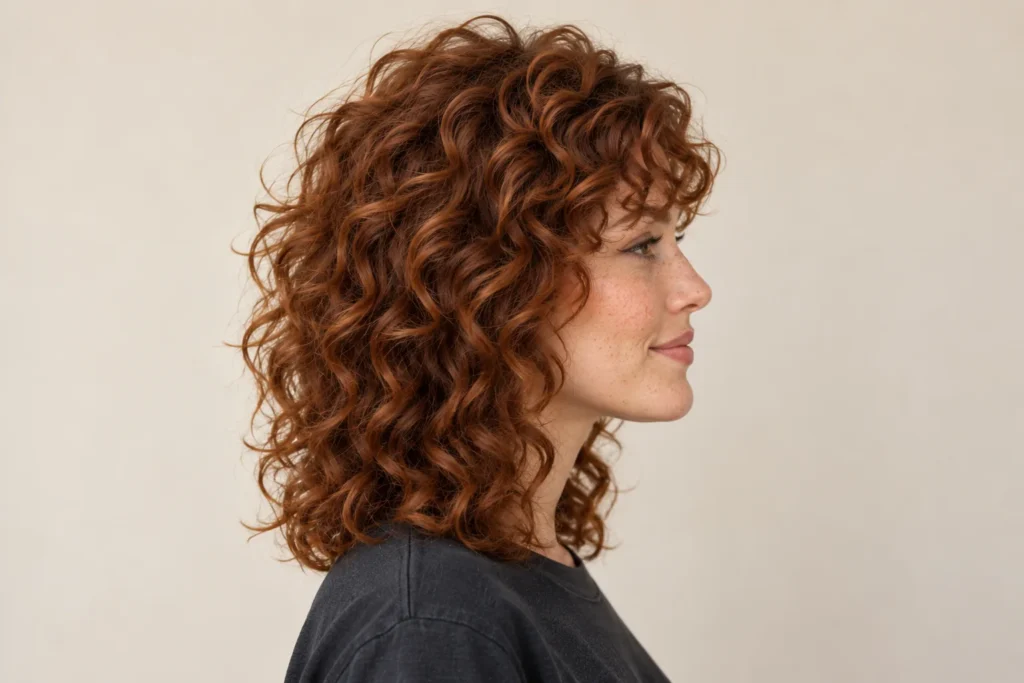
    The curly shag combines a layered crown, a lighter perimeter and a relaxed fringe. Its charm comes from an uneven, lived-in outline rather than perfectly matching ringlets. It suits someone who enjoys visible movement and does not want the sides to form a solid block.

    Keep the fringe conversation separate from the overall length. Ask how it will blend into the cheekbone pieces. When styling, lift selected curls around the crown and let the shorter layers find their own direction.
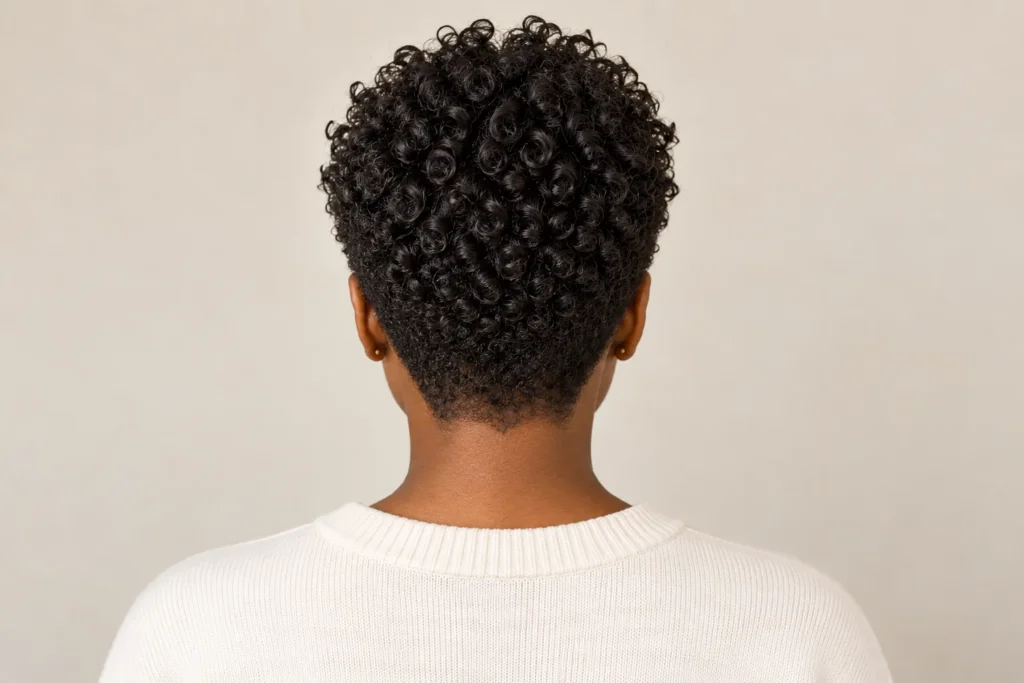
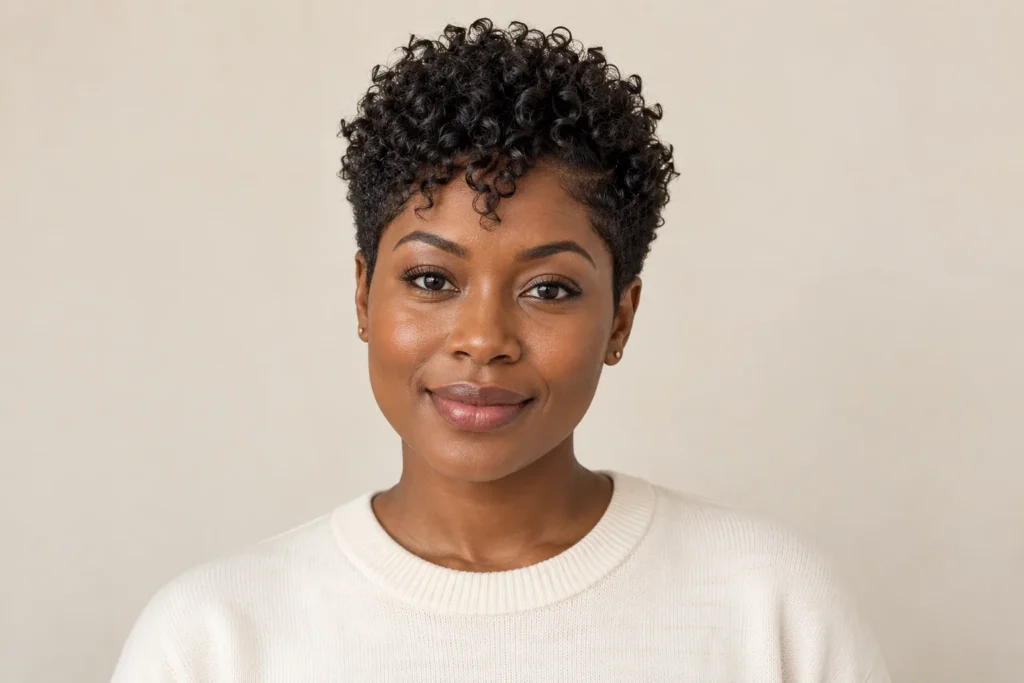
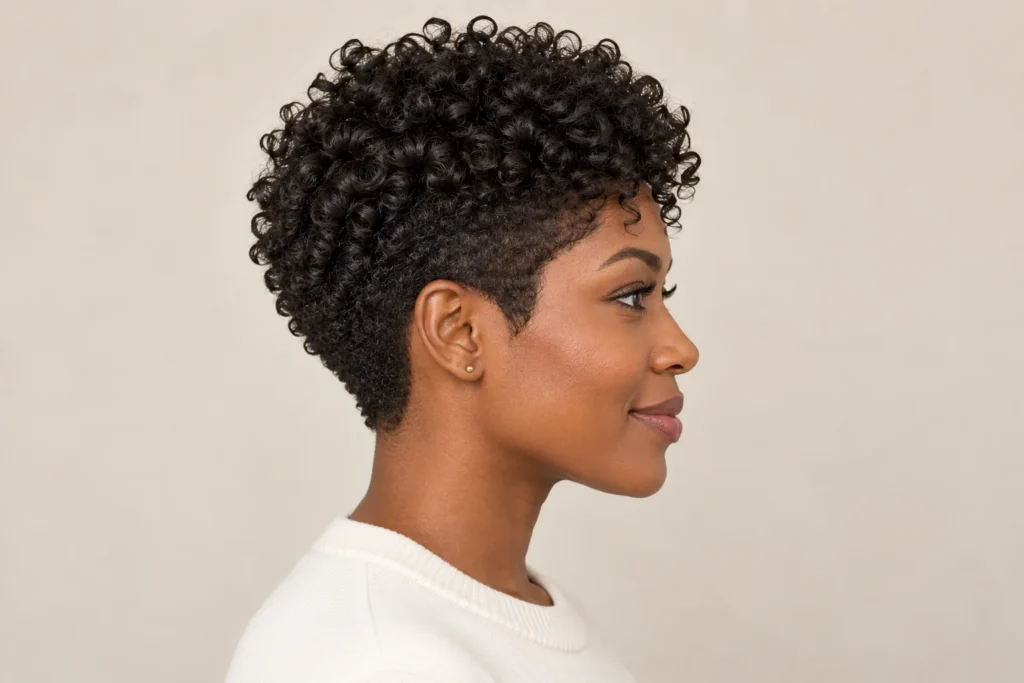
    4. Curly Pixie

    A curly pixie keeps the sides compact and leaves more texture on top. The contrast makes the individual curls easy to see and gives a short cut a clear profile. It can be neat around the ears while still feeling soft through the fringe.

    Show your stylist both the front and side references, especially if you want tapered edges. A little definition on the longer top section is often enough for the visual effect; the outline will also need attention as the cut grows.
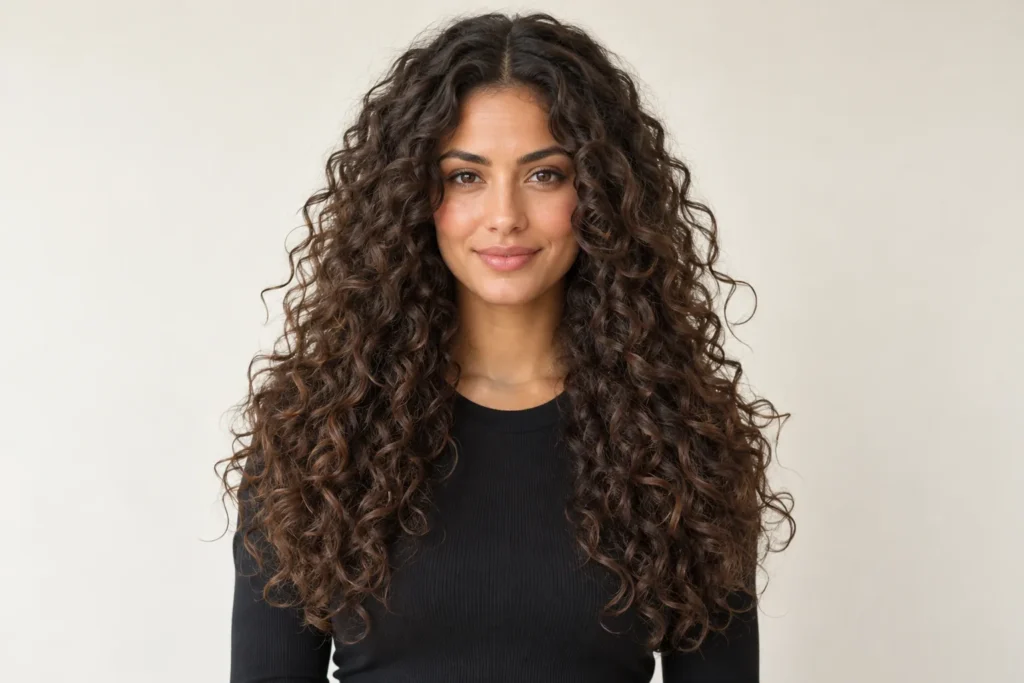
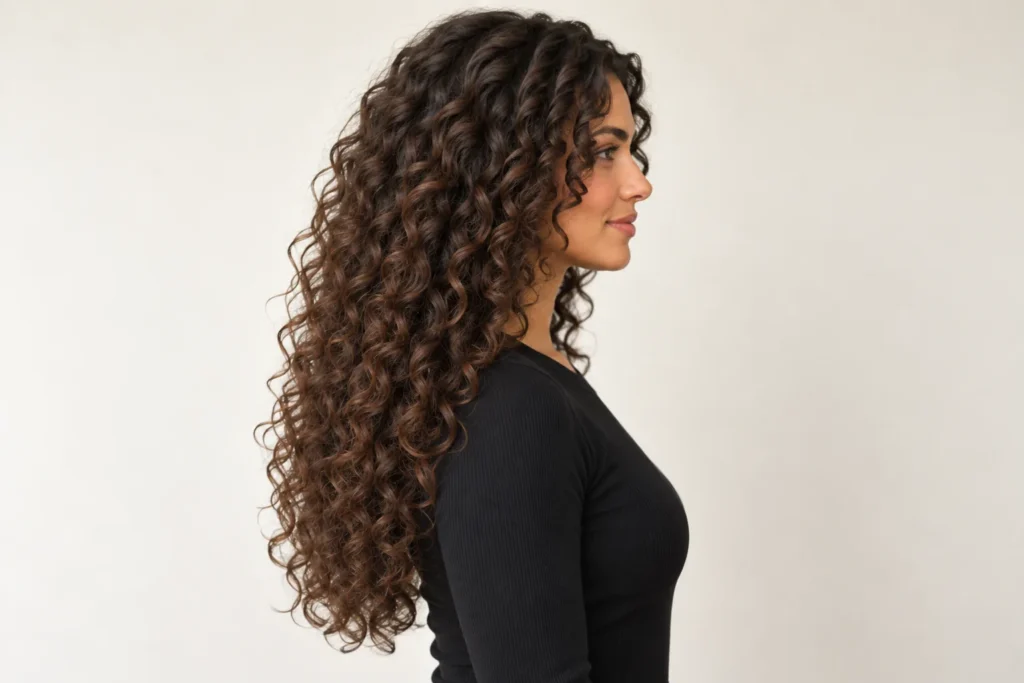
    5. Long Layers With a Centre Part

    Long layers preserve length while changing how the curls fall around the shoulders. A centre part creates a balanced frame, and subtle shorter pieces prevent all the visual weight from collecting at the bottom. This is an option when you love long hair but want a more considered shape.

    Avoid copying the shortest layer from a reference without discussing your density. Ask for enough fullness through the ends. Style the two sides in their natural direction instead of forcing every curl to sit identically.
    6. Curly Curtain Bangs

    Curly curtain bangs open around the centre and blend into longer pieces beside the face. They create a softer frame than a straight, heavy fringe. The important detail is the transition: the shortest curls should connect naturally with the rest of the haircut.

    Talk through the fringe length on dry curls before any cutting starts. For everyday styling, place the split where you want it while damp and guide each side gently outward. A fringe can need its own refresh even when the lengths look settled.
    7. Rounded Curly Afro

    A rounded curly afro puts the whole silhouette at the centre of the look. The crown, sides and back work together, with fullness distributed around the head. Defined coils and a soft outer edge can coexist; the style does not have to look rigid to have a deliberate shape.

    Use all three angles to explain the proportions you like. Ask whether you want more width at the sides or height at the crown. Arrange the outer curls lightly so the outline remains visible without flattening the texture.
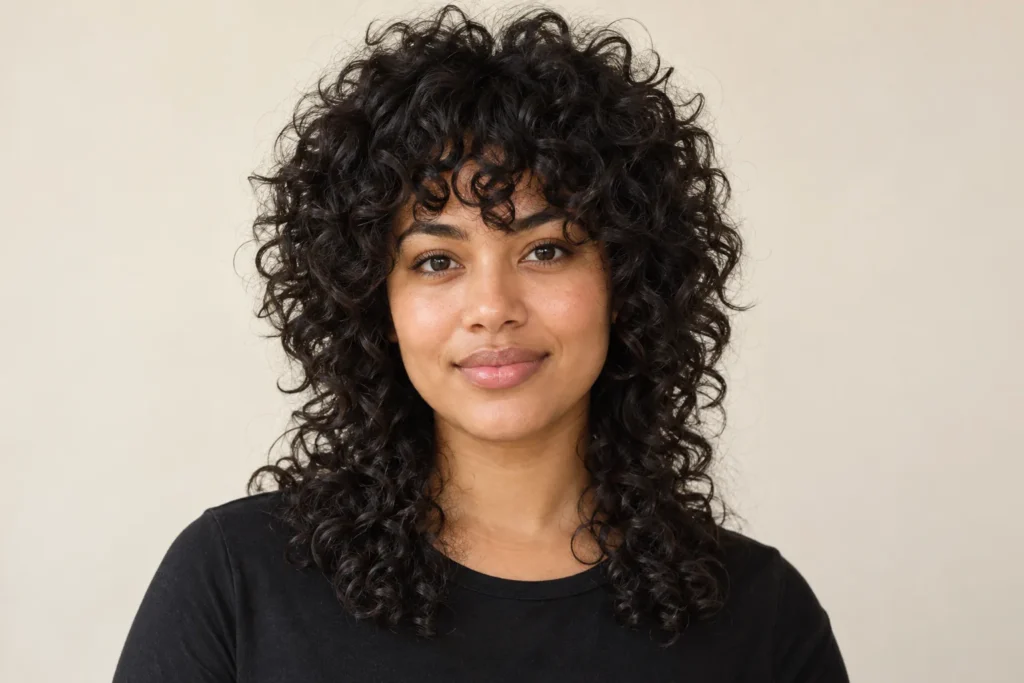
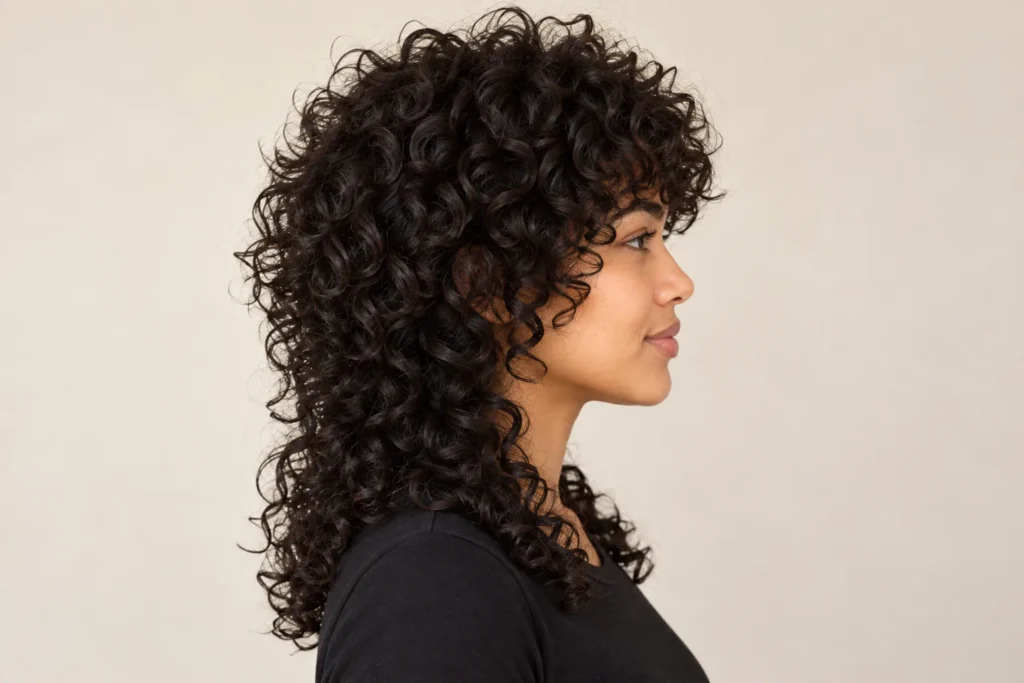
    8. Curly Wolf Cut

    The curly wolf cut has a fuller top, shorter framing pieces and a longer nape. Its contrast is stronger than a gentle layered cut, giving it a slightly rebellious profile. It is useful inspiration if you want the back length to remain visible beneath the crown.

    Discuss how dramatic the transition should be. A subtle version can be easier to tie up, while very short crown layers create a different daily styling commitment. Look closely at the side reference before deciding where that change in length should begin.
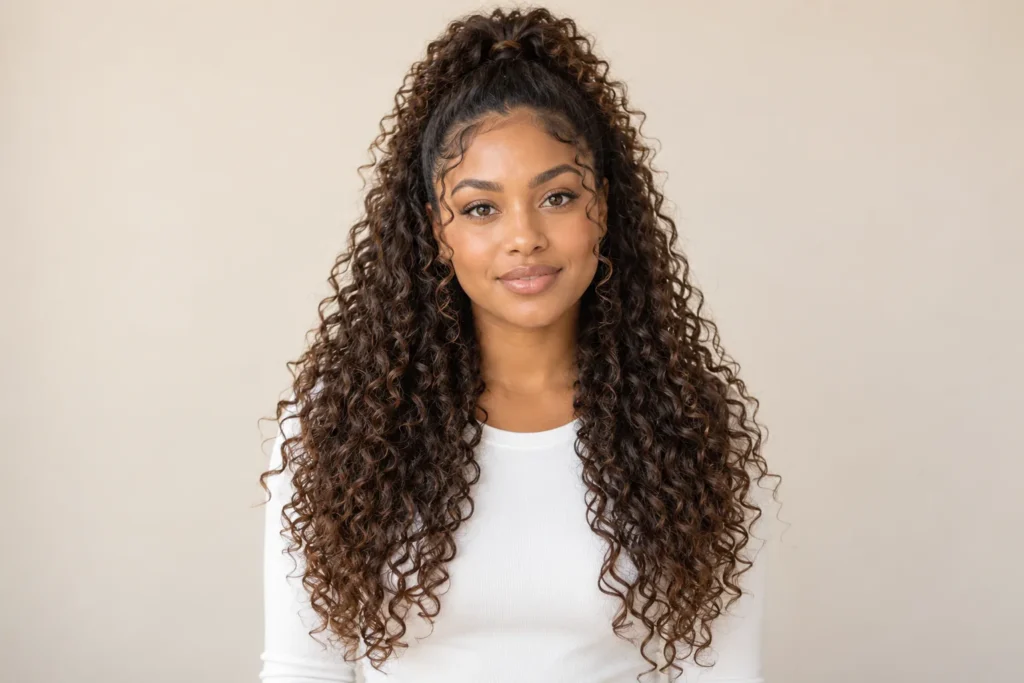
    9. Half-Up Curly Ponytail

    A half-up curly ponytail gathers the upper section while leaving the lower curls loose. It shows the face and preserves movement through the back, making it an easy alternative to wearing everything down. The amount you gather changes how much volume remains beside the ears.

    Start with a smaller top section and adjust it before fastening. Let the ponytail sit loosely enough for comfort, then arrange a few curls around the join. The back view helps you judge whether the gathered section feels balanced.
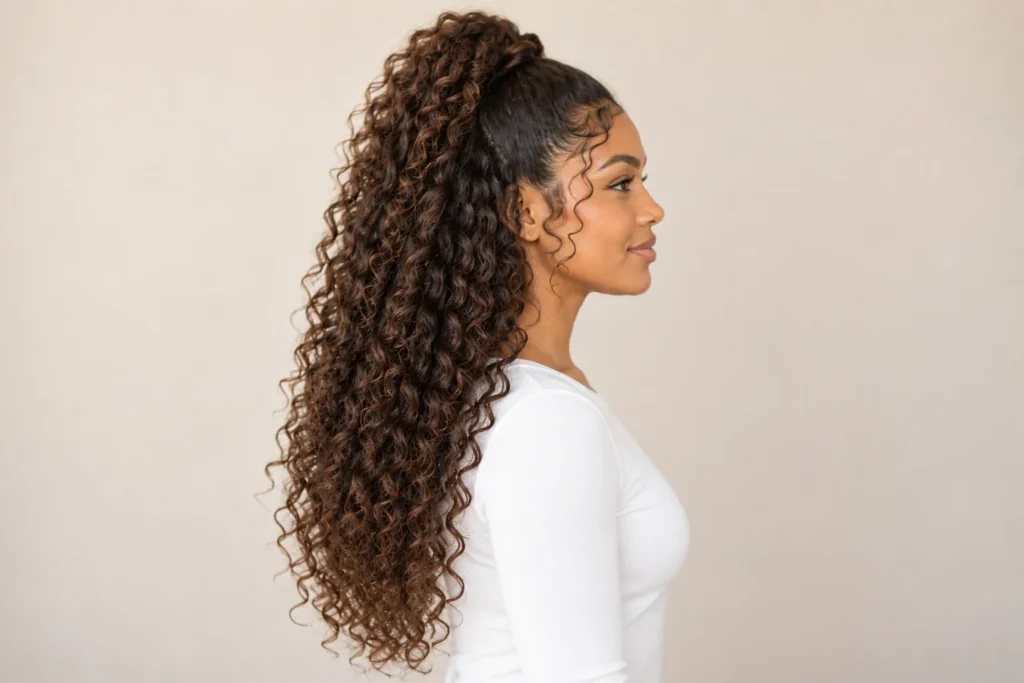
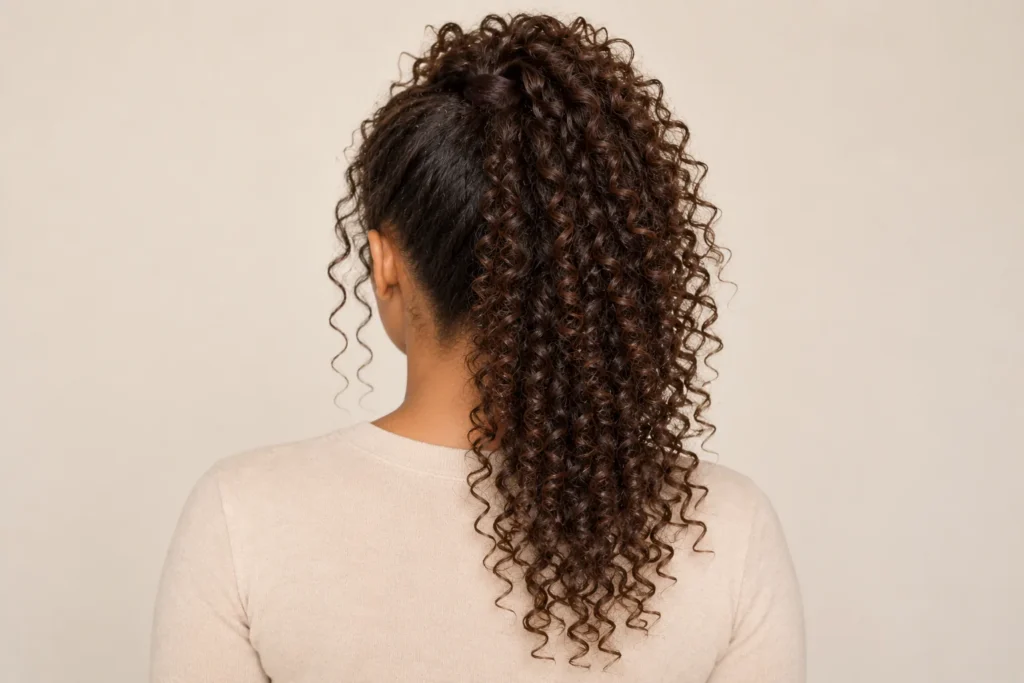
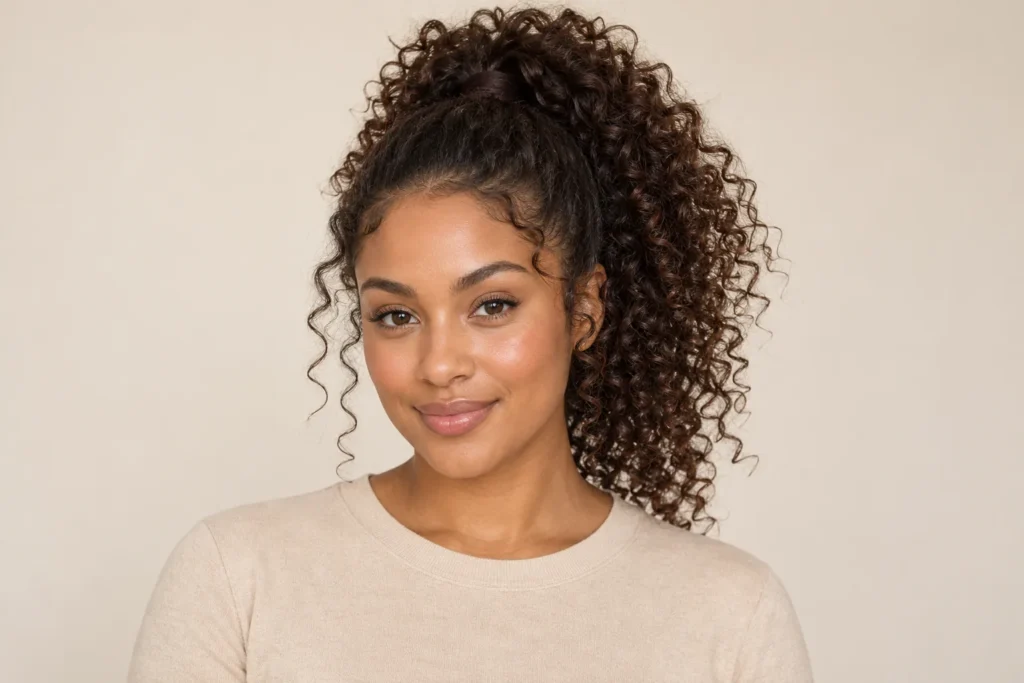
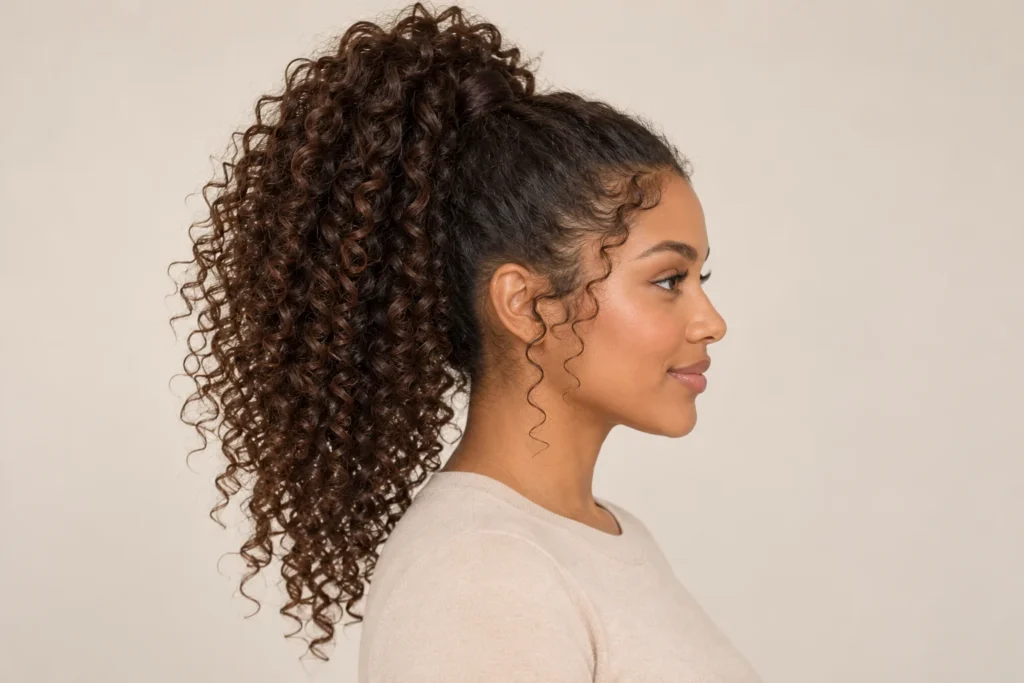
    10. High Curly Ponytail

    A high curly ponytail creates height and a cascading tail. Smooth sides can make the contrast more visible, although a softer finish works too. It is a styling idea rather than a particular haircut, and the result will look different depending on your length and density.

    Gather the hair with your hands and choose a comfortable fastening point near the crown. Leave room for the tail to spread instead of pulling it into one narrow section. If the style feels tight, loosen it rather than chasing a flatter finish.
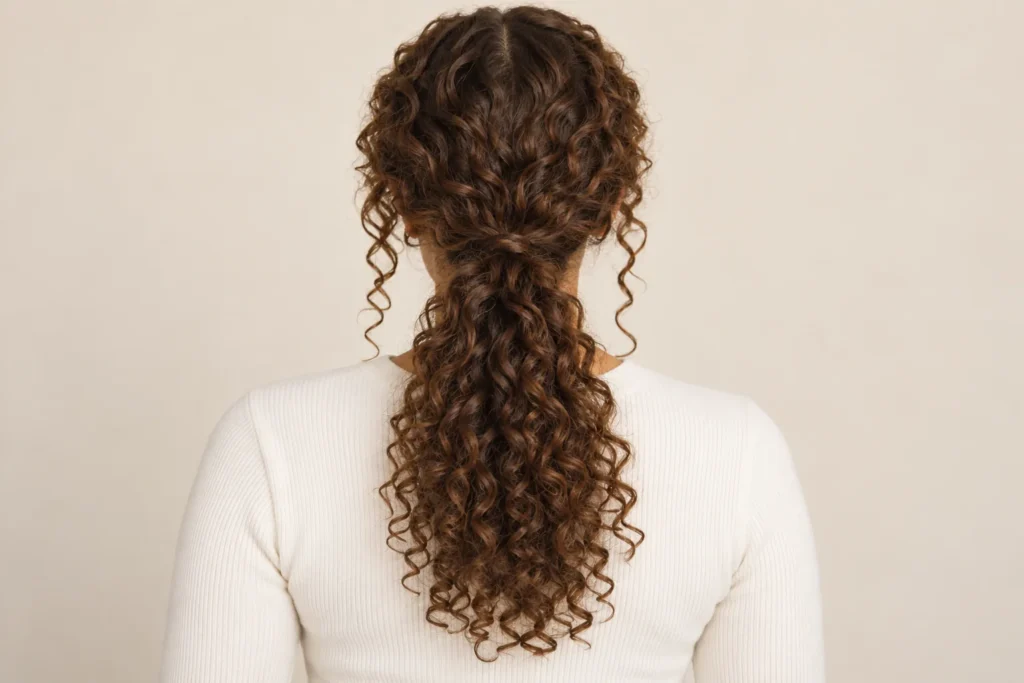
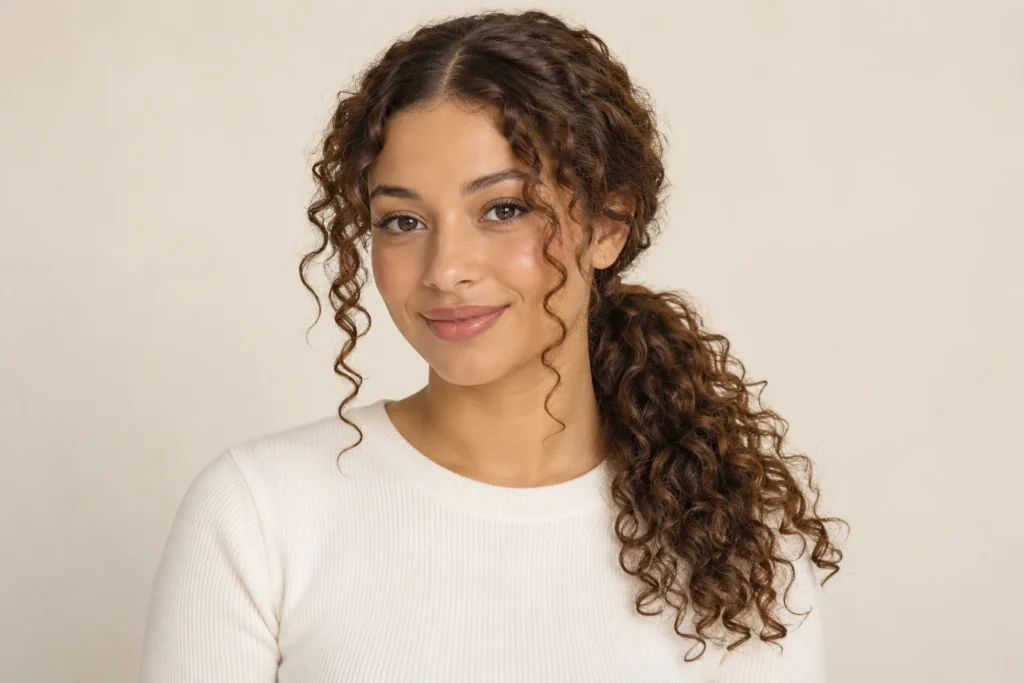
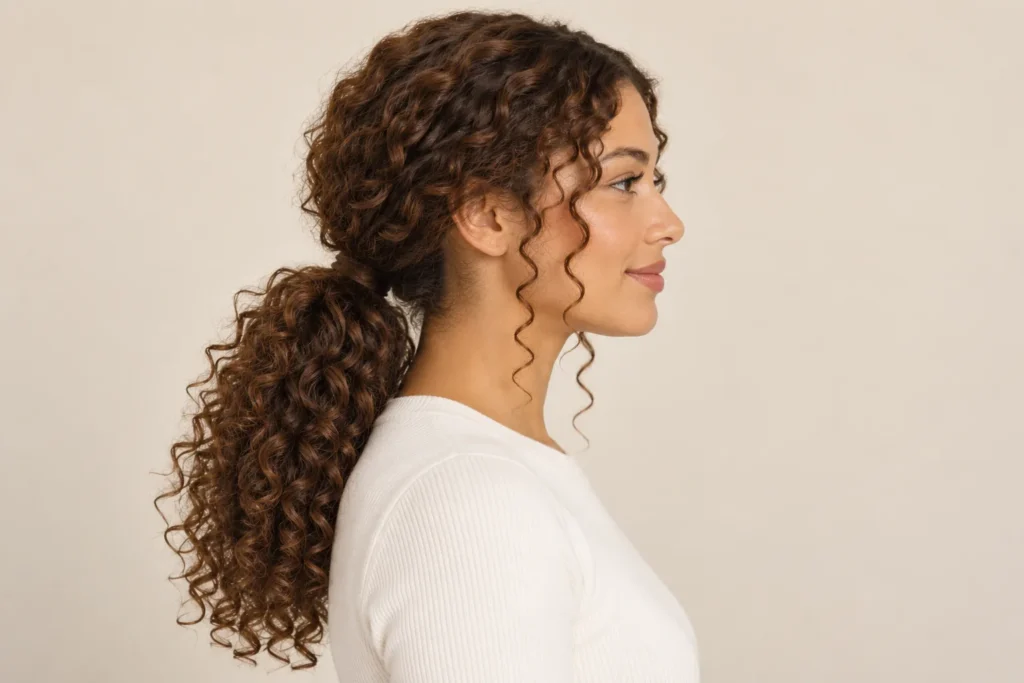
    11. Low Curly Ponytail

    A low curly ponytail places the main shape near the nape. A centre part and a couple of loose tendrils give it a calm, understated finish. It works well when you want the curls contained while still showing their texture along the tail.

    Gather the lengths gently and check that the two sides sit comfortably. Choose tendrils from curls that naturally fall forward rather than pulling new pieces out repeatedly. The side view is particularly useful for comparing where the fastening sits.
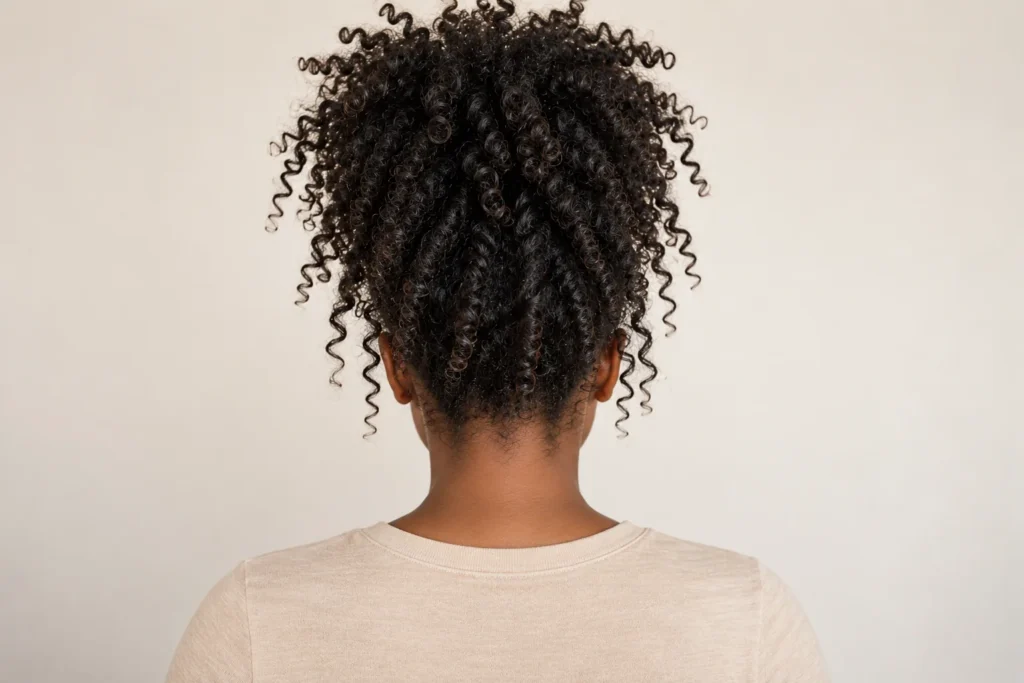
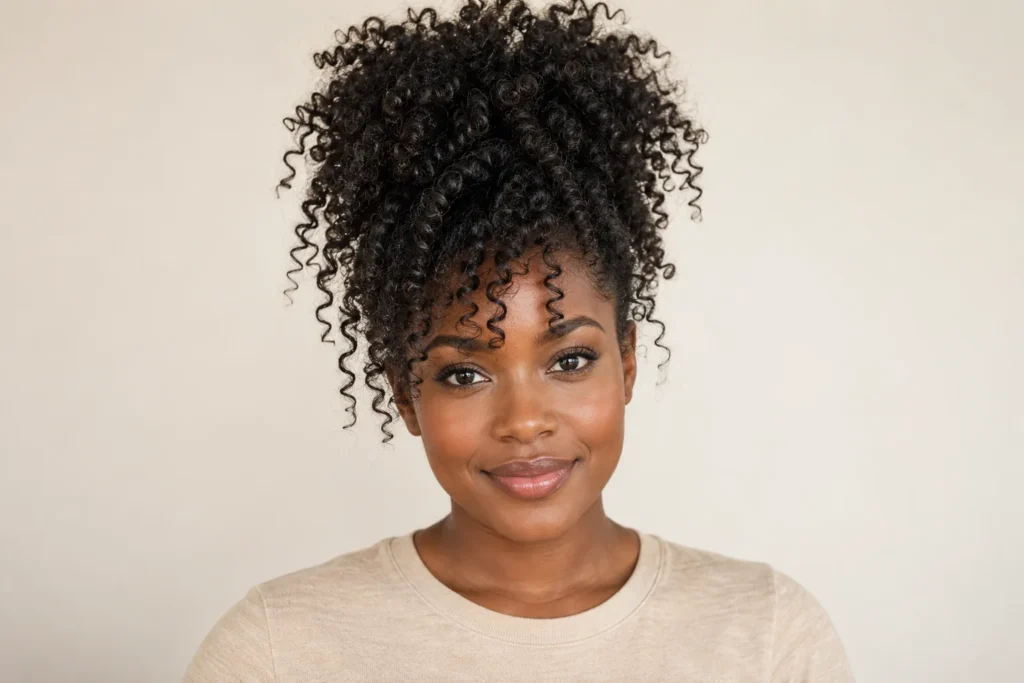
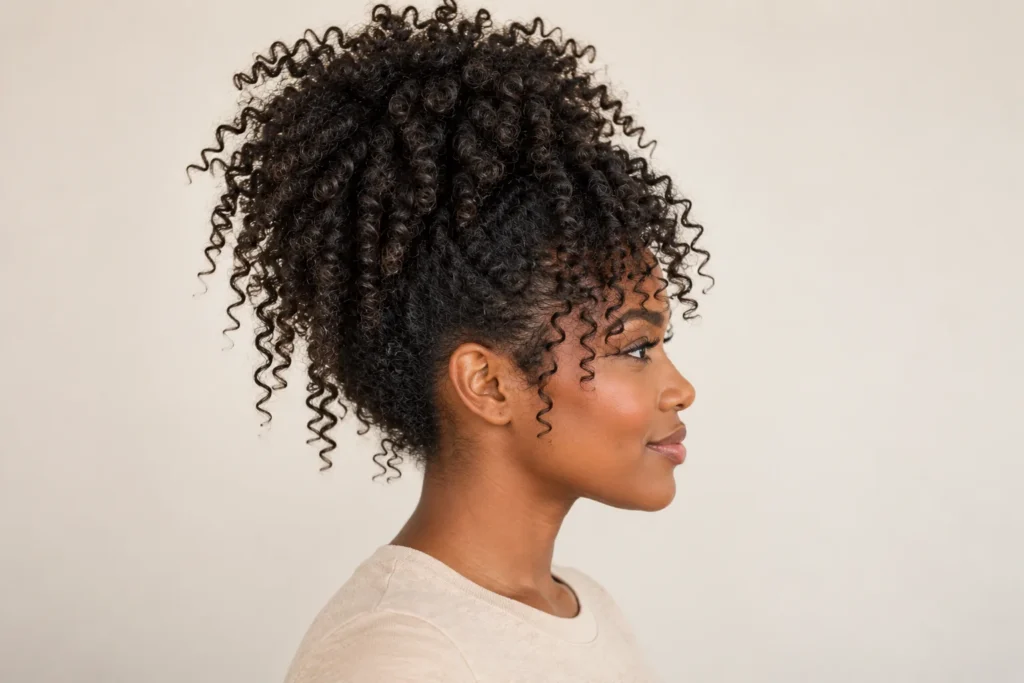
    12. Pineapple Updo

    The pineapple updo gathers curls high on the head, leaving the ends to fan forward and outward. Its loose, airy appearance makes it a distinct daytime look as well as a familiar way of gathering longer curls. The final silhouette depends on how much length you have.

    Use a relaxed fastening and arrange the ends instead of tightening the base until everything looks smooth. Check the back for loose sections and adjust them individually. The aim is a comfortable cluster of curls with visible movement.
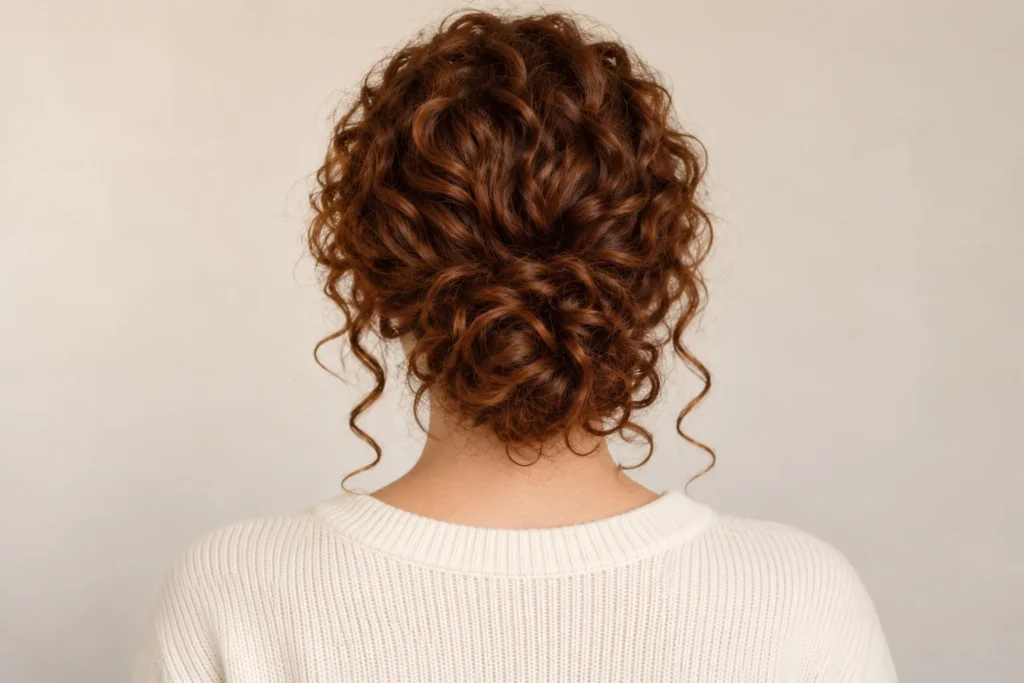
    13. Messy Curly Bun

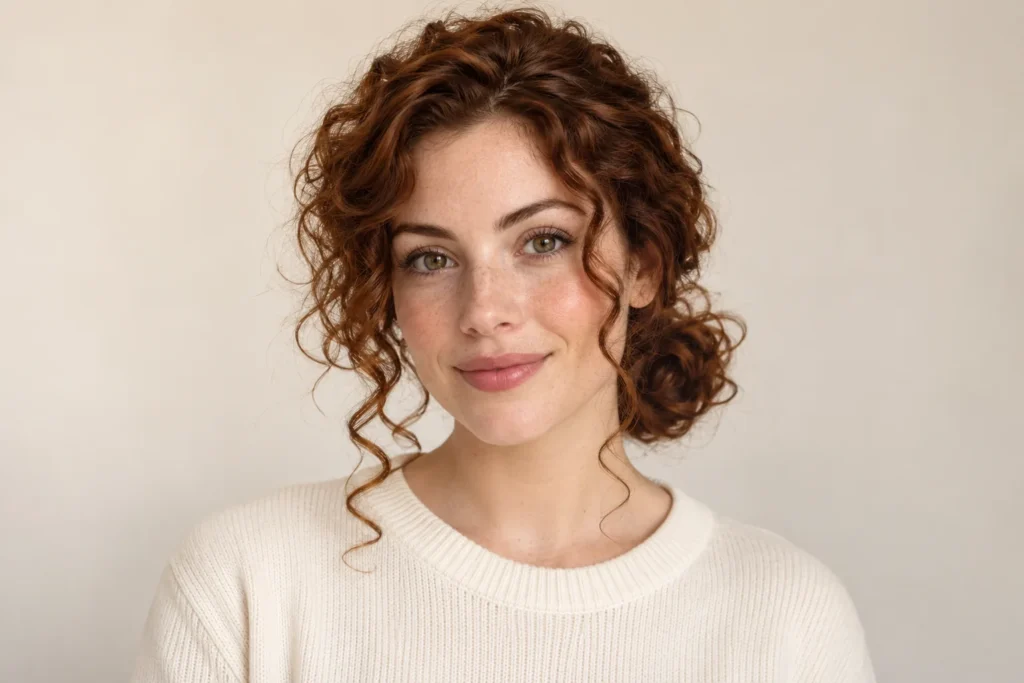
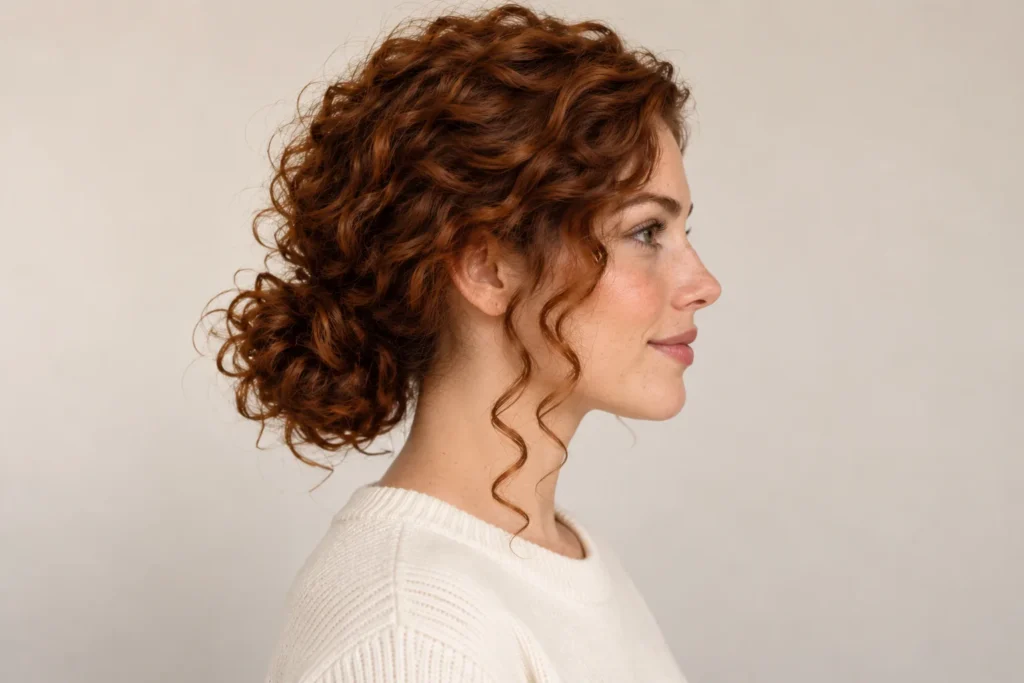
    A messy curly bun uses loops and loose ends to create texture around the nape. It feels softer than a perfectly tucked bun because the curl pattern remains visible. A few face-framing pieces can connect the updo with the front of your haircut.

    Gather the hair low, form a loose bun and secure the shape without hiding every end. Reposition sections that stick out awkwardly rather than adding more tension. The rear reference shows how an intentional outline can still look relaxed.
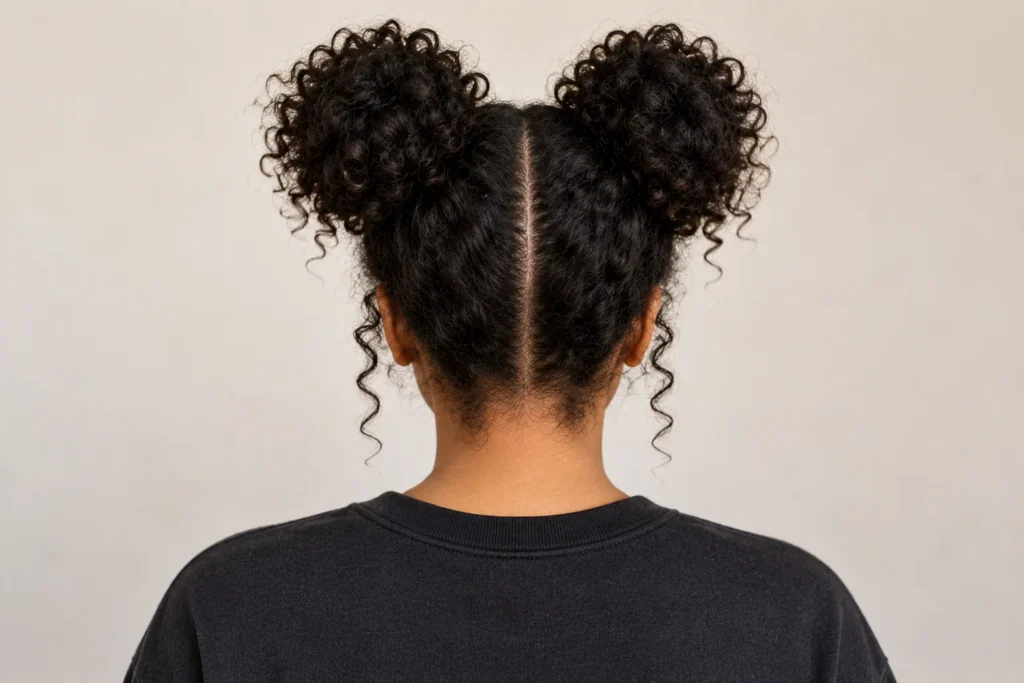
    14. Curly Space Buns

    Curly space buns divide the hair into two sections and build matching shapes above the ears. The curls keep the buns from looking too solid, while a centre part gives the arrangement a clear structure. They can feel playful without needing extra accessories.

    Make the two sections similar in size before fastening them. Arrange each bun loosely and compare their height in a mirror. Leave a couple of curls near the temples if you want a softer front, or keep the outline clean for more contrast.
    15. Side-Swept Curls

    Side-swept curls move most of the length toward one shoulder. A deeper part creates the shift, and the exposed side adds contrast to the full side. It is a useful way to change the silhouette of an existing long cut without taking away length.

    Try the part on both sides before settling on the direction. Guide the curls over your shoulder and secure a small section discreetly if needed. Keep the ends loose so the look remains about the curl texture rather than the fastening.
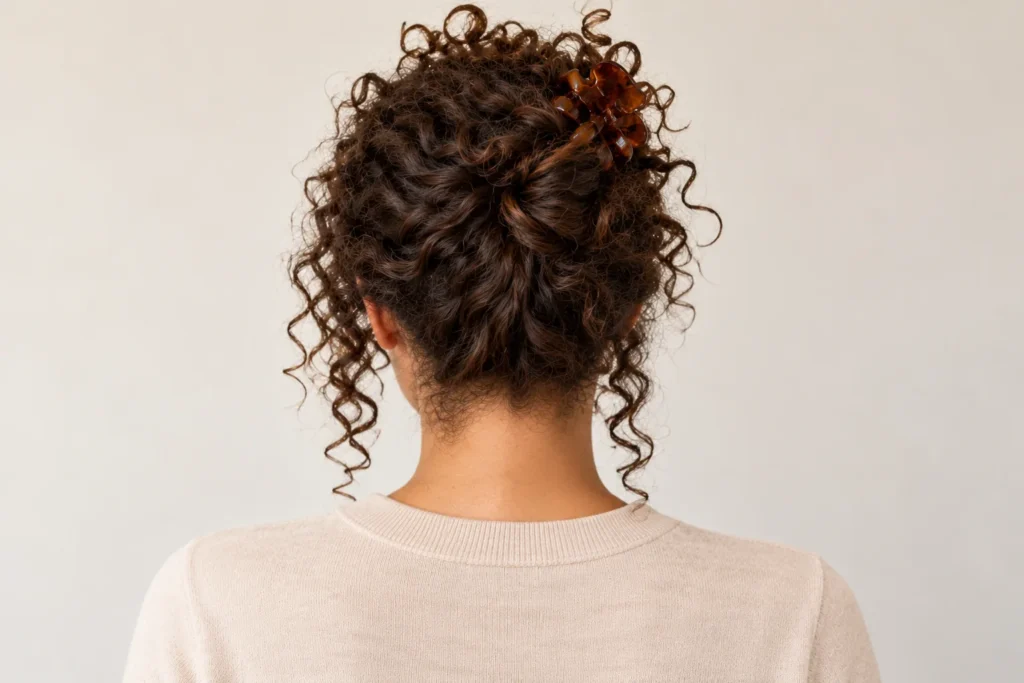
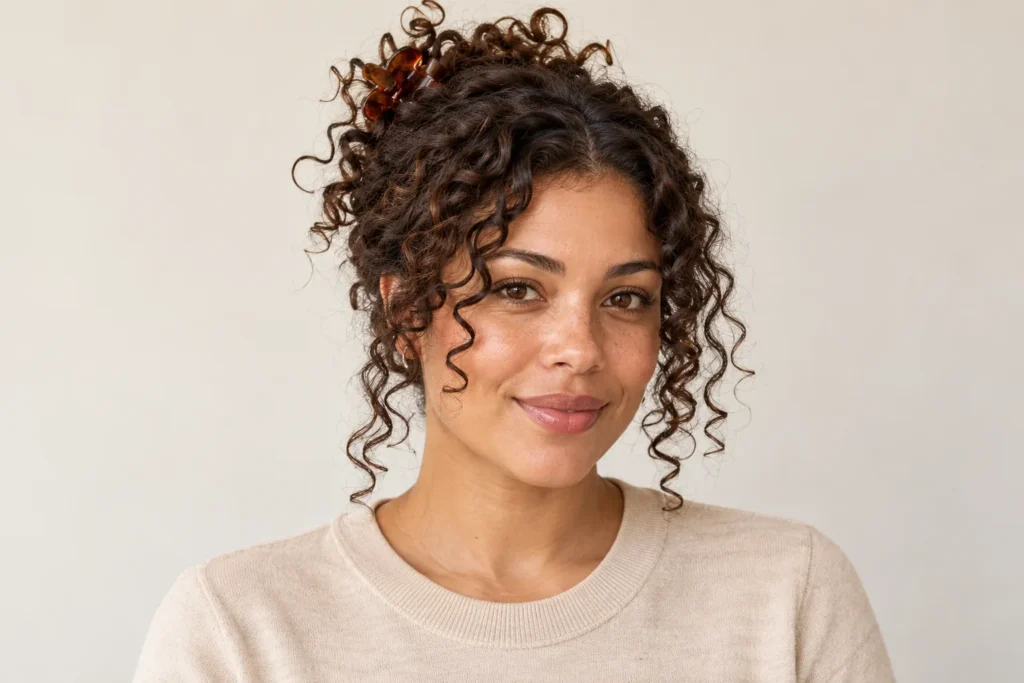
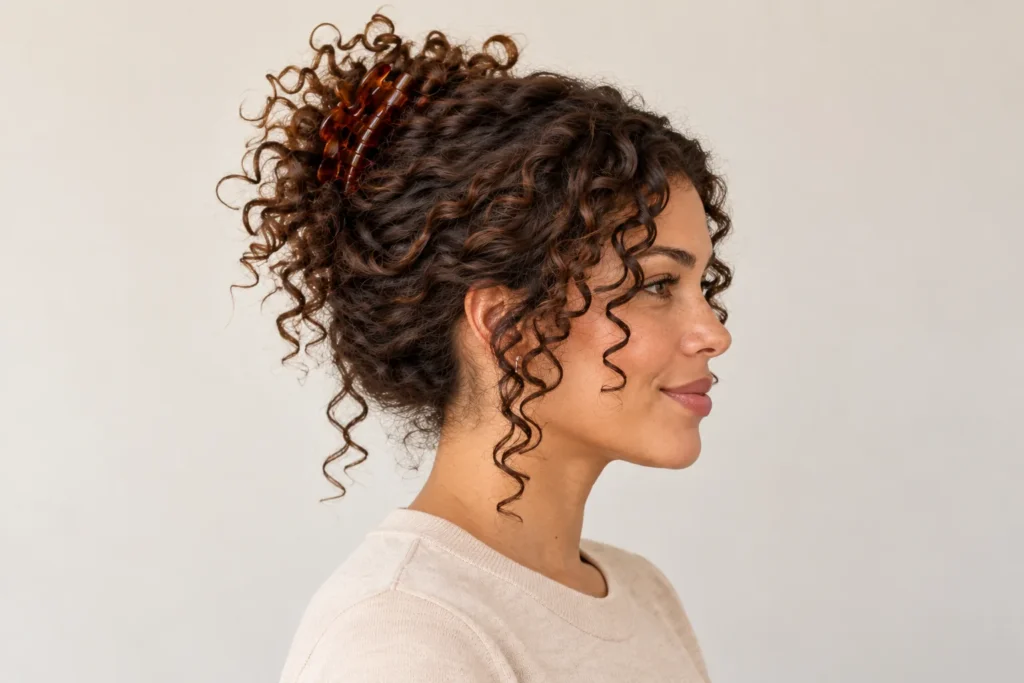
    16. Claw-Clip Curly Updo

    A claw-clip curly updo gathers the back into an upward twist and lets the ends spill above the clip. The accessory holds the structure while the curls provide the finish. It is especially helpful as a reference for medium lengths that do not form a large bun.

    Choose a clip that comfortably holds your hair, then twist the lengths loosely before closing it. Check that the teeth do not press awkwardly against the scalp. From the rear, the clip and curls should look like one balanced arrangement.
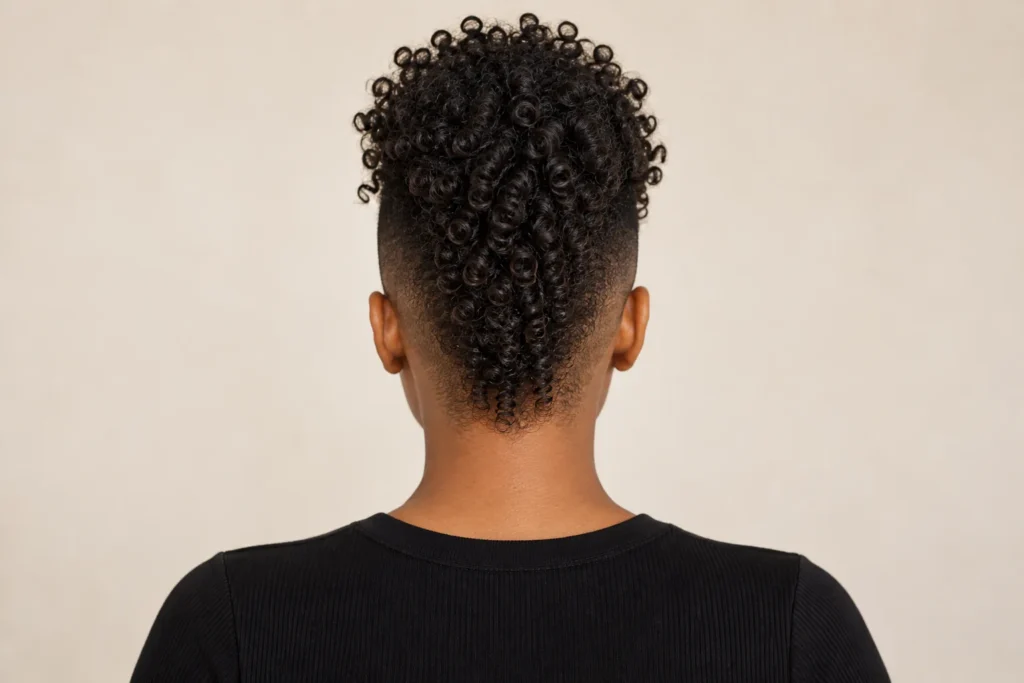
    17. Curly Mohawk

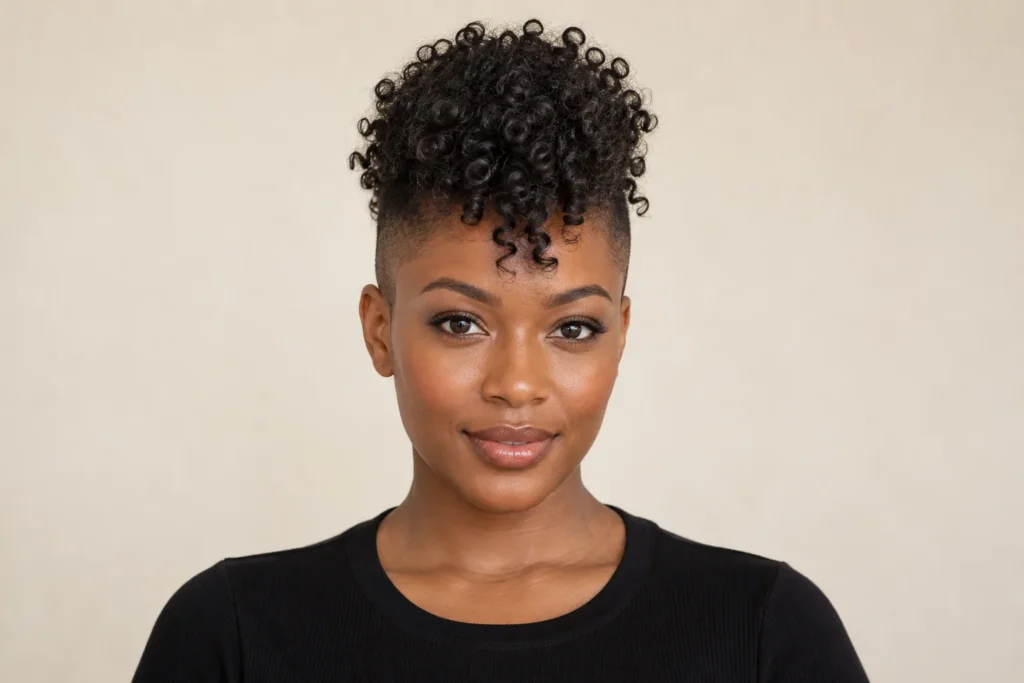
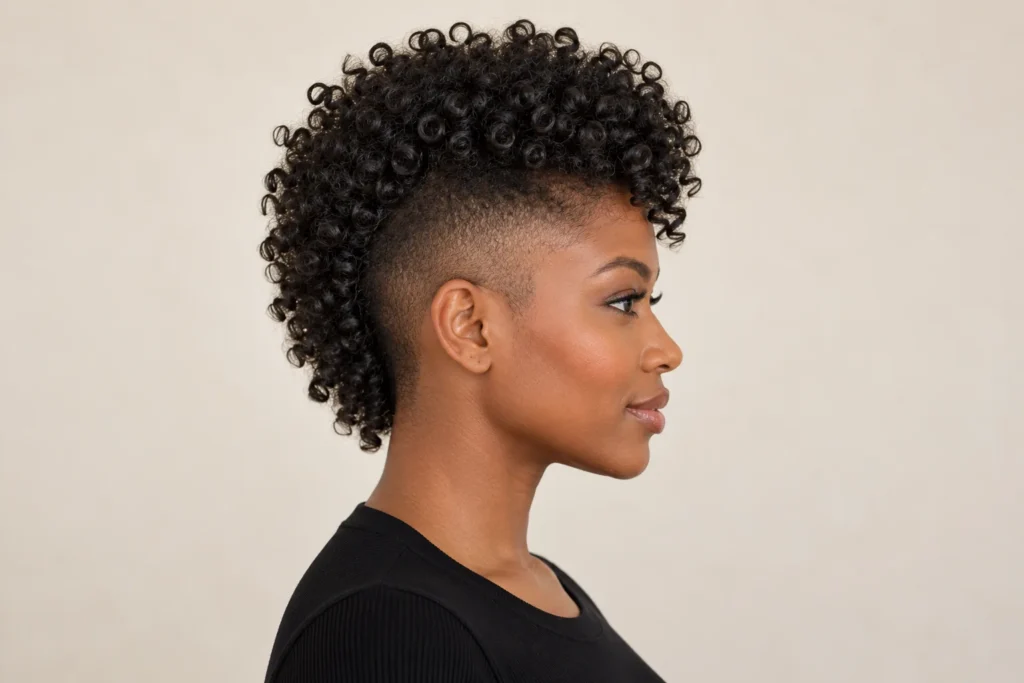
    The curly mohawk places the fullest texture through the centre and keeps the sides much shorter. This strong contrast makes the profile as important as the front. A tapered version feels different from shaved sides, so those details are worth deciding before the appointment.

    Bring a side image and discuss the width of the central strip. Ask how the shorter sides will grow into the longer section. Let the curls on top keep their natural character instead of trying to turn them into a rigid ridge.
    18. Curly Bixie

    A curly bixie sits between a pixie and a short bob. It keeps softness around the ears and nape while giving the crown a more compact shape. A little curly side fringe connects the short outline with the face and makes the cut feel less severe.

    Specify which bob details you want to keep, particularly the back length. The name alone does not tell a stylist your preferred proportions. Arrange the fringe separately from the crown so the two areas do not compete for the same direction.
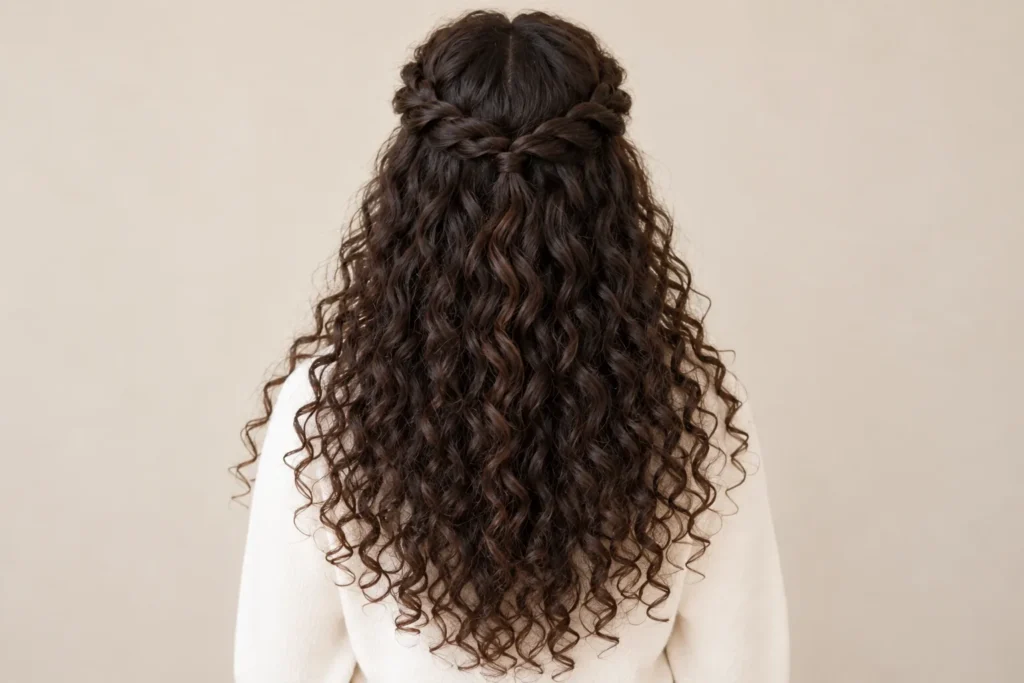
    19. Half-Up Twists With Curls

    Half-up twists add a small structured detail to loose curls. Two sections from near the temples meet at the back, leaving the lower hair free. Compared with a ponytail, the fastening can sit more discreetly and preserve a softer outline around the crown.

    Twist each section gently in the direction you prefer and secure their meeting point at the back. Keep the sections modest so the loose hair remains the main feature. Use the rear reference to explain the placement of the join.
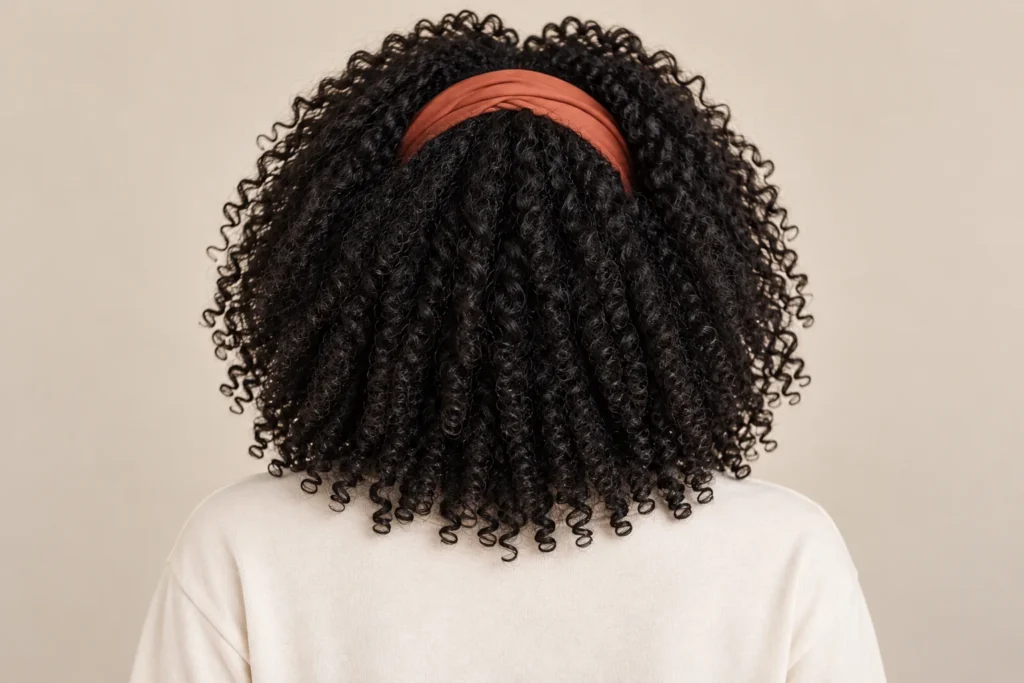
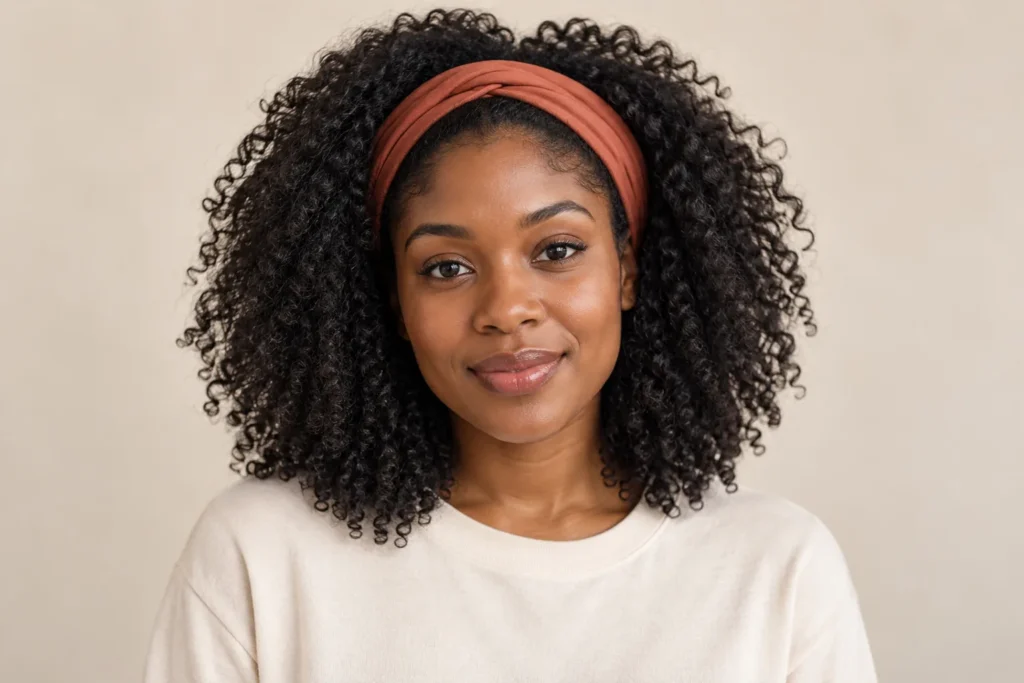
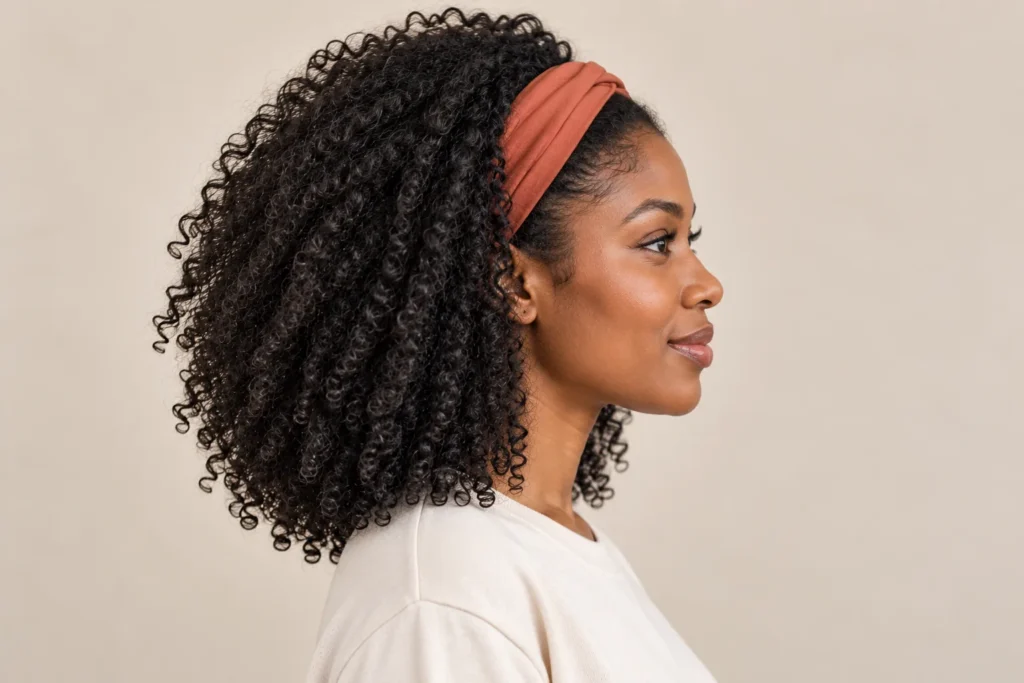
    20. Curly Hair With a Headband

    A headband gives loose curly hair an immediate change of frame. A plain fabric band can hold the front back while leaving volume above and behind it. The width and placement of the band determine how much of the hairline and fringe stays visible.

    Try the band slightly behind the hairline and adjust it for comfort. Arrange a few curls around the edge rather than trapping every strand beneath it. A simple colour lets the texture stand out and makes the accessory easy to pair with everyday clothes.
    How to Choose Between Curly Hairstyles

    Begin with the amount of change you want. A new part, ponytail or headband can change the outline for an afternoon. A bob, shag or pixie changes the haircut itself. Consider how often you tie your hair up, what length you enjoy and whether you want a fringe before choosing a salon reference.

    What to Ask Your Stylist

    Describe the silhouette, not just the style name. Point out the crown height, side fullness, fringe length and back shape you like. Explain how your curls look after your usual styling routine. The reference is a starting point for a conversation, and your finished cut can be adapted rather than copied exactly.

    Small Styling Details That Change the Result

    Notice where the part begins, how tightly an updo is fastened and whether the ends are tucked away or visible. These small decisions can make two versions of the same hairstyle feel different. Start with one change at a time so you can see which detail gives you the finish you prefer.

    Quick Reference Checklist

    • Compare front, side and back views before choosing a cut.
    • Discuss the finished dry length and the shortest layers.
    • Choose an updo fastening that feels comfortable.
    • Save references with a curl texture close to your own.

    For more inspiration, browse our Haircare guides and explore our cool hair styles collection. Choose a few references that fit your routine, then make the final shape your own.

  • Top Trending Hairstyles: 12 Looks to Try in 2026

    Top Trending Hairstyles: 12 Looks to Try in 2026

    Looking for hairstyles that feel fresh without becoming difficult to wear? This guide brings together twelve options, from layered cuts and short bobs to curls, braids and simple updos. Some involve a salon appointment; others let you change your look using the hair you already have.

    These are editorial picks inspired by current hairstyle coverage and Pinterest styling ideas, rather than a statistical ranking of the most popular looks. Choose according to your texture, density and routine. All twelve images are original AI-generated hairstyle illustrations, intended as visual inspiration rather than photographs of real salon results.

    A useful reference shows the front, side and back, but the conversation with your stylist matters just as much. Explain how you usually dry your hair, whether you tie it up and how much time you want to spend styling. A hairstyle should fit your life as well as your inspiration board.

    1. Butterfly Layers for Soft Movement

    Butterfly Layers hairstyle illustration
    Original AI-generated hairstyle illustration.

    Butterfly layers create shorter pieces around the face while keeping length through the back. The airy shape is useful when you like long hair but want the front to feel lighter. A soft blowout makes the different lengths visible, although the cut can also look relaxed with your natural wave.

    Ask your stylist where the shortest layer should begin and how it will blend into the rest. Hair density matters: removing too much weight can leave fine ends looking sparse. Start with longer face-framing pieces if you want a cautious change, and check whether those pieces will still reach your usual ponytail.

    Style the Front First

    Work with small front sections and direct them away from your face using a round brush or rollers. Let the shape cool before loosening it with your fingers. For more ideas about movement, read our soft volume hair guide.

    2. Soft French Bob With Wispy Fringe

    Soft French Bob hairstyle illustration
    Original AI-generated hairstyle illustration.

    A French bob brings the focus close to the face, usually with a chin-length outline and a softly lived-in finish. The wispy fringe in this example keeps the shape lighter than a heavy straight bang. It feels deliberate without needing every strand to sit in exactly the same place.

    Bring a front and side reference to your appointment. Explain whether you want to tuck the sides behind your ears and how much daily styling you can manage. A bob can be easy to wear, but maintaining a particular length still means returning for trims.

    Keep the Finish Soft

    Try a small amount of a styling product suited to your texture and gently bend the ends rather than creating tight curls. If your hair dries with a wave, work with that movement. A little natural irregularity is part of this hairstyle’s appeal.

    3. Collarbone Lob for an Easy Length Change

    Collarbone Lob hairstyle illustration
    Original AI-generated hairstyle illustration.

    The collarbone lob sits between a short bob and longer hair, making it a useful option when you want a change without losing all your length. A clean outline and one loose bend can make the haircut look neat while preserving a relaxed feel.

    Check where the ends will fall against your shoulders. Hair can kick outward at that point, which might be a detail you enjoy rather than something to correct. Ask your stylist how the proposed length behaves with your normal parting and drying routine.

    Use One Gentle Bend

    Create a loose curve through the mid-lengths and leave the tips relatively straight. Avoid repeatedly working the same section just to make both sides identical. A lob with slight variation often feels more natural than a rigid, perfectly matched finish.

    4. Curtain Bangs With Long Layers

    Curtain Bangs and Long Layers hairstyle illustration
    Original AI-generated hairstyle illustration.

    Curtain bangs divide near the centre and frame the face with longer pieces at the sides. They can refresh long hair while keeping most of its familiar shape. The transition into the layers is the important detail: a smooth blend usually feels easier to wear than an abrupt step.

    Think about your hairline, cowlicks and preferred part before choosing the length. A photo shows the finished look, but your stylist can explain how much effort that fringe might take on your own hair. Begin a little longer if you want room to adjust.

    Dry the Fringe Before It Sets

    Style the fringe while it is still manageable, moving it gently across the forehead before directing each side outward. Use a light touch with products near the roots. Too much product can weigh down the airy shape you were trying to create.

    5. Soft Modern Shag With Natural Texture

    Soft Modern Shag hairstyle illustration
    Original AI-generated hairstyle illustration.

    A modern shag uses layers around the crown and face to create a more textured outline. This softer version keeps the ends wearable and the fringe light. It is an appealing choice if you prefer hair that looks a little tousled rather than carefully smoothed.

    The amount of layering should fit your density and curl pattern. Ask how the cut will look after air-drying, not only after a salon blowout. A shape that works with your natural movement can be more practical than one requiring you to restyle every section.

    Encourage Movement Without Overworking

    Scrunch lightly or arrange individual pieces with your fingers, then leave the hair alone as it dries. Choose a product based on your texture and desired hold. Touching and rearranging every strand can disrupt the soft finish and make styling take longer.

    6. Textured Pixie With a Longer Crown

    Textured Pixie hairstyle illustration
    Original AI-generated hairstyle illustration.

    A textured pixie keeps the sides shorter while leaving enough length on top for a soft, piecey finish. The contrast creates a clear shape without needing a dramatic undercut. A longer fringe can also give you different ways to change the direction of the style.

    Short hair deserves a proper consultation. Discuss your natural growth pattern, how often you want trims and whether you prefer a tidy or grown-out outline. Those decisions matter more than trying to copy another person’s face shape or exact hairline.

    Use Product in Small Amounts

    Warm a little suitable styling product between your fingers and separate a few pieces at the crown. Start with less than you think you need. You can add a touch more, but a heavy coating can flatten the texture and make the haircut feel stiff.

    7. Natural Curly Bob With a Rounded Shape

    Natural Curly Bob hairstyle illustration
    Original AI-generated hairstyle illustration.

    A curly bob lets the curl pattern become the main feature. The rounded outline in this example gives the hair a balanced shape while keeping individual curl clumps visible. Some gentle frizz is normal and can contribute to an authentic, soft appearance.

    Talk with a stylist familiar with your texture about shrinkage and how the finished length will look when dry. Avoid choosing the cut solely from a straightened reference. Your usual styling routine should guide the shape, especially if you normally wear your curls naturally.

    Keep Definition Flexible

    Apply your preferred curl products in manageable sections and let the curls set before separating them. Adjust product amounts to your density rather than following a fixed quantity. Our healthy hair habits guide offers more everyday care ideas.

    8. Loose Everyday Waves With Straight Ends

    Loose Everyday Waves hairstyle illustration
    Original AI-generated hairstyle illustration.

    Loose waves offer movement without the formal appearance of identical ringlets. Leaving the ends softer or relatively straight makes the style feel casual. This is a flexible option for longer hair when you want to change the finish without committing to a haircut.

    Use larger sections for a looser result and vary the direction slightly if that suits your hair. The goal is a flowing shape, not a row of matching curls. When using a heated tool, follow its instructions and use an appropriate heat protectant.

    Try a Heatless Alternative

    If you prefer to avoid heat styling, experiment with a loose overnight method and adjust it for comfort. Results depend on texture, moisture and how the hair is wrapped. See our heatless waves guide for a gentler styling approach.

    9. Relaxed Low Bun With a Clean Part

    Relaxed Low Bun hairstyle illustration
    Original AI-generated hairstyle illustration.

    A low bun brings the hair together at the nape and leaves the neckline clear. A clean part gives it some definition, while a few fine flyaways keep the finish soft. It works for a casual day as well as an occasion when you want your accessories to stand out.

    Gather the hair gently, twist it into a loose shape and secure it with pins or a comfortable tie. The bun should feel stable without pulling tightly at the hairline. If it feels uncomfortable, loosen and rebuild it rather than adding more tension.

    Choose the Shape From the Side

    Check the bun in a second mirror so you can see its position. A slightly flatter twist and a rounder coil create different effects. Leave a little softness around the face if you prefer it, instead of forcing every short strand into place.

    10. Braided Ponytail for a Defined Outline

    Braided Ponytail hairstyle illustration
    Original AI-generated hairstyle illustration.

    A braided ponytail combines the clear shape of a ponytail with the detail of a three-strand braid. The example here uses a medium-height placement so the braid is visible from the back without sitting extremely high. It can make a simple outfit feel more considered.

    Detangle gently, secure a comfortable ponytail and divide the length into three even sections. Cross the outer sections over the centre until you reach the ends, then fasten with a suitable tie. Avoid pulling harder simply to make the braid look sharper.

    Keep the Base Comfortable

    Check that the ponytail does not tug when you turn your head. A braid can feel heavier than loose hair, especially at longer lengths. Adjust the placement or choose a lower ponytail if that feels better for your day.

    11. Half-Up Hair With a Ribbon Bow

    Half-Up Ribbon Hairstyle hairstyle illustration
    Original AI-generated hairstyle illustration.

    A half-up hairstyle lifts the upper section while leaving the lower lengths loose. A small ribbon adds a clear finishing detail without requiring an elaborate updo. Soft waves make the contrast between the tied section and the loose hair easy to see.

    Take a modest section from above the ears and secure it before adding the ribbon. Keeping the section smaller can preserve more fullness underneath. Choose a bow that suits your hair length; an oversized ribbon is optional, not a requirement for the look.

    Let the Accessory Stay Simple

    Match the ribbon to one colour in your outfit or use a quiet neutral. Make sure it is tied securely without squeezing the hair. The bow should complement the shape, while the hair itself remains the main feature.

    12. Claw-Clip Twist for a Quick Updo

    Claw-Clip French Twist hairstyle illustration
    Original AI-generated hairstyle illustration.

    A claw-clip twist gathers the hair vertically and holds it with one clip. A few wispy ends at the top give this everyday style a relaxed finish. It is useful when you want to keep hair away from your face without creating a polished occasion updo.

    Choose a clip that can comfortably hold your hair density. Twist the gathered hair upward, fold or arrange the remaining length and secure the clip over the twist. If the clip barely closes or pulls at the roots, use a different size.

    Check the Hold Before Leaving

    Turn your head and move around to make sure the clip stays in place. You can adjust the twist without tightening it excessively. Our cool hair styles guide includes more practical looks for everyday confidence.

    How to Choose Between These Hairstyles

    Start by separating cuts from temporary styles. A ribbon, bun or claw clip lets you experiment immediately, while a pixie, bob or shag changes the shape of your hair for longer. Save a few examples and compare what you actually like about them: the fringe, length, volume or finishing detail.

    Ask your stylist which features can be adapted to your own texture. You do not need the same colour or density as the model to take inspiration from a shape. Keep your routine realistic and choose a result you would enjoy wearing on an ordinary day, not only after professional styling.

    Trend references: current coverage from ELLE on butterfly haircuts and Allure on fall hair trends helped inform the selection. The descriptions and generated illustrations in this guide were created for Haya Glam.

  • Cool Hair Styles: 5 Easy Looks for Everyday Confidence

    Cool Hair Styles: 5 Easy Looks for Everyday Confidence

    Cool hair styles do not have to involve a dramatic haircut or an hour in front of the mirror. Often, a different parting, a softer finish or a simple change in how you gather your hair is enough to refresh your look. The most useful style is one that feels comfortable, works with your texture and fits the time you actually have.

    This guide covers five wearable ideas: a textured lob, a sleek low ponytail, a half-up claw-clip style, defined natural curls and a loose side braid. Each section includes a matching image, practical styling steps and ways to adapt the look. Use the photographs as inspiration rather than a promise that every hair type will produce the same result.

    How to Choose Cool Hair Styles That Work for You

    Start with your current length and natural texture. Hair that falls above the shoulders behaves differently from long hair, and a dense curl pattern needs a different approach from fine, straight strands. Choose a look that cooperates with those features instead of assuming you need to change them.

    Next, think about your day. A loose style can suit an evening out, while a ponytail or clip may be easier when you need your face clear. Consider how a neckline, earrings or scarf will sit beside the hairstyle. You can keep the same outfit and change its overall impression simply by moving your hair.

    Make your first attempt on a day when you have a little extra time. Check the back with a second mirror and notice whether a clip slips or an elastic feels tight. Those small observations are more useful than buying several new products before you know what the style needs.

    1. The Textured Lob: Soft Movement Without a Complicated Finish

    Shoulder-length textured lob with softly tousled waves
    Illustrative hairstyle inspiration.

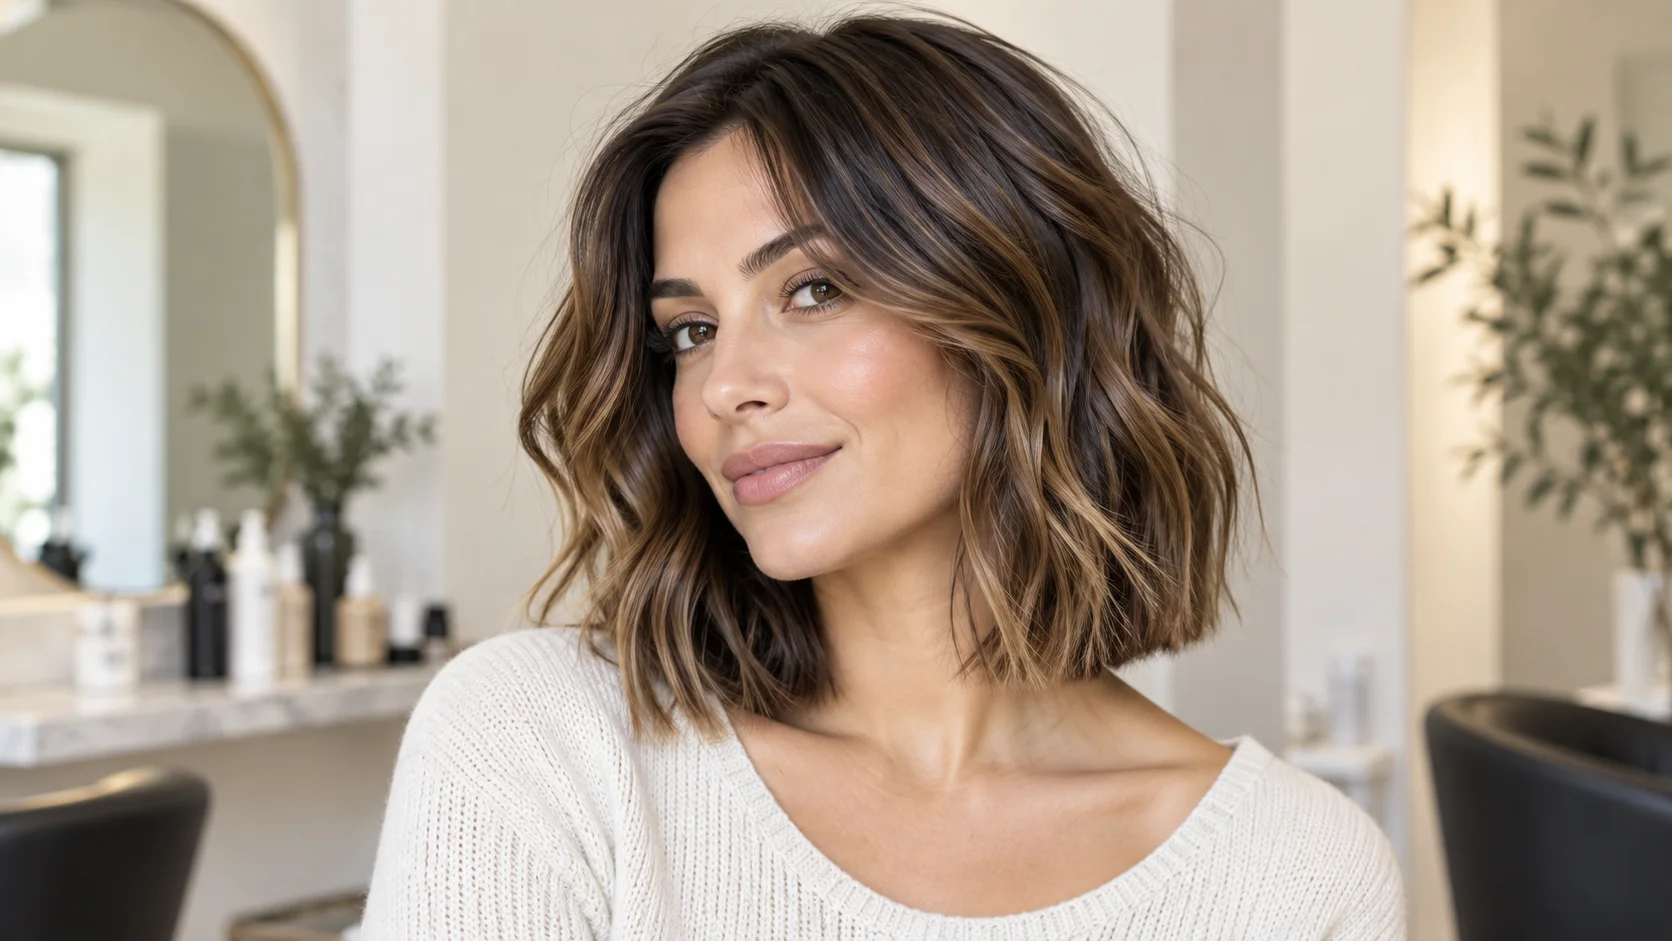
    A lob is a longer bob, commonly sitting around the shoulders. A textured finish gives the shape movement rather than making every strand lie perfectly flat. It can feel relaxed with a T-shirt and more polished beside a tailored jacket, which makes it a versatile starting point for everyday styling.

    How to Style a Textured Lob

    Begin with detangled hair and choose your parting before shaping the lengths. If your hair already has a wave, work a small amount of your usual styling product through damp lengths and gently encourage that pattern. Let the ends keep a little variation instead of forcing them into identical bends.

    On straighter hair, you can try a heatless method on slightly damp hair, then release it only once dry. The outcome depends on the method and your texture, so expect some experimentation. Our guide to heatless waves offers another way to explore movement without making a hot tool your daily starting point.

    Make the Shape Your Own

    A centre part gives the style a balanced appearance, while a side part changes the distribution of volume. Tuck one side behind your ear to show an earring or neckline. If you want the haircut itself, take reference images to a stylist and discuss your density, shrinkage and usual styling routine before choosing a length.

    2. The Sleek Low Ponytail: Clean Lines for Busy Days

    Sleek low ponytail secured at the nape
    Illustrative hairstyle inspiration.

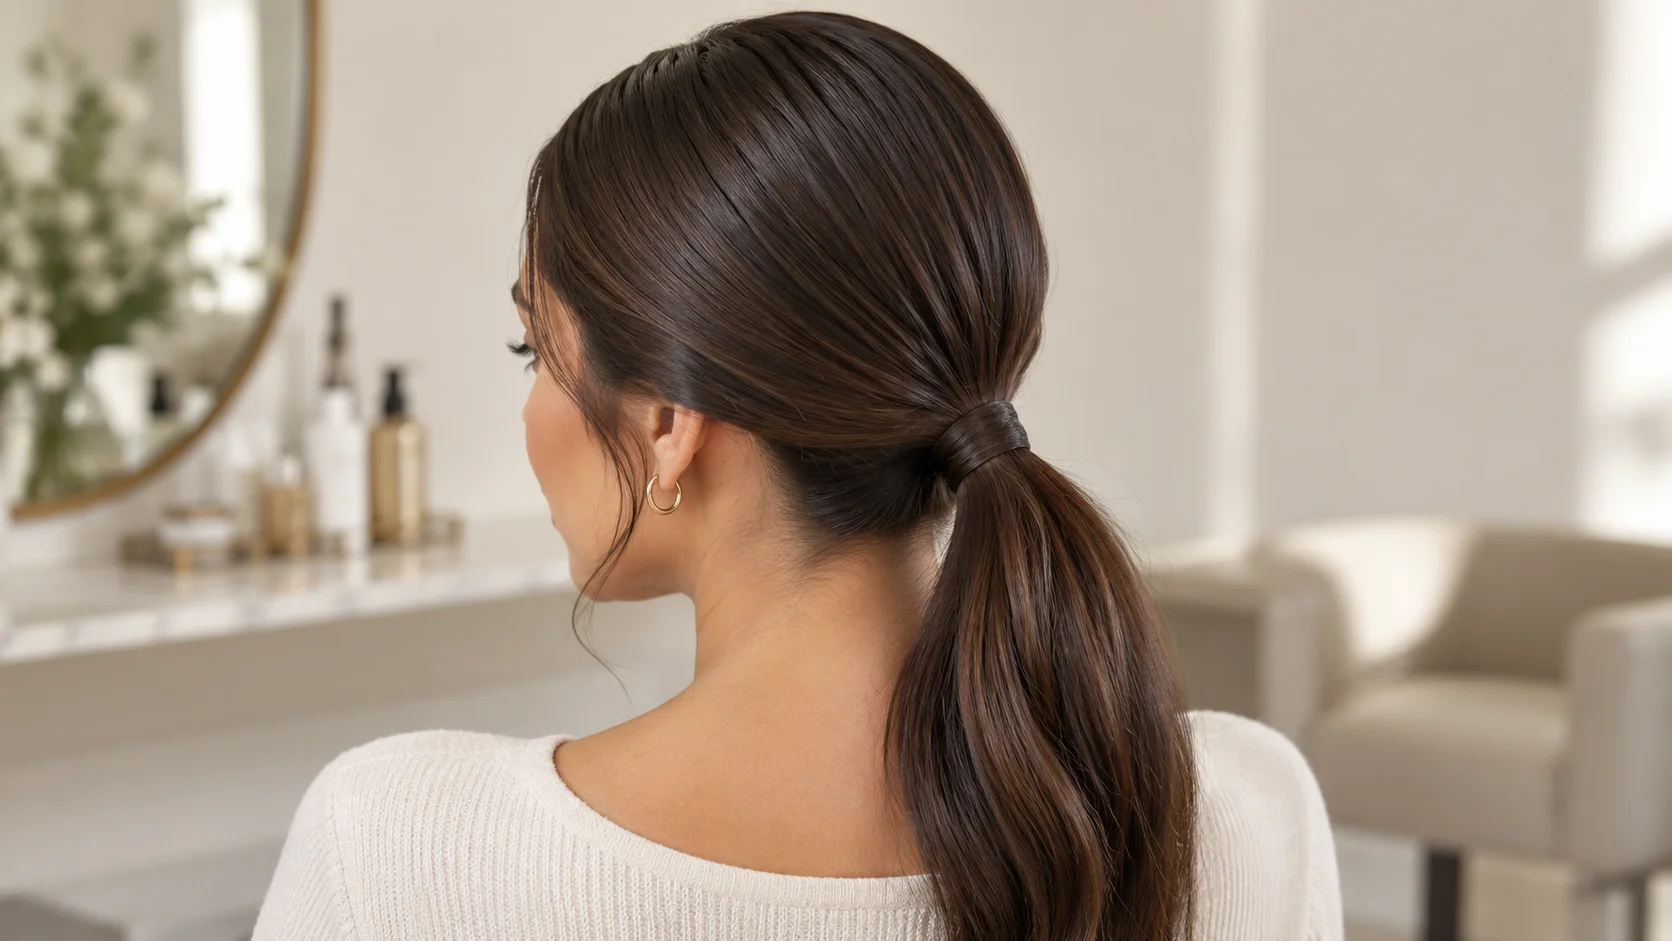
    A low ponytail sits close to the nape rather than high on the head. Its appeal is the contrast between a tidy top section and free-moving lengths. It is a useful option for work, a dinner outfit or a morning when you want your face clear without creating a complicated updo.

    Build a Smooth Shape Without Pulling Hard

    Set your parting first, then gather your hair with your hands. Smooth the surface gently with a brush suited to your texture, concentrating on the areas you want to tidy. Secure the ponytail with a covered hair elastic and check that the hold feels comfortable rather than tight.

    If you use a styling product, start with a small amount and add only where needed. A sleek appearance does not require flattening every short hair. Leave the tail straight, softly waved or naturally curly according to your existing texture. Avoid repeatedly tugging the ponytail tighter once it is secured.

    Small Details That Change the Look

    A slim ribbon or simple barrette can echo an outfit colour without turning the hairstyle into a costume. Keep accessories light enough that they do not drag on the ponytail. For a softer version, leave a small amount of face-framing hair loose. Smooth should describe the finish, not uncomfortable tension at your hairline.

    3. Half-Up Hair With a Claw Clip: Practical and Relaxed

    Half-up hairstyle secured with a small claw clip
    Illustrative hairstyle inspiration.

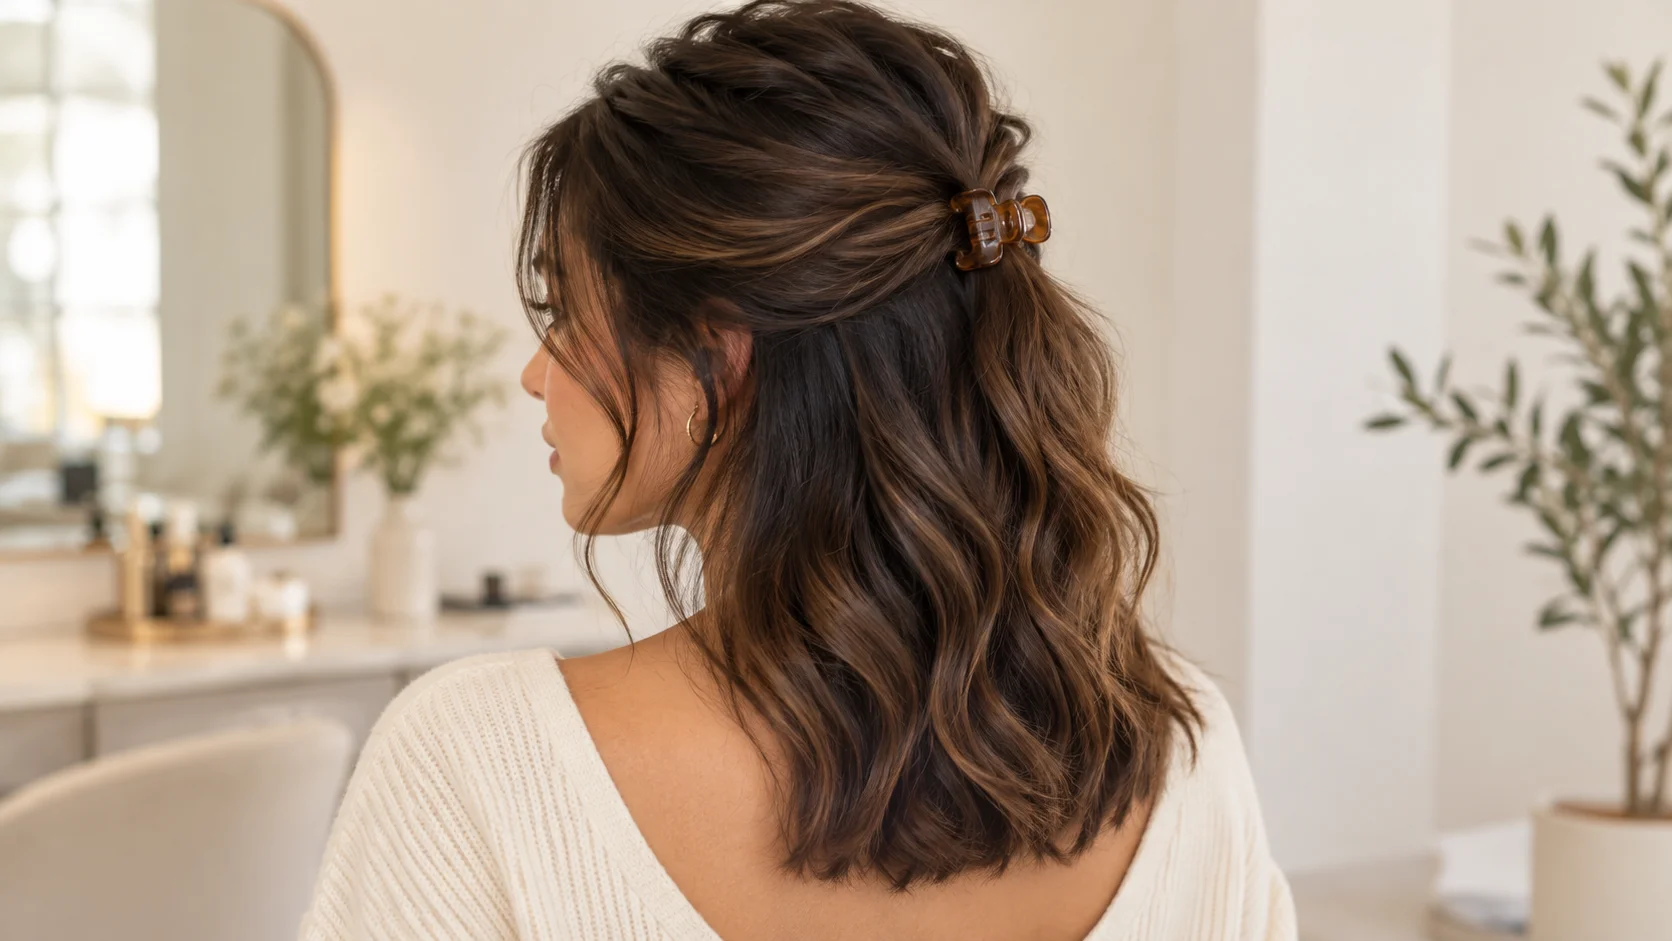
    A half-up style gathers the upper section while leaving the lower lengths loose. It is especially useful when you like wearing your hair down but want the front pieces out of your way. A small claw clip adds a visible detail and can be easier to reposition than a tightly secured arrangement.

    Choose the Right Amount of Hair

    Take a section from above your ears and guide it towards the back of your head. Start with less hair than you think you need; you can add more if the clip feels secure. Twist the gathered section lightly, then close the clip around it without catching or scraping your scalp.

    Check whether the clip can hold the section comfortably. If it keeps opening, use a slightly larger clip or a smaller section rather than forcing it shut. Fine hair may need a lighter accessory, while thick hair often needs more room inside the clip. The fit matters more than the accessory’s appearance.

    Keep the Lower Lengths Natural

    Let the loose hair follow its normal pattern. You can arrange a few front pieces with your fingers, but you do not need to restyle the entire head. This look pairs well with a casual shirt, knitwear or a simple dress. Try it alongside a calm getting-ready routine when you want fewer morning decisions.

    4. Defined Natural Curls: Let Texture Lead the Style

    Defined natural curls in a rounded shoulder-length shape
    Illustrative hairstyle inspiration.

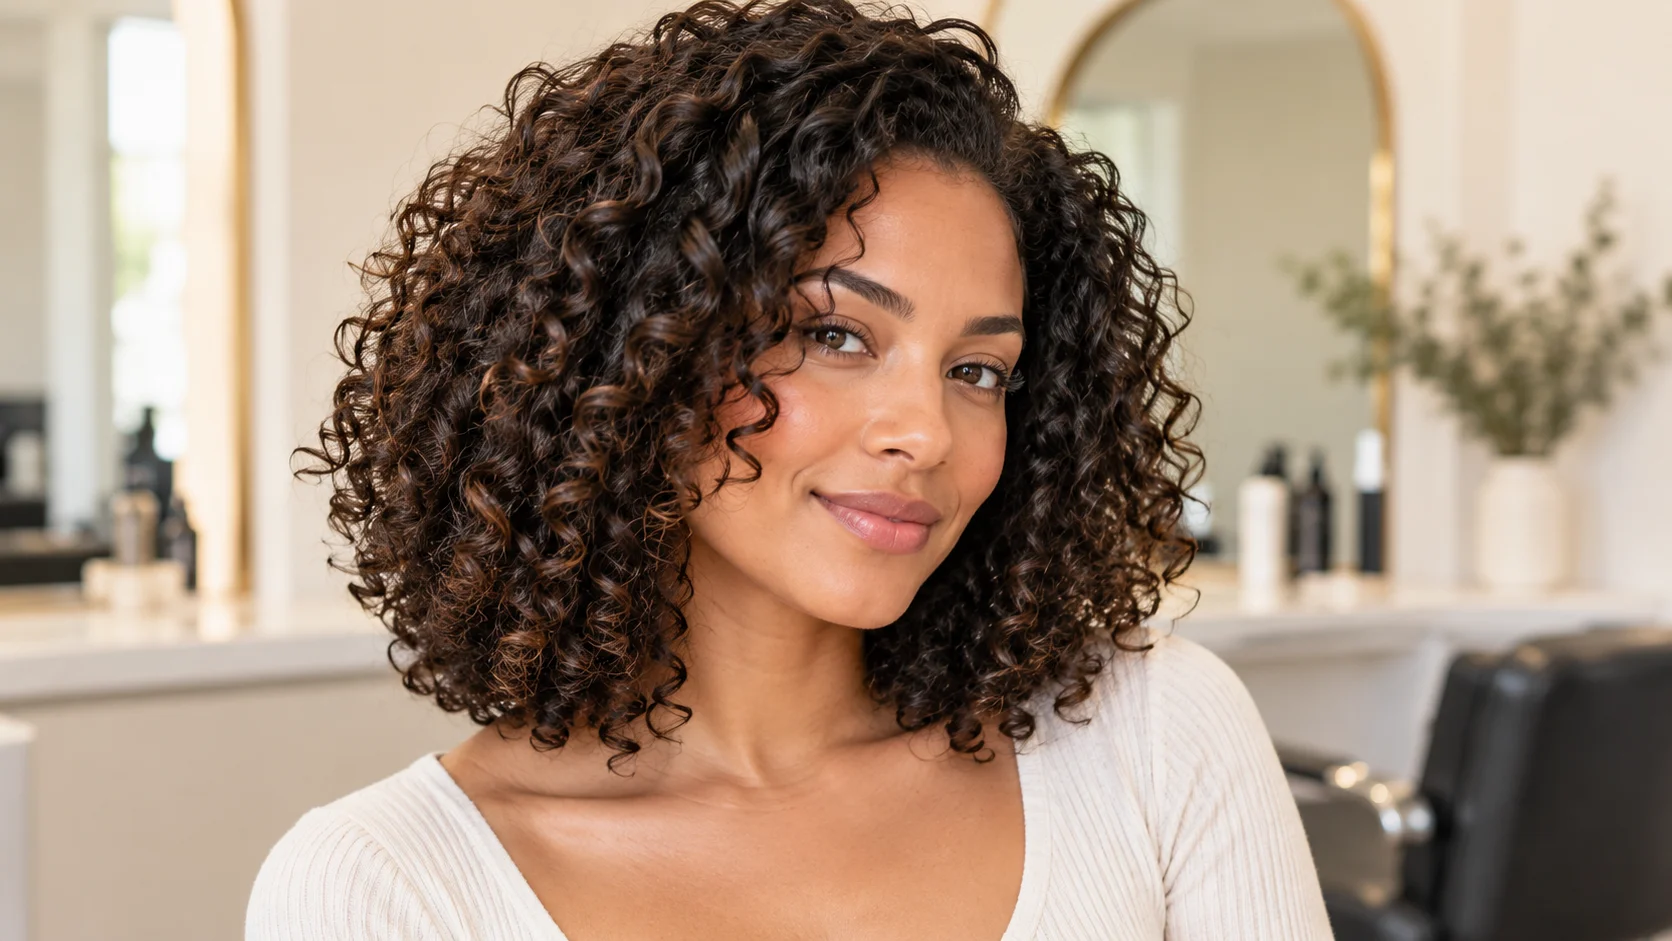
    Defined curls can look distinctive without a complex arrangement. The aim is to bring out a curl pattern you already have, not to make every section identical. Some areas may curl more tightly than others, and that variation can be part of the finished shape rather than something to hide.

    Style in Manageable Sections

    After your usual wash and conditioning routine, divide damp hair into sections you can comfortably handle. Distribute your chosen curl product evenly, starting with a modest amount. Use your fingers or a suitable detangling tool to arrange the sections, then gently encourage the curls without repeatedly pulling them apart.

    Let your hair dry with as little unnecessary handling as possible. Once dry, decide whether you prefer a more defined finish or a little extra volume. You can lift gently at the roots without dragging through the lengths. If your product leaves the hair feeling coated, adjust the amount on your next attempt.

    Balance Definition and Volume

    A rounded shape, a side part or a tucked-back section can change the look while keeping the same texture. There is no requirement to eliminate every flyaway. Our soft volume hair guide explores movement and shape when you prefer a less rigid finish. Choose the balance that feels like you.

    5. The Loose Side Braid: An Easy Way to Wear Longer Hair

    Loose three-strand side braid over one shoulder
    Illustrative hairstyle inspiration.

    A side braid brings the hair over one shoulder, making the detail visible from the front. A simple three-strand plait is enough to create the look. It suits many casual outfits and can also work beside an open neckline when you want an alternative to wearing all your hair loose.

    Create a Comfortable Three-Strand Braid

    Gently detangle the lengths and gather them towards one side. Divide the hair into three sections, then alternate the outer sections over the middle section. Keep the movement controlled but the hold relaxed. Secure the end with a covered elastic before adjusting the shape.

    If you want a fuller appearance, ease the outer edges of the braid slightly with your fingers. Stop if the sections begin to unravel or your shorter layers slip out too much. Face-framing strands can stay loose, and the braid does not need to start tightly against the scalp.

    Adapt It to Your Length

    Longer hair usually gives you more room for a visible side braid. With shorter layers, a smaller plait or a partly braided section may be easier than gathering everything. Try the style before an event so you know how it behaves when you move. Keep spare elastics handy rather than over-tightening the first one.

    Keep Your Styling Routine Gentle

    Comfort is a useful check for any of these cool hair styles. If an elastic, braid or clip feels uncomfortable, loosen or reposition it. Rotate between loose hair and gathered styles instead of repeatedly pulling the same sections in the same direction.

    The American Academy of Dermatology’s hair-care guidance recommends loose styling, covered hair bands and reducing heat exposure. If you use hot tools, avoid unnecessary repeat passes and follow the tool’s instructions. For everyday habits around washing and handling, read our healthy hair care guide.

    Find Your Everyday Favourite

    You do not need to master all five looks at once. Choose one that matches your current length, try it a few times and change one detail at a time. A different parting, a lighter clip or a looser finish can make a familiar hairstyle feel new. The best cool hair styles are the ones you enjoy wearing and can comfortably repeat.

  • Soft Volume Hair: Create Movement Without a Stiff Finish

    Soft Volume Hair: Create Movement Without a Stiff Finish

    Soft volume hair has shape and movement without looking rigid or overloaded. The appeal is not the biggest possible result; it is hair that feels comfortable and keeps some lift as you go about your day. The method will vary with length, texture and density, so begin with a realistic goal for your own hair.

    More expressive and fuller hair has featured in current beauty reporting, but you do not need an elaborate blowout to borrow the idea. This guide focuses on preparation, controlled product use and styling choices that avoid unnecessary heat or tension. Think of the final look as flexible movement rather than a fixed helmet.

    Decide where you want the volume

    Look at your usual style and identify the area that feels flat. You might want a little lift at the crown, more movement around the face or fuller looking ends. Those are different goals and do not necessarily need the same tool or technique.

    Take a photograph of the starting style from the front and side. This helps you see whether the issue is the parting, the shape of the cut or the way the hair falls after drying. Adding product everywhere can make the result heavier without solving the area you wanted to change.

    Be realistic about texture and density

    Fine straight hair, thick waves and tightly curled hair behave differently. A reference image can show a direction, but it may include extensions, professional styling or a texture unlike yours. Use it to describe the movement you enjoy rather than as a promise of an identical result.

    If you regularly struggle with the same shape, discuss the cut with a stylist. Small changes in length or layering may make daily styling easier. More product and stronger heat are not always the right answer to a cut that does not support the look you want.

    Prepare hair without loading the roots

    Follow a washing and conditioning routine suited to your hair and scalp. The American Academy of Dermatology’s healthy hair guidance recommends focusing shampoo on the scalp and using conditioner after washing, with application adjusted for your hair type.

    When styling, use the product amount advised on the label and build gradually if needed. A heavy application near the roots can make a soft volume goal harder. Do not assume that several products with the word volume will work better together than one well chosen option.

    Choose a method you can repeat comfortably

    You might use a gentle blow dry, a suitable roller method or a change in how you arrange the parting. Choose according to the tools you understand and the time you have. A technique that takes an hour may not be useful for ordinary mornings even if you enjoy it occasionally.

    Practice when you can assess the result without rushing. Note which part of the method created the useful lift and which steps added work without improving the style. Keeping a simple record makes it easier to repeat the successful version next time.

    Use heat carefully when you choose it

    The AAD advises low or medium heat and a heat protecting product when heat styling. Follow the instructions for your tool and product. Heat protection does not make unlimited high temperature styling harmless, so avoid repeatedly working the same section to chase a perfect finish.

    Keep the tool moving as instructed and stop if the process feels uncomfortable. A hairstyle should not require pulling firmly at the scalp or heating the same area over and over. For more detail, see the AAD’s hair styling guidance.

    Let the shape settle before touching it repeatedly

    After creating the style, avoid constant brushing or rearranging. Repeated handling can change the finish you just made, especially when the hair is still settling. Give yourself time to look at the result from a normal distance before deciding that every section needs more work.

    Use fingers or an appropriate tool to make small adjustments rather than pulling the whole style apart. If a front section is too round or too flat, change that section only. A surgical adjustment is more efficient than restarting the entire head because one piece feels wrong.

    Keep the finish light enough to move

    Apply finishing products according to their directions and avoid layering several textures automatically. A little hold may support the shape, but too much product can leave the hair feeling stiff or heavy. The right amount depends on the formula and your hair rather than a universal number of sprays.

    Check how the style feels as well as how it looks. If you dislike touching it or feel the need to wash immediately, the finish may be too much for your preference. A slightly softer shape that you enjoy wearing is more useful than a larger result you cannot tolerate.

    Make the style work with your outfit

    A collar, scarf or jacket can affect how the ends sit. Try the hairstyle with the clothes you intend to wear, especially if the outfit has a high neckline. Hair that looks balanced with bare shoulders may feel crowded when a bulky collar is added.

    Our scarf styling guide offers ways to keep neck details manageable. You can also move the hair gently away from one side of the face when the outfit already has a strong neckline or large earrings.

    Keep a simple second day option

    Soft volume does not have to stay identical until the next wash. A relaxed half up arrangement or a comfortable clip can use the remaining shape without requiring another full styling session. Avoid tight tension and choose accessories that suit your hair.

    If you need to refresh, focus on the specific area that has changed. Do not repeatedly add dry shampoo or finishing spray without considering product buildup and scalp comfort. Follow product instructions and wash according to your actual needs.

    Soft volume hair checklist

    • Decide where you want lift or movement.
    • Choose a method suited to your hair and available time.
    • Use product amounts recommended on the label.
    • Keep heat and tension controlled.
    • Adjust individual sections rather than restarting.
    • Plan an easy alternative for the next day.

    Our healthy hair habits guide provides a broader care framework. Styling works best when it fits a manageable routine rather than becoming a daily struggle to recreate one reference image.

    Questions to ask before changing the routine

    Will more layers always create more volume?

    Not necessarily. The effect depends on your hair and the cut. Too many or poorly placed layers may make the shape harder to manage. Discuss the movement you want with a stylist and bring references that show the overall shape rather than only the colour.

    Can I get soft volume without a hot tool?

    You can experiment with suitable heatless methods or changes in arrangement, but the result varies. Avoid methods that create uncomfortable pulling. Test a small, practical version and judge whether it produces movement you enjoy rather than expecting the same result as a professional blowout.

    For trend context, see Vogue’s beauty trend report. Use the interest in fuller hair as inspiration, while keeping your own comfort, texture and maintenance needs in control.

  • Heatless Waves: A Gentle Styling Plan for Everyday Hair

    Heatless Waves: A Gentle Styling Plan for Everyday Hair

    Heatless waves offer a way to change your hair’s shape without relying on a hot tool for every styling session. The result can be loose, soft or more defined depending on the method, section size and your hair. It is not a guarantee of identical curls, and heatless does not mean every technique is automatically gentle.

    A useful routine should feel comfortable while the hair is set and remain practical when you release it. This guide focuses on choosing a method, avoiding unnecessary pulling and learning from small adjustments. Begin with a simple version you can test at home rather than a complicated arrangement you have to sleep through immediately.

    Choose the shape you actually want

    Decide whether you want a slight bend, loose waves or a more defined curl. Save a reference that shows the shape clearly, but consider whether the person has a similar length and texture. A method demonstrated on long, thick hair may behave differently on a shorter or finer cut.

    Think about where you want the movement. Waves beginning near the cheek look different from bends only at the ends. That decision affects how you divide the hair and where you place the setting tool. A clear goal makes it easier to evaluate the result later.

    Pick a comfortable method

    You might use suitable soft rollers, a loose braid or a purpose made heatless tool. Read its instructions and choose an arrangement you can wear without discomfort. Avoid tightly pulling the roots to make the sections look perfectly neat.

    If the method is painful or creates strong tension, loosen it or stop. The American Academy of Dermatology’s hair damage guidance highlights the problems associated with damaging styling habits. A no heat label should not distract from how the technique feels.

    Start with a manageable section test

    Before setting the entire head, try a small section when you have time to observe it. This helps you understand how the tool, product and amount of moisture affect your hair. You can change one detail without committing to a full overnight routine.

    Use the tool as instructed. Some methods may suit slightly damp hair, while others work differently. Do not assume that very wet hair will produce a better result. Hair that has not dried properly may release with a shape different from the one you expected.

    Keep preparation simple

    Use your normal washing and conditioning routine, adjusted to your hair’s needs. The AAD’s healthy hair tips provide a basic reference for gentle cleansing and conditioning. You do not need to add several new products just to test one styling method.

    If you use a styling product, follow the label and start with a controlled amount. Too much can make the waves feel heavy or sticky. Keep the rest of the preparation stable so you can judge the method itself rather than a mixture of unfamiliar formulas.

    Divide the hair according to the result

    Larger sections often create a different shape from smaller ones, but the exact result depends on your method and hair. Try a few consistent sections first. You can then adjust the size in a later session if the waves are too tight or too loose.

    Pay attention to the front pieces because they frame the face. Decide whether you want them moving away from the face or falling more directly. Make this adjustment deliberately instead of wrapping every section in the same direction simply because it is quicker.

    Set the hair without uncomfortable tension

    Arrange the hair so it stays in place while remaining comfortable. Accessories should secure the method without pulling firmly at the scalp. If you cannot move your head normally or feel pressure around the hairline, the arrangement needs adjustment.

    A wide editorial portrait of an adult woman with soft loose heatless waves after removing her satin curling ribbon, natural hair texture, clean softly lit bedroom.

    Do not force yourself to sleep in a tool that interrupts rest or feels painful. Try setting the hair during an evening at home instead. A slightly different result may be worth the comfort, and some routines work better as occasional styling than as a nightly habit.

    Release the waves patiently

    Remove the tool or undo the arrangement gently. Pulling through tangled sections can undo the shape and make the process uncomfortable. Work slowly and separate pieces only as much as you need for the finish you want.

    Look at the whole style before brushing. A brush may soften the waves significantly, while fingers can preserve more definition. Choose the finishing method based on your result, and follow any guidance provided for your hair type rather than assuming one tool suits everyone.

    Adjust one variable next time

    If the waves are too tight, try a different section size or method in a later session. If they barely appear, review whether the hair was properly prepared and whether the setting time matched the tool instructions. Do not change five details at once.

    Keep a short note of the version that worked best. Include the tool, approximate section arrangement and the product used. That turns a lucky result into something you can repeat instead of starting from scratch each time.

    Build a practical next day style

    Heatless waves can provide texture for a relaxed clip arrangement, a low loose ponytail or a simple half up look. Choose accessories that do not create uncomfortable tension. The waves do not have to remain exactly as they looked immediately after release.

    Our soft volume hair guide offers more ideas for movement and finishing. If you prefer a smoother look on another day, choose that instead. A useful routine gives you options rather than making one style compulsory.

    Heatless waves checklist

    • Setting hair so tightly that the scalp feels uncomfortable.
    • Using more product than the label recommends.
    • Expecting every hair texture to respond identically.
    • Pulling the tool out through tangled sections.
    • Changing several variables before assessing the first attempt.
    • Sleeping in an arrangement that makes rest difficult.

    Our everyday hair care article helps place styling within a broader routine. If you notice persistent scalp discomfort, breakage or unusual shedding, seek professional advice instead of trying increasingly elaborate setting techniques.

    Frequently asked questions

    Will heatless waves last all day?

    That depends on your hair, the method, products and conditions. Test the style during an ordinary day and notice when the shape changes. A softer result later can still look attractive; it does not need to remain perfectly defined to be useful.

    Are heatless methods always less damaging?

    They avoid a hot tool, but tension, rough handling and unsuitable accessories can still cause problems. Choose a comfortable technique and treat the hair gently. The absence of heat is one feature of the method, not a complete guarantee.

    For examples of different approaches, see L’Oréal’s heatless styling guide. Use it to compare options, then follow the instructions for the method you choose and adjust according to your own hair.

  • Gray Blending Guide: Plan a Softer Hair Colour Transition

    Gray Blending Guide: Plan a Softer Hair Colour Transition

    Gray blending is a hair colour approach that works with visible gray rather than treating complete coverage as the only goal. The exact technique depends on your starting colour, the amount and placement of gray and the finish you want. It can be a gradual transition, but it is not automatically a low effort or one appointment solution.

    The approach has featured in current hair colour coverage, including the softer idea of quiet silver. Before choosing it, think about maintenance, previous colour and the look you will enjoy between appointments. This guide helps you prepare a useful salon conversation rather than promising one formula for everyone.

    Decide what you want to change

    Some people want less contrast at the roots. Others want to show more natural gray while keeping dimension through the lengths. You may simply want to move away from a solid colour that requires frequent attention. These goals can lead to different plans.

    Write down what currently frustrates you and what you are happy to keep. A clear description helps a colourist understand the problem beyond a reference photograph. You do not need technical terminology; phrases such as softer regrowth or more natural variation are useful when explained in your own words.

    Separate blending from complete coverage

    Complete coverage aims for a more uniform result, while blending allows gray to remain part of the overall colour. The finish can still include salon colour, but the balance is different. Ask the colourist to explain which approach they recommend and what will remain visible.

    Do not assume that blending means every gray strand will disappear. If that is the result you want, say so clearly. A consultation is the place to align expectations before any colour is applied, rather than discovering afterwards that you and the stylist meant different things.

    Bring references that show colour and regrowth

    Choose a few images with a starting colour or texture reasonably close to yours. A final polished photograph may show the effect you enjoy, but an image with visible regrowth can help discuss maintenance. Ask what parts of the reference are achievable for your hair.

    Avoid collecting many conflicting examples. A cool silver result, a warm highlighted result and a fully covered dark result communicate different goals. Choose the main direction first, then use the other images to explain what you do not want rather than presenting everything as equally desirable.

    Explain your colour history honestly

    Tell the colourist about previous dyes, lightening, chemical services and any at home colour you have used. Include approximate timing and products when you know them. The history of the lengths matters even if the roots are now natural.

    Do not leave out information because you think a home product sounds unprofessional. Accurate history helps the stylist assess options and avoid unsuitable assumptions. If you cannot remember the details, say so. Guessing an exact product or date is less useful than being clear about uncertainty.

    Ask about the transition, not only the first result

    Discuss how the colour is likely to look as it grows and how future appointments may differ from the first one. Ask whether the plan involves several stages and what the stylist expects between them. A softer transition should be understood as a process rather than a single photograph.

    You can also ask what happens if you later decide to keep more natural gray. A flexible plan may be easier to live with than an approach that requires a finish you are unsure about. Make the decision around your future routine as well as the immediate effect.

    Keep maintenance expectations realistic

    A blended look may reduce some visible contrast, but it can still involve appointments, toning or specific care. Ask about the likely upkeep for your proposed result rather than assuming that the phrase low maintenance means no maintenance.

    Consider your budget, travel and available time. A colour plan that needs attention more often than you can manage will become frustrating. Tell the stylist your realistic limits before choosing a technique. It is better to adapt the finish than to commit to a routine you cannot sustain.

    Follow product and salon instructions

    Hair colour products require appropriate use, including the safety instructions supplied with them. Follow the salon’s advice and any required allergy testing guidance. Do not improvise a complex colour correction at home because a short video makes it look simple.

    If you have a history of reactions or scalp problems, mention it during the consultation and seek appropriate medical advice when needed. A trend is not a reason to ignore discomfort. You can appreciate a colour idea while choosing a different approach for your circumstances.

    Support the hair with a manageable care routine

    Follow a washing and conditioning routine suitable for your hair and the colour service. Ask the colourist which product functions are necessary and which are optional. Avoid buying every item in a range without understanding what each one adds.

    Our healthy hair habits guide provides a basic care framework. For heat styling, the American Academy of Dermatology recommends controlled heat and suitable protection. Keep the styling routine comfortable rather than repeatedly chasing a salon finish.

    Think about the cut and styling too

    Colour and shape work together. A different parting or a change in the cut can alter how the natural gray is seen, but that does not mean you need a dramatic haircut. Discuss whether a small adjustment could support the colour direction you want.

    Our soft volume styling guide offers ideas for movement without a rigid finish. A style you can repeat at home makes the colour easier to enjoy than one that only looks right after professional styling.

    Gray blending checklist

    • What result is realistic from my current colour?
    • How much natural gray will remain visible?
    • Will the transition need more than one appointment?
    • What maintenance should I expect between visits?
    • Which home care steps are necessary?
    • How can the plan change if I want more natural gray later?

    Write the answers down so you can consider them after the appointment. You do not have to agree to a major colour change immediately. A useful consultation leaves you understanding the process, costs and maintenance rather than only excited by a reference image.

    Frequently asked questions

    Is gray blending suitable for dark hair?

    It may be an option, but the starting colour, previous services and desired contrast affect the plan. A colourist can assess those details. Do not assume a technique shown on naturally light hair will produce the same transition on previously coloured dark lengths.

    Does blending mean I am giving up colouring my hair?

    No. It can involve colour used to support a different balance of natural gray and other tones. You can also choose full coverage or no colour at all. The useful choice is the one you enjoy and can maintain, rather than a rule about how gray should be worn.

    For current context, see Allure’s quiet silver coverage. Treat the trend as a starting point for your own consultation, with the final plan based on your hair history and preferences.

  • Healthy Hair Habits: A Simple Everyday Care Guide

    Healthy Hair Habits: A Simple Everyday Care Guide

    Healthy-looking hair rarely comes from one miracle product. Everyday choices around washing, conditioning, drying and styling can make a bigger difference to how hair feels and behaves. Hair texture, scalp oil, color treatments and climate all affect what works for an individual. This guide focuses on gentle habits you can adapt rather than a fixed schedule or expensive shopping list. If you notice sudden hair loss, scalp pain or persistent irritation, speak with a dermatologist or another qualified health professional for advice specific to you.

    Wash according to your scalp

    A wash schedule should respond to your scalp and hair, not a rule from someone with a different texture. Some people need to shampoo more often because oil builds up quickly; others find less frequent washing more comfortable. Apply shampoo primarily to the scalp and let the rinse carry it through the lengths. Use your fingertips gently rather than scratching hard. The American Academy of Dermatology recommends choosing a washing frequency that fits how oily or dirty the hair becomes.

    Adjust your wash schedule

    Pay attention to signs that your routine needs adjusting. Hair that feels heavy with buildup may need more thorough cleansing, while lengths that feel dry may need a gentler approach. Product buildup, sweat and styling habits can change the balance from week to week. A clarifying product may help some routines when used according to directions, but it is not an everyday requirement for everyone. Keep the process simple enough that you can observe what helps.

    Condition the lengths

    Conditioner can make hair easier to detangle and reduce friction during styling. Apply it where your hair needs it, often through the mid-lengths and ends, and follow the product directions. Fine hair may prefer a lighter formula; thicker or drier hair may enjoy a richer texture. The right amount depends on length and density. More product does not automatically mean a better result if it leaves the hair limp or coated.

    Detangle with patience

    Detangle with patience, especially when hair is wet and more vulnerable to stretching. Start near the ends and work upward with an appropriate comb or brush. If a knot resists, add a little conditioner or detangling product rather than pulling sharply. A leave-in product may suit some hair types, but it should complement rather than replace the rinse-out product unless its instructions say otherwise. Aim for easier handling, not a complicated shelf.

    Dry with less friction

    Rubbing hair vigorously with a towel can roughen the strands and create tangles. Instead, gently squeeze out water and use a soft towel or suitable fabric to absorb excess moisture. If you air-dry, arrange the hair in the shape you want while it is damp. If you blow-dry, keep the tool moving and use a comfortable setting. Avoid holding intense heat close to one section for too long.

    Your drying method can be adjusted to your texture. Curly hair may respond well to minimal disturbance while it dries, whereas straight hair may be easier to shape with a brush and moderate airflow. Try one change at a time and notice whether the result feels smoother or easier to manage. There is no need to force a method that takes too long or leaves your hair uncomfortable.

    Use heat thoughtfully

    Heat tools can be useful, but excessive heat may damage the hair. The American Academy of Dermatology advises using lower heat settings and limiting how often heat is applied. Follow the tool’s instructions, avoid repeatedly passing over the same section and use a heat protection product when appropriate. Let hair dry to the level recommended for the tool before styling; a flat iron, for example, is not intended for wet hair unless designed for it.

    Try a second-day style

    Consider whether every day needs a freshly styled finish. A loose braid, low bun, clip or scarf can make a second-day look feel deliberate. Our silk scarf ideas include an easy hair accessory option. When using ties, choose ones that do not snag and avoid pulling the hair very tightly for long periods. Comfort is a useful sign that a style fits your day.

    Be gentle with color and treatments

    Coloring, bleaching and chemical services can change how hair feels and how much care it needs. Follow the instructions from a qualified professional or the product maker and allow enough time for maintenance. If hair is already fragile, avoid stacking new treatments without advice. A conditioner or mask may improve the feel of dry lengths, but it cannot undo every kind of damage. Trimming split ends can help the hair look tidier as it grows.

    Think through the upkeep before choosing a major change. How often will it need refreshing? Can your current routine support it? A striking color can be fun, but it should fit your budget and time. If you are unsure, try a less permanent option or discuss the plan with a professional stylist. Your everyday experience with the hair matters more than the first photograph after an appointment.

    Protect hair in daily life

    Weather, sleep and friction can affect the way hair looks by morning. A loose hairstyle at night may help prevent tangles, while a soft pillowcase can feel more comfortable for some people. Protect hair from strong sun and wind with a hat or scarf when practical. If you swim, rinse and care for hair according to your texture and the pool or sea conditions. These habits do not need to become another strict checklist.

    Notice where breakage or tangles happen repeatedly. It may be the same tight hairstyle, a rough accessory or a bag strap rubbing against the lengths. Changing one of those small daily habits can be more useful than buying another serum. For a broader getting-ready routine, see our simple everyday beauty guide. A dependable hair option can save time alongside makeup and outfit choices.

    Build a routine you can repeat

    Choose a wash-day sequence you can remember: cleanse the scalp, condition the lengths, detangle gently and dry in a way that suits your texture. Add one styling product only if it solves a clear need, such as hold, definition or comfort. Keep track of how the hair feels after a few washes before deciding whether a product works. It is easy to mistake a single humid day for a product problem.

    Storage and tool care matter as well. Clean brushes and combs regularly, follow appliance safety instructions and replace worn accessories that snag. If you have a persistent scalp issue, seek professional guidance rather than repeatedly switching products at random. A simple, adaptable routine gives you a clearer baseline and makes it easier to notice when something changes.

    Quick takeaways

    • Cleanse the scalp when it needs washing.
    • Condition and detangle the lengths gently.
    • Dry and style with as little avoidable heat and friction as practical.

    Final thought

    Good hair care is a collection of gentle decisions, not a perfect product lineup. Wash for your scalp, condition where needed, reduce avoidable friction and use heat with care. Keep styles comfortable and seek professional help for concerning changes. When the routine fits your texture and real schedule, hair becomes easier to manage without taking over the day.