Author: Faiz RK

  • Moisturizer Guide: Choose a Texture That Fits Your Routine

    Moisturizer Guide: Choose a Texture That Fits Your Routine

    This moisturizer guide starts with a simple question: will you comfortably use the product you choose? A formula can sound impressive yet feel too heavy beneath makeup, too light for your needs or inconvenient to apply. The best purchase for your routine is one whose purpose, texture and instructions make sense to you.

    You do not have to become an ingredient expert before buying ordinary skincare. Begin with your skin’s needs, any known sensitivities and the conditions in which you use the product. This guide explains how to compare options thoughtfully without assuming that price, packaging or one popular ingredient tells the whole story.

    Describe the problem you want to solve

    Write down what makes your current moisturizer inconvenient or unsuitable. You might dislike the finish beneath foundation, find the packaging difficult or need a product you can carry without leaks. These are clearer buying criteria than simply wanting something that promises a glow.

    If the problem is persistent stinging, a rash or a diagnosed skin condition, speak with a dermatologist rather than treating it as a texture preference. A different jar may not address the underlying issue. Ordinary product comparison is useful for routine choices, but it should not replace assessment of symptoms.

    Think about morning and evening use

    A product used before makeup may need to settle comfortably within your available time. An evening product can feel different if you enjoy a richer texture. You can use the same suitable moisturizer for both, but there is no reason to force identical choices if your practical needs differ.

    Try your existing product with the rest of the routine before replacing it. Sometimes using too much product or rushing straight into makeup causes the frustrating finish. Follow instructions, use a sensible amount and assess the complete combination rather than judging one product in isolation.

    Compare textures without assuming one is superior

    Gels, lotions, creams and ointments can feel different, but the category alone does not guarantee suitability. A lighter texture may be comfortable for one person and insufficient for another. A richer texture may suit evening use but feel inconvenient beneath a particular makeup base.

    The American Academy of Dermatology’s moisturizer guidance discusses selecting products for your skin’s needs. Use the guidance as a reference, then consider the actual product instructions rather than relying on a broad label such as lightweight.

    Read the label before the advertising

    Look at the intended use, ingredients, warnings and storage instructions. If you know that a particular ingredient causes a reaction, check every new formula rather than assuming products within a familiar brand will be the same. Names and packaging can remain similar while formulas differ.

    For skin that reacts to fragrance, the AAD distinguishes fragrance free products from the broader idea of an unscented product. Its product testing guidance is useful when considering a new option. A pleasant smell is not evidence that a formula will be comfortable.

    Test a new product thoughtfully

    Follow the product’s instructions and the AAD guidance on checking a small area before wider use. Avoid introducing several unfamiliar products at the same time. If a reaction occurs, stop the product and seek appropriate advice rather than continuing because the packaging calls the effect normal.

    Keep notes on practical comfort as well as appearance. Does the product leave a finish you like? Can you apply makeup over it without repeatedly correcting the base? Does the container dispense cleanly? These observations help you choose a product you will use consistently.

    Check the whole makeup combination

    A moisturizer can behave differently with different sunscreens and makeup products. If the layers roll into small particles or become patchy, simplify the combination and test it again. Do not automatically assume that the moisturizer is defective or that more primer will solve the problem.

    Use a small, controlled routine when comparing. Keep the same makeup base and application tool so you can see what changed. Our natural makeup guide offers a straightforward approach that makes it easier to assess the finish without many overlapping products.

    Keep the buying decision within your budget

    A moisturizer should be a purchase you can repeat comfortably. Expensive packaging may be enjoyable, but it is not a reason to stretch your budget for an ordinary routine step. Look for the function you need and compare the amount of product as well as the price.

    Check whether a smaller size is available if you are trying something unfamiliar. A large container can be poor value if you dislike the product and never finish it. Avoid buying several alternatives at once; that makes it harder to understand which option is worth keeping.

    Consider the packaging you will actually use

    A pump can be convenient when you want quick dispensing, while a tube may travel more easily than a heavy jar. A jar is not automatically unsuitable, but it asks for clean handling and careful storage. Choose the format according to your habits and the product instructions.

    Keep the original label and do not decant into an unmarked container for everyday storage. If you use a travel container where permitted, label it clearly and avoid mixing products. Knowing what is inside matters more than making the bathroom shelf look uniform.

    Organise moisturizer within a simple routine

    Give the product a clear place beside the other daily steps. If the shelf contains many similar jars, move occasional options elsewhere. A routine that is easy to see is easier to repeat and easier to review when something is no longer working for you.

    Our skinimalism routine guide can help you reduce unnecessary overlap. The aim is not to remove useful products; it is to make every step understandable so you are not choosing randomly between several options each morning.

    Moisturizer guide checklist

    • Identify the purpose before choosing a brand.
    • Compare the texture with your practical needs.
    • Check ingredients against known sensitivities.
    • Read use, storage and testing instructions.
    • Choose a price you can comfortably repeat.
    • Test one new option rather than several together.

    Keep a short note of the exact product you choose, including the version and size. If you later repurchase, check that you are selecting the same formula. Similar names can refer to different products, especially when a range has separate day, night or fragranced versions.

    Frequently asked questions

    Do I need different moisturizers for every season?

    Not automatically. Changes in comfort or daily conditions may justify a review, but the calendar alone does not mean your existing product has become wrong. Assess your actual needs and follow professional advice if you have a skin condition.

    Can a moisturizer replace sunscreen?

    Only use a product for sun protection when it is labelled and used appropriately for that purpose. Do not assume an ordinary moisturizer provides it. Read the sunscreen information carefully, including the amount and reapplication instructions, and keep shade and protective clothing in the wider plan.

    Should I choose a product because everyone online likes it?

    Popularity can help you discover options, but it cannot predict your experience. Use reviews to understand texture and packaging, then check the label and your own requirements. A useful routine is built around your needs rather than the most photographed jar.
  • Skinimalism Routine: Fewer Products, Clearer Decisions

    Skinimalism Routine: Fewer Products, Clearer Decisions

    A skinimalism routine means using a considered set of skincare products instead of adding a new step whenever something becomes popular. The goal is not the smallest possible shelf or a promise of perfect skin. It is a routine you understand, can maintain and can adjust without changing everything at once.

    The idea fits the wider interest in manageable beauty routines, but the basics are more important than the label. Start by separating essential daily care from optional experiments. Then make decisions based on your needs, product instructions and how your skin responds, rather than the number of products in an influencer’s routine.

    Know what each product is doing

    Write a short list of everything you apply and the reason you use it. If you cannot explain a product’s role, that is a useful prompt to investigate before repurchasing. Two products may serve similar purposes, while another may have been added for a concern you no longer have.

    Do not include prescribed treatments in an ordinary decluttering exercise. Follow your clinician’s instructions and ask before changing them. Skinimalism is an organisation approach, not a reason to interrupt treatment or assume that every active ingredient is unnecessary.

    Give the basic routine a clear place

    The American Academy of Dermatology’s budget skincare guidance describes a straightforward framework of cleansing, moisturising and sun protection. Those roles are a useful starting point when a routine has become difficult to understand or too expensive to maintain.

    Keep the products you already tolerate while reviewing optional additions. You do not need to buy a matching range or use one brand for every step. A routine is coherent when the products have clear functions, not when the packaging looks identical.

    Review the morning and evening separately

    A morning routine has different practical demands from an evening routine. In the morning, you may need products that sit comfortably beneath makeup and fit a short schedule. At night, you have time to remove makeup and follow the care instructions for your chosen products.

    Write down both routines in the order you actually use them. Notice whether extra steps appear only because the products are sitting beside the sink. Move optional items into a separate area so the daily routine remains easy to see without making every product compulsory.

    Introduce one change at a time

    When several products are introduced together, it becomes harder to identify which one caused a problem or provided a useful effect. Choose a specific reason for the change and follow the product instructions. Keep the rest of the routine stable while you assess it.

    The AAD provides guidance on testing new skincare products, including checking a small area before wider use. That is not a guarantee against every reaction, but it is more considered than putting several unfamiliar products on your face together.

    Keep a short routine record

    A few notes can help when you are deciding whether a product belongs in the routine. Record when you began using it, what you expected and any changes you noticed. Include practical details such as whether the packaging leaks or whether the texture makes you avoid the step.

    Avoid checking your face repeatedly throughout the day for tiny differences. Look for meaningful patterns rather than judging the routine from one photograph or one difficult morning. Lighting, makeup and temporary changes can affect what you see. A simple record is useful without becoming a constant inspection.

    Separate comfort from marketing language

    Words such as luxury, advanced or glow do not tell you whether a product suits your routine. Look at the purpose, instructions and the concerns it is meant for. If you have sensitive skin or a known allergy, ingredient information matters more than attractive descriptions.

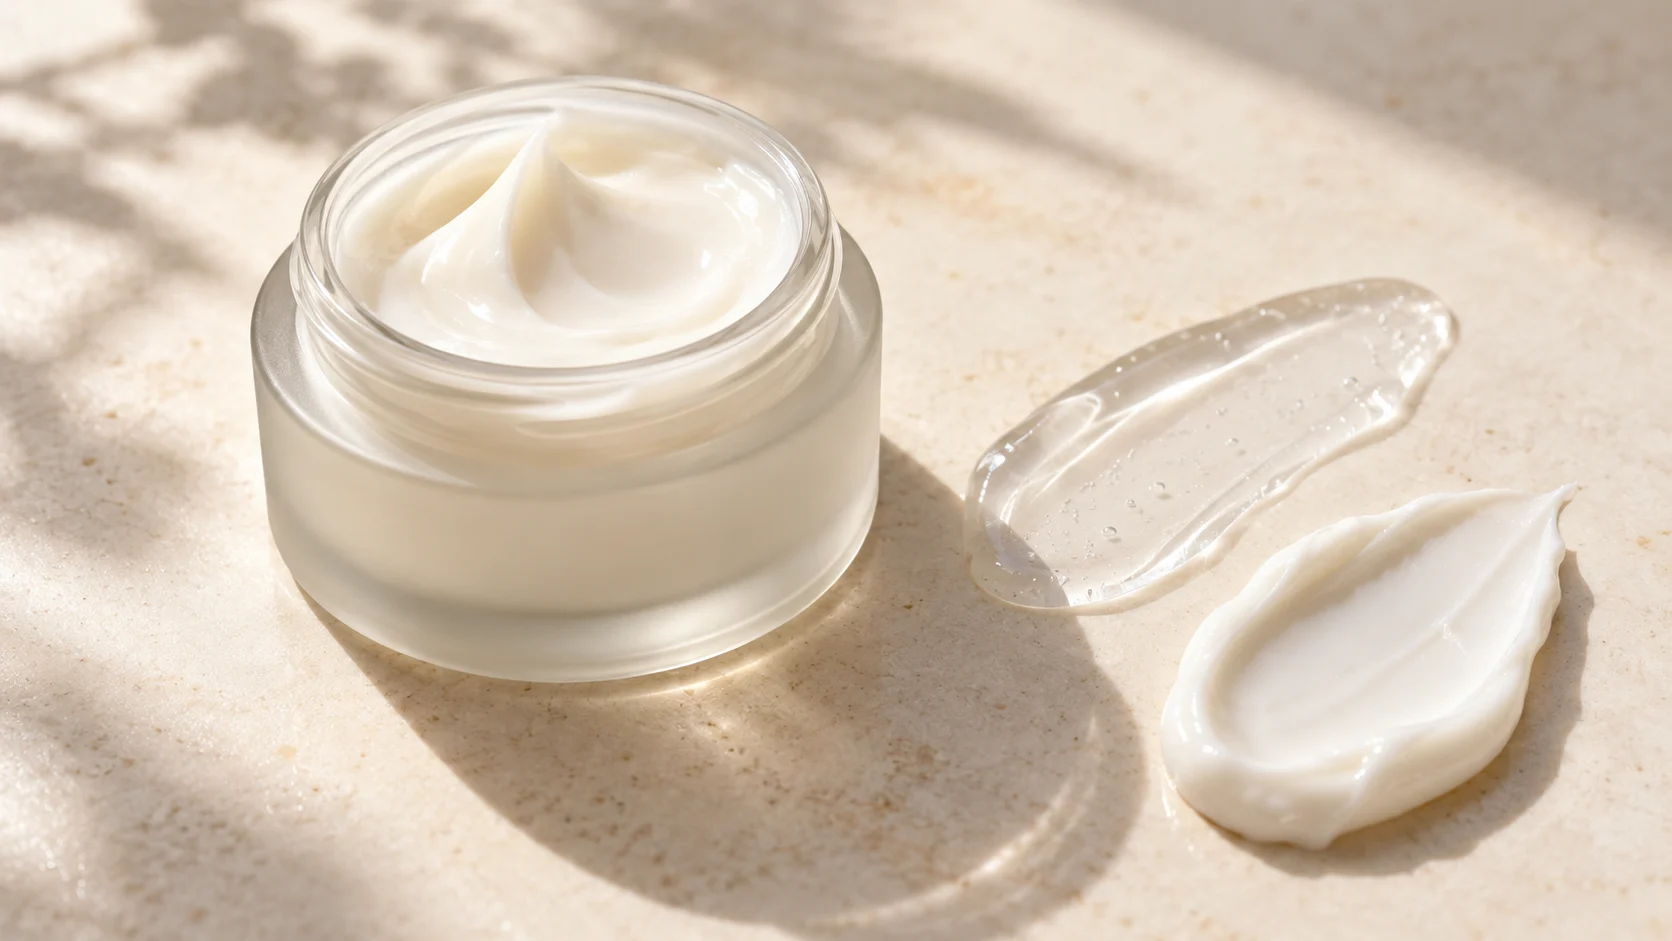
    Elegant close-up product texture photograph of an open unbranded moisturizer jar with cream, a light gel moisturizer swatch and a rich cream swatch on an ivory surface.

    Do not assume that natural ingredients are automatically suitable or that a longer ingredient list means a product is poor. Those shortcuts can make decisions less accurate. If you are unsure about a particular ingredient or persistent irritation, a dermatologist can help you assess the actual issue.

    Make the routine easy to use

    Keep daily products where you can reach them without digging through a drawer. Store them as instructed, away from conditions that could damage them. If a product is difficult to dispense, transfer decisions should follow manufacturer guidance rather than an improvised container with no label.

    A small tray can separate daily care from occasional products, but elaborate storage is optional. The point is visibility and convenience. You should be able to identify the next step without comparing several similar bottles while rushing to leave home.

    Work out a realistic replacement budget

    A smaller routine may reduce spending, but only if you avoid replacing the removed steps with more expensive alternatives automatically. Write down how often you use each product and whether it is a purchase you can comfortably repeat.

    Choose a dependable price range and look for a product that fulfils the needed function. Save the exact name and version of products you like so you do not accidentally buy a different formula. Packaging can look similar even when the product purpose has changed.

    Keep sun protection in the plan

    A simplified routine should still include a sensible sun protection strategy. The AAD recommends broad spectrum, water resistant sunscreen with SPF 30 or higher, alongside shade and protective clothing. Read the label and follow reapplication guidance when outdoors rather than treating morning application as permanent coverage.

    For more detail on labels, use the AAD’s sunscreen label guide. Our beginner skincare article also provides a simple overview of where care steps fit in an ordinary routine.

    Skinimalism routine checklist

    • Can you explain the purpose of each product?
    • Are you following the instructions for use and storage?
    • Have optional products become automatic steps?
    • Does the routine fit your time and budget?
    • Are you changing too many things together?
    • Is a persistent concern better assessed by a dermatologist?

    If the answer to the final question is yes, adding more products may only complicate the situation. Persistent pain, irritation or a changing skin problem deserves appropriate assessment. A beauty trend is not a diagnosis, and a shorter routine does not solve every concern.

    Frequently asked questions

    Does skinimalism mean avoiding every serum?

    No. An optional product can belong in a simple routine when it has a clear purpose and is suitable for you. The useful question is whether it adds value, not whether its category sounds too elaborate. Follow instructions and avoid stacking unfamiliar products just to increase the number of steps.

    Can I simplify my routine while wearing makeup daily?

    Yes. Organise makeup separately from care so the two collections do not become one long list of compulsory steps. Our beauty capsule guide can help you identify the makeup you repeat while leaving skincare decisions based on your own needs.

    How do I know when the routine needs another review?

    Review it when your schedule, budget or needs change, or when a product is no longer comfortable to use. You do not need to rebuild it every season simply because new launches appear. Keep what works and make specific changes with a clear reason.

  • Makeup Brush Care: Keep Your Beauty Kit Clean and Useful

    Makeup Brush Care: Keep Your Beauty Kit Clean and Useful

    Makeup brush care is easy to overlook when the interesting part of beauty is colour and technique. Yet a brush covered in yesterday’s products can change how a new shade applies, leave streaks and make a simple routine more frustrating. Looking after a small set of tools is often more useful than adding another set.

    This guide focuses on a practical cleaning and storage system rather than a complicated collection of accessories. Your tools should be clean, suitable for their purpose and easy to maintain. Follow the instructions from the brush or sponge manufacturer, especially when a tool contains delicate natural fibres, unusual materials or replaceable parts.

    Begin by separating the tools you actually use

    Empty your brush cup or pouch onto a clean surface. Put daily tools in one group and occasional tools in another. Look at which products each brush touches. A base brush used with liquid makeup may need different attention from a brush used only for a dry powder.

    Check for loose handles, damaged ferrules and bristles that shed heavily. Cleaning cannot repair every problem. If a brush scratches, loses its shape or no longer applies product properly, it may be time to replace it. Keep the tools that work rather than measuring the kit by how many pieces it contains.

    Give each daily tool a clear purpose

    You do not need a separate brush for every colour, but a few clear roles make maintenance easier. A base tool, a cheek brush and one or two eye brushes may cover your ordinary look. Adjust the number to your makeup rather than copying someone else’s complete kit.

    A smaller collection also makes it easier to see when something needs cleaning. Our beauty capsule routine explains how to organise products around repeated habits. Choose tools that support those products and remove duplicates that create clutter without making application easier.

    Read the cleaning instructions before starting

    Different fibres and adhesives can respond differently to water and cleansers. Use a product or method recommended for the tool rather than assuming that a strong household cleaner will be suitable. Harsh solvents can damage bristles, loosen glue or leave residues you do not want near your face.

    Prepare a clean towel and a place for drying before wetting the tools. This avoids putting freshly cleaned brushes back into an old pouch. If the manufacturer recommends a particular direction for rinsing or a specific cleaning product, follow that guidance even when an online shortcut seems quicker.

    Wash gently and rinse thoroughly

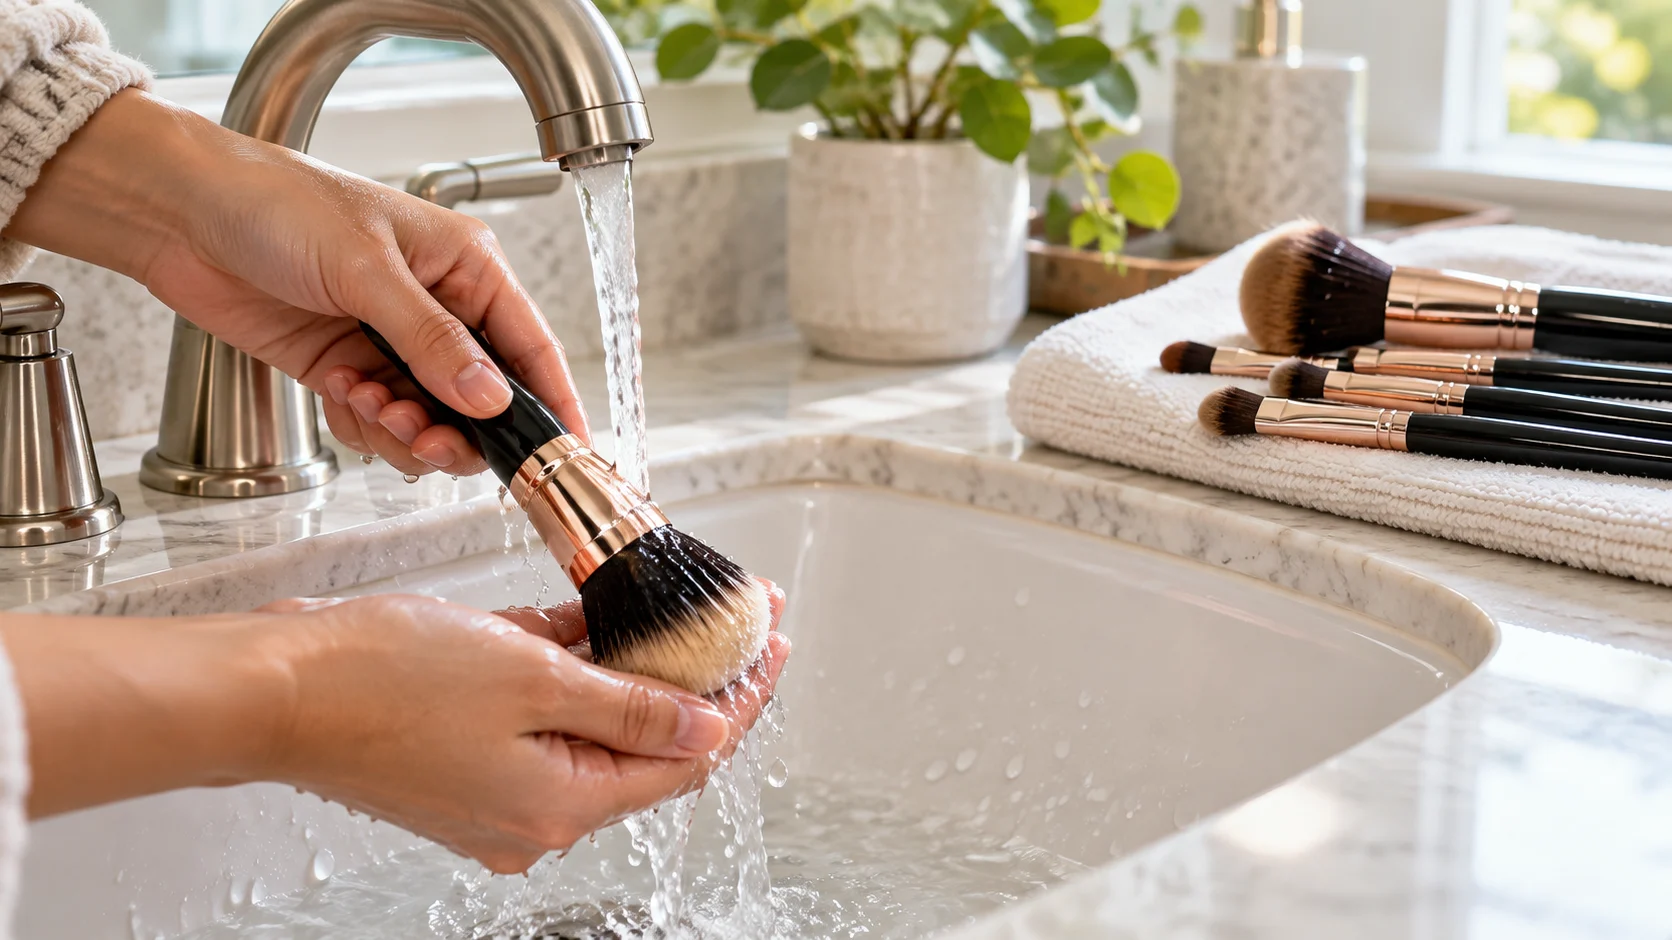
    Wet the bristles as directed, keeping the handle and glue area from unnecessary soaking. Work the recommended cleanser through the bristles gently. You should not need to pull hard, twist the brush sharply or scrub it against a rough surface to remove makeup.

    Rinse until the water is clear and no cleanser remains. Leftover product can make the brush feel stiff or change how makeup applies. Check dense brushes carefully because makeup can remain close to the centre. Repeat the gentle cleaning process if needed rather than using more force.

    Let brushes dry before storing them

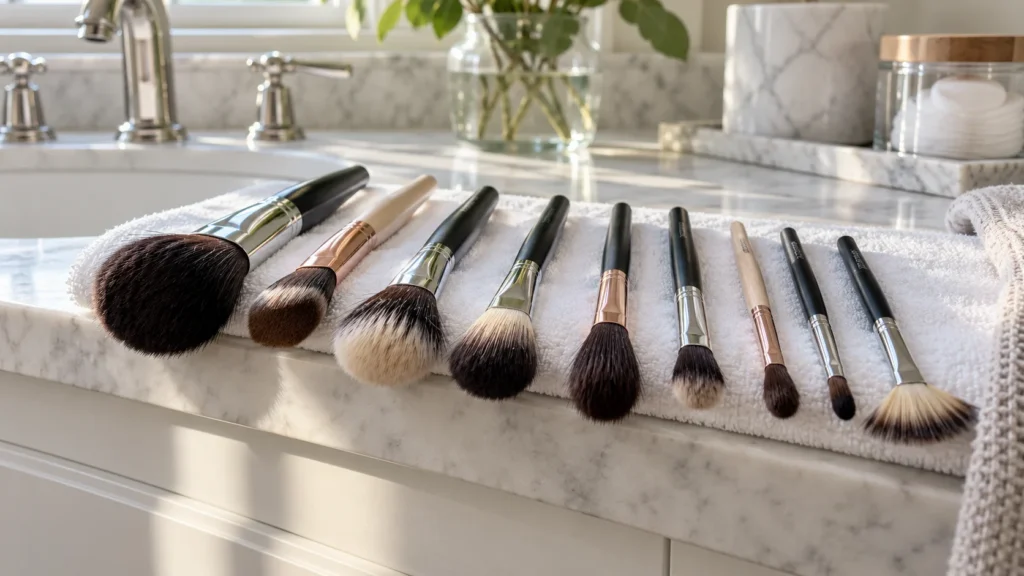
    Gently reshape the bristles after removing excess water according to the instructions. Arrange the brushes where air can circulate and where the bristles are not pressed into a bent shape. Do not put them away while damp simply because the outside looks dry.

    Avoid speeding the process with intense heat. A hairdryer, radiator or direct hot surface can affect materials and adhesives. If you need the brush urgently, use another clean suitable tool. Building drying time into the routine is more dependable than trying to rescue a wet brush in the morning.

    Treat makeup sponges as a separate task

    Sponges hold moisture and product differently from brushes. Follow the manufacturer’s washing, drying and replacement guidance rather than applying the same rules to every type. Inspect the sponge carefully and replace it if it cannot be cleaned properly or its material has deteriorated.

    Store a sponge only after it is fully dry, in a clean ventilated place. A closed pouch can trap moisture. If you travel with it, give it time to dry when you arrive instead of leaving it sealed for the whole trip. Convenience should not make maintenance harder.

    A neat row of freshly washed makeup brushes lying horizontally on a folded white towel with bristles projecting over the counter edge to air dry, no water dripping and no products.

    Keep your storage area clean too

    A clean brush placed inside a makeup covered pouch becomes dirty again. Wipe suitable storage surfaces and wash washable pouches according to their care instructions. Let the container dry before returning tools. A simple cup can work well if it is stable, clean and easy to maintain.

    Do not crowd the brushes so tightly that you have to tug them out by the bristles. Keep handles accessible and separate clean tools from those waiting to be washed. That small distinction prevents you from accidentally using a dirty brush because it looks identical to the clean one.

    Plan cleaning around your real routine

    Choose a regular time when you can wash tools and leave them to dry. The right schedule depends on use and the manufacturer’s advice; tools used frequently or with wet products need particular attention. Do not wait for visible streaks or an unpleasant smell before thinking about care.

    A short checklist helps:

    • Identify which tools were used.
    • Clean them using their recommended method.
    • Rinse thoroughly and reshape gently.
    • Allow complete drying.
    • Clean the storage area before putting tools back.

    If you have a skin condition or repeated irritation, ask a dermatologist about your products and tools rather than assuming cleaning alone will solve it. For general hygiene, the American Academy of Dermatology’s makeup brush guidance is a useful reference.

    Avoid sharing and improvised shortcuts

    Keep personal tools personal, especially those used near the eyes. A quick wipe does not make every shared product or brush suitable to use. If a professional does your makeup, it is reasonable to expect clean tools and appropriate hygiene rather than assuming that a large kit guarantees it.

    Skip shortcuts that involve saliva, strong household chemicals or improvised products not intended for cosmetic tools. These ideas may appear convenient online, but they can create new problems. A straightforward cleaning routine is easier to repeat and easier to assess than a collection of unverified hacks.

    Know when technique is the real problem

    A clean brush can still produce a patchy result if the product, amount or application method is unsuitable. Try a small amount of makeup and build gradually. Check whether the brush is designed for the texture you are using before deciding you need a more expensive tool.

    Our natural makeup tutorial can help you simplify application. When the routine is clear, it becomes easier to notice whether a tool is helping or making the process harder. Good maintenance and sensible technique work together.

    Frequently asked questions

    Do I need an expensive brush cleaner?

    Not necessarily. You need a cleaning method that is suitable for your tool and leaves it properly rinsed. Follow the manufacturer’s recommendations and avoid choosing a cleanser solely because it is popular. A simple, consistent process matters more than elaborate packaging.

    Can I store brushes in a closed travel case?

    Yes, when they are clean and fully dry. Keep the case clean too, and avoid compressing the bristles into a bent shape. After travel, unpack tools that need air or cleaning instead of leaving them untouched in a pouch until the next trip.

    Should I replace every brush at the same time?

    Usually it is more useful to inspect each one individually. Replace tools that are damaged, uncomfortable or cannot be maintained properly. A brush that still works well does not become unnecessary just because another tool in the set has worn out.

  • Expressive Beauty Trends: Make Bold Makeup Wearable

    Expressive Beauty Trends: Make Bold Makeup Wearable

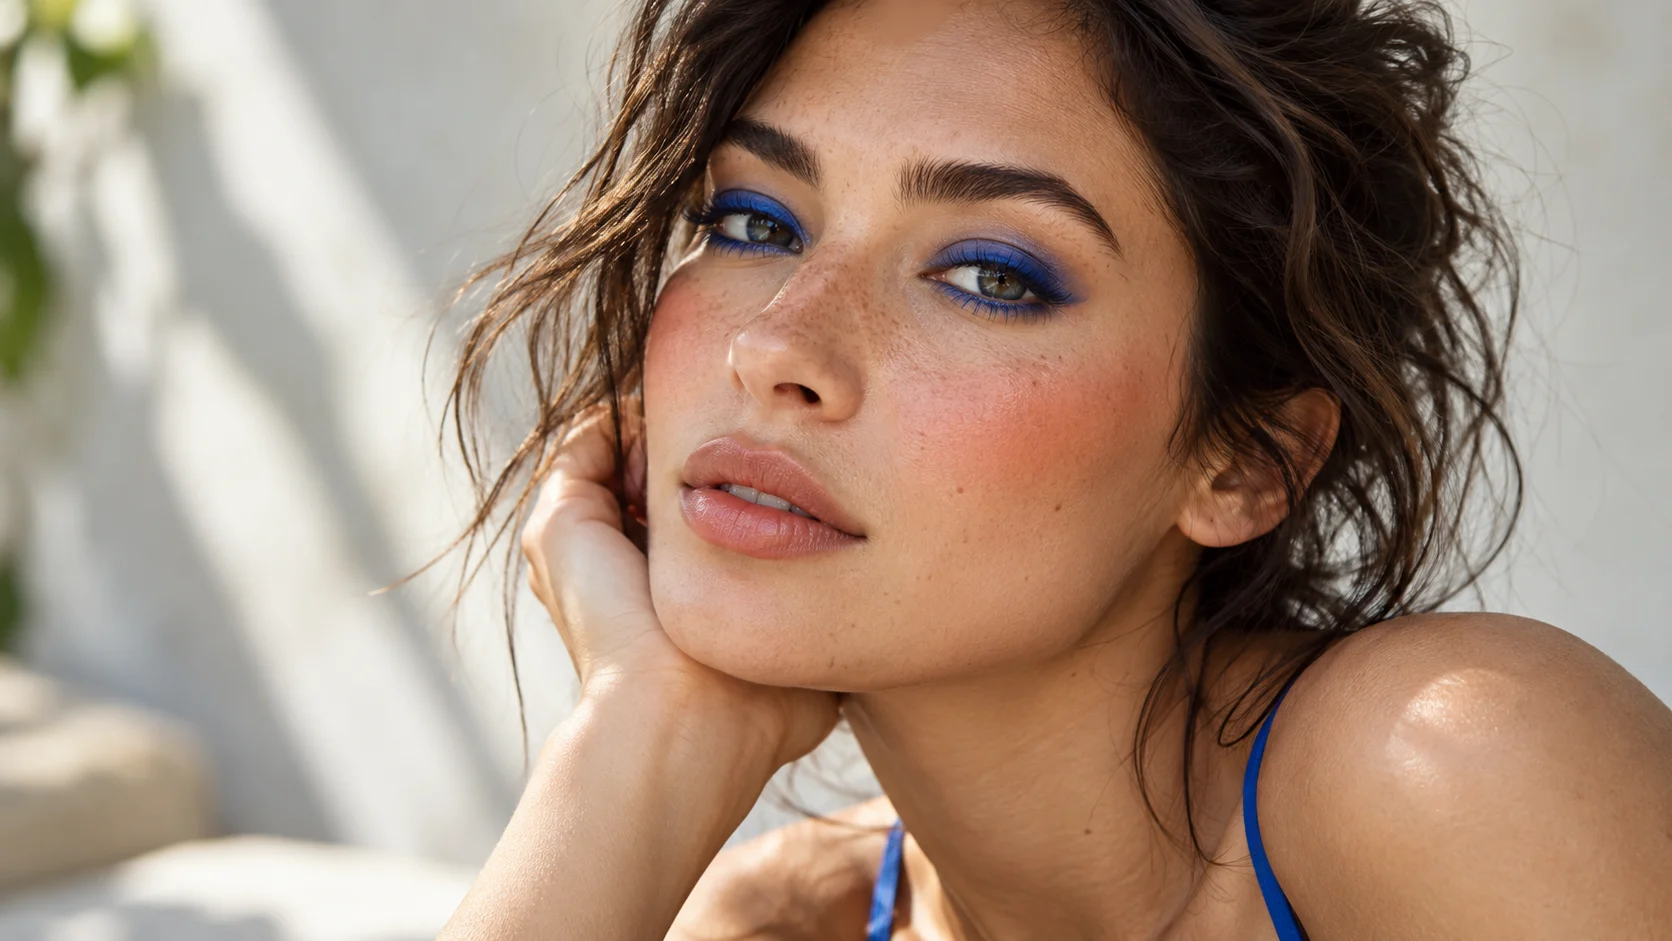
    Expressive beauty trends give you permission to enjoy colour, texture and a little imperfection. That does not mean every look has to be dramatic. A softly blurred lip or a small coloured liner can feel expressive while remaining easy to wear with the clothes and routine you already have.

    Recent beauty reporting has highlighted richer colour, decorative eyes and more individual finishes. Instead of treating a runway face as a complete instruction, choose the one feature you like. This guide shows how to reduce the scale, balance the rest of the face and practise a version that works in ordinary daylight.

    Choose one feature before choosing products

    Look at a reference and describe what attracts you. Is it the lip colour, the shape of the liner, the sheen on the cheek or the overall contrast? Naming the feature helps you separate the idea from the model, lighting and styling around it.

    You may not need a new product. A lipstick applied more lightly can create a softer stain. An eye pencil you already own can be blended instead of drawn sharply. Begin with the effect you want, then decide which suitable product in your collection can create it.

    Keep the first experiment small

    A full face inspired by a runway can be difficult to judge when you are trying several unfamiliar techniques. Choose one change and keep your usual base. You will see more clearly whether you like the colour or placement, rather than blaming the entire look if one element feels wrong.

    Take a photograph in normal light and look at it later. The distance of a phone photograph can reveal balance differently from a close mirror. Do not use a smoothing filter to judge the result; you need to see the actual edges and texture you are trying to improve.

    Try a softer version of a rich lip

    A deep lip does not need a crisp outline or opaque coverage. Apply a little colour to the centre, then blend it outward with a suitable clean tool. The result can feel less formal than a precise lip while keeping the depth that makes the shade interesting.

    Check the corners and the area just beyond the lip line. Blurred should look deliberate rather than accidental. If colour spreads too far, use a clean cotton bud to refine the shape. Keep the rest of the makeup familiar until you know how strong you like the lip.

    Use colourful liner as a small accent

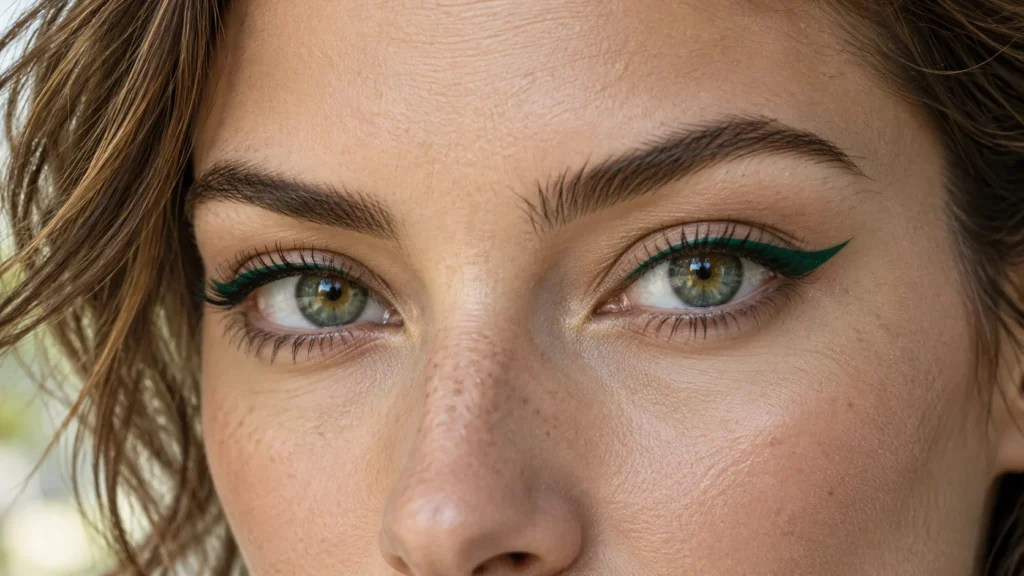
    A short line close to the upper lashes is an approachable way to use colour. Choose a product labelled for the eye area and follow its instructions. Avoid using lip pencils or craft glitter around the eyes simply because the shade looks appealing.

    You can place the colour at the outer third rather than along the whole lid. This reduces the amount you need to control and makes the effect visible without overwhelming the face. If the line becomes uneven, soften it into a small shadow shape instead of repeatedly adding thickness.

    Build cheek colour gradually

    Strong cheek colour can be beautiful, but it is easier to add than remove. Start with a small amount and blend the edges before deciding whether to add more. Look at both sides of the face from a normal distance so the placement feels balanced.

    Choose whether you want the blush or the lip to lead. They can both have colour, but one can be softer. A familiar neutral lip beside a more noticeable cheek is an easy experiment. With a rich lip, use a lighter hand on the cheeks to keep the face comfortable to read.

    Let texture change the mood

    The same shade looks different as a sheer wash, soft matte finish or glossy layer. If a colour feels too strong, reduce opacity rather than immediately abandoning it. A small amount of burgundy blended into the lips can feel very different from a fully opaque application.

    Close-up of an adult woman's eyes with a crisp emerald green eyeliner wing, minimal neutral eyelid and natural skin texture, eyes are the clear focus.

    Match the texture to the situation. A glossy lip may need more attention during a meal, while a soft stain may be easier on a busy day. There is no superior finish. The useful choice is the one you enjoy wearing and can maintain without frustration.

    Balance makeup with your outfit

    A colourful top and expressive makeup can work together, but begin with a simple relationship. Repeat a related tone or allow the makeup to be the only strong colour. You do not have to match a lip exactly to a dress; that can make the look feel more deliberate than you intended.

    Neutral clothing gives you room to experiment. A plain shirt, dark denim and a small coloured liner create a clear focal point. Our dark denim outfit ideas can help you build an easy clothing base for a more playful makeup detail.

    Make the trend suit your available time

    An ordinary morning is not the best moment to learn a complicated eye shape. Practise when you can remove the makeup and begin again. Once you understand the technique, create a quick version with fewer steps and products for daily use.

    Our everyday makeup guide offers a dependable starting point. Keep that routine as the base and replace one step with the expressive detail. This makes experimentation a small addition rather than a complete new routine.

    Avoid buying a full collection for one look

    Write down the colour and finish you need, then check your existing kit. A suitable product may already offer a similar result. If you still want something new, choose one item you can imagine using in more than one combination.

    A beauty capsule routine helps separate everyday essentials from experimental products. Store the new item where you can see and practise with it. A trend purchase loses its usefulness when it disappears into a drawer before you learn how to use it.

    Expressive beauty trends checklist

    • Choose one feature from the reference.
    • Use products suitable for the intended area.
    • Keep the rest of the routine familiar.
    • Add colour in small amounts.
    • Check the result in normal light.
    • Practise a quick version before a busy day.

    Clean tools and sensible product use matter more than copying an exact finish. Do not share eye products, and stop using a product that causes irritation. A look should be enjoyable to wear rather than something you tolerate for a photograph.

    Frequently asked questions

    Can bold makeup still look simple?

    Yes. Simplicity comes from a clear focus and controlled placement, not from avoiding colour. A single rich lip with a familiar base can be straightforward. A small colourful line can be simpler than a multi shade neutral eye look that takes much longer to blend.

    What if I like the trend but dislike it on myself?

    Change the scale, texture or placement before deciding. A softer shade or smaller area may fit your taste better. You can also appreciate a look without wearing it. Trends are sources of ideas, not obligations to change your face or personal style.

    For current context, see Vogue’s Milan beauty coverage. The practical adaptations here are designed for ordinary routines, with room to choose the details you actually enjoy.

  • Beauty Capsule Routine: Build a Kit You Will Actually Use

    Beauty Capsule Routine: Build a Kit You Will Actually Use

    A beauty capsule routine is a small collection of products and tools that covers the looks and care steps you actually repeat. It is not a fixed number of bottles, and it does not mean giving up colour or experimentation. The point is to make daily choices easier while keeping enough flexibility for different occasions.

    Beauty coverage is full of new finishes, tools and launches, but every new product does not need a place on your shelf. This guide helps you sort what you own, identify genuine gaps and build an everyday kit around your skin, preferred makeup and available time. Begin with your habits rather than someone else’s shopping list.

    Decide what your routine needs to do

    Write down three situations: an ordinary day, a day when you want a little more polish and an occasion when you enjoy experimenting. Note what changes between them. You may find that the same base products work each time while only the lip colour or eye makeup changes.

    Then consider practical limits. Do you apply makeup at home or on the move? Do you prefer brushes or fingers? Are you willing to clean several tools? A useful capsule fits these details. A kit that looks elegant but creates extra work will probably stay untouched.

    Separate care from decoration

    Skincare supports your routine, while makeup changes the appearance of the finish. Keeping those roles clear makes it easier to see what you need. A glitter shadow cannot replace a cleanser, and a skincare product does not have to provide the colour you want in a makeup look.

    Use our beginner skincare routine as a basic reference for organising care steps. Keep any prescribed treatment outside the decluttering decisions you make for optional beauty products, and follow the advice provided with it.

    Sort your current collection before buying

    Place products on a clean surface and group them by function. Put base makeup together, then lip products, eye products and tools. Look for repeated shades or textures. Three similar blushes may all be enjoyable, but only one may be useful for your ordinary morning.

    Check packaging instructions and period after opening symbols. A product that has changed smell, texture or appearance should not be kept simply because it was expensive. Do not pass old eye products to someone else. Make a note of products you enjoy so you can replace them thoughtfully when needed.

    Choose a dependable everyday makeup base

    Start with the coverage you like rather than assuming that foundation is compulsory. A concealer used only where you want it may be enough. If you prefer an even base, choose a finish that feels comfortable throughout your day and works with the rest of your routine.

    Keep the tools simple. One brush or sponge that you clean properly is more useful than several unfamiliar options. Try the product in daylight and check the result after a normal day. Your capsule should contain things that suit real conditions, not just the first few minutes after application.

    Add colour with a small range of finishes

    A versatile cheek colour, a lip shade you enjoy and one more expressive option can cover many looks. The colours do not need to match perfectly. They should work together comfortably, so you are not constantly trying to correct one product with another.

    For eyes, a familiar neutral and a liner may be enough for daily use. If you enjoy colourful makeup, keep one shade that encourages experimentation. A smaller kit should reflect your taste. Minimalism is not useful if it removes the part of makeup you most enjoy.

    Keep occasion products in a separate section

    Products used for parties or special events can live together without crowding your everyday area. This makes the daily routine quicker while keeping options available. A small pouch is often enough for stronger lip colours, sparkly shadows or an extra brush.

    Elegant close-up product texture photograph of an open unbranded moisturizer jar with cream, a light gel moisturizer swatch and a rich cream swatch on an ivory surface.

    Review this section honestly. If a product has not been used because you dislike the texture or cannot apply it comfortably, keeping it for a hypothetical event will not solve the problem. Learn the technique while the product is suitable to use, or let it leave the collection.

    Make tools earn their place

    Choose tools according to the products in the kit. A cream blush may need a different application method from a powder, but you do not automatically need a specialised brush for every step. Follow product instructions and use clean tools that give you a result you can repeat.

    A useful tool arrangement might include:

    • One base application tool you know how to use.
    • One cheek brush if your chosen formula needs it.
    • A small eye brush for the looks you repeat.
    • A clean spoolie for brows.
    • A simple cleaning setup that is easy to maintain.

    Keep tools somewhere they can dry and remain clean. A damp sponge sealed in a pouch is inconvenient and unhygienic. Build the storage around the cleaning routine rather than buying a beautiful organiser that traps everything together.

    Test the capsule over ordinary days

    Use the proposed kit for a week of normal activities. Notice what you reach for, what feels unnecessary and where you genuinely lack an option. Do not judge the capsule on a single rushed morning. A routine needs to work across different moods, weather and schedules.

    If something is missing, describe the function before naming a product. You may need a lip colour that wears comfortably with little attention, or a base that looks less shiny by lunchtime. A clear description reduces the chance of buying another attractive item that solves nothing.

    Refresh your look without replacing the kit

    A new placement can change a familiar product. Blend cheek colour slightly differently, soften the edges of a lip shade or use a liner in a shorter shape. These small experiments can make the capsule feel current while you keep the products you understand.

    Our natural makeup guide offers a starting routine you can adjust. Once the basics feel comfortable, add one expressive detail rather than changing the entire face at once. This makes it easier to see whether the new idea suits you.

    Keep a simple replacement list

    Record the products you would buy again and why. Include the shade, finish and the situations where you use them. This is more useful than saving a long list of launches. When something runs out, you can make a decision based on experience.

    The American Academy of Dermatology’s budget skincare guidance also supports focusing on needs rather than price alone. A practical routine should fit your finances as well as your preferences; expensive packaging does not make a product essential.

    Frequently asked questions

    How many products should a beauty capsule contain?

    There is no universal total. Someone who enjoys detailed eye looks may need more colour options than someone who mainly uses lip and cheek products. Count useful functions and repeated habits instead. A collection is manageable when you can find, use and maintain what it contains.

    Can I keep products simply because makeup is a hobby?

    Yes. Separate hobby products from the daily capsule so they do not complicate ordinary mornings. Enjoying experimentation is a valid reason to keep suitable products. The capsule is an organisation method, not a rule that every purchase must be purely functional.

  • Burgundy Outfit Ideas: How to Wear Autumn’s Rich Colour

    Burgundy Outfit Ideas: How to Wear Autumn’s Rich Colour

    Burgundy outfit ideas are useful when you want autumn colour without rebuilding your wardrobe. The shade can act as a small accent or become the main colour of a look, depending on the amount you wear and the fabrics around it. A wine coloured bag makes a different statement from a matching knit and skirt.

    Burgundy has appeared in current seasonal colour coverage, but a wearable outfit starts with your own preferences. Think about whether you enjoy colour near your face, whether your wardrobe is mostly warm or cool and which pieces you repeat most often. Those answers help you choose a practical entry point.

    Understand the shade before combining it

    Burgundy sits in a family of deep reds, but individual pieces can lean brown, purple or clear red. Two items described as burgundy may therefore look different together. Put them beside each other in daylight before assuming that the name guarantees a match.

    You do not need perfectly identical shades. A darker bag beside a softer wine knit can look considered when the difference is visible enough to feel intentional. Problems usually arise when two pieces are almost the same but compete. A neutral layer between them can make the combination easier.

    Start with one piece you enjoy wearing

    If you usually dress in neutrals, begin with a scarf, bag or pair of shoes. These let you test the colour in an outfit you already trust. If you enjoy stronger colour, a knit or blouse gives burgundy more space without committing to a complete matching look.

    Before shopping, look for a piece already in your wardrobe that contains a similar shade. A printed scarf or patterned skirt may offer the same effect. Repeating a colour from that print is a straightforward way to create a connected outfit with fewer purchases.

    Pair burgundy with cream for clear contrast

    A burgundy knit with cream trousers gives the colour a clean setting. The light fabric stops the outfit feeling too heavy, especially in mild autumn weather. Add a brown belt or neutral bag if you want warmth, or use black shoes for a sharper finish.

    Check the weight of the fabrics. A chunky sweater beside very thin trousers can feel unbalanced unless that contrast is deliberate. A smooth knit with structured trousers is easier to repeat. If cream feels impractical for your day, use an ivory shirt above dark trousers instead.

    Use navy for a quieter combination

    Navy and burgundy can work when you want depth without a dramatic contrast. Try navy trousers with a wine coloured top, or dark jeans with a burgundy cardigan. Keep a small light detail near the neckline if the overall outfit feels too dark.

    Texture helps distinguish the colours. A soft knit beside clean denim or a smooth blouse beside wool trousers gives the eye something to read. Our dark denim outfit guide offers more combinations if jeans are your most reliable starting point.

    Add grey for an everyday outfit

    Grey makes burgundy feel approachable and works across casual and more polished looks. A grey sweater, dark trousers and a burgundy bag are easy to assemble. If you prefer colour near your face, reverse the arrangement with a burgundy sweater and a grey coat.

    Charcoal gives a stronger, darker result than pale grey. Choose the shade based on the contrast you like rather than a rule about what is flattering. Hold the pieces together near a window and compare. A small change in grey can alter the mood of the entire combination.

    Try burgundy and pale pink without overcomplicating it

    Pale pink creates a softer contrast with burgundy. Use one colour as the base and the other as a detail. A pink shirt beneath a wine cardigan works well with simple trousers. Alternatively, a burgundy dress can pair with a small pale pink scarf.

    Keep the remaining accessories quiet while you test the combination. Adding several other colours can make the outfit difficult to repeat. Cream, grey or a related brown usually provides enough support. The aim is a clear two colour relationship, not a collection of trend references.

    Make a monochrome look feel layered

    An outfit built around burgundy benefits from different textures and slightly different depths. A fine knit, a fluid skirt and a structured bag can create separation even when the colours are close. Without that variation, a matching outfit may look flatter than expected.

    Leave some visual space around the neckline and wrists. Small areas of skin, a simple shirt collar or understated jewellery can break up the colour. If the full look feels too strong, replace one major piece with a neutral rather than changing every accessory.

    Choose shoes and bags according to the outfit

    Burgundy shoes can act as the accent in a neutral look. A bag in the same family creates a stronger connection, but an exact match is optional. Think about the finish: glossy leather reads differently from suede or a soft fabric bag.

    You can also use burgundy above the waist and keep shoes neutral. This is useful when your existing footwear already works with most of your clothes. A trend should not force unnecessary purchases. Begin with the pieces that make the outfit comfortable and practical.

    Adjust the colour for different occasions

    For errands, combine a burgundy cardigan with a plain tee and jeans. For an informal office, try a wine blouse with grey trousers and a tailored jacket. For dinner, a simple burgundy skirt with a dark knit can feel polished without needing a dramatic dress.

    The same colour does not need the same styling every time. Your bag, shoes and outer layer determine much of the outfit’s mood. Photograph two versions using the same burgundy piece so you can see how small changes affect the result before buying more.

    Burgundy outfit ideas checklist

    • Compare burgundy shades in daylight.
    • Choose one main colour relationship for each outfit.
    • Use texture to separate similar dark shades.
    • Try an accessory before committing to a full colour look.
    • Build around footwear that already suits your day.

    A printed scarf can connect several pieces when its pattern contains burgundy and one neutral. Keep the knot simple so the print remains the focus. Our scarf styling guide shows ways to add colour without creating a crowded neckline.

    Frequently asked questions

    Does burgundy work with black?

    Yes. The combination can feel rich and understated, especially when the fabrics differ. A burgundy knit with black trousers is an easy example. If both pieces are very dark, add a small lighter detail or choose jewellery that gives the neckline definition.

    Can I wear burgundy outside autumn?

    Certainly. A lighter blouse, a small bag or a printed scarf can work in other seasons. The fabric weight and the colours around burgundy matter more than the calendar. Use lighter layers and simpler accessories when the weather is warm.

    For current colour context, see Vogue Arabia’s burgundy trend coverage. Our outfit suggestions focus on adaptable combinations, so you can enjoy the colour in a way that fits your existing clothes and routine.

  • Dark Denim Outfits: A Practical Autumn Styling Guide

    Dark Denim Outfits: A Practical Autumn Styling Guide

    Dark denim outfits can move between a casual morning and a more polished evening with surprisingly few changes. A deep indigo wash gives jeans a clean appearance, while the shape and length decide whether the result feels relaxed, structured or somewhere in between. You do not need an entirely new wardrobe to make the combination work.

    Recent autumn denim coverage has encouraged different silhouettes and styling possibilities. The useful question is which version suits your own clothes, climate and daily routine. This guide starts with fit, then builds outfit formulas around shirts, knits and jackets so you can use the ideas with the jeans you already own.

    Start with the pair you can actually move in

    Try your jeans while sitting, walking and bending. A waist that feels comfortable only when standing will become irritating during a long day. Look at the front rise, the room around the thighs and where the fabric falls behind the knees. Different cuts behave differently even when the labelled size is identical.

    Check the hem with your intended shoes. A wide leg that works over a boot may drag when worn with flats. A straight leg often needs a cleaner break at the ankle. There is no single correct length; the useful length is the one that stays clear of the ground and looks balanced with your footwear.

    Straight, wide or gently tapered?

    Straight jeans offer an easy starting point with shirts and everyday jackets. Wide jeans create more volume, so a defined shoulder or a partially tucked top can help the outfit feel deliberate. A tapered cut puts more focus on shoes and works well when you prefer a compact silhouette.

    Do not choose a shape simply because a trend report names it. Look at your favourite trousers and ask why you wear them repeatedly. If you like room through the leg, a dark wide cut may feel familiar. If you dislike extra fabric, a simple straight cut is likely more useful.

    A white shirt makes dark denim feel sharper

    Combine deep indigo jeans with a white or ivory shirt, then choose one of two finishes. For a neat look, tuck the shirt and add a slim belt. For a relaxed version, leave it open over a fitted tee. Both create contrast without relying on elaborate accessories.

    Keep the shirt’s proportions in mind. An oversized shirt with very wide jeans can work, but a small front tuck gives the outfit a reference point. With narrow jeans, a longer shirt may feel balanced without any tuck. Roll the sleeves only if they stay comfortably in place.

    Build a comfortable weekend combination

    A soft crewneck knit, dark jeans and familiar trainers create a dependable weekend outfit. Choose a knit that ends around the waistband or tuck a small section at the front. A crossbody bag keeps the combination practical, especially if your plans involve walking or public transport.

    Add a jacket according to the weather rather than the photograph you are copying. A light overshirt is enough for mild days. A coat adds warmth when needed. Leave a little of the knit visible at the neckline or cuff so the layers feel connected instead of looking like separate outfits.

    Use texture to make a simple outfit interesting

    Dark denim has a dense visual finish, so it pairs well with softer or smoother materials. Try a brushed knit, a fluid blouse or a leather jacket. The differences in texture make two neutral pieces feel less flat, even when the colour palette is limited.

    Choose one contrast at a time. If the blouse is shiny and the jacket has strong hardware, keep the bag and jewellery understated. If the top is plain cotton, a textured bag can provide the detail. This keeps the outfit readable and avoids adding accessories just to fill space.

    Make jeans work for an informal office

    Where your workplace allows denim, start with a clean wash and minimal distressing. Add a tailored blazer, a simple top and shoes that look cared for. Dark denim does not automatically meet every dress code, so check what is appropriate before relying on this formula.

    A blazer with enough room at the shoulder usually sits better over a knit than a close fitted style. Make sure the layers do not pull when you reach forward. Our capsule wardrobe guide can help you choose reusable work basics rather than buying separate pieces for every outfit.

    Change the mood for an evening

    Keep the jeans and replace the daytime top with a fluid blouse or a simple fitted knit. Add earrings or a small bag, then choose shoes you can comfortably wear for the evening. The change in fabric and accessories is often enough to make the same jeans feel intentional.

    You do not need heels to make denim look dressed up. A clean pointed flat, a polished loafer or a neat ankle boot can create a sharper finish. If the jeans have a long hem, check the length again with the evening shoes rather than assuming every pair will work.

    Choose colours that suit deep indigo

    Cream and white create clear contrast. Grey gives a softer effect, while brown adds warmth. Burgundy works as a small accent through a bag, shoe or knit. Black can also sit comfortably beside dark denim when the fabrics have enough contrast to distinguish the pieces.

    A patterned scarf is another way to connect your colours. Pick a print containing indigo or a related dark blue, then repeat one lighter colour in your top. Read our autumn silk scarf styling ideas for ways to add the detail without covering the entire neckline.

    Dark denim outfits checklist

    • Check the hem with each pair of shoes.
    • Leave enough room for a tucked shirt at the waistband.
    • Keep a wide silhouette balanced with a visible waist or clear shoulder line.
    • Use one strong accessory rather than several competing details.
    • Follow the care label and watch for colour transfer on light fabrics.

    New dark denim can transfer dye, so be cautious with pale upholstery and light bags until you understand how the fabric behaves. Read the manufacturer’s washing instructions and avoid assuming that all jeans need the same treatment. Washing, drying and stretching can change fit over time.

    Create three outfits before buying anything else

    Set your jeans beside one shirt, one knit and one evening top. Add suitable shoes to each combination, then try the outfits rather than judging them flat on a bed. Photograph the finished results so you can see the proportions without constantly looking down.

    If all three outfits fail for the same reason, solve that specific problem. A hem adjustment may help more than another top. A belt might improve a loose waist, but it will not fix a rise that feels uncomfortable. Make the smallest useful change before replacing the jeans.

    Frequently asked questions

    Can I wear black shoes with dark blue jeans?

    Yes. Black shoes can work with indigo, especially when another black detail appears in the outfit. A belt, jacket or bag can make the combination feel connected. You do not need to match every accessory exactly; aim for a clear relationship between the pieces.

    How do I make dark denim look less formal?

    Use relaxed fabrics, easy footwear and a softer outer layer. A tee with an open shirt feels different from a crisp tucked blouse, even with the same jeans. Let comfort guide the finish rather than adding distressed denim or deliberately untidy details.

    For seasonal inspiration, explore Vogue’s autumn denim report. Use the ideas as a starting point, then choose the fit and combinations that make sense in your own wardrobe.

  • Silk Scarf Styling: 7 Fresh Outfit Ideas for Autumn

    Silk Scarf Styling: 7 Fresh Outfit Ideas for Autumn

    Silk scarf styling is an easy way to make familiar clothes feel considered again. A printed square can change the neckline of a plain shirt, soften a leather jacket or bring colour to an outfit without another major purchase. The trick is choosing one clear role for the scarf rather than treating it as an extra decoration.

    Scarf dressing has appeared in recent autumn runway coverage, but the most useful versions work outside fashion week. This guide focuses on seven wearable combinations, how to choose the right size and what to adjust when a knot feels bulky. Start with a scarf you already own and build around the colours in its print.

    Choose a scarf that works with your wardrobe

    Lay the scarf beside three outfits you actually wear. Look for one colour that connects with a shirt, jacket or pair of trousers. The match does not have to be exact. A cream ground beside an ivory knit, for example, gives the pieces enough connection while a rust border adds contrast.

    Fabric changes the effect as much as pattern. A fine, fluid scarf folds neatly at the neck. A heavier square has more presence on a bag or over a shoulder. Check the care label before steaming, washing or storing it, especially if the material is silk rather than a synthetic alternative.

    Pick the size for the knot

    A small square makes a tidy neck knot with short ends. A medium square offers more folding options without too much fabric. A long rectangular scarf is better when you want loose tails over a coat. If an arrangement looks crowded, try a narrower fold before deciding that the print is wrong.

    1. Add a narrow scarf to a white shirt

    Fold the scarf into a band and place it under the collar. Tie a loose single knot just below the open neckline, letting the ends sit at different lengths. With straight jeans and loafers, the scarf becomes the outfit’s main detail while the rest stays practical.

    Avoid buttoning the shirt tightly around the knot. A little space makes the fabric look intentional and feels more comfortable. If your shirt has a stiff collar, position the scarf above it instead. Small earrings are enough; a large necklace often competes with the same area.

    2. Soften a leather jacket with a printed square

    A leather jacket brings structure, so a fluid scarf provides useful contrast. Try a softly folded triangle at the neck with the knot tucked slightly to one side. Keep the print visible without covering the jacket’s entire lapel. A plain top beneath gives the pattern room to stand out.

    For a lighter look, combine the jacket with a flowing skirt or dress. For a more casual version, use a cotton tee and denim. Our silk scarf outfit guide has more simple starting points if you want to practise the basic folds first.

    3. Bring colour to a neutral knit

    A crewneck sweater can leave an outfit looking unfinished when everything is one shade. Fold a square scarf into a slim band and tie it loosely above the neckline. Let a little fabric show between the sweater and your face instead of pulling the knot close against the throat.

    Choose a print with a darker border if your knit is pale. That edge creates definition without needing a bold necklace. With a dark sweater, a light centre can brighten the combination. Tuck the scarf ends inside the knit if you prefer a quieter effect.

    4. Wear the scarf beneath an open blazer

    Place a long, narrow fold around your neck and leave the ends untied beneath the blazer. This creates a vertical line and keeps the outfit flexible when you remove the jacket. A simple vest or fitted tee helps the layers sit cleanly without too many overlapping collars.

    Watch where the ends finish. If they stop at the same point as a wide belt or a large blazer button, the centre of the outfit can feel busy. Shorten one side or tuck both ends inside. The aim is an easy layer that moves with you.

    Close-up editorial still life of a patterned silk scarf neatly tied around the handle of a brown leather handbag beside a cream knit sweater, warm autumn colours.

    5. Tie a small scarf to your handbag

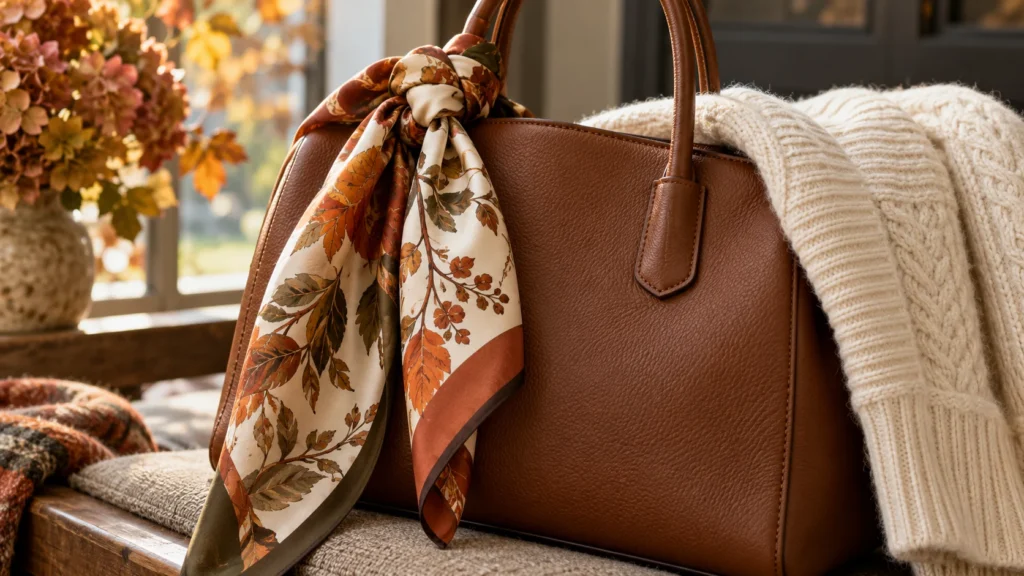
    A scarf on a bag is useful when you like a print but do not want colour near your face. Tie it around a handle with a simple knot, keeping the ends short enough to avoid catching on doors or dragging against your coat. Leave the other accessories fairly quiet.

    Do not wrap delicate fabric around a handle that is rough, damp or visibly transferring colour. A loose knot on a smooth handle is usually easier to undo than a tight spiral. Remove the scarf before storing the bag so the fabric is not compressed for weeks.

    6. Use a scarf as a soft waist detail

    Thread a narrow scarf through roomy belt loops or tie it over a plain dress. It should mark the waist gently rather than carry the weight of trousers. Keep the knot small and slightly off centre if a large bow feels too decorative for your usual style.

    This works best with simple fabrics and uncluttered silhouettes. A heavily pleated skirt, patterned blouse and printed scarf can create too many competing elements. Choose one patterned piece, then connect it to a solid colour elsewhere. Check the knot while sitting down as well as standing.

    7. Drape a scarf over a lightweight coat

    A longer scarf can soften a trench or straight coat without hiding its shape. Drape it evenly, then pull one side slightly longer for a relaxed finish. In warmer weather, leave it open. On cooler days, loop it once while keeping enough space around the neckline.

    A coat already has strong lines, so resist elaborate folding. Let the print appear in a small area near the collar and again in the trailing ends. If the scarf slips constantly, a shorter fold or a simple knot is more useful than repeatedly rearranging it.

    Make the colour combination feel deliberate

    Start with two main clothing colours and let the scarf introduce a third. Navy trousers, a cream shirt and a scarf with soft red details are a straightforward example. If the scarf contains several colours, repeat only one of them in a shoe, bag or small accessory.

    • Keep a busy print beside a plain neckline.
    • Try a narrower fold when a knot looks bulky.
    • Repeat one scarf colour elsewhere, rather than every colour.
    • Check that loose ends do not interfere with movement.
    • Store the scarf loosely and follow its care label.

    A wardrobe with dependable basics makes these combinations easier. Use our capsule wardrobe guide to identify the pieces you can restyle, then photograph two scarf outfits you would happily repeat. That is more useful than collecting many knots you will never wear.

    Frequently asked questions

    Can a silk scarf work with casual clothes?

    Yes. A tee, jeans and a simple jacket leave enough visual space for a small neck knot or a scarf tied to a bag. Keep the arrangement relaxed and choose footwear you already wear. The scarf should fit the outfit’s mood rather than make the whole look feel formal.

    How do I keep the scarf from overpowering my outfit?

    Reduce the visible area by folding it more narrowly, tuck the ends inside a neckline or move it to your handbag. You can also choose a print whose background matches your clothes. Smaller styling changes often work better than replacing the scarf.

    For current runway context, see Vogue’s autumn scarf coverage. The combinations above are Haya Glam’s practical styling suggestions, designed to help you use existing clothes rather than copy a runway outfit piece for piece.

  • Celebrity-Inspired Outfits You Can Wear Every Day

    Celebrity-Inspired Outfits You Can Wear Every Day

    Celebrity street-style photographs can be inspiring, but a memorable look does not require designer labels or a red-carpet schedule. What often makes an outfit stand out is a clear idea: strong proportions, a repeatable color story or one unexpected accessory. This guide translates those ideas into everyday outfit formulas you can build from clothes you already own. The focus is on observing styling choices rather than copying a person exactly. Your climate, comfort and budget should shape the finished version.

    Look for the formula beneath the label

    When you see an outfit you like, ignore the brand names at first. Ask what the structure is: oversized jacket plus narrow trousers, monochrome pieces plus a bright bag, or a soft dress beneath a tailored coat. Write the formula in plain words and look for similar roles in your closet. A jacket need not be identical to the photograph to create the same balance. This approach turns a fleeting image into a useful idea.

    Make the idea wearable

    Pay attention to what makes the outfit wearable. Are the shoes practical? Does the layer suit the weather? Would you feel comfortable sitting, walking and working in it? If not, adapt the formula. Style inspiration is a starting point, not a set of instructions. You can keep the proportion you love while changing the fabric, heel height or color to suit an ordinary day.

    Quick takeaways

    • Notice the silhouette and color story.
    • Find pieces with similar roles in your own closet.
    • Adapt shoes, layers and fabrics to your day.

    Try the tailored layer

    One common polished formula is a simple base topped with a structured jacket. Start with jeans or comfortable trousers and a tee, shirt or fine knit. Add a blazer, tailored vest or clean-lined coat. The layer creates shape even when the pieces underneath are relaxed. Roll a sleeve or leave the jacket open if that feels more natural. Keep the shoes in line with your plans, from flats to clean sneakers.

    Relax the styling

    Fit matters more than price here. A jacket that sits well at the shoulder and moves comfortably can elevate a familiar outfit. If the shape feels too formal, pair it with denim or a softer fabric. If it feels too boxy, try a narrower bottom or define the waist. Our capsule wardrobe guide shows how to build multiple outfits around versatile layers and bottoms.

    Use one-color dressing

    Wearing related shades from head to toe creates a calm, intentional look. You might combine cream with ivory, different tones of brown, or dark navy with denim. Exact color matching is not required; in fact, slight variation often adds depth. Mix textures so the outfit does not feel flat: knit with cotton, denim with a smooth shirt, or a soft scarf with a structured coat.

    Add a point of contrast

    If a full monochrome outfit feels too plain, add a contrasting accessory or shoe. A burgundy bag against neutrals can become the focal point. For a more subtle version, keep the accessory in the same color family but change the finish. Use pieces you already own to test the idea before buying anything. A one-color formula can be a useful shortcut on mornings when coordinating several colors feels like too much work.

    Balance volume

    Many striking outfits play with proportion. A roomy shirt can work with straight or slimmer trousers; wide-leg trousers can sit well with a more fitted top or cropped jacket. These are options, not rules about body shape. The purpose is to create a silhouette you like and can move in. Stand back from the mirror and look at the whole outfit rather than judging one garment in isolation.

    Small adjustments make a difference. Half-tuck a shirt, change the jacket length or switch from a bulky shoe to a sleeker one. Photograph two versions and compare what feels most like you. If oversized pieces are your signature, wear them together with confidence; perhaps show a wrist, collar or waistline for visual definition. There is no requirement to copy the exact proportions of a celebrity photograph.

    Make accessories do the work

    Accessories often turn a simple base into a recognizable look. Sunglasses, earrings, a belt, a bag or a scarf can each provide one clear point of interest. Choose one or two rather than adding everything at once, unless a more maximal style is genuinely yours. A scarf is especially flexible because it can move from neck to hair to bag. See our five silk scarf styling ideas for practical examples.

    Think about the role of an accessory before buying it. Does it add color to several outfits? Can you carry it comfortably? Will you wear it more than once? A smaller collection of frequently used details can be more useful than many pieces kept for a hypothetical occasion. The best finishing touch feels effortless because it works with the clothes you actually wear.

    Adapt event style for daytime

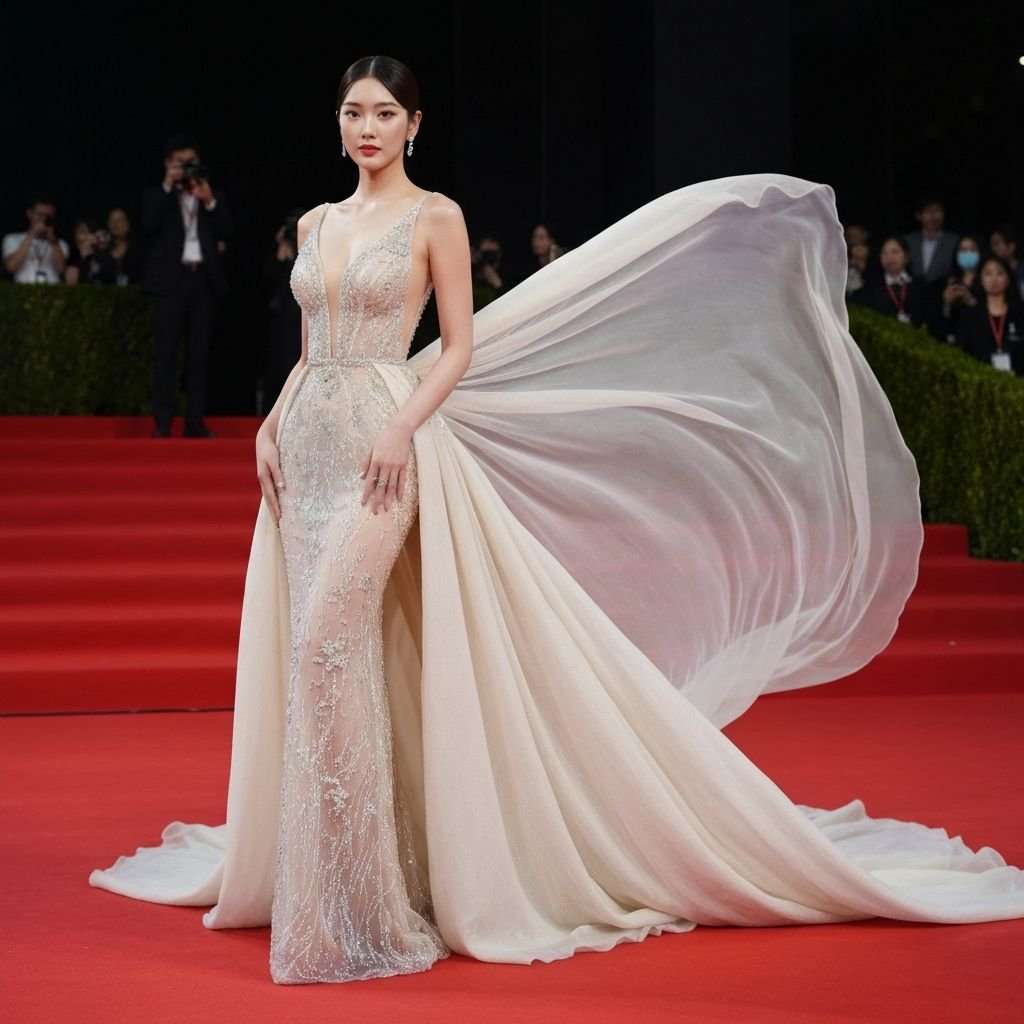
    A dramatic evening look can inspire a quieter daytime outfit. Translate a satin dress into a satin shirt with jeans, a sparkling accent into modest earrings, or a sharp suit into one tailored piece with a casual base. Keep the part you admire and lower the formality elsewhere. This makes inspiration useful beyond parties and photographs.

    Occasion dressing also depends on context. A work meeting, family dinner and outdoor event ask for different levels of polish and comfort. Prepare one dependable formula for each kind of plan. Then you can change a color or accessory without rebuilding the outfit. If you enjoy pairing style with makeup, the natural makeup guide offers a flexible face that can be softened or dressed up.

    Build your own reference folder

    Save images because of a specific detail rather than the person wearing them. Label the idea: “long coat with denim,” “brown and cream,” or “bright scarf with a plain shirt.” After collecting a few, look for repeated patterns. Perhaps you always save relaxed tailoring or tonal outfits. Those patterns reveal your preferences more clearly than a long list of items to buy.

    Try recreating one idea each week with what you have. Note whether it works with your day and how it feels after several hours. If it does, add the formula to your outfit album. If it does not, adjust it or let it go. Personal style develops through wearing clothes, not just saving photographs. A reference folder should help you get dressed rather than make you feel that your closet is inadequate.

    Final thought

    Celebrity-inspired style works best when you borrow a principle and make it yours. Notice the silhouette, color and finishing detail; then choose versions that suit your body, schedule and budget. An outfit you can wear comfortably on an ordinary day is a better result than a perfect copy that stays in the closet.

  • Healthy Hair Habits: A Simple Everyday Care Guide

    Healthy Hair Habits: A Simple Everyday Care Guide

    Healthy-looking hair rarely comes from one miracle product. Everyday choices around washing, conditioning, drying and styling can make a bigger difference to how hair feels and behaves. Hair texture, scalp oil, color treatments and climate all affect what works for an individual. This guide focuses on gentle habits you can adapt rather than a fixed schedule or expensive shopping list. If you notice sudden hair loss, scalp pain or persistent irritation, speak with a dermatologist or another qualified health professional for advice specific to you.

    Wash according to your scalp

    A wash schedule should respond to your scalp and hair, not a rule from someone with a different texture. Some people need to shampoo more often because oil builds up quickly; others find less frequent washing more comfortable. Apply shampoo primarily to the scalp and let the rinse carry it through the lengths. Use your fingertips gently rather than scratching hard. The American Academy of Dermatology recommends choosing a washing frequency that fits how oily or dirty the hair becomes.

    Adjust your wash schedule

    Pay attention to signs that your routine needs adjusting. Hair that feels heavy with buildup may need more thorough cleansing, while lengths that feel dry may need a gentler approach. Product buildup, sweat and styling habits can change the balance from week to week. A clarifying product may help some routines when used according to directions, but it is not an everyday requirement for everyone. Keep the process simple enough that you can observe what helps.

    Condition the lengths

    Conditioner can make hair easier to detangle and reduce friction during styling. Apply it where your hair needs it, often through the mid-lengths and ends, and follow the product directions. Fine hair may prefer a lighter formula; thicker or drier hair may enjoy a richer texture. The right amount depends on length and density. More product does not automatically mean a better result if it leaves the hair limp or coated.

    Detangle with patience

    Detangle with patience, especially when hair is wet and more vulnerable to stretching. Start near the ends and work upward with an appropriate comb or brush. If a knot resists, add a little conditioner or detangling product rather than pulling sharply. A leave-in product may suit some hair types, but it should complement rather than replace the rinse-out product unless its instructions say otherwise. Aim for easier handling, not a complicated shelf.

    Dry with less friction

    Rubbing hair vigorously with a towel can roughen the strands and create tangles. Instead, gently squeeze out water and use a soft towel or suitable fabric to absorb excess moisture. If you air-dry, arrange the hair in the shape you want while it is damp. If you blow-dry, keep the tool moving and use a comfortable setting. Avoid holding intense heat close to one section for too long.

    Your drying method can be adjusted to your texture. Curly hair may respond well to minimal disturbance while it dries, whereas straight hair may be easier to shape with a brush and moderate airflow. Try one change at a time and notice whether the result feels smoother or easier to manage. There is no need to force a method that takes too long or leaves your hair uncomfortable.

    Use heat thoughtfully

    Heat tools can be useful, but excessive heat may damage the hair. The American Academy of Dermatology advises using lower heat settings and limiting how often heat is applied. Follow the tool’s instructions, avoid repeatedly passing over the same section and use a heat protection product when appropriate. Let hair dry to the level recommended for the tool before styling; a flat iron, for example, is not intended for wet hair unless designed for it.

    Try a second-day style

    Consider whether every day needs a freshly styled finish. A loose braid, low bun, clip or scarf can make a second-day look feel deliberate. Our silk scarf ideas include an easy hair accessory option. When using ties, choose ones that do not snag and avoid pulling the hair very tightly for long periods. Comfort is a useful sign that a style fits your day.

    Be gentle with color and treatments

    Coloring, bleaching and chemical services can change how hair feels and how much care it needs. Follow the instructions from a qualified professional or the product maker and allow enough time for maintenance. If hair is already fragile, avoid stacking new treatments without advice. A conditioner or mask may improve the feel of dry lengths, but it cannot undo every kind of damage. Trimming split ends can help the hair look tidier as it grows.

    Think through the upkeep before choosing a major change. How often will it need refreshing? Can your current routine support it? A striking color can be fun, but it should fit your budget and time. If you are unsure, try a less permanent option or discuss the plan with a professional stylist. Your everyday experience with the hair matters more than the first photograph after an appointment.

    Protect hair in daily life

    Weather, sleep and friction can affect the way hair looks by morning. A loose hairstyle at night may help prevent tangles, while a soft pillowcase can feel more comfortable for some people. Protect hair from strong sun and wind with a hat or scarf when practical. If you swim, rinse and care for hair according to your texture and the pool or sea conditions. These habits do not need to become another strict checklist.

    Notice where breakage or tangles happen repeatedly. It may be the same tight hairstyle, a rough accessory or a bag strap rubbing against the lengths. Changing one of those small daily habits can be more useful than buying another serum. For a broader getting-ready routine, see our simple everyday beauty guide. A dependable hair option can save time alongside makeup and outfit choices.

    Build a routine you can repeat

    Choose a wash-day sequence you can remember: cleanse the scalp, condition the lengths, detangle gently and dry in a way that suits your texture. Add one styling product only if it solves a clear need, such as hold, definition or comfort. Keep track of how the hair feels after a few washes before deciding whether a product works. It is easy to mistake a single humid day for a product problem.

    Storage and tool care matter as well. Clean brushes and combs regularly, follow appliance safety instructions and replace worn accessories that snag. If you have a persistent scalp issue, seek professional guidance rather than repeatedly switching products at random. A simple, adaptable routine gives you a clearer baseline and makes it easier to notice when something changes.

    Quick takeaways

    • Cleanse the scalp when it needs washing.
    • Condition and detangle the lengths gently.
    • Dry and style with as little avoidable heat and friction as practical.

    Final thought

    Good hair care is a collection of gentle decisions, not a perfect product lineup. Wash for your scalp, condition where needed, reduce avoidable friction and use heat with care. Keep styles comfortable and seek professional help for concerning changes. When the routine fits your texture and real schedule, hair becomes easier to manage without taking over the day.