Author: Faiz RK

  • Romantic Celebrity Style: Wear Lace and Soft Volume Today

    Romantic Celebrity Style: Wear Lace and Soft Volume Today

    Romantic celebrity style brings softness, texture and a little drama to modern dressing. Lace, fluid fabrics and fuller sleeves can suggest a period inspired mood without turning an ordinary outfit into costume. The most wearable versions combine one romantic detail with pieces that keep the look grounded in your own routine.

    In recent press tour coverage, Vogue described Daisy Edgar-Jones wearing period inspired elements while promoting Sense and Sensibility. That provides a current reference for the mood, but the everyday adaptations below are our own suggestions. Focus on the detail you enjoy rather than trying to reproduce a complete promotional look.

    Decide which romantic detail appeals to you

    You might like the delicacy of lace, the movement of a long skirt or the shape of a fuller sleeve. These features do different things. Lace adds texture, a fluid skirt creates movement and a sleeve changes the silhouette around the shoulders.

    Choose one starting detail so the outfit has a clear direction. If you select lace, let the rest of the clothes be simpler. If you want a flowing silhouette, use a quieter top. You can add more later, but one feature is easier to adapt and repeat.

    Keep the rest of the wardrobe familiar

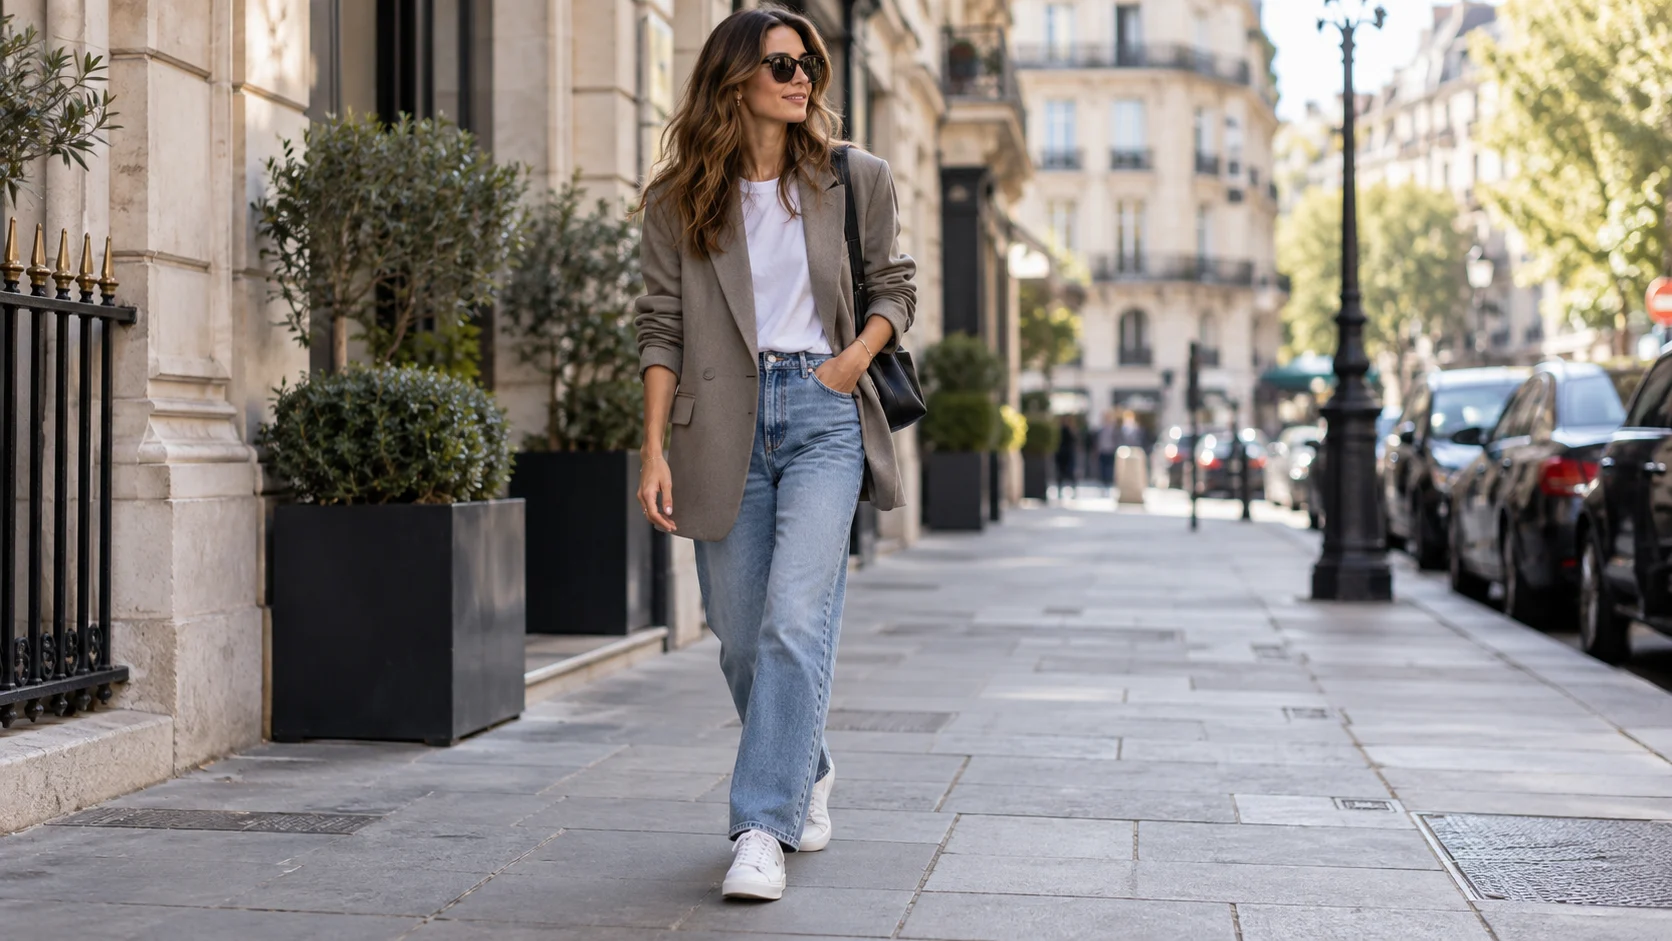
    Begin with clothes you already wear comfortably. A romantic blouse can sit beside your usual jeans, while a flowing skirt can work with a plain knit. Familiar pieces make the new detail feel like part of your style instead of a costume you are borrowing for the day.

    Try the combination before buying extra accessories. You may discover that your usual shoes and bag are enough. A trend becomes more useful when it changes how you wear existing clothes, rather than requiring an entirely separate collection.

    Pair a lace blouse with simple denim

    A lace blouse has enough texture to lead the outfit. Straight or gently relaxed jeans can provide a clear contrast, while a simple belt or neat bag keeps the combination practical. Check the blouse’s lining and choose underlayers that suit the garment and your comfort.

    Our dark denim guide offers more ways to balance a detailed top. You do not need distressed jeans to make lace feel casual. A clean wash and ordinary footwear can create a modern result without competing with the fabric.

    Balance fuller sleeves with a clear waist or hem

    A puffed or gathered sleeve adds volume near the shoulders. Try it with trousers or a skirt whose shape you understand, then decide whether a tuck helps define the outfit. A small adjustment at the waist can make the sleeve feel intentional rather than oversized everywhere.

    Check movement as well as appearance. You should be able to reach and bend your arms without the blouse pulling. A romantic shape should not mean constant discomfort. If the sleeves are too large for your routine, choose a subtler gather rather than forcing the most dramatic version.

    Add a structured layer over a flowing dress

    A jacket can ground a soft dress and make it easier to wear outside a formal occasion. Look at where the jacket ends relative to the waist and skirt. A shorter layer may create a clear division, while a longer one can produce a more relaxed line.

    Choose the jacket for your weather and activity. A light blazer may be more useful than leather on a warm day. The important relationship is structure beside movement, not a compulsory material. Test the outfit with the shoes you will actually wear.

    Keep a long skirt practical

    A fluid skirt can offer a romantic shape with a plain tee or knit. Check the hem while walking and sitting, especially if the fabric is delicate. A skirt that drags or catches constantly may need an alteration before it becomes a useful everyday piece.

    Think about the waistband too. A soft skirt may look beautiful while standing but feel awkward with a bulky tucked sweater. Try a thinner top or a partial tuck if appropriate. Small proportion changes often solve the problem without replacing either piece.

    Use colour to control the mood

    Cream, pale pink and muted shades can emphasise softness, while black or deep tones create a stronger contrast. Neither is more correct. Choose the palette according to your wardrobe and how romantic you want the final outfit to feel.

    A dark jacket over a light dress gives the soft fabric a firmer setting. A tonal combination feels more unified. If you enjoy richer accents, our burgundy outfit ideas show ways to add depth without overwhelming a delicate blouse or skirt.

    Keep accessories from becoming a costume

    One small romantic accessory may be enough. Earrings, a simple hair detail or a printed scarf can support the mood, but adding every possible reference can make the outfit feel themed. Choose the detail you would still enjoy if nobody knew the inspiration.

    A practical bag and familiar shoes help keep the combination modern. Do not automatically choose vintage looking accessories just because the blouse has lace. Contrasting a soft fabric with a plain structured bag can be more wearable than matching the entire outfit to one era.

    Adapt the idea for different occasions

    For a daytime outing, pair a detailed blouse with denim and comfortable shoes. For dinner, use a flowing skirt with a simple knit and a small bag. For a formal event, let the romantic fabric lead while keeping jewellery and the rest of the styling controlled.

    Our red carpet styling guide explains how to scale event inspiration to your own venue. Check the invitation and practical conditions before choosing a long dress or delicate shoes simply because they suit the mood.

    Care for the details you want to keep

    Read the care label before washing or steaming lace and delicate fabrics. Avoid assuming that all romantic looking clothes need the same treatment. A simple maintenance routine makes the garment easier to repeat and helps you decide whether it suits your lifestyle.

    Check for accessories or bag hardware that may catch on the fabric. Try the complete outfit at home so you can notice friction before an event. The most beautiful detail is less enjoyable when you spend the day protecting it from everything you touch.

    Romantic celebrity style checklist

    • Choose one romantic feature.
    • Pair it with familiar practical pieces.
    • Check lining, movement and hem length.
    • Use colour to set the level of softness.
    • Keep accessories selective.
    • Follow the garment’s care instructions.

    Photograph the combination you like and save a second version for a different occasion. Repeating the same blouse with new trousers or a jacket is a better test of its usefulness than wearing it once in a highly styled photograph.

    Frequently asked questions

    Can romantic clothes work in a minimal wardrobe?

    Yes. A single textured blouse or flowing skirt can offer variety while using the same reliable basics. Choose a colour that connects with your existing clothes and a shape you can maintain. The detail can be expressive without requiring many supporting purchases.

    How do I avoid a costume effect?

    Mix one period inspired detail with modern, straightforward pieces. Keep the shoes, bag and outer layer practical. You can also reduce the scale of the feature, choosing a subtle sleeve or small lace panel instead of several dramatic details together.

    For the current celebrity reference, see Vogue’s Daisy Edgar-Jones press tour coverage. Use the mood as inspiration, then build an outfit that belongs comfortably in your own wardrobe.
  • Red Carpet Style Lessons: Dress Up Without Copying a Gown

    Red Carpet Style Lessons: Dress Up Without Copying a Gown

    Red carpet style lessons are most useful when you separate the idea from the scale. A dramatic gown may not suit your event, budget or venue, but the outfit can still teach you about a clear focal point, a balanced silhouette or restrained accessories. Those principles work with an ordinary dress or a tailored set.

    Current celebrity event coverage offers plenty of striking looks, yet a real occasion comes with practical needs. You may be walking, sitting through dinner or travelling between venues. This guide helps you borrow the styling logic while choosing clothes you can comfortably wear for the whole event.

    Begin with the invitation and venue

    Read the dress code before looking for an outfit. A formal evening, daytime wedding and small dinner do not ask for the same level of dress. The venue and weather matter too. An outdoor event may make a long delicate hem or narrow heel impractical.

    Think through the full route, including transport and any time spent outside. A look that works only while standing still may create problems later. Choosing the right level of formality first makes the rest of the decisions easier and reduces unnecessary shopping.

    Define the mood in a few words

    You might want simple and polished, soft and romantic or bold and structured. Those descriptions help narrow the choices without tying you to one celebrity. Save two or three references that share the same mood rather than a large folder of conflicting ideas.

    Look at what creates that mood. It may be the fabric, neckline, shape or colour. Once you can describe the feature, you can find a more practical version. A flowing skirt can suggest movement without needing a long train, for example.

    Choose one focal point

    A strong neckline, rich colour, interesting texture or statement accessory can lead the outfit. You do not need all four together. One clear feature gives the eye somewhere to settle and makes the rest of the styling simpler.

    If the dress has a detailed bodice, choose quieter earrings or a small bag. If the clothes are very plain, an accessory can provide the interest. The balance is not about removing personality; it is about making the feature you like visible.

    Treat fit as part of the styling

    Check the outfit while sitting, walking and lifting your arms. A neckline that moves constantly or a waistband that becomes uncomfortable will distract you throughout the event. Fit should support confidence rather than require continuous adjustment.

    Consider a useful alteration before replacing the whole outfit. A hem, sleeve length or small waist adjustment can change the result significantly. Ask a suitable professional what is possible with the garment rather than assuming every problem can be solved by tightening it.

    Use fabric to create the right level of dress

    A smooth or fluid fabric can make a simple silhouette feel more formal. A matte knit or structured cotton may create a quieter effect. Choose according to the occasion and how the material moves, not only how it looks on a hanger.

    Try the outfit under lighting similar to the event when possible. Some fabrics appear shinier or more transparent in different conditions. Check any lining and the way the garment sits during movement so there are no surprises when you arrive.

    Keep jewellery connected to the neckline

    A high neckline may leave more room for earrings than a necklace. An open neckline can work with a small pendant or simply no necklace at all. Look at the full outfit rather than assuming every formal look needs a complete matching set.

    If you choose statement earrings, test their comfort for the length of the event. Heavy accessories can become distracting after an hour. A smaller pair you enjoy wearing is often more useful than a dramatic option you remove halfway through dinner.

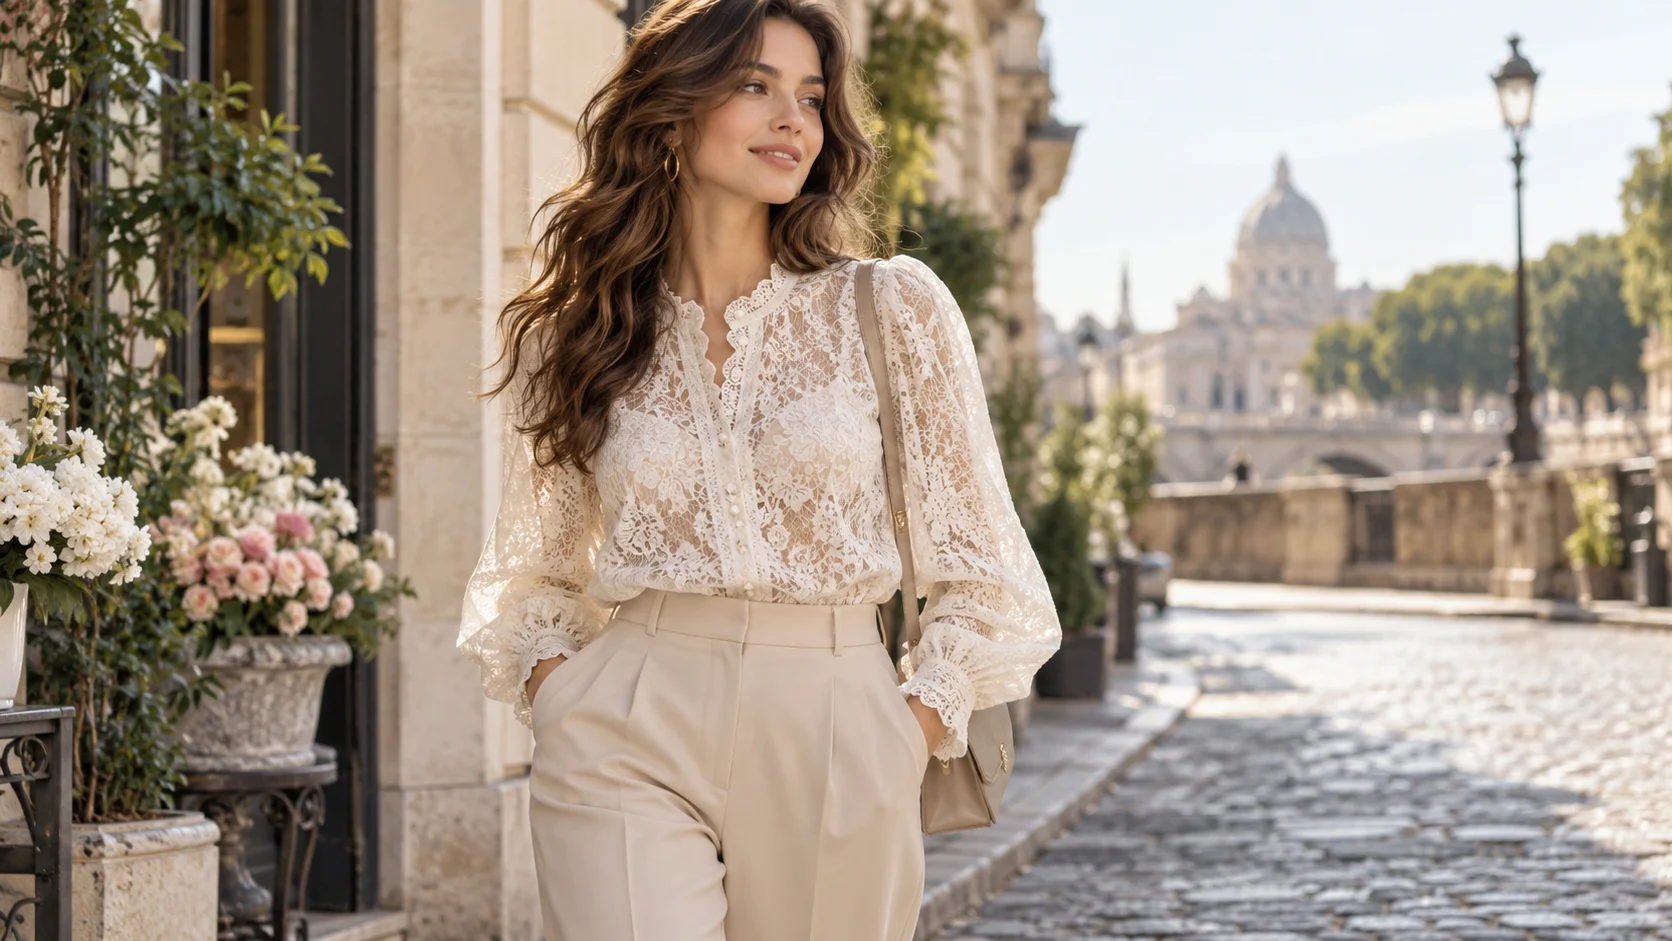
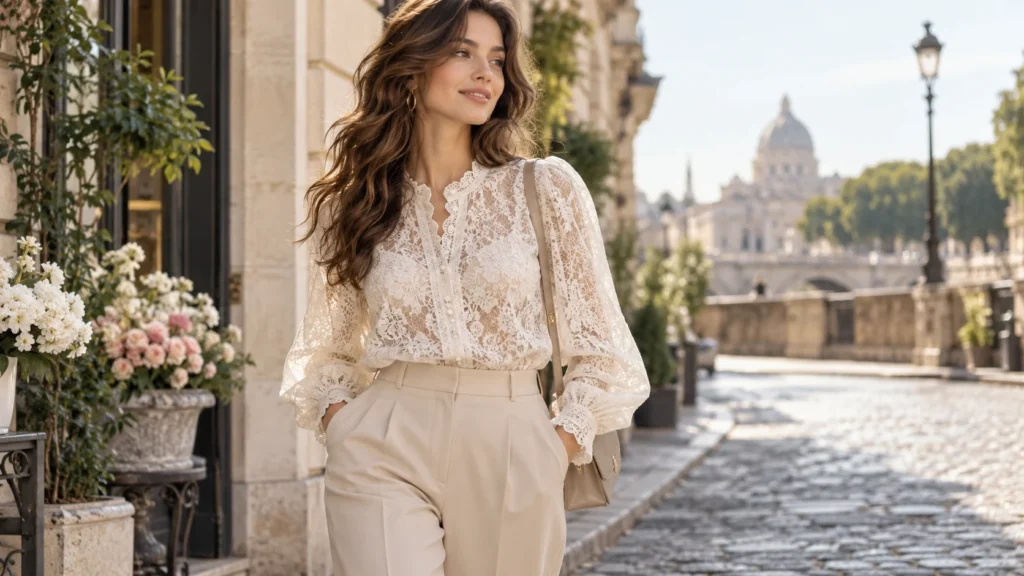
    Generic adult fashion model, not any real celebrity, wearing an ivory lace blouse with softly voluminous sleeves and neutral tailored trousers, tasteful romantic street style.

    Choose a bag that supports the evening

    A small bag should still hold the essentials you need. Check your phone, transport details and any personal items before deciding the bag is practical. A beautiful clutch that forces you to carry another bag may complicate the outfit.

    The bag does not have to match the shoes exactly. A related colour or a quiet neutral can work. Think about texture too: if the clothes are heavily embellished, a simple bag gives the outfit space. If the clothes are plain, a more interesting finish can add detail.

    Make footwear a comfort decision

    Try the shoes with the outfit and walk on a suitable surface. Check the hem length and whether the shoes remain comfortable while standing. If the event is outdoors, consider the ground rather than choosing only for the front view in a mirror.

    You do not need high heels to look dressed up. A polished flat or appropriate low heel can provide the finish you want. The useful question is whether the shoes suit the outfit and the event, not whether they recreate a celebrity’s height or posture.

    Plan hair and makeup around the clothes

    A detailed neckline may work better with hair arranged away from it, while a simple outfit gives you room for a stronger beauty detail. Choose a routine you know or practise the new element beforehand. Do not leave every styling decision to the final hour.

    Our soft volume hair guide and burgundy makeup ideas offer adaptable options. Keep one feature stronger and let the others support it, especially if the clothes already have a dramatic colour or texture.

    Do a complete outfit rehearsal

    Try everything together, including outerwear and the bag. Sit for a few minutes, walk and check the outfit from the side. This is when you notice practical issues such as a coat that crushes the sleeves or jewellery that catches on the fabric.

    Take a photograph and save the final combination. You may be able to reuse it with a different accessory for another event. Our celebrity inspired outfit guide can help you think in repeatable combinations instead of treating every invitation as a reason to start again.

    Red carpet style lessons checklist

    • Confirm the dress code and weather.
    • Choose one clear focal point.
    • Check fit while moving and sitting.
    • Test shoes for the venue.
    • Pack a useful bag.
    • Practise any unfamiliar hair or makeup step.

    The best adaptation feels appropriate to your event and comfortable on you. You can appreciate an elaborate red carpet look while borrowing only its colour or balance. There is no need to reproduce a train, a designer label or a highly staged pose.

    Frequently asked questions

    Can I wear trousers to a formal event?

    A suitable tailored outfit may work, depending on the dress code and event. Check the invitation and choose fabrics, fit and accessories that match the level of formality. Do not assume a dress is the only route to a polished look.

    How do I avoid looking overdressed?

    Start with the event rather than the reference image. Reduce the scale of the dramatic feature and keep the remaining pieces simple. A rich colour in a straightforward silhouette often feels easier to wear than elaborate embellishment, a long train and large accessories together.

    For current inspiration, explore Vogue’s Milan event arrivals. The images can spark ideas, while your own venue, comfort and personal taste decide the final outfit.

  • Celebrity Off-Duty Style: Autumn Outfits You Can Adapt

    Celebrity Off-Duty Style: Autumn Outfits You Can Adapt

    Celebrity off-duty style is often most useful when it shows a familiar piece worn in a slightly different way. Jeans, a shirt and a jacket are not unusual, but their proportions and accessories can make the combination feel considered. You can borrow those relationships without buying the exact labels in the photograph.

    Recent celebrity street style coverage has included relaxed denim and transitional layers. The practical lesson is to look at the outfit’s structure first. This guide turns that idea into adaptable formulas, with fit checks and small changes that make sense for an ordinary day rather than a photographed arrival.

    Look past the brand names

    When you save an outfit, describe the pieces in plain language. Instead of naming the designer, write straight jeans, a cropped jacket, a striped top or a soft shoulder bag. This makes the outfit easier to recreate with your own wardrobe or a sensible alternative.

    Then notice the relationship between the pieces. Is the top loose and the bottom compact, or the reverse? Where does the jacket end? What makes the shoes feel connected? These details explain more about the result than the price or the celebrity wearing it.

    Identify one feature worth borrowing

    Choose the part you genuinely like. It might be the short jacket over a longer top, a bright shirt beside plain denim or a small patterned accessory. You do not need to reproduce the entire outfit, especially if several parts would be impractical for your day.

    Try the feature within an outfit you already trust. This gives you a clearer comparison than changing everything together. If the new proportion works, you can build another combination around it. If it does not, adjust the fit before assuming the idea cannot suit you.

    Use denim as the reliable starting point

    Choose jeans you can comfortably sit and walk in. A relaxed pair can support a more structured jacket, while a straight cut often works easily with an open shirt or knit. Check the hem with your shoes before deciding the whole outfit looks wrong.

    Our dark denim outfit guide offers simple combinations for different occasions. The wash does not have to match the reference exactly. Focus on the shape and how the jeans connect with the top and footwear you already own.

    Let one layer provide structure

    A coat, blazer or neat jacket can make relaxed basics feel more deliberate. Keep the layer suitable for your weather and activity. A heavy coat may look impressive in a photograph but be uncomfortable during a warm commute.

    Look at shoulder room and sleeve length as well as the front view. You should be able to move without the layers pulling. If the jacket is roomy, a simpler base underneath can help. If the jacket is fitted, avoid crowding it with several bulky pieces.

    Add a small point of contrast

    A striped top, a coloured shirt or a textured bag can give a basic outfit personality. Choose one detail and keep the surrounding pieces straightforward. This makes the contrast visible and helps the outfit remain easy to assemble.

    Colour does not need to be dramatic. A pale shirt under a dark jacket creates contrast too. If you enjoy richer shades, a burgundy accessory can change a neutral combination. Our burgundy styling guide gives practical ways to introduce the colour in small amounts.

    Choose shoes for your actual route

    Footwear can change the mood of an off-duty outfit, but comfort and suitability come first. A polished loafer, clean trainer or simple flat can each work depending on the clothes and the walking you plan to do. Do not choose an impractical shoe solely because it completes the reference.

    A tidy autumn wardrobe rail with cream knits, indigo denim, camel coat and burgundy cardigan, neatly folded clothes on a bench, realistic home dressing room.

    Check the jeans again with the selected pair. A long wide hem can drag over flats even when it worked with boots. That practical difference matters more than matching the celebrity photograph exactly. An outfit that works throughout the day is the better adaptation.

    Keep accessories useful

    A bag should hold what you need and feel comfortable to carry. A cap, scarf or sunglasses can add personality when they also suit the situation. Avoid collecting accessories merely because the original outfit contains several.

    You can repeat one colour between a bag and a top without making every item match. A scarf can connect a few tones, but keep the arrangement simple. The goal is a clear outfit with useful details, not a checklist of everything visible in the photograph.

    Adjust the formula for your dress code

    Celebrity street style often sits outside ordinary workplace rules. If you want the idea for an informal office, choose the appropriate version of each piece. A clean denim wash, a structured shirt and suitable shoes may work where distressed jeans or a cropped top would not.

    For a weekend, relax the same formula with a tee and comfortable footwear. The core relationship remains: familiar basics supported by one clear layer or accessory. You can adapt the mood without buying separate wardrobes for work and leisure.

    Photograph the version you would repeat

    Try the whole outfit and take a simple front and side photograph in normal light. Look at the proportions, not your ability to resemble the person in the reference. Notice whether the jacket length, hem or top shape needs a small adjustment.

    Save the final combination with a short note about the shoes and layers. This makes it easier to repeat on a rushed day. Our celebrity inspired outfit formulas offer more starting points if you want to build a small set of dependable looks.

    Celebrity off-duty style checklist

    • Describe the clothes without naming brands.
    • Identify the proportion or detail you enjoy.
    • Recreate one feature with existing pieces.
    • Check movement and comfort.
    • Choose shoes for your real plans.
    • Keep accessories useful and manageable.

    A reference should expand your options rather than create a shopping obligation. If the outfit only appeals because of the setting, lighting or famous person, it may not offer a practical idea for your own clothes. Save the looks that communicate a clear combination you can use.

    Frequently asked questions

    Do I need designer pieces to recreate celebrity style?

    No. The useful parts are often shape, colour and proportion. A well fitting ordinary shirt can fulfil the same role as a designer shirt in a simple outfit formula. Choose quality and practicality within your budget rather than treating a logo as the main requirement.

    Why does my version look different from the photograph?

    The fit, body proportions, lighting, angle and styling conditions are different. That does not mean the outfit has failed. Assess whether your version feels balanced and comfortable on you. Adjust specific details rather than expecting an identical image.

    For current examples, see Vogue’s celebrity street style edit. Use the photographs to study combinations, then build your own version around the clothes and routine you actually have.

  • Gray Blending Guide: Plan a Softer Hair Colour Transition

    Gray Blending Guide: Plan a Softer Hair Colour Transition

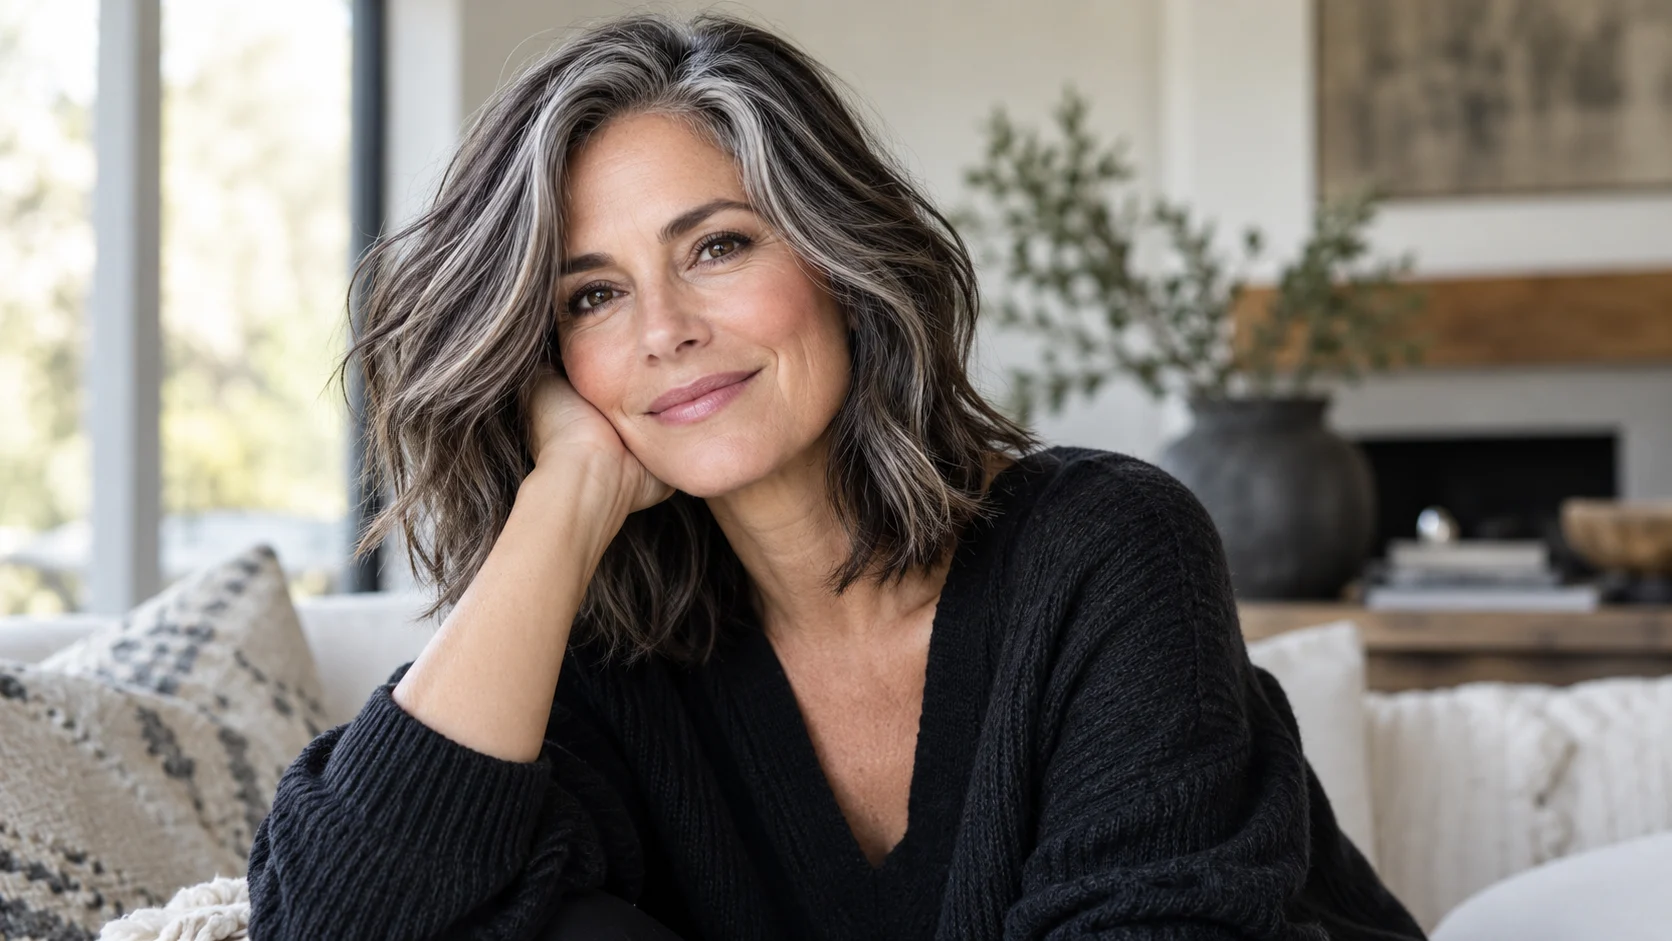
    Gray blending is a hair colour approach that works with visible gray rather than treating complete coverage as the only goal. The exact technique depends on your starting colour, the amount and placement of gray and the finish you want. It can be a gradual transition, but it is not automatically a low effort or one appointment solution.

    The approach has featured in current hair colour coverage, including the softer idea of quiet silver. Before choosing it, think about maintenance, previous colour and the look you will enjoy between appointments. This guide helps you prepare a useful salon conversation rather than promising one formula for everyone.

    Decide what you want to change

    Some people want less contrast at the roots. Others want to show more natural gray while keeping dimension through the lengths. You may simply want to move away from a solid colour that requires frequent attention. These goals can lead to different plans.

    Write down what currently frustrates you and what you are happy to keep. A clear description helps a colourist understand the problem beyond a reference photograph. You do not need technical terminology; phrases such as softer regrowth or more natural variation are useful when explained in your own words.

    Separate blending from complete coverage

    Complete coverage aims for a more uniform result, while blending allows gray to remain part of the overall colour. The finish can still include salon colour, but the balance is different. Ask the colourist to explain which approach they recommend and what will remain visible.

    Do not assume that blending means every gray strand will disappear. If that is the result you want, say so clearly. A consultation is the place to align expectations before any colour is applied, rather than discovering afterwards that you and the stylist meant different things.

    Bring references that show colour and regrowth

    Choose a few images with a starting colour or texture reasonably close to yours. A final polished photograph may show the effect you enjoy, but an image with visible regrowth can help discuss maintenance. Ask what parts of the reference are achievable for your hair.

    Avoid collecting many conflicting examples. A cool silver result, a warm highlighted result and a fully covered dark result communicate different goals. Choose the main direction first, then use the other images to explain what you do not want rather than presenting everything as equally desirable.

    Explain your colour history honestly

    Tell the colourist about previous dyes, lightening, chemical services and any at home colour you have used. Include approximate timing and products when you know them. The history of the lengths matters even if the roots are now natural.

    Do not leave out information because you think a home product sounds unprofessional. Accurate history helps the stylist assess options and avoid unsuitable assumptions. If you cannot remember the details, say so. Guessing an exact product or date is less useful than being clear about uncertainty.

    Ask about the transition, not only the first result

    Discuss how the colour is likely to look as it grows and how future appointments may differ from the first one. Ask whether the plan involves several stages and what the stylist expects between them. A softer transition should be understood as a process rather than a single photograph.

    You can also ask what happens if you later decide to keep more natural gray. A flexible plan may be easier to live with than an approach that requires a finish you are unsure about. Make the decision around your future routine as well as the immediate effect.

    Keep maintenance expectations realistic

    A blended look may reduce some visible contrast, but it can still involve appointments, toning or specific care. Ask about the likely upkeep for your proposed result rather than assuming that the phrase low maintenance means no maintenance.

    Consider your budget, travel and available time. A colour plan that needs attention more often than you can manage will become frustrating. Tell the stylist your realistic limits before choosing a technique. It is better to adapt the finish than to commit to a routine you cannot sustain.

    Follow product and salon instructions

    Hair colour products require appropriate use, including the safety instructions supplied with them. Follow the salon’s advice and any required allergy testing guidance. Do not improvise a complex colour correction at home because a short video makes it look simple.

    If you have a history of reactions or scalp problems, mention it during the consultation and seek appropriate medical advice when needed. A trend is not a reason to ignore discomfort. You can appreciate a colour idea while choosing a different approach for your circumstances.

    Support the hair with a manageable care routine

    Follow a washing and conditioning routine suitable for your hair and the colour service. Ask the colourist which product functions are necessary and which are optional. Avoid buying every item in a range without understanding what each one adds.

    Our healthy hair habits guide provides a basic care framework. For heat styling, the American Academy of Dermatology recommends controlled heat and suitable protection. Keep the styling routine comfortable rather than repeatedly chasing a salon finish.

    Think about the cut and styling too

    Colour and shape work together. A different parting or a change in the cut can alter how the natural gray is seen, but that does not mean you need a dramatic haircut. Discuss whether a small adjustment could support the colour direction you want.

    Our soft volume styling guide offers ideas for movement without a rigid finish. A style you can repeat at home makes the colour easier to enjoy than one that only looks right after professional styling.

    Gray blending checklist

    • What result is realistic from my current colour?
    • How much natural gray will remain visible?
    • Will the transition need more than one appointment?
    • What maintenance should I expect between visits?
    • Which home care steps are necessary?
    • How can the plan change if I want more natural gray later?

    Write the answers down so you can consider them after the appointment. You do not have to agree to a major colour change immediately. A useful consultation leaves you understanding the process, costs and maintenance rather than only excited by a reference image.

    Frequently asked questions

    Is gray blending suitable for dark hair?

    It may be an option, but the starting colour, previous services and desired contrast affect the plan. A colourist can assess those details. Do not assume a technique shown on naturally light hair will produce the same transition on previously coloured dark lengths.

    Does blending mean I am giving up colouring my hair?

    No. It can involve colour used to support a different balance of natural gray and other tones. You can also choose full coverage or no colour at all. The useful choice is the one you enjoy and can maintain, rather than a rule about how gray should be worn.

    For current context, see Allure’s quiet silver coverage. Treat the trend as a starting point for your own consultation, with the final plan based on your hair history and preferences.

  • Heatless Waves: A Gentle Styling Plan for Everyday Hair

    Heatless Waves: A Gentle Styling Plan for Everyday Hair

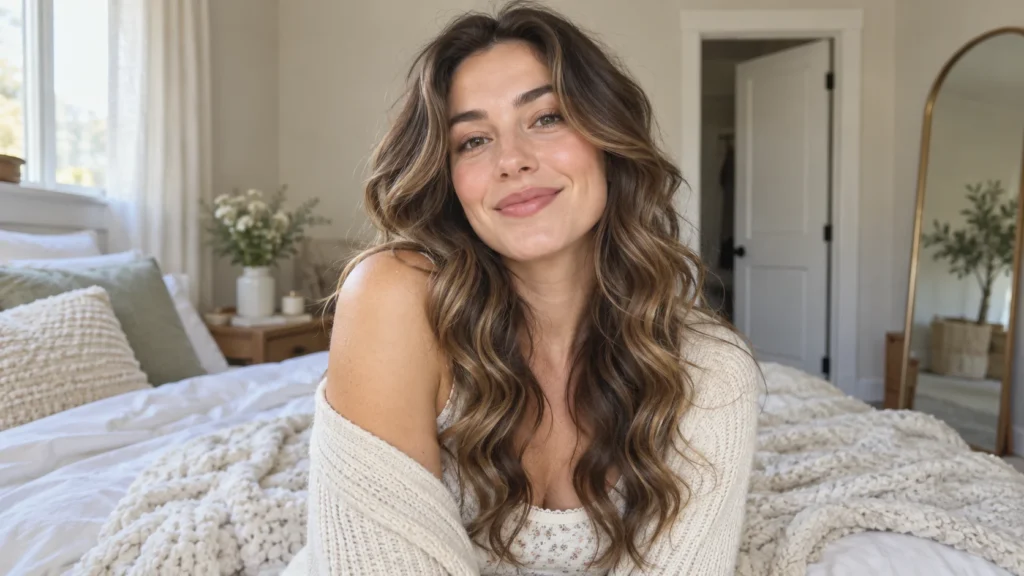
    Heatless waves offer a way to change your hair’s shape without relying on a hot tool for every styling session. The result can be loose, soft or more defined depending on the method, section size and your hair. It is not a guarantee of identical curls, and heatless does not mean every technique is automatically gentle.

    A useful routine should feel comfortable while the hair is set and remain practical when you release it. This guide focuses on choosing a method, avoiding unnecessary pulling and learning from small adjustments. Begin with a simple version you can test at home rather than a complicated arrangement you have to sleep through immediately.

    Choose the shape you actually want

    Decide whether you want a slight bend, loose waves or a more defined curl. Save a reference that shows the shape clearly, but consider whether the person has a similar length and texture. A method demonstrated on long, thick hair may behave differently on a shorter or finer cut.

    Think about where you want the movement. Waves beginning near the cheek look different from bends only at the ends. That decision affects how you divide the hair and where you place the setting tool. A clear goal makes it easier to evaluate the result later.

    Pick a comfortable method

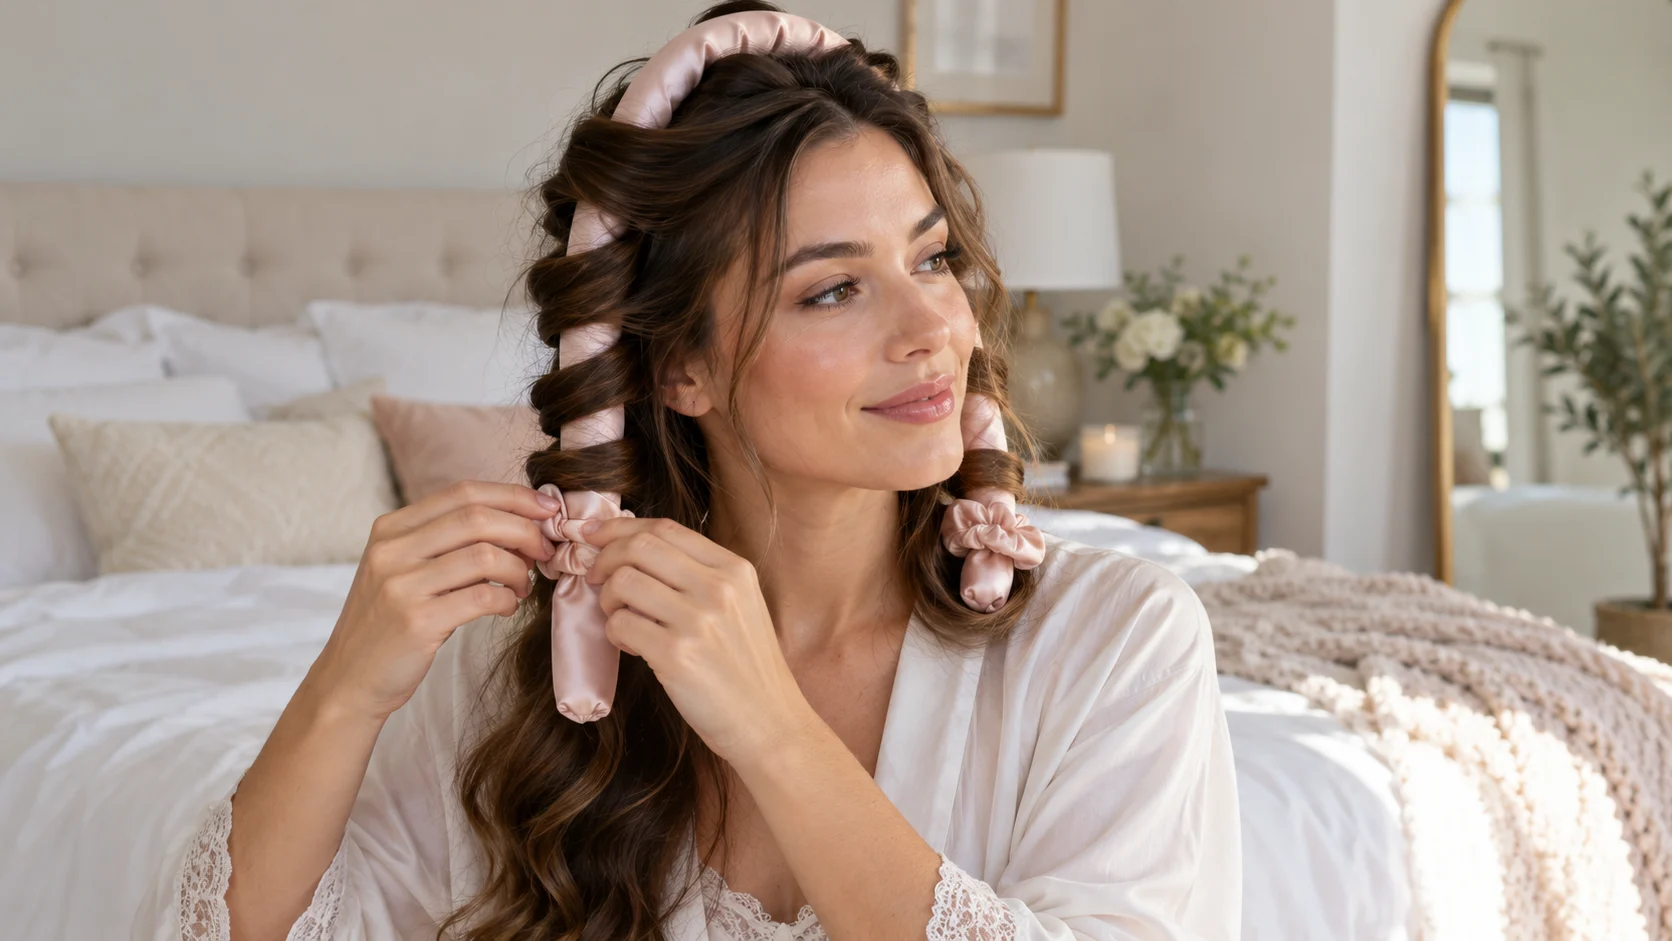
    You might use suitable soft rollers, a loose braid or a purpose made heatless tool. Read its instructions and choose an arrangement you can wear without discomfort. Avoid tightly pulling the roots to make the sections look perfectly neat.

    If the method is painful or creates strong tension, loosen it or stop. The American Academy of Dermatology’s hair damage guidance highlights the problems associated with damaging styling habits. A no heat label should not distract from how the technique feels.

    Start with a manageable section test

    Before setting the entire head, try a small section when you have time to observe it. This helps you understand how the tool, product and amount of moisture affect your hair. You can change one detail without committing to a full overnight routine.

    Use the tool as instructed. Some methods may suit slightly damp hair, while others work differently. Do not assume that very wet hair will produce a better result. Hair that has not dried properly may release with a shape different from the one you expected.

    Keep preparation simple

    Use your normal washing and conditioning routine, adjusted to your hair’s needs. The AAD’s healthy hair tips provide a basic reference for gentle cleansing and conditioning. You do not need to add several new products just to test one styling method.

    If you use a styling product, follow the label and start with a controlled amount. Too much can make the waves feel heavy or sticky. Keep the rest of the preparation stable so you can judge the method itself rather than a mixture of unfamiliar formulas.

    Divide the hair according to the result

    Larger sections often create a different shape from smaller ones, but the exact result depends on your method and hair. Try a few consistent sections first. You can then adjust the size in a later session if the waves are too tight or too loose.

    Pay attention to the front pieces because they frame the face. Decide whether you want them moving away from the face or falling more directly. Make this adjustment deliberately instead of wrapping every section in the same direction simply because it is quicker.

    Set the hair without uncomfortable tension

    Arrange the hair so it stays in place while remaining comfortable. Accessories should secure the method without pulling firmly at the scalp. If you cannot move your head normally or feel pressure around the hairline, the arrangement needs adjustment.

    A wide editorial portrait of an adult woman with soft loose heatless waves after removing her satin curling ribbon, natural hair texture, clean softly lit bedroom.

    Do not force yourself to sleep in a tool that interrupts rest or feels painful. Try setting the hair during an evening at home instead. A slightly different result may be worth the comfort, and some routines work better as occasional styling than as a nightly habit.

    Release the waves patiently

    Remove the tool or undo the arrangement gently. Pulling through tangled sections can undo the shape and make the process uncomfortable. Work slowly and separate pieces only as much as you need for the finish you want.

    Look at the whole style before brushing. A brush may soften the waves significantly, while fingers can preserve more definition. Choose the finishing method based on your result, and follow any guidance provided for your hair type rather than assuming one tool suits everyone.

    Adjust one variable next time

    If the waves are too tight, try a different section size or method in a later session. If they barely appear, review whether the hair was properly prepared and whether the setting time matched the tool instructions. Do not change five details at once.

    Keep a short note of the version that worked best. Include the tool, approximate section arrangement and the product used. That turns a lucky result into something you can repeat instead of starting from scratch each time.

    Build a practical next day style

    Heatless waves can provide texture for a relaxed clip arrangement, a low loose ponytail or a simple half up look. Choose accessories that do not create uncomfortable tension. The waves do not have to remain exactly as they looked immediately after release.

    Our soft volume hair guide offers more ideas for movement and finishing. If you prefer a smoother look on another day, choose that instead. A useful routine gives you options rather than making one style compulsory.

    Heatless waves checklist

    • Setting hair so tightly that the scalp feels uncomfortable.
    • Using more product than the label recommends.
    • Expecting every hair texture to respond identically.
    • Pulling the tool out through tangled sections.
    • Changing several variables before assessing the first attempt.
    • Sleeping in an arrangement that makes rest difficult.

    Our everyday hair care article helps place styling within a broader routine. If you notice persistent scalp discomfort, breakage or unusual shedding, seek professional advice instead of trying increasingly elaborate setting techniques.

    Frequently asked questions

    Will heatless waves last all day?

    That depends on your hair, the method, products and conditions. Test the style during an ordinary day and notice when the shape changes. A softer result later can still look attractive; it does not need to remain perfectly defined to be useful.

    Are heatless methods always less damaging?

    They avoid a hot tool, but tension, rough handling and unsuitable accessories can still cause problems. Choose a comfortable technique and treat the hair gently. The absence of heat is one feature of the method, not a complete guarantee.

    For examples of different approaches, see L’Oréal’s heatless styling guide. Use it to compare options, then follow the instructions for the method you choose and adjust according to your own hair.

  • Soft Volume Hair: Create Movement Without a Stiff Finish

    Soft Volume Hair: Create Movement Without a Stiff Finish

    Soft volume hair has shape and movement without looking rigid or overloaded. The appeal is not the biggest possible result; it is hair that feels comfortable and keeps some lift as you go about your day. The method will vary with length, texture and density, so begin with a realistic goal for your own hair.

    More expressive and fuller hair has featured in current beauty reporting, but you do not need an elaborate blowout to borrow the idea. This guide focuses on preparation, controlled product use and styling choices that avoid unnecessary heat or tension. Think of the final look as flexible movement rather than a fixed helmet.

    Decide where you want the volume

    Look at your usual style and identify the area that feels flat. You might want a little lift at the crown, more movement around the face or fuller looking ends. Those are different goals and do not necessarily need the same tool or technique.

    Take a photograph of the starting style from the front and side. This helps you see whether the issue is the parting, the shape of the cut or the way the hair falls after drying. Adding product everywhere can make the result heavier without solving the area you wanted to change.

    Be realistic about texture and density

    Fine straight hair, thick waves and tightly curled hair behave differently. A reference image can show a direction, but it may include extensions, professional styling or a texture unlike yours. Use it to describe the movement you enjoy rather than as a promise of an identical result.

    If you regularly struggle with the same shape, discuss the cut with a stylist. Small changes in length or layering may make daily styling easier. More product and stronger heat are not always the right answer to a cut that does not support the look you want.

    Prepare hair without loading the roots

    Follow a washing and conditioning routine suited to your hair and scalp. The American Academy of Dermatology’s healthy hair guidance recommends focusing shampoo on the scalp and using conditioner after washing, with application adjusted for your hair type.

    When styling, use the product amount advised on the label and build gradually if needed. A heavy application near the roots can make a soft volume goal harder. Do not assume that several products with the word volume will work better together than one well chosen option.

    Choose a method you can repeat comfortably

    You might use a gentle blow dry, a suitable roller method or a change in how you arrange the parting. Choose according to the tools you understand and the time you have. A technique that takes an hour may not be useful for ordinary mornings even if you enjoy it occasionally.

    Practice when you can assess the result without rushing. Note which part of the method created the useful lift and which steps added work without improving the style. Keeping a simple record makes it easier to repeat the successful version next time.

    Use heat carefully when you choose it

    The AAD advises low or medium heat and a heat protecting product when heat styling. Follow the instructions for your tool and product. Heat protection does not make unlimited high temperature styling harmless, so avoid repeatedly working the same section to chase a perfect finish.

    Keep the tool moving as instructed and stop if the process feels uncomfortable. A hairstyle should not require pulling firmly at the scalp or heating the same area over and over. For more detail, see the AAD’s hair styling guidance.

    Let the shape settle before touching it repeatedly

    After creating the style, avoid constant brushing or rearranging. Repeated handling can change the finish you just made, especially when the hair is still settling. Give yourself time to look at the result from a normal distance before deciding that every section needs more work.

    Use fingers or an appropriate tool to make small adjustments rather than pulling the whole style apart. If a front section is too round or too flat, change that section only. A surgical adjustment is more efficient than restarting the entire head because one piece feels wrong.

    Keep the finish light enough to move

    Apply finishing products according to their directions and avoid layering several textures automatically. A little hold may support the shape, but too much product can leave the hair feeling stiff or heavy. The right amount depends on the formula and your hair rather than a universal number of sprays.

    Check how the style feels as well as how it looks. If you dislike touching it or feel the need to wash immediately, the finish may be too much for your preference. A slightly softer shape that you enjoy wearing is more useful than a larger result you cannot tolerate.

    Make the style work with your outfit

    A collar, scarf or jacket can affect how the ends sit. Try the hairstyle with the clothes you intend to wear, especially if the outfit has a high neckline. Hair that looks balanced with bare shoulders may feel crowded when a bulky collar is added.

    Our scarf styling guide offers ways to keep neck details manageable. You can also move the hair gently away from one side of the face when the outfit already has a strong neckline or large earrings.

    Keep a simple second day option

    Soft volume does not have to stay identical until the next wash. A relaxed half up arrangement or a comfortable clip can use the remaining shape without requiring another full styling session. Avoid tight tension and choose accessories that suit your hair.

    If you need to refresh, focus on the specific area that has changed. Do not repeatedly add dry shampoo or finishing spray without considering product buildup and scalp comfort. Follow product instructions and wash according to your actual needs.

    Soft volume hair checklist

    • Decide where you want lift or movement.
    • Choose a method suited to your hair and available time.
    • Use product amounts recommended on the label.
    • Keep heat and tension controlled.
    • Adjust individual sections rather than restarting.
    • Plan an easy alternative for the next day.

    Our healthy hair habits guide provides a broader care framework. Styling works best when it fits a manageable routine rather than becoming a daily struggle to recreate one reference image.

    Questions to ask before changing the routine

    Will more layers always create more volume?

    Not necessarily. The effect depends on your hair and the cut. Too many or poorly placed layers may make the shape harder to manage. Discuss the movement you want with a stylist and bring references that show the overall shape rather than only the colour.

    Can I get soft volume without a hot tool?

    You can experiment with suitable heatless methods or changes in arrangement, but the result varies. Avoid methods that create uncomfortable pulling. Test a small, practical version and judge whether it produces movement you enjoy rather than expecting the same result as a professional blowout.

    For trend context, see Vogue’s beauty trend report. Use the interest in fuller hair as inspiration, while keeping your own comfort, texture and maintenance needs in control.

  • Colourful Eyeliner Ideas: Small Details With Big Personality

    Colourful Eyeliner Ideas: Small Details With Big Personality

    Colourful eyeliner ideas are most useful when they start small. A short blue line, a soft plum accent or a bright detail at the outer corner can change a familiar makeup routine without requiring a full eye look. You can keep the same base and lip colour while experimenting with one controlled shape.

    Current beauty coverage has made more room for decorative and expressive eyes, but everyday versions do not need to be theatrical. Think of colour as a detail you place deliberately. The following approaches help you choose a manageable product, build a shape gradually and correct mistakes without turning the whole lid into a heavy line.

    Pick the product before the shape

    A pencil often gives you time to soften an uneven edge, while some liquid formulas create a sharper line and set quickly. The useful choice depends on your confidence and the finish you want. Read the instructions and choose a product intended for the eye area.

    Do not use a lip pencil, craft paint or loose decorative glitter around the eyes because the colour looks appealing. Cosmetic products have specific intended uses. If you want a shade you do not own in an appropriate eye formula, choose another colour rather than improvising with an unsuitable material.

    Try the formula when you have time

    Practice before a busy morning or important event. Check whether the product glides, catches, transfers or needs a particular removal method. A formula that works on a hand swatch may behave differently on your eyelid, so a small test look is more informative.

    Use a clean tool and follow any product warnings. Stop if the product causes irritation. No eyeliner shape is worth discomfort, and continuing to apply more product usually makes both the look and the problem harder to assess.

    Keep the line close to the upper lashes

    For a first experiment, apply colour in small sections near the upper lashes rather than drawing one long sweep. Short marks are easier to connect and control. Look straight ahead between sections so you can see how the line appears when the eye is open.

    You do not need to cover the entire lash line. Colour on the outer third can be enough. Keep the inner section simple while you learn how the shade changes the look. Once the small version feels comfortable, you can extend it if you want more presence.

    Make a short outer accent

    A small outward flick can feel playful without becoming a large wing. Mark the end lightly, then connect it to the upper line. Compare both eyes with your face relaxed. A shape that looks symmetrical with the eyes closed may look different when you open them.

    Let the angle suit your eye shape rather than forcing a reference photograph exactly. If a sharp flick feels difficult, soften the outer edge into a small shadow. A controlled blurred accent is a finished look, not a failed version of a wing.

    Use colour above a familiar neutral line

    If you already draw a reliable dark line, add a narrow coloured detail above part of it. This keeps the shape familiar while allowing the new shade to show. Begin with a short section so the two lines do not become a thick band.

    Choose whether you want clear contrast or a subtle relationship. Plum beside dark brown can feel quieter than turquoise beside black. Test the effect in daylight. The colour may appear stronger or softer depending on your skin, the formula and the width of the line.

    Try a soft pencil edge instead of a sharp graphic shape

    A blendable eye pencil can create a small wash close to the lashes. Apply a little product, then soften it with a suitable clean brush before it sets. Keep the movement controlled so the colour stays where you intended rather than spreading across the whole lid.

    This approach is useful when your hands are not steady enough for a fine liquid line. It also suits a more relaxed outfit. Pair it with a simple base and a familiar lip so the colour remains the main new detail.

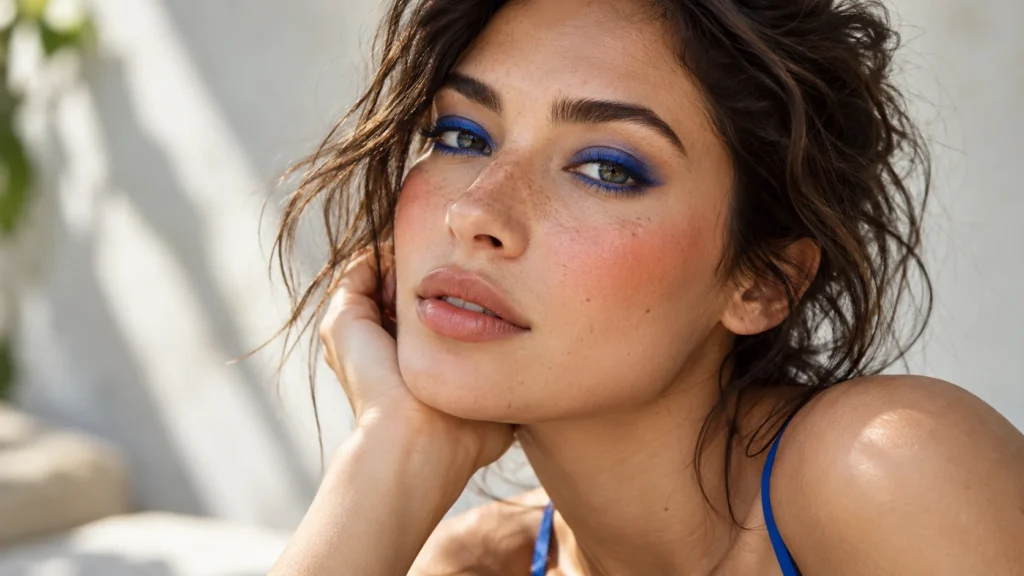
    Close-up editorial portrait of an adult woman with wearable cobalt blue eye makeup and warm coral blush, natural skin texture and subtle lips, expressive contemporary beauty.

    Choose colours from your wardrobe

    Look at a scarf, knit or accessory you enjoy wearing. A related eyeliner shade can connect the makeup to your outfit without matching it exactly. You might choose a plum detail beside a burgundy bag or a blue accent with a neutral outfit.

    Do not repeat every colour in a patterned outfit on your face. One connection is usually enough. Our scarf styling guide offers simple clothing combinations where a small coloured eye detail can sit comfortably beside a print.

    Keep the rest of the face manageable

    Use your ordinary base, brows and lip while you test the liner. If the colour looks too strong, reduce the width or the length before adding more makeup elsewhere. Trying to balance an oversized line with stronger blush often creates a much heavier face.

    Our natural makeup routine makes a useful starting point. For a more expressive version, change one extra feature after the liner is settled. A clear sequence helps you understand which adjustment improved the result.

    Correct mistakes before they become bigger

    When the line is uneven, pause and inspect the shape from a normal distance. You may only need to remove a small section. Adding thickness everywhere to hide one mistake can turn a small accent into a large eye look you never intended.

    Use an appropriate removal method and a clean small tool, keeping products out of the eye. Let the area settle before reapplying. Repeated rubbing can make the skin uncomfortable and the next line harder to control.

    Plan for wear and removal

    Try the look on an ordinary day before relying on it for a long event. Notice whether the product transfers when you blink or fades in a way you dislike. These observations help you decide whether the formula suits your routine or only works for a short photograph.

    Remove it according to the product instructions instead of scrubbing. A long wearing formula may need a specific remover. Keep that product available before you begin, especially when practising several versions in one session.

    Colourful eyeliner ideas checklist

    • A short plum line on the outer third of the upper lid.
    • A soft blue pencil edge close to the lashes.
    • A narrow coloured accent above part of a familiar neutral line.
    • A small flick with the rest of the eye kept simple.
    • A wardrobe inspired shade used as the only bright makeup detail.

    These are starting shapes rather than fixed rules. Adjust the placement and intensity to what you like seeing on yourself. The best technique is one you can reproduce comfortably without needing to rebuild the entire face.

    Questions that come up while practising

    Does colourful liner need matching eyeshadow?

    No. A plain lid can make the colour easier to see and reduce the number of products you need to manage. Add shadow only when it supports the shape you want. A simple line is a complete eye look if you enjoy the finish.

    Can I wear colour with a strong lip?

    Yes, but begin with a smaller line and compare the full face. You can also use a softer lip application, as in our blurred lip guide. The balance depends on intensity and placement, not a strict ban on combining colour.

    For wider trend inspiration, see Vogue’s Milan beauty report. Borrow the idea of expressive eyes, then scale it to the time, products and shapes that work for you.

  • Burgundy Makeup Look: Balance Rich Lips, Eyes and Cheeks

    Burgundy Makeup Look: Balance Rich Lips, Eyes and Cheeks

    A burgundy makeup look can feel rich without becoming heavy. The colour works as a soft lip stain, a small eye detail or a deeper evening feature, depending on the formula and placement. The most useful approach is choosing one focal point before deciding how much colour to use elsewhere.

    Deep red tones have appeared in current beauty reporting, but you do not need a complete matching face to enjoy the idea. This guide explains how to choose a suitable shade, keep the application controlled and balance the look with your clothes. Start with a product you know, then adjust the intensity gradually.

    Compare the actual shade rather than its name

    Burgundy makeup can lean berry, brown, purple or clear red. Two products with the same shade description may look quite different once applied. Check the colour in daylight and at the coverage you intend to wear, rather than judging only a heavy hand swatch.

    Consider how the shade works with your usual blush and wardrobe. You do not need exact matches, but a clear relationship makes the look easier to repeat. A cool berry lip beside a warmer cheek can work if both are soft; strong competing tones may need more adjustment.

    Choose the focal point first

    Decide whether you want the eyes or lips to lead. That does not ban colour elsewhere, but it gives the look a clear direction. If the lip is rich and opaque, the eye can stay softly defined. If the eye has a deep burgundy accent, a quieter lip can provide balance.

    Take your available time into account. A lip focus may be quicker to create, while a blended eye needs more practice. Choose the feature you can comfortably maintain during the day or evening, not just the one that looks most dramatic in a reference photograph.

    Begin with a familiar base

    Use the foundation or concealer routine you already understand. A new colour is easier to judge when the rest of the face is familiar. Apply coverage only where you want it, and avoid adding extra layers simply because the lip or eye is stronger than usual.

    Our natural makeup guide offers a straightforward base routine. Keep sun protection decisions separate from cosmetic coverage, and follow the instructions for the products you use rather than mixing everything together to save a step.

    Make burgundy lips softer for daytime

    Apply a small amount of lip colour, then blend the edge while keeping the natural shape readable. A lighter layer allows the shade to feel present without the weight of a full opaque application. Check the corners before adding more pigment to the centre.

    Our blurred lip tutorial explains this technique in more detail. If you prefer a precise lip, use the product in that way instead. The colour does not require one particular finish; choose the version that suits your taste and maintenance habits.

    Build a stronger evening lip carefully

    For an opaque look, apply thin layers and refine the outline with a suitable clean tool. Do not rush to cover the entire lip heavily in one pass. A controlled application makes uneven areas easier to correct and gives you more choice over the final depth.

    Test how the product wears before an important occasion. Check whether it transfers, becomes patchy or needs a specific removal method. That information helps you plan touch-ups. A beautiful shade becomes less useful if you only discover its behaviour while eating dinner.

    Use burgundy near the eyes with appropriate products

    Choose an eye product labelled for that area. A lip pencil is not automatically suitable for the eyelids or waterline, even when the colour looks right. Follow the product instructions and avoid improvising with pigments or glitter not intended for eye use.

    Begin with a small amount close to the upper lashes or at the outer part of the lid. Blend gradually and check both eyes from a normal distance. You can add depth later; starting with a large dark shape makes it harder to keep the look soft.

    Keep the surrounding eye shades simple

    A familiar neutral can support a burgundy accent without creating a complicated multi colour eye. Use a clean brush to soften edges and avoid repeatedly spreading the darker shade farther than intended. The transition should look controlled rather than smoky by accident.

    If the colour makes the eye area look more tired than you like, try a smaller placement or a different undertone. You can also move burgundy to the lips instead. Enjoying a shade does not mean you have to use it on every feature.

    Choose cheek colour for balance

    Apply blush lightly and look at the entire face before adding more. A rich lip already changes the overall colour balance. You may need less cheek colour than with your usual neutral lip, or simply a softer texture and placement.

    Avoid assuming that burgundy lipstick must be used as blush. Only use a product for purposes permitted by its instructions. A suitable cheek product gives you more control, especially when you are still learning how the tones work together.

    Pair the makeup with a clear outfit palette

    Cream, grey, navy and dark denim can give a burgundy lip a straightforward setting. If your clothes already include rich red tones, decide whether you want a close match or a quieter makeup version. Both can work, but the choice should feel deliberate.

    Our burgundy outfit guide offers clothing combinations you can adapt. Keep accessories simple while testing the makeup. You can add more detail later once you understand which feature you want people to notice first.

    Burgundy makeup look checklist

    • Check the shade in daylight.
    • Choose eyes or lips as the main feature.
    • Use products appropriate for the application area.
    • Build colour in thin layers.
    • Assess the full face before adding more blush.
    • Carry what you need for sensible touch-ups.

    Clean tools make the colour easier to control. Old product on a brush can muddy the shade and change the edge you are trying to create. Keep your daily tools maintained and avoid sharing products used directly around the eyes or lips.

    Frequently asked questions

    Is burgundy makeup only suitable for evenings?

    No. A sheer lip, a small liner detail or a soft wash can work during the day. The amount of pigment and the placement matter more than the shade name. Begin with a restrained version and increase the depth only if you enjoy the result.

    Can I wear burgundy eyes and lips together?

    Yes, but it is useful to vary the intensity. A soft eye beside a more defined lip can feel balanced, while equally strong features may create a more dramatic effect. Try the combination when you have time to adjust it rather than during a rushed morning.

    For seasonal context, see Vogue’s current Milan beauty coverage. Treat the trend as a source of colour ideas and choose the application that fits your own face, products and routine.

  • Blurred Lip Makeup: A Soft Colour Look You Can Repeat

    Blurred Lip Makeup: A Soft Colour Look You Can Repeat

    Blurred lip makeup gives colour a softer outline than a sharply drawn lipstick look. The centre can carry more pigment while the edges fade gently, creating a finish that feels relaxed but deliberate. It is useful when you enjoy a rich shade yet prefer something easier to wear than an opaque, precise lip.

    Soft and imperfect lip finishes have appeared in current beauty coverage, but you can adapt the idea without recreating a runway face. The key is controlled placement. Blurred does not mean spreading colour everywhere or ignoring the shape of your lips. Start with a small amount and build the finish you actually like.

    Choose a product that suits a soft finish

    A lipstick that blends easily is a useful starting point. Some lip stains also create a diffused effect, but fast setting formulas can be harder to adjust. Test the texture before an occasion, especially if you have never used the product. Follow its instructions rather than assuming every lip colour behaves the same way.

    Avoid buying a whole collection for one technique. A shade already in your kit may work when applied more lightly. The finish depends on opacity and placement as well as colour. Try the product on the back of your clean hand to understand how quickly it sets and how easily it blends.

    Pick a shade you enjoy at lower coverage

    A deep berry or burgundy can look softer as a light layer, while a rose shade may create a quieter effect. Compare the colour in daylight and choose according to your preferences. Rules about which shade every skin tone must wear are less useful than checking how the actual product looks on you.

    If you are uncertain, begin with a colour close to one you already wear comfortably. Learn the technique first, then experiment with a stronger shade. That separates two decisions and makes it easier to understand whether you dislike the colour or simply need a different application method.

    Prepare the lips without an elaborate routine

    Begin with comfortable, clean lips and avoid aggressive scrubbing. If you use a lip balm, follow its instructions and check whether excess product makes the colour slide. You do not need a long preparation ritual to try a soft lip look.

    Persistent cracking, pain or irritation is a reason to seek appropriate advice rather than cover the problem with more makeup. A cosmetic technique should feel comfortable. Do not continue using a product that stings because a trend tutorial says the effect is normal.

    Place colour in the centre first

    Apply a small amount to the central area of the upper and lower lips. Keep the first layer light so you can see where the colour needs to move. Starting with a full opaque outline makes it harder to achieve the gradual edge that defines the look.

    Use a suitable clean brush or clean fingertip to soften the colour outward. Work in small motions and pause to look at the shape. It is easier to add another light layer than to remove a thick application that has already spread beyond the area you wanted.

    Soften the edge while keeping the shape readable

    Blend the colour towards the natural outline without automatically going beyond it. Look at the corners, cupid’s bow and lower edge separately. A soft outline can still follow the lip shape closely; the difference is the lack of a hard line.

    If one area becomes too wide, refine it with a clean cotton bud or suitable removal method. Avoid repeatedly covering the mistake with concealer, which can create a heavy border. Small corrections preserve the relaxed finish better than rebuilding a sharp outline around it.

    Add depth only where you want it

    Once the edge looks balanced, add a little more colour to the centre. This creates depth without making the entire lip equally opaque. Press the lips together gently if that suits the product, then check whether the lower lip has picked up too much colour in one place.

    The centre does not need to look dramatically darker. A subtle difference may be enough for an everyday version. If the finish feels patchy, try a thinner application and a more blendable formula next time rather than adding more pigment to every area.

    Decide whether to keep it matte or add sheen

    A soft matte finish emphasises the diffused colour, while a small amount of compatible gloss changes the mood. If you add gloss, keep the application controlled so it does not move the colour beyond the edge. Follow the product instructions and test the combination before relying on it.

    Think about your day. A glossy finish may need more attention during meals, while a lighter stain can feel easier to maintain. Choose the version you enjoy wearing rather than assuming the most photographed texture is the best choice for every situation.

    Balance the rest of the makeup

    Keep your usual base and add a small amount of cheek colour if you like. Defined brows or a simple lash look can give the face structure without competing with the lip. You do not need a full eye look simply because the lip technique is current.

    Our natural makeup tutorial offers a simple foundation for the look. If you want a stronger version, add one extra detail and check the balance. Changing every feature at once makes it harder to see why the result feels different.

    Make touch-ups easy

    Carry the same lip product and a small clean tool if you use one. After eating, check the centre and corners before adding more colour. You may only need a little pigment in the middle rather than another complete layer.

    Avoid building thick colour on top of an uneven worn layer. If necessary, remove the remaining makeup appropriately and begin again. A look that takes a minute to refresh is more practical than one that becomes increasingly patchy because you are trying to preserve every trace.

    Blurred lip makeup checklist

    • If the colour spreads, use less product and smaller blending motions.
    • If the finish looks patchy, check whether the formula sets too quickly.
    • If the outline disappears, keep the blending closer to the natural lip shape.
    • If the look feels too strong, reduce coverage before changing the shade.
    • If the lip feels dry, reconsider the formula rather than adding repeated layers.

    A small, organised kit helps you practise without constantly changing products. Our beauty capsule guide can help you keep a dependable daily shade and one more expressive option within easy reach.

    Frequently asked questions

    Do I need lip liner for this look?

    Not necessarily. A liner can provide subtle definition if you enjoy using one, but a sharp visible border changes the effect. Begin without it and decide whether the lip shape needs more structure. If you add liner, soften it carefully so it works with the diffused finish.

    Can a bright lipstick create blurred lips?

    Yes, if the formula blends suitably and you like the colour at lower coverage. Start with a very small amount. A bright shade can remain noticeable even when applied lightly, so keep the rest of the makeup familiar while you test it.

    For current beauty context, see Vogue’s Milan beauty report. The steps here turn the broader idea of softer lip edges into a controlled routine you can practise at home.

  • Sunscreen Under Makeup: Build a Comfortable Morning Routine

    Sunscreen Under Makeup: Build a Comfortable Morning Routine

    Sunscreen under makeup can be straightforward when you choose a suitable product and keep the layers manageable. The frustrating part is often the finish: makeup may roll, slide or look patchy when several textures are applied quickly. Solving that problem should not mean reducing sunscreen to a tiny amount just to make foundation behave.

    This guide separates sun protection from cosmetic finishing. First, choose and use sunscreen according to its label. Then simplify the makeup around it and test the combination on an ordinary day. The goal is a comfortable routine you can repeat, with a realistic plan for outdoor time rather than a perfect photograph.

    Read the sunscreen label before considering makeup

    The American Academy of Dermatology’s sunscreen label guide recommends broad spectrum protection, SPF 30 or higher and water resistance. These details matter more than whether a product is marketed as a makeup primer or has attractive packaging.

    Check the instructions for application, reapplication and storage. Do not assume that a higher SPF means the product can stay on indefinitely. Shade and sun protective clothing also belong in your plan. Makeup is an optional finish around sun protection, rather than the measure of whether the sunscreen is doing its job.

    Do not treat foundation SPF as a complete routine

    A makeup product with an SPF label may sound convenient, but its labelled protection depends on appropriate use. The amount applied for cosmetic coverage may not be the amount needed for that protection. Avoid assuming that a few small dots of foundation replace your sunscreen routine.

    It is usually easier to keep the decisions separate: use a suitable sunscreen as instructed, then choose makeup for the appearance you want. If you are considering a combined product, read its protection instructions carefully rather than treating every SPF claim as equivalent.

    Begin with a simple set of layers

    When testing a new combination, use only the products you need. Extra serums, several moisturizers and multiple primers make it difficult to identify why the makeup becomes patchy. Keep any prescribed products in place as advised, and review optional cosmetic steps first.

    Write down the order and the products you used. If a problem appears, change one optional element at a time. This is more useful than buying a new primer after every unsuccessful morning. Our skinimalism routine guide explains how to make each step easier to understand.

    Follow application guidance rather than rushing

    Use the sunscreen as directed and give the routine enough time before applying makeup. The AAD’s application guidance recommends applying before outdoor exposure and using enough for uncovered skin. Read the product’s specific instructions as well.

    Do not mix foundation into sunscreen to create a custom tint unless the manufacturer explicitly instructs that use. Mixing makes it harder to know whether you are applying the sunscreen as intended. Apply your cosmetic colour separately so the purpose and amount of each step remain clear.

    Adjust the makeup technique

    Start with a small amount of makeup and build only where you want coverage. Heavy rubbing can disturb layers and make the finish uneven. Try gentle application with a clean tool suited to the formula, then check whether the base needs more product at all.

    A full face of foundation is optional. Concealer in selected areas may create the finish you prefer while leaving fewer layers to manage. Our natural makeup guide provides a simple routine you can adapt around your chosen sunscreen.

    Troubleshoot pilling without removing protection

    If product rolls into small particles, review the optional layers and application technique. Check whether you are applying several rich textures or working the makeup repeatedly over the same area. Test a simpler combination before deciding that sunscreen and makeup cannot work together.

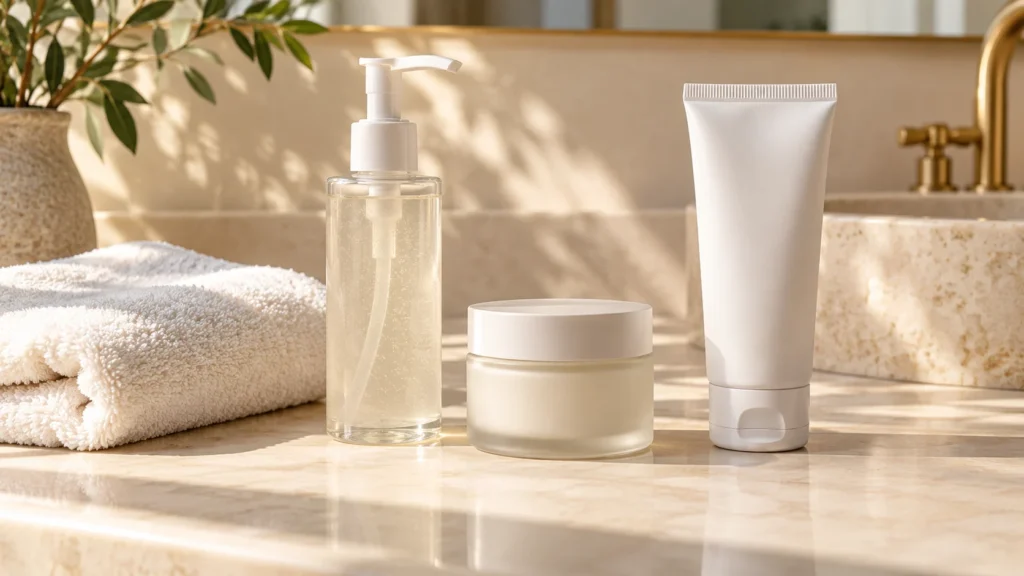
    Minimal skincare flat lay: only three unbranded containers representing cleanser, moisturizer and sunscreen, with a folded cotton towel on a warm cream bathroom counter.

    Do not solve the problem by using less sunscreen than instructed or wiping most of it away. If the finish remains impractical, look for another suitable sunscreen texture and test it carefully. A product you can wear comfortably is more useful than one you avoid because every morning becomes a struggle.

    Check the finish in ordinary conditions

    Look at the base in daylight and after a normal period of wear. A bathroom mirror can hide colour mismatch or texture, while a ring light may make the result look different from daily life. Assess comfort, appearance and practicality rather than expecting the skin to look filtered.

    Keep notes on what actually changes. Does the foundation separate around the nose, become shiny or feel heavy? Specific observations help you adjust the cosmetic part of the routine. A vague conclusion that the sunscreen is bad makes the next purchase harder to evaluate.

    Plan reapplication before leaving home

    The AAD advises reapplication when outdoors, generally every two hours and after activities such as swimming or sweating, with label guidance for water resistance. Think about how your day will work before applying elaborate makeup that you are unwilling to adjust.

    A practical plan may involve simpler makeup, a place to wash your hands and access to your sunscreen. Do not assume a light dusting of an SPF powder automatically gives the same protection as properly applied sunscreen. Read the product’s directions and consider whether you can realistically follow them.

    Keep shade and clothing in the routine

    A hat, suitable clothing and shade reduce the pressure to treat one cosmetic layer as your entire plan. Choose these according to the weather and the outdoor activity. A brief commute, a long walk and a day near water create different practical demands.

    Put the items you need beside your bag rather than remembering them after leaving home. A routine works better when the sunscreen, hat or sunglasses are accessible. Organisation may seem less interesting than product shopping, but it often makes the useful steps easier to repeat.

    Sunscreen under makeup checklist

    • Read the label and use sunscreen as instructed.
    • Keep optional skincare and makeup layers manageable.
    • Apply makeup gently with clean tools.
    • Check the finish in normal light.
    • Plan outdoor reapplication.
    • Include shade and protective clothing.

    If a sunscreen causes irritation, stop using that product and seek advice about a suitable alternative. Do not tolerate pain because a formula is popular. The aim is a sun protection routine that suits you, not loyalty to one texture or brand.

    Frequently asked questions

    Can I wear a tinted sunscreen instead of foundation?

    You can choose a tinted product for its appearance if it provides the protection you need and you use it correctly. Check the shade and finish in daylight. It may simplify the cosmetic routine, but the application and reapplication instructions still matter.

    Do I need primer over sunscreen?

    Not automatically. Try your chosen makeup without an extra primer first. If the combination works comfortably, another layer may be unnecessary. If you do add one, test it as a separate change so you can judge whether it improves the finish.

    What if reapplying ruins my makeup?

    That is a practical reason to simplify the look on days with substantial outdoor time. Sun protection should not depend on keeping a cosmetic finish untouched. Plan a routine you can maintain, and ask a dermatologist if you need advice for a particular skin concern.